How to Create an Active Sourdough Starter from Scratch
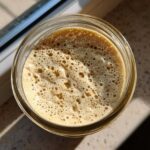
A day-by-day guide for beginners to create a reliable, bubbly sourdough starter using only flour and water.
- Prep Time: 5 min
- Cook Time: 0 min
- Total Time: 7 days (active creation period)
- Yield: One active culture
- Category: Baking Base
- Method: Fermentation
- Cuisine: General
- Diet: Vegan
Ingredients
Scale
- 100g Whole Rye Flour or Whole Wheat Flour
- 100g Unbleached All-Purpose Flour
- 120g Non-chlorinated Water (room temperature)
Instructions
- Day 1: Mix 50g whole grain flour and 50g water in a clean jar. Cover loosely and let sit at room temperature (68-75F) for 24 hours.
- Day 2: You may see small bubbles or nothing. Discard half of the mixture. Add 25g all-purpose flour and 25g water to the remaining starter. Mix well, cover loosely, and wait 24 hours.
- Day 3: You should see some activity. Discard half. Feed with 25g all-purpose flour and 25g water. Wait 24 hours.
- Day 4: Activity should increase. Discard half. Feed with 25g all-purpose flour and 25g water. Wait 12 hours.
- Day 5: Feed again after 12 hours using the same ratio (discard half, feed 25g flour, 25g water). You should see consistent doubling within 4-8 hours after feeding.
- Day 6 & 7: Continue feeding every 12 hours with the same ratio (discard half, feed 25g flour, 25g water). Your starter is active when it reliably doubles in size and is full of bubbles a few hours after feeding.
- Maintenance: Once active, you can switch to a standard feeding schedule of 1:1:1 ratio (starter:flour:water) every 12-24 hours, or store it in the refrigerator and feed it once a week.
Notes
- Use non-chlorinated water; chlorine can inhibit yeast growth.
- Maintain a consistent room temperature between 70F and 75F for best results during the initial creation phase.
- If you see mold or pink/orange streaks, discard the starter and begin again.
- A mature starter should float when a small spoonful is dropped into a glass of water.
Nutrition
- Serving Size: 100g
- Calories: 200
- Sugar: 0.5
- Sodium: 1
- Fat: 0.5
- Saturated Fat: 0.1
- Unsaturated Fat: 0.4
- Trans Fat: 0
- Carbohydrates: 40
- Fiber: 3
- Protein: 6
- Cholesterol: 0
Find it online: https://delishdreams.com/sourdough-starter-from-scratch-guide/