

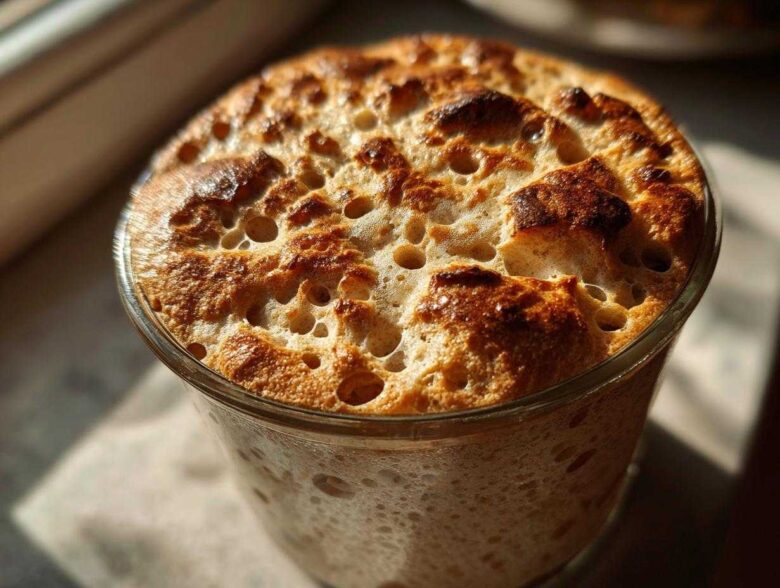
There’s just something magical, almost ancient, about baking bread using only flour, water, and time, isn’t there? Forget those bland, fast loaves! When you start working with wild yeast, you unlock a whole new world of flavor. I remember feeling so intimidated when I first tried to cultivate my own **sourdough starter**. It felt like I needed a science degree!
But trust me, that’s not true. I’ve helped dozens of friends, and I’ve refined this into what I think is the easiest way to capture those wild yeasts right in your kitchen. This guide is all about making your **sourdough starter from scratch** painless. I promise, if you follow these simple steps, you’ll have that lovely, reliable, bubbly culture ready for your first loaf before you know it. We are going to conquer this together. You can read more about my philosophy on why I love sharing these reliable recipes right here on my site.
Why You’ll Love This Easy Sourdough Process for Your Sourdough Starter
Creating your own culture from scratch used to sound like a huge commitment, but honestly, mine is so straightforward. It takes all the guesswork out of the initial creation phase. Once you see those first few bubbles, you’re hooked!
Key Benefits of Our Sourdough Starter for Beginners
- It truly only needs two ingredients—flour and water—to get going!
- The day-by-day instructions mean you know exactly what to look for each morning.
- We focus heavily on reliable activation so you get a bubbly culture fast.
The Simple Flour and Water Recipe for Your Sourdough Starter
I love how unbelievably basic the initial ingredient list is for starting this whole process. Seriously, it’s just flour and water, which is why this is such an accessible route to building your own **homemade sourdough culture**. You don’t need any fancy conditioners or additives to begin capturing that wild yeast. Keep things pure!
Essential Ingredients for Homemade Sourdough Culture
For the very beginning, you’ll want to mix some heavy-duty whole grain—I like whole rye or whole wheat—with unbleached all-purpose flour. We start with whole grains because they carry more wild microbes to kick things off. Then, you need water, and this is important: make sure it’s non-chlorinated and room temperature. Chlorine is the enemy of happy yeast, so let tap water sit out or use filtered water!
Equipment Needed for Your Sourdough Starter From Scratch
Luckily, this whole project fits right onto your countertop. You don’t need tons of obscure tools to start your sourdough culture. I swear by my kitchen scale, which makes measuring the flour and water super accurate—no eyeballing! I use a medium, wide-mouthed glass jar, maybe a quart size, so I can easily stir it up. A flexible silicone spatula is perfect for scraping down the sides after you feed it.
Step-by-Step Guide: How to Make Sourdough Starter
Okay, here is where the real fun begins! Don’t let the seven days scare you; most of that time is just waiting. We are basically culturing wild yeast and bacteria from the air and the flour itself into one happy, active community. My biggest advice? Be patient and keep it warm—around 70 to 75 degrees F is the cozy sweet spot for our little microbes. Don’t forget to check out my main baking site, Delish Dreams, for when you’re ready to bake!
Days 1 to 3: Beginning Your Sourdough Starter for Beginners
For Day 1, grab that whole grain flour—the rye or wheat—and mix 50 grams of it with 50 grams of room-temperature, chlorine-free water in your jar. Stir it up until it’s just combined, kind of like thick pancake batter. Loosely cover it; you need airflow! Day 2 might look like nothing, or maybe a sad little bubble or two. That’s okay! On Day 2 and Day 3, you’ll do your first feeding: toss out half of what’s in the jar (I know, it feels wasteful, but this shrinks the population so the good guys can thrive!). Then, feed the remainder with 25 grams of all-purpose flour and 25 grams of water. Mix well and wait 24 hours.
Days 4 and 5: Increasing Activity in Your Sourdough Starter
By now, you should definitely see some action—maybe some tiny bubbles across the surface or even a few smells that are a bit vinegary. That means the good fermentation is happening! From Day 4 onward, we switch things up just a bit. You’ll start feeding every 12 hours instead of every 24. The feeding process stays the same: discard half, then feed the remaining culture with 25 grams of flour and 25 grams of water. This disciplined routine helps you establish that reliable 1:1:1 ratio we talk about later!
Days 6 and 7: Achieving a Bubbly Sourdough Starter Guide
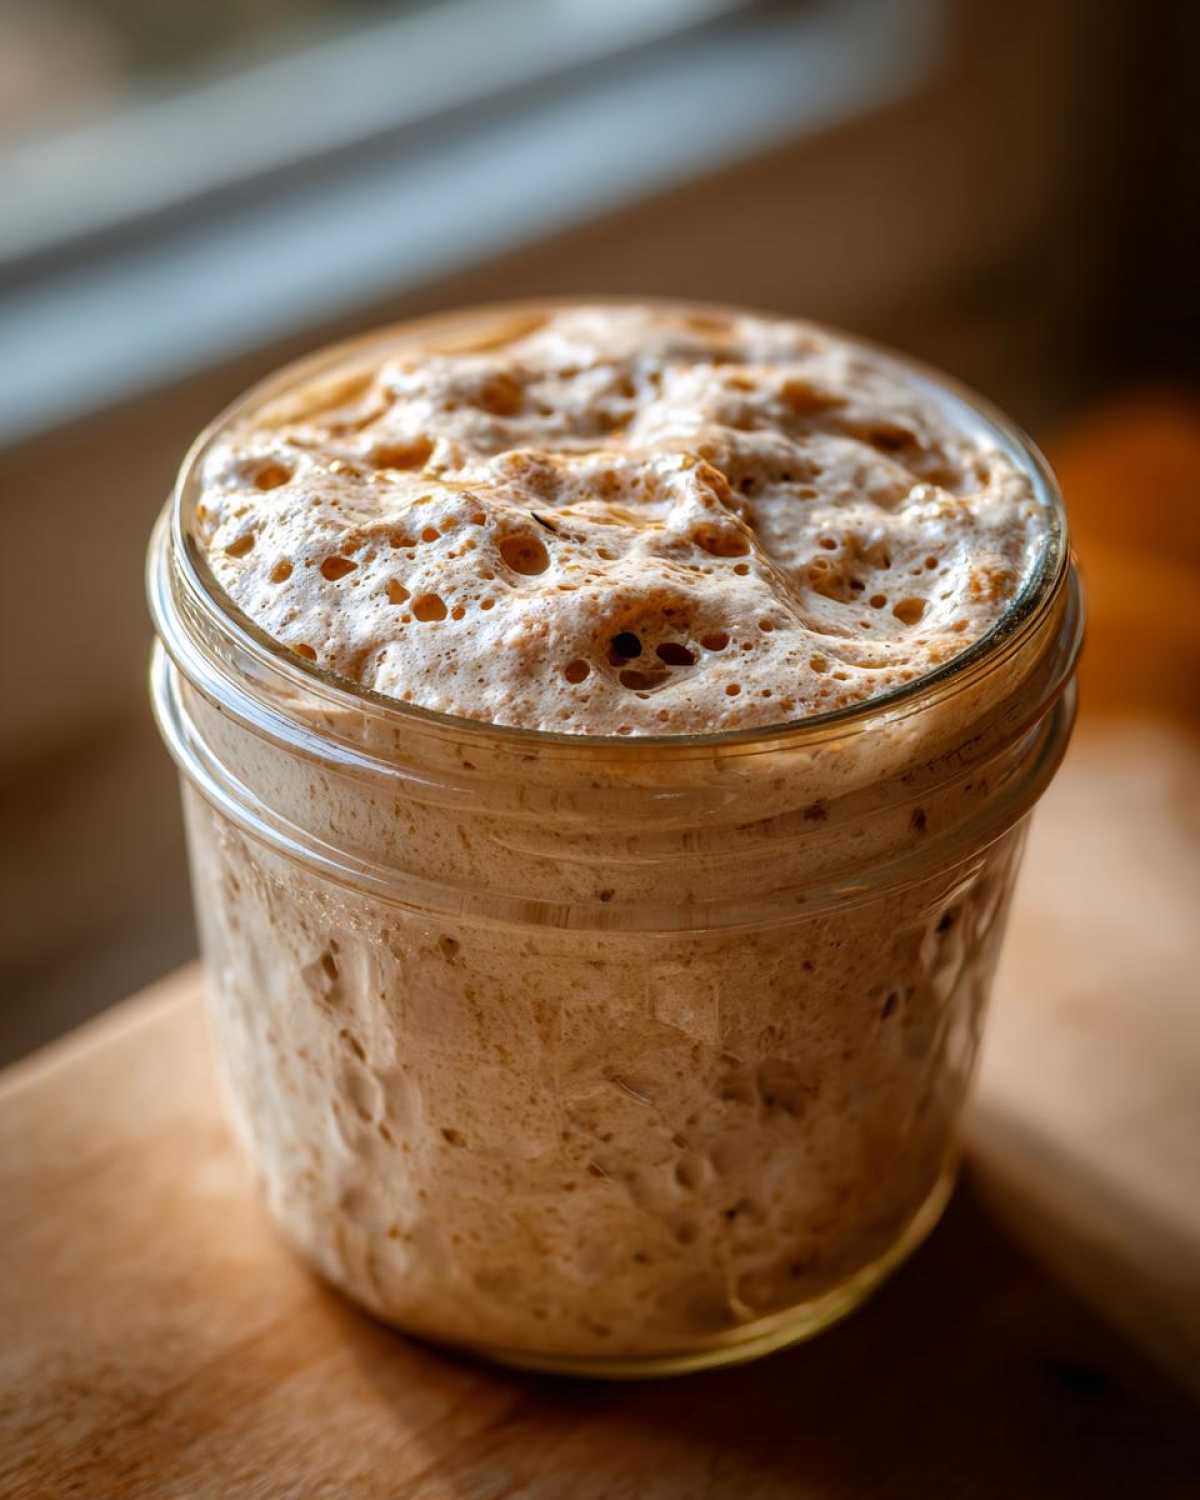
This is the breakthrough phase! If you’ve been diligent with discarding and feeding, your sourdough starter should now be reliably doubling in size within 4 to 8 hours after you feed it. That doubling is your success metric! It should look webby and full of bubbles all the way through. Keep feeding it every 12 hours on this schedule, and by Day 7, you’ll have a mature, strong culture ready to go. If it peaks and falls nicely, you’ve officially created your own natural yeast!
Sourdough Starter Feeding Schedule and Maintenance
Phew! You did it! Your starter is active and ready to bake with. Now the big question is: how do I keep this little guy alive without baking three loaves a day? Don’t stress, the sourdough starter feeding schedule becomes super flexible once it’s mature. If you’re baking often, you’ll want to keep it on the counter at room temperature. If bread baking is more of a weekend thing, sticking it in the fridge is your new best friend!
How to Maintain Sourdough Starter Long-Term
When your starter is living on the counter, you need to feed it regularly—usually every 12 to 24 hours—to keep that yeast happy and strong. This is when we stick rigidly to that 1:1:1 ratio we mentioned before: one part starter, one part fresh flour, and one part fresh water. For instance, if you keep 50 grams of starter, you feed it 50 grams of flour and 50 grams of water. Simple!
If you’re taking a break, pop it in the fridge! The cold drastically slows down the yeast’s activity. When refrigerated, you only need to feed it once a week, maybe every two weeks if you’re feeling lazy. Just be sure to pull it out a day or two before you plan to bake and give it two or three feedings at room temperature to wake it right up again!
Troubleshooting Common Issues with Your Natural Yeast Starter
Listen, every baker—and I mean *every single one*—runs into starter drama, especially in the first week. Don’t panic if your **sourdough starter** looks grumpy! The first few days are messy because different types of bacteria are jockeying for position. If you see no bubbles by Day 4, your kitchen might be too cold. Try moving the jar to the top of the fridge or near a warm pipe. If you see dark liquid pooling on top a few days in a row, that’s called “hooch,” and it just means it’s hungry! Pour it off or stir it in, and give it a slightly bigger feeding next time.
The only time you need to absolutely give up is if you see mold—that fuzzy white, black, green, or worse, pink or orange stuff. If that shows up, I’m so sorry, but you have to toss the whole batch and start over. That discoloration means unwanted bacteria took hold, and it isn’t safe to save. Just remember the water tip—chlorine-free water usually saves you from that huge headache!
Tips for Success When Creating Your Sourdough Starter
Okay, you’ve gone through the daily routine, and now you’re close to having a reliable culture. I want to give you just a few more pointers—the things I learned over years of failing and finally succeeding spectacularly with my very first sourdough starter from scratch. These little tweaks make all the difference between a slow, sad culture and a truly vigorous **activating sourdough starter**.
First, if you aren’t already, please start using a kitchen scale. I mentioned it before, but it bears repeating! Measuring flour by volume (cups) is so inconsistent. A scoop of flour can weigh wildly different amounts depending on how packed it is. Using grams ensures your ratio of flour to water is exactly 100% hydration every single time, which eliminates so much confusion!
Second, we already talked about water, but let’s drill down—no chlorine! If you can’t get filtered water, just fill up a jug and let it sit on your counter overnight with the lid off. That allows the chlorine gas to dissipate. This simple step drastically improves the environment for your wild yeast population to boom.
Finally, the magic test for when your **sourdough starter** is finally mature enough for beginner bread making is the float test. Once it has doubled and looks really happy a few hours after feeding, take a small dollop and gently drop it into a glass of room temperature water. If it floats, it’s full of gas and vigorous enough to leaven your dough. If it sinks, give it one more feeding cycle before you try baking. It’s a simple way to check progress!
If you ever have questions about the process or just want to share your bubbly success photos, feel free to get in touch through my contact page. Happy culturing!
Frequently Asked Questions About Your Sourdough Starter
I get asked these same questions almost every time I introduce someone to this whole wild yeast process! Honestly, it’s totally normal to have a few lingering doubts when you are just starting your sourdough bread journey. Let’s clear up the big ones so you can feel totally confident moving into beginner bread making!
What is a Sourdough Starter?
Simply put, your **sourdough starter** is a live, thriving culture made of wild yeast and lactic acid bacteria that you cultivate from flour and water. It’s your container holding all the natural yeast that will replace commercial baking yeast in your bread. It takes time, but once it’s established, it’s alive!
Can I use bleached flour for my sourdough starter?
You really shouldn’t—especially not for the first week while you are trying to create your culture! Bleached flour has had many of the natural microbes and nutrients stripped away. Those bits are what you are *trying* to capture! Stick with whole wheat or rye for the first few days to give your homemade culture the best chance to thrive. After it’s established, you can switch to all-purpose or bread flour for maintenance.
When is my sourdough starter ready for baking?
This is the moment you wait for! Your starter is ready when it reliably doubles in size—or even triples—within about four to eight hours after you feed it. That means it’s strong and vigorous. The best final check is the float test: drop a tiny spoonful into a glass of water. If it floats happily, it has enough gas built up to lift your dough, and you are ready to go!
Nutritional Estimates for Flour and Water Sourdough Starter
You know, people often ask me about the nutrition in a starter, even though it’s really just a base ingredient, not the finished product. Since the nutritional profile changes so much based on what you feed it and how much you discard, these numbers are really just a snapshot of what’s in a typical 100-gram portion based on the initial flour and water recipe we used to get things going.
Think of this as generalized data for the active culture itself. When you bake bread, the numbers change dramatically because you’re diluting that starter with more flour and water during the actual dough making. I always refer people to the final bread’s nutrition label, but here’s what the raw culture looks like:
- Serving Size: 100g
- Calories: About 200 (because of the flour breakdown)
- Carbohydrates: Roughy 40g
- Protein: Around 6g
- Fat: Very low, maybe 0.5g total
- Sugar: Quite low, under 1 gram
Now, this is super important: these figures are purely estimates based on the flour and water combination used during the growth phase. If you feed it once a day versus twice a day, or if you decide to use rye flour more often, these values will shift! For any legal or medical reasons, I always recommend checking the specific nutrition of the bread you bake, especially since this culture itself is more about the beneficial bacteria than the actual macronutrient breakdown. You can always read my full site disclaimer here if you need more details on liability for these quick estimates!
PrintHow to Create an Active Sourdough Starter from Scratch
A day-by-day guide for beginners to create a reliable, bubbly sourdough starter using only flour and water.
- Prep Time: 5 min
- Cook Time: 0 min
- Total Time: 7 days (active creation period)
- Yield: One active culture
- Category: Baking Base
- Method: Fermentation
- Cuisine: General
- Diet: Vegan
Ingredients
- 100g Whole Rye Flour or Whole Wheat Flour
- 100g Unbleached All-Purpose Flour
- 120g Non-chlorinated Water (room temperature)
Instructions
- Day 1: Mix 50g whole grain flour and 50g water in a clean jar. Cover loosely and let sit at room temperature (68-75F) for 24 hours.
- Day 2: You may see small bubbles or nothing. Discard half of the mixture. Add 25g all-purpose flour and 25g water to the remaining starter. Mix well, cover loosely, and wait 24 hours.
- Day 3: You should see some activity. Discard half. Feed with 25g all-purpose flour and 25g water. Wait 24 hours.
- Day 4: Activity should increase. Discard half. Feed with 25g all-purpose flour and 25g water. Wait 12 hours.
- Day 5: Feed again after 12 hours using the same ratio (discard half, feed 25g flour, 25g water). You should see consistent doubling within 4-8 hours after feeding.
- Day 6 & 7: Continue feeding every 12 hours with the same ratio (discard half, feed 25g flour, 25g water). Your starter is active when it reliably doubles in size and is full of bubbles a few hours after feeding.
- Maintenance: Once active, you can switch to a standard feeding schedule of 1:1:1 ratio (starter:flour:water) every 12-24 hours, or store it in the refrigerator and feed it once a week.
Notes
- Use non-chlorinated water; chlorine can inhibit yeast growth.
- Maintain a consistent room temperature between 70F and 75F for best results during the initial creation phase.
- If you see mold or pink/orange streaks, discard the starter and begin again.
- A mature starter should float when a small spoonful is dropped into a glass of water.
Nutrition
- Serving Size: 100g
- Calories: 200
- Sugar: 0.5
- Sodium: 1
- Fat: 0.5
- Saturated Fat: 0.1
- Unsaturated Fat: 0.4
- Trans Fat: 0
- Carbohydrates: 40
- Fiber: 3
- Protein: 6
- Cholesterol: 0