

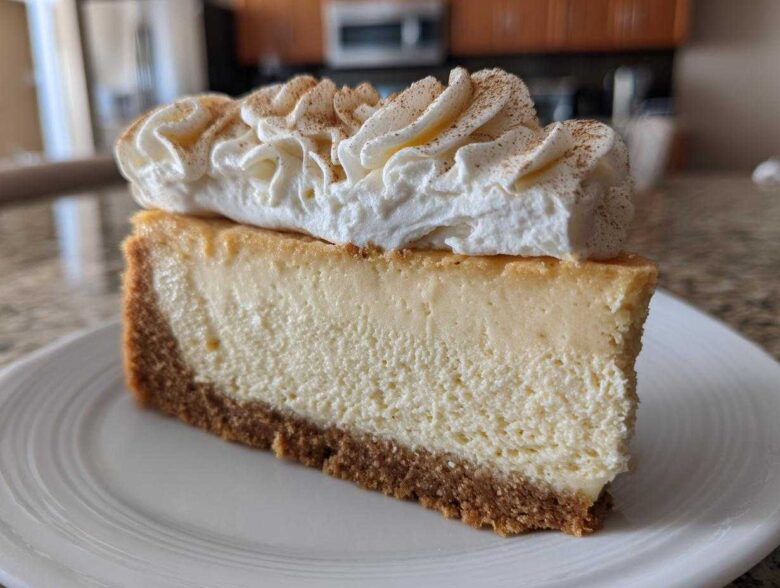
Okay, ditch the dry cookies and the boring fudge, because the holidays are here, and that means we pull out the showstoppers! If I could only bake one thing between Thanksgiving and New Year’s, it would hands-down be my ultimate eggnog cheesecake recipe. Trust me, this isn’t some stiff, cracked dessert you buy at the store; this is the creamiest, richest, dreamiest baked cheesecake you’ll ever pull from your oven.
My family goes absolutely wild for this. The moment that nutmeg hits the air—you know exactly what’s happening. It’s moist, it’s spiced perfectly, and honestly, making it feels like you’re waving a magic wand over your holiday dessert table. We’ve spent years perfecting the balance of spice and that signature eggnog tang, so come on in, grab your springform pan, and let’s get baking! I’m so happy you’re here to try this version, because once you taste how beautifully this sets up, it’ll become your family tradition too. Feel free to check out why we started sharing our family secrets, but mostly, let’s focus on this cake!
Why This Classic Baked Eggnog Cheesecake Recipe Works (Holiday Cheesecake Recipes)
There are so many holiday cheesecake recipes out there, but what makes this one the champion? It all comes down to texture and spice control! We are aiming for that dreamy, smooth bite—the kind that makes everyone go quiet for a second after the first taste. That’s the hallmark of a truly creamy cheesecake recipe, and we get it thanks to a few non-negotiable steps.
The secret weapon, which I know sounds fussy but I promise it’s worth it, is the water bath. Seriously, don’t skip it! Baking the cheesecake nestled in hot water ensures the edges don’t cook faster than the center. This gentle, steamy environment is what gives us that flawless, crack-free top and that unbelievably velvety interior every single time we bake it for our Christmas dessert ideas gathering.
Achieving the Perfect Creamy Eggnog Filling
If you want that signature velvety smoothness, listen to me: everything must hang out on the counter before you start. I mean *everything*. Room temperature cream cheese means no lumps, period. More importantly, once you add those eggs, you must mix them gently, just until they disappear. If you beat too fast or too long, you whip air into the batter, and air turns into cracks when it bakes. We don’t want fluffy; we want dense, luxurious creaminess!
Essential Equipment for Your Eggnog Cheesecake Recipe
You need a few specific tools set aside for this job. First, a 9-inch springform pan is an absolute must. You simply cannot get this delicacy out cleanly without one! Second, grab the heavy-duty aluminum foil—we need at least two strong layers to wrap the bottom completely tight so water doesn’t sneak in. Third, you’ll need a large, sturdy roasting pan. That pan is going to cradle your springform pan for the water bath, holding all that crucial hot water securely in the oven.
Ingredients for the Ultimate Eggnog Cheesecake Recipe
Okay, now we get down to the nitty-gritty! Having all your ingredients measured out and ready—what we call mise en place—is how you keep that mixing gentle and the filling perfectly smooth. You absolutely must grab your ingredients before you preheat the oven so you can bring that cream cheese and those eggs to room temperature. That little bit of extra planning stops any lumps before they ever start!
We divided this into three parts: the buttery, spiced base; the star of the show, the filling; and the light, airy topping spiked with that gorgeous nutmeg scent. I even wrote down the exact measurements for the eggnog because using too much or too little throws off the whole structure of this festive cheesecake. Do the prep work now so your baking is relaxing later!
For the Spiced Crust Cheesecake Base
- 1 1/2 cups graham cracker crumbs
- 1/4 cup packed light brown sugar
- 6 tablespoons unsalted butter, melted
- 1 teaspoon ground cinnamon
For the Creamy Eggnog Filling
- 3 (8 ounce) packages cream cheese, softened
- 1 1/2 cups granulated sugar
- 1/4 cup all-purpose flour
- 1 teaspoon ground nutmeg
- 1/2 teaspoon ground cinnamon
- 1/4 teaspoon salt
- 1 cup eggnog
- 1 teaspoon vanilla extract
- 4 large eggs
For the Nutmeg Whipped Cream Topping
- 1/2 cup heavy cream, chilled
- 2 tablespoons powdered sugar
- Pinch of ground nutmeg (for garnish)
Step-by-Step Instructions for the Baked Eggnog Cheesecake Recipe
Alright, this is it—where we take those glorious ingredients and turn them into the showstopper we dreamed of! This baked eggnog cheesecake recipe follows a specific timeline to ensure you get that postcard-perfect look with zero cracking. Pay close attention to the cooling process; that’s more important than the actual baking time, honestly!
Preparing and Pre-Baking the Spiced Crust Cheesecake
First things first, let’s get the oven nice and hot to 325 degrees F. You’ve got to wrap that bottom of your 9-inch springform pan tightly with heavy-duty foil—get at least two layers on there so no water sneaks in during the bath. Mix your crust ingredients—crumbs, brown sugar, melted butter, and that cinnamon—and press it firmly into the bottom and a little way up the sides. Pop that into the oven for just 10 minutes. When it comes out, let it cool down just a bit while you tackle the filling.
Mixing the Smooth Creamy Eggnog Filling
Now for the important part: keeping it smooth! Start by beating your softened cream cheese until it’s totally streak-free. Then, slowly mix in the granulated sugar, flour, nutmeg, and cinnamon. Once that’s blended, pour in the cold eggnog and vanilla, mixing gently. The final step is the eggs—and this is crucial! Add them one at a time, mixing only until *just* incorporated. Please, please, please—do not overmix! We want it combined, not fluffy.
Baking the Eggnog Cheesecake Recipe Using a Water Bath
Grab that larger roasting pan. Put your foil-wrapped springform pan inside it. Now, carefully pour hot water into the roasting pan until the water level reaches about an inch high up the sides of the cheesecake pan. This is your water bath doing its job! Slide the whole setup into the oven and bake for 60 to 75 minutes. You know it’s done when the edges look set but the very center still gives a tiny, delicate wobble when you nudge the pan. Don’t look for rock-solid! You can learn more about our baking philosophy over on our homepage.
Cooling and Chilling for the Best Texture
Don’t you dare pull it out yet! When that bake time is up, turn the oven off completely. Prop the door open just a crack—maybe stick a wooden spoon in there—and let the cheesecake sit inside that warm, steamy environment for a full hour. This gradual temperature drop prevents sudden shrinkage. After the oven cool-down, take it out, let it finish cooling on a rack, and then cover it tight. It needs a minimum of 6 hours, but you’ll get the absolute best result—that perfect creamy cheesecake recipe texture—if you chill it overnight before serving.
Tips for Success with Your Festive Cheesecake
Listen, I know we covered a lot of steps, but a few tiny actions make the difference between a great holiday dessert and the absolute *best* one. My notes from Grandma always emphasized preparation. So, if you take anything away from this, remember the gentle handling and the importance of temperature!
First up, I cannot stress this enough: bring your cream cheese and your eggs to room temperature before you even think about turning on the mixer. Cold, hard cream cheese forces you to overmix to get it smooth, and that introduces air. Air is the enemy of a silky cheesecake! It’s easy—just leave them out for an hour or so. It’s worth the wait!
Now, let’s talk about that water bath again. I know wrapping the pan in foil seems tedious, and yes, skipping it will save you about five minutes of prep time. But if you skip the water bath, you are rolling the dice on getting a huge crack right down the middle. And who wants a sad, cracked center in their beautiful seasonal baked goods? If you absolutely cut corners somewhere, make sure it isn’t here. A water bath guarantees that even, slow bake needed for that gorgeous, dense, creamy eggnog filling everyone raves about.
Finally, when you are mixing, use a rubber spatula more often than you think you should. Scrape the sides and the bottom of the bowl every time you add a new ingredient, even after using the electric mixer. That way, you ensure that no pockets of unmixed sugar or cream cheese get stuck at the bottom, which keeps the whole thing uniformly delicious.
Variations on the Eggnog Cheesecake Recipe
While I think this classic baked version is just unbeatable—it’s just so rich and decadent—I totally get that sometimes you need something faster, or maybe you just don’t want to mess with the water bath! Don’t worry, this amazing eggnog flavor combo works in other formats too. We can definitely adapt this fantastic flavor profile for different needs.
If you’re in a huge rush before a party and need one of those *easy holiday baking* miracles, you can pivot toward a no bake eggnog dessert. You’d swap out the baked eggs and flour for a setting agent like gelatin, or maybe just whip your heavy cream much stiffer, adding maybe a touch of cream cheese to stabilize the mix for a lighter, fluffier texture that sets up in the fridge. It’s lighter, quicker, but definitely not the dense centerpiece this baked one is!
We also talked about the crust, and you have so much room to play there! If you loved the spice in the filling but wanted something totally different underneath, ditch the graham crackers for a bit. How about crushing up some gingersnap cookies? Or maybe even some speculoos cookies if you can find them! This swaps that lovely cinnamon note in the crust for a punchier ginger flavor, turning our spiced crust cheesecake into something bolder. Just follow the same process with the melted butter you used for the graham crackers, and it works like a charm every time.
And look, if you prefer a lighter texture but still want that warm, winter holiday treat feel, you can always make this as cupcakes! Pour the batter into muffin tins lined with paper cups, and reduce your baking time significantly—maybe 20 to 25 minutes. They bake up fast and look adorable with a tiny swirl of that nutmeg cream on top. See? So many ways to enjoy this wonderful flavor!
Serving Suggestions for This Decadent Holiday Dessert
Once this gorgeous, creamy beauty has chilled overnight until it’s firming up perfectly, the real fun begins: dressing it up! Because this is such a showstopper, you want the presentation to scream holiday cheer. It’s definitely destined to be the star of any potluck, making it the best cheesecake for holiday party tables across the neighborhood.
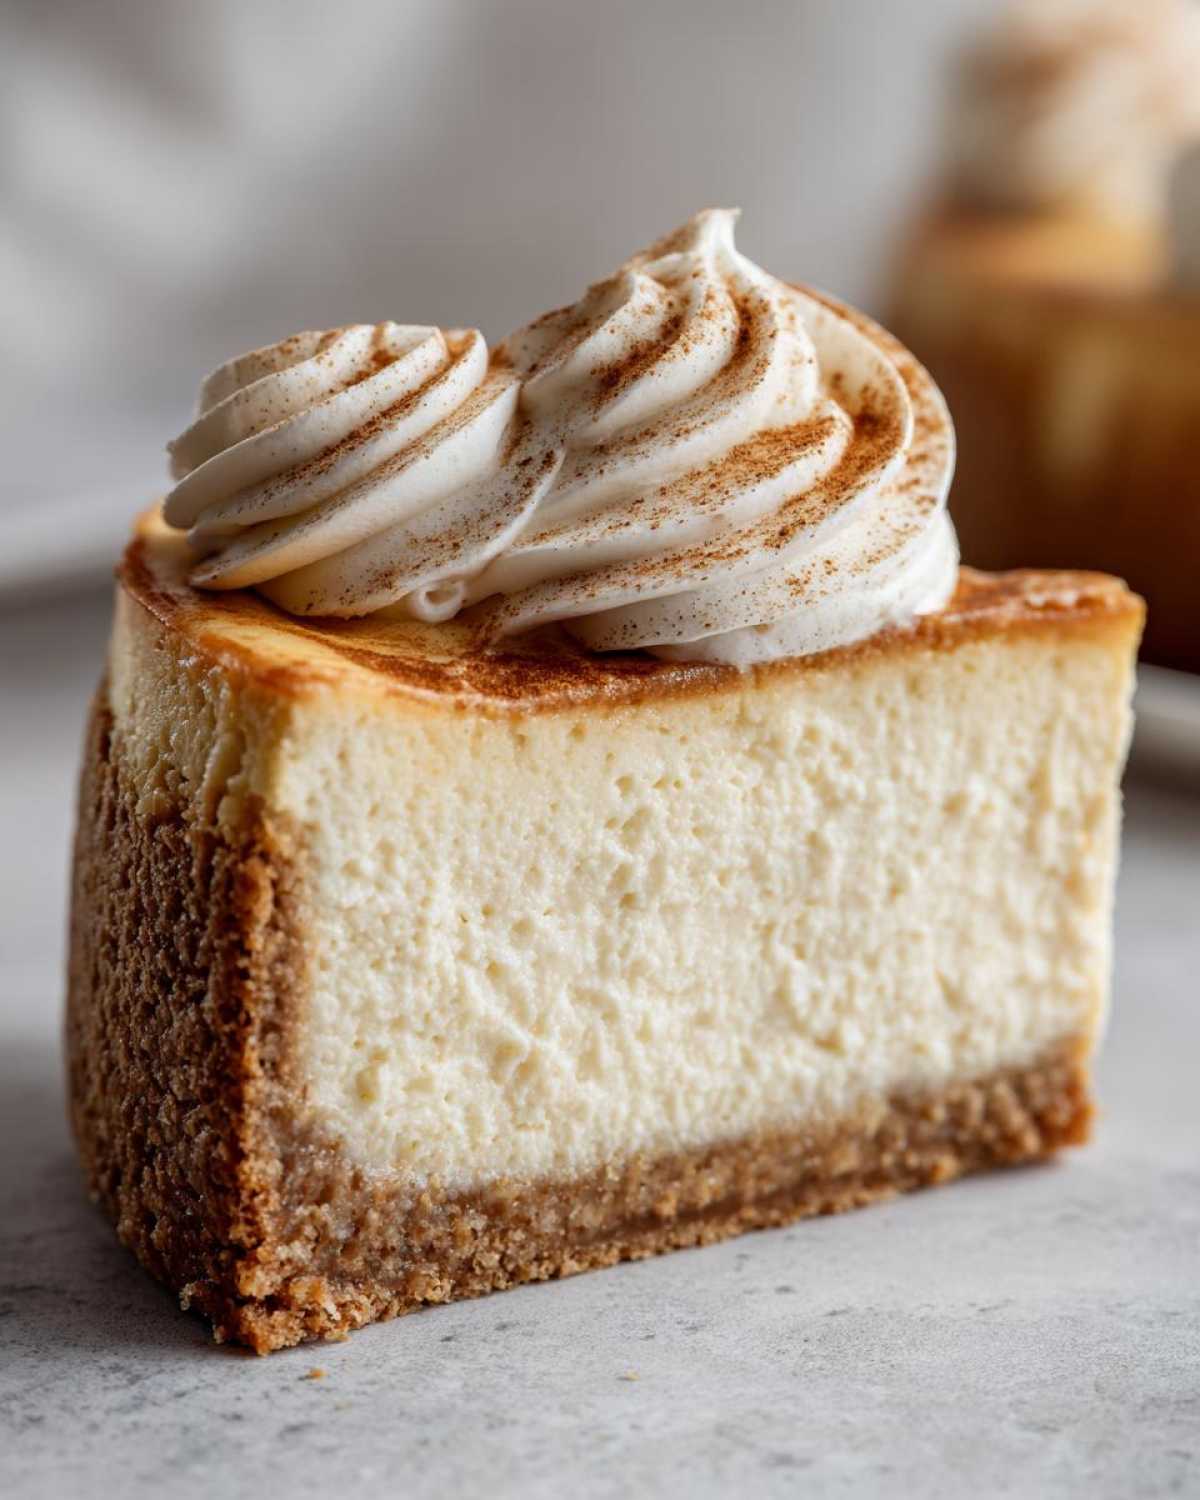
We already love the simple dusting of nutmeg in the whipped cream, but if you want to skip that part entirely and just serve it chilled, it still looks stunning naked against dark chocolate plates. However, I’ve got a few ways I like to elevate this even further for my biggest gatherings, especially when I’m planning my complete spread of Christmas dessert ideas.
First, try making candied or sugared cranberries—they are so easy! You just toss fresh cranberries in a little simple syrup and then roll them in granulated sugar before letting them dry on parchment paper for an hour. Scatter those ruby-red jewels around the edge or right over the top of the nutmeg cream. The little burst of tartness cuts through the richness of the cheesecake so nicely. It looks incredibly festive!
Another thing that pairs unbelievably well with the spices in the cake is good, strong coffee. We usually serve this right after dinner, and I love having a fresh pot of dark roast or even a rich French press ready. If you want to make it an absolute event, set up a small corner with espresso cups and maybe a bottle of Kahlúa or a nice Irish Cream liqueur. It turns slicing the cheesecake into a whole dessert experience!
Remember, since this cake is so rich, a small slice goes a super long way. People will usually take a smaller piece just because it’s so decadent, which means you might actually have leftovers—lucky you! Serve it cold straight from the fridge for the firmest texture, or let it sit out for about 15 minutes before serving if you prefer it slightly softer on the edges.
Storage and Make Ahead Christmas Desserts
This is honestly one of my favorite parts—this cheesecake is the perfect recipe for those busy holiday weeks! Because it *must* chill for so long anyway, you are already miles ahead of the game. It fits perfectly into the category of make ahead Christmas desserts.
Once it’s completely chilled and set, carefully remove the sides of the springform pan. You wrap it up tightly—and I mean TIGHTLY—with plastic wrap, making sure there’s no air getting near that beautiful top. It will keep wonderfully in the fridge for up to four or five days. Honestly, it’s even better on day two!
Now, about reheating? We don’t reheat cheesecake, sweetie! It messes up that glorious creamy texture we worked so hard for! Just plan to pull it out about 20 minutes before you cut into it, especially if you baked it for a party. That slight resting time lets the very edges soften just a tiny bit, making for effortless, gorgeous slices.
Frequently Asked Questions About the Eggnog Cheesecake Recipe
I always get questions after I post this recipe, usually relating to that water bath or how to make sure it sets up just right. Don’t worry if you’re nervous about baking a cheesecake for the first time; these little tips should address most of your concerns so you can serve up the best cheesecake for holiday party!
Can I make this eggnog cheesecake recipe without a water bath?
Technically, yes, you can skip the water bath, but I gotta tell you, you’re making life difficult for yourself! If you skip it, you’re going to almost certainly get cracks because the edges bake faster and dry out while the middle is still setting. The top might look pretty uneven, and the texture won’t be as uniformly smooth, which defeats the purpose of this particular creamy cheesecake recipe. If you must skip it, lower the oven temperature by 25 degrees and be ready to pull it out the second the center wiggles!
How do I ensure my cheesecake has that signature cheesecake with nutmeg flavor?
The nutmeg flavor needs to be present but not overpowering—that’s the balancing act, right? The key here is using fresh, high-quality spices. If your ground nutmeg has been sitting in the cupboard since last Thanksgiving, it might taste flat. We call for nutmeg in both the main filling *and* as a garnish on top of the whipped cream. Make sure the nutmeg you use for the garnish is freshly grated or freshly ground if you want that intense, warm aroma that just screams “winter holiday treats.”
What is the best way to store leftovers of this festive cheesecake?
Storing leftovers from this festive cheesecake is almost as important as baking it correctly! You need to cover it super tightly with plastic wrap—I usually use two layers—to keep any fridge smells out. Keep it in the coldest part of your refrigerator. I’ve found that it tastes its absolute best within the first 72 hours (three days). After that, the crust can start getting a little soft, even if the filling remains glorious. Never leave leftovers out on the counter; it’s a dairy product, so keep it chilled for safety!
If you’re looking into making this ahead, I always point people toward our full guide on handling recipe disclaimers and food safety, just to make sure everything is stored perfectly!
Nutritional Estimates for This Seasonal Baked Goods Recipe
Now, I know most of us aren’t making this decadent masterpiece for health reasons—it’s the holidays, after all! But I always like to give you a quick rundown of what you’re expecting calorie-wise, just so you can plan accordingly around those other amazing seasonal baked goods you’ll likely be eating.
Keep in mind these numbers are just my best guesses based on standard kitchen ingredients. If you use a full-fat cream cheese versus 1/3 less fat, or if your brand of eggnog is extra sugary, things will shift! Think of this as a general guideline for one generous slice of this rich dessert.
For one slice of this amazing cheesecake, here’s the rough breakdown:
- Calories: Roughly 450
- Fat: About 30 grams
- Carbohydrates: Around 40 grams
- Protein: Near 8 grams
See? It’s a proper treat meant for celebrating! Don’t worry too much about those numbers when you’re enjoying a slice with your family. Life is too short, especially during the holidays, to skip out on creamy, spiced perfection. You can always read a bit more about our general policies regarding ingredient transparency over on our privacy policy page if you’re curious about how we handle data!
PrintClassic Baked Eggnog Cheesecake with Spiced Crust
A rich, creamy baked cheesecake flavored with eggnog and spices, set on a graham cracker crust, and topped with nutmeg whipped cream.
- Prep Time: 25 min
- Cook Time: 75 min
- Total Time: 8 hours 40 min
- Yield: 12 servings
- Category: Dessert
- Method: Baking
- Cuisine: American
- Diet: Vegetarian
Ingredients
- 1 1/2 cups graham cracker crumbs
- 1/4 cup packed light brown sugar
- 6 tablespoons unsalted butter, melted
- 1 teaspoon ground cinnamon
- 3 (8 ounce) packages cream cheese, softened
- 1 1/2 cups granulated sugar
- 1/4 cup all-purpose flour
- 1 teaspoon ground nutmeg
- 1/2 teaspoon ground cinnamon
- 1/4 teaspoon salt
- 1 cup eggnog
- 1 teaspoon vanilla extract
- 4 large eggs
- 1/2 cup heavy cream, chilled (for topping)
- 2 tablespoons powdered sugar (for topping)
- Pinch of ground nutmeg (for garnish)
Instructions
- Preheat your oven to 325 degrees F. Wrap the outside bottom of a 9-inch springform pan with heavy-duty aluminum foil.
- Prepare the crust: Mix graham cracker crumbs, brown sugar, melted butter, and 1 teaspoon cinnamon in a bowl. Press the mixture firmly into the bottom and 1 inch up the sides of the prepared springform pan. Bake for 10 minutes. Remove and let cool slightly.
- Prepare the filling: In a large bowl, beat the softened cream cheese with an electric mixer until smooth. Gradually beat in the granulated sugar, flour, 1 teaspoon nutmeg, and 1/2 teaspoon cinnamon until combined.
- Beat in the eggnog and vanilla extract until the mixture is smooth. Add the eggs one at a time, mixing just until each egg is incorporated. Do not overmix.
- Pour the filling over the cooled crust in the springform pan.
- Bake using a water bath: Place the foil-wrapped springform pan inside a larger roasting pan. Carefully pour hot water into the roasting pan until it reaches about 1 inch up the side of the springform pan.
- Bake for 60 to 75 minutes, or until the edges are set but the center still jiggles slightly when gently nudged.
- Turn off the oven, prop the door open slightly, and let the cheesecake cool in the oven for 1 hour.
- Remove the cheesecake from the water bath and foil. Cool completely on a wire rack. Refrigerate for at least 6 hours, or preferably overnight, before serving.
- Prepare the topping: Beat the heavy cream and powdered sugar until soft peaks form. Gently fold in a pinch of nutmeg. Spoon or pipe the whipped cream onto the chilled cheesecake before serving, garnishing with extra nutmeg.
Notes
- For the smoothest texture, bring the cream cheese and eggs to room temperature before mixing.
- If you skip the water bath, watch the cheesecake closely to prevent cracking.
- You can substitute the graham cracker crust with a shortbread cookie crust for a different flavor base.
Nutrition
- Serving Size: 1 slice
- Calories: 450
- Sugar: 35
- Sodium: 250
- Fat: 30
- Saturated Fat: 18
- Unsaturated Fat: 10
- Trans Fat: 0.5
- Carbohydrates: 40
- Fiber: 1
- Protein: 8
- Cholesterol: 120