

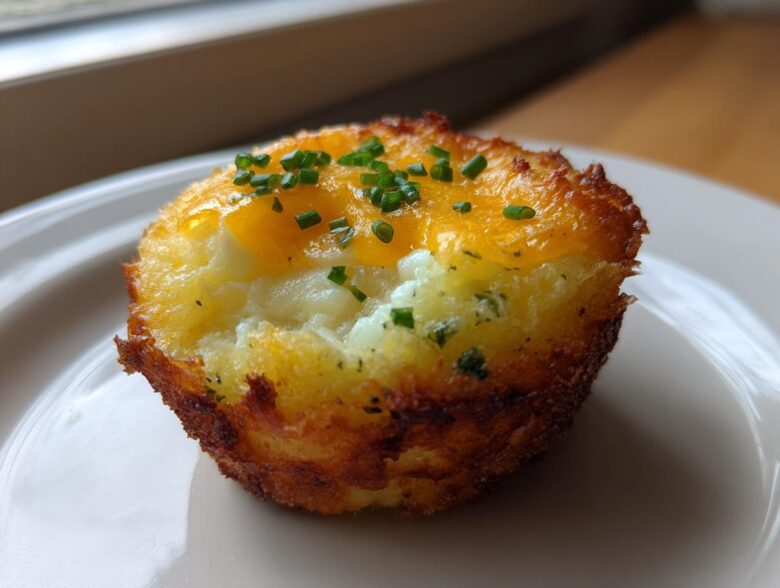
Oh my goodness, are you tired of staring into the fridge at 7 AM, wondering how you’re going to get a hot, satisfying breakfast into everyone before the school rush? I was there, trust me! My mornings were pure chaos until I figured out this trick. Forget messy pancake batches or juggling skillets; we’re making individual, perfectly portioned, crispy **Hash Brown Breakfast Cups**!
These little beauties, baked right in a standard muffin tin, are my absolute secret weapon for busy days. The crispy potato shell acts like a sturdy little bowl holding creamy, savory egg filling. They look fancy enough for a big brunch, but honestly, they save my life during the regular Tuesday morning scramble. They bake up golden, travel beautifully, and seriously, everyone loves their own perfectly baked portion.

Why You Will Love These Hash Brown Breakfast Cups
I’m telling you, these are game-changers. I’ve tried every quick breakfast under the sun, and nothing beats the sheer functionality of these little potato nests. When you see them come out of the oven, you’ll understand why I’m obsessed. Here’s the easy rundown on why you need this **Hash Brown Breakfast Cups** recipe in your rotation:
- They are totally portable and freezer-friendly! Just grab one, reheat for thirty seconds, and you’re out the door. That’s *grab and go* perfection right there.
- That golden-brown potato edge? It’s the crunchiest part, and everyone fights over the crispiest edges. We’ve mastered getting that potato nest firm enough to hold everything together.
- They are endlessly customizable. Seriously, you can swap out the bacon for veggies or use whatever cheese you have hiding in the back of the fridge.
- Portion control built-in! No awkward slicing or fighting over who gets the bigger piece. Twelve perfect servings, done.
- They are much lighter than a giant casserole. Since they are individual, you feel like you’re eating a satisfying, wholesome meal without being weighed down.
- You can prep the potato shells entirely ahead of time. That knocks fifteen minutes off your morning routine—a huge win!
If you’re looking for more fantastic ways to start your day right, check out my main source for breakfast inspiration. But first, you have to try these cups!
Essential Ingredients for Crispy Hash Brown Breakfast Cups
Okay, listen closely because the success of these cups totally hinges on the quality and preparation of just a few simple things. You don’t need a pantry full of weird specialty items here, which is why I love them so much. But we do need to be precise about the potato prep! If you follow these quantities, you’ll get a perfect dozen **Hash Brown Breakfast Cups**.
First up—the base! You’ll need about 2 cups of shredded potatoes. Crucially, these *must* be thawed if you use frozen, and then you have to squeeze every last drop of water out of them. I mean it—use a clean tea towel or paper towels until your hands hurt! That moisture is the enemy of crispiness.
For that beautiful potato container, we keep it simple:
- 2 cups shredded potatoes, thawed and squeezed dry (don’t skip the squeezing!)
- 2 tablespoons melted butter (real butter makes a difference here, trust me)
- 1/4 teaspoon salt
- 1/8 teaspoon black pepper
Now for the yummy part that fills those potato nests. This is where you get your protein and flavor:
- 4 large eggs, the freshest you can find.
- 1/4 cup milk—any kind works, but whole milk gives a slightly richer, fluffier result.
- 1/2 cup shredded cheddar cheese—sharp cheddar melts the best!
- 1/4 cup cooked, crumbled bacon (if you’re cooking bacon fresh, use a little of the rendered fat to coat the pan instead of extra butter—flavor bonus!)
- 1 tablespoon chopped chives (or a teaspoon of dried ones if you’re in a pinch).
See? Nothing crazy, just good, honest ingredients ready to bake up into the most convenient breakfast you’ve ever made.
Tips for Perfect Hash Brown Breakfast Cups Shells
You absolutely have to treat these potato shells like their own separate recipe because if the shell fails, the whole cup collapses. My number one, non-negotiable rule for achieving **Crispy Hash Brown Cups** is getting rid of the water! Whether you use frozen or squeeze leftover cooked potatoes, you must wring that moisture out. I wrap mine in a clean dish towel and literally twist until my arms complain—seriously, make sure the towel comes out anything but damp. If you want a great guide on getting that potato texture right, check out my tips for perfect potato texture, because the drying principle is the same!
Once they’re dry and mixed with the melted butter, salt, and pepper, they go into a 400°F oven for a solid 15 minutes *before* anything wet touches them. This pre-bake is what sets up that beautiful, golden edge. You need that time to crisp the outside and make sure the bottom isn’t going to steam itself soggy once the eggs go in. For the best results on crispiness, trust me on that initial bake time; it’s essential for forming a strong base.
Achieving the Best Potato Nest Breakfast Texture
After that first 15 minutes, pull that tray out and get gentle but firm with your potato mixture. You aren’t just sprinkling it in; you are building a structure! Use about two tablespoons of the potato mix for each cup. Use your fingers or the back of a small spoon to press the mix firmly against the bottom and then push it up the sides, making sure you build a nice little wall about a quarter-inch thick.
If you press down too lightly, the shell won’t have enough structural integrity and will just crumble when you try to lift it out later. A strong, tightly packed nest is key to getting those perfect **Potato Nest Breakfast** portions on your plate later, looking exactly as gorgeous as they did coming out of the tin.
Step-by-Step Instructions for Baked Hash Brown Cups Recipe
Alright, you’ve got your crispy potato shells baked and smelling amazing, right? Now it’s time for the real fun—getting those eggs nestled in there! Follow these steps exactly, and you’ll have perfect **Hash Brown Breakfast Cups** every single time. Remember, we are operating at 400 degrees Fahrenheit for the whole show.
First things first: make sure your potato nests have had that initial 15-minute bake and are starting to brown nicely around the top edges. That’s your cue to move to the next step. Don’t worry about pulling them out to cool down yet; we’re working fast!
Preparing the Egg Filling for Individual Breakfast Bakes
While those shells are getting that head start, whisk up your egg mixture. You just need a small bowl for this. Whisk the 4 large eggs with the 1/4 cup of milk until they are completely smooth, maybe with a tiny bit of froth on top. Don’t overdo it; we aren’t making meringue!
Now, carefully take the hot tin out of the oven. This is the layering stage. Divide your cheese, your pre-cooked bacon (if you’re using it!), and those lovely chopped chives evenly across the bottom of all twelve little potato beds. Spread them out so every bite gets some goodness.
Once your toppings are settled, gently pour your egg mixture right over them. You want that liquid to settle around the fillings. Only fill them about three-quarters of the way up. If you fill them to the absolute brim, I guarantee you’ll have egg overflow running down the sides of your perfectly crisp potato shell!
Baking and Setting the Hash Brown Breakfast Cups
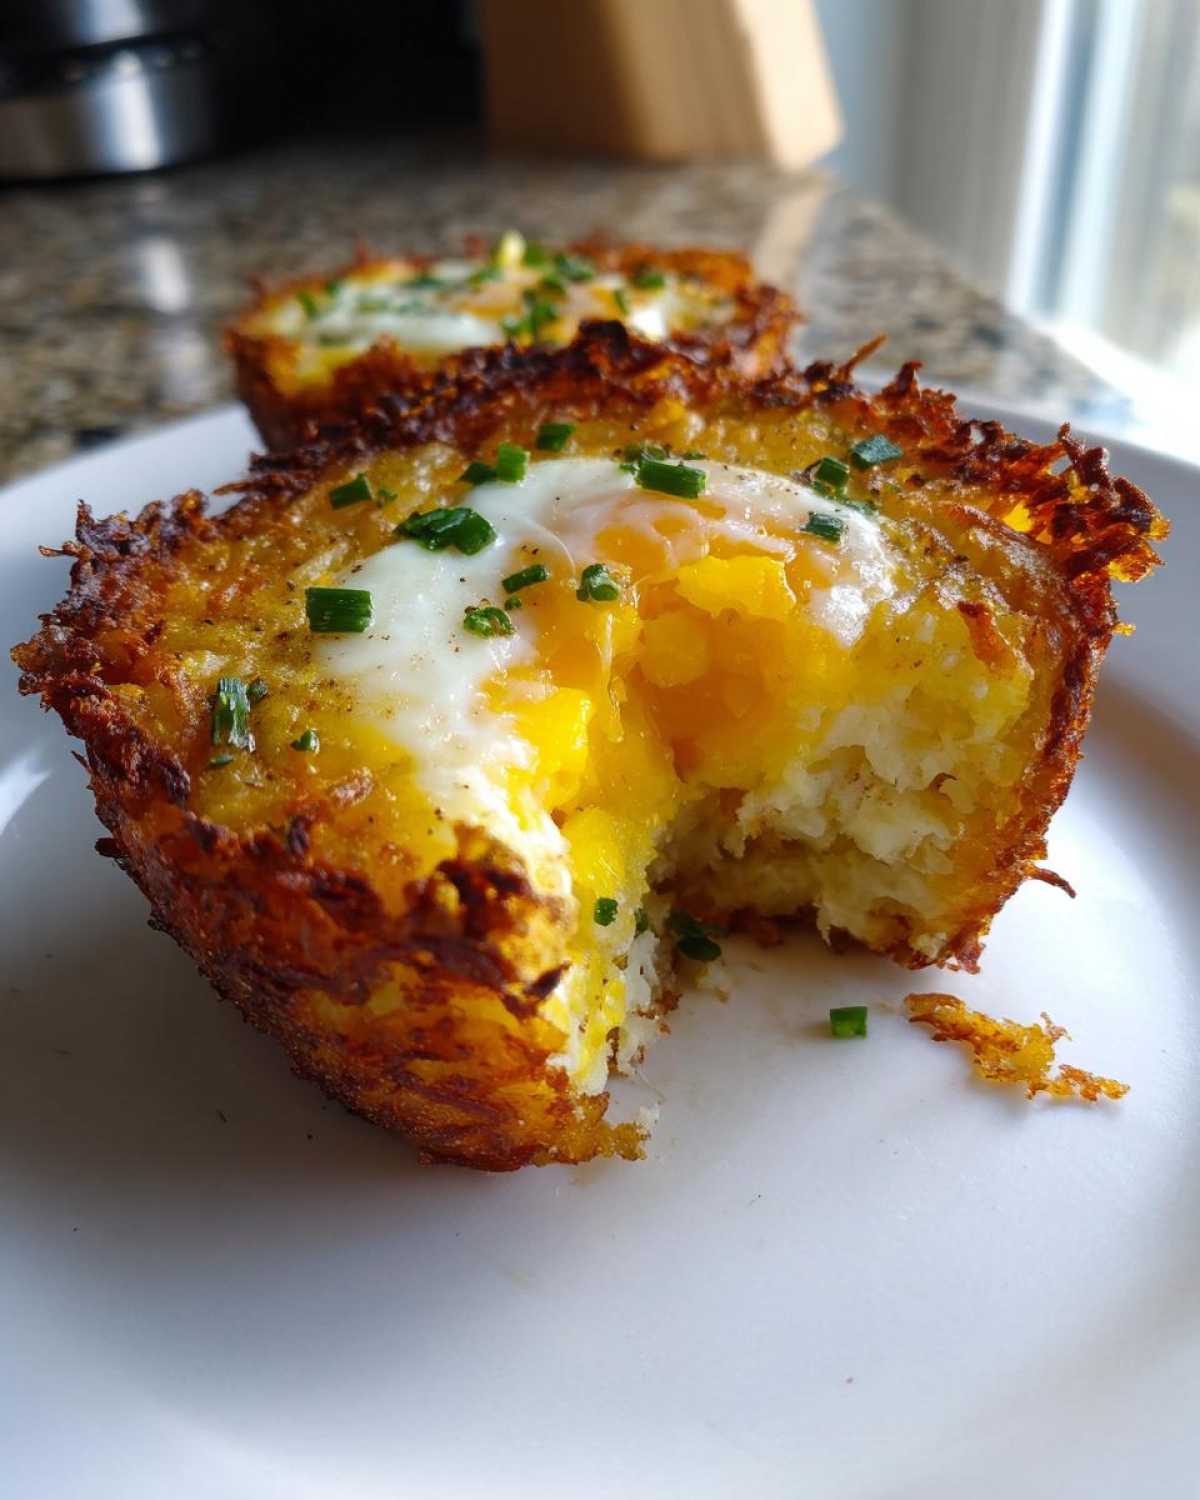
Back into the 400°F oven they go! This second bake is what sets the eggs. You’re looking for them to bake for another 12 to 15 minutes. How do you know they are done? The egg should look completely set—no wobble in the center when you gently nudge the pan. The potato edges should be deep golden brown and look extra crispy too.
This next bit is crucial if you want to lift them out easily without them sticking or cracking: Let the **Hash Brown Breakfast Cups** cool slightly in the tin! Give them at least 5 minutes right on the cooling rack. When you try to remove them too early, they tend to tear apart. After that short rest, slide a thin offset spatula or even a butter knife under the edge of the potato cup and gently lift them out. Voila! Perfect breakfast portions!
For some great tips on creative applications, including how to bake things like fruit fillings, take a peek at my guide on baking apples—the principles of checking for doneness are surprisingly similar!
Variations for Your Muffin Tin Breakfast Cups
The beauty of these **Muffin Tin Breakfast Cups** is that they are totally adaptable. That original bacon and cheddar recipe is fantastic, but if you’re trying to lighten things up, or if you just feel like experimenting, you have so many routes you can take! I always keep a list handy for when I’m staring into the odds-and-ends bin of my crisper drawer.
If you’re looking for something vegetarian, this is where these shine as **Brunch Egg Cups**. Try swapping the bacon for sautéed spinach and mushrooms! Make sure you cook the mushrooms until they release their liquid and it evaporates completely, otherwise, you’re back to that soggy bottom issue we are working so hard to avoid.
Cheese swaps are easy! Instead of cheddar, try mozzarella for that nice, gooey pull, or maybe some salty feta for a Mediterranean twist paired with sun-dried tomatoes and oregano. Pepper jack adds a great little kick if you like some heat without going full spicy.
For a different flavor profile altogether, you could make these almost like tiny breakfast pies. Try mixing in some cooked sweet potato hash instead of regular potatoes for the shell (though you’ll need to squeeze that sweet potato dry too!). Then fill it with ham, Gruyère cheese, and a pinch of thyme for a sophisticated, savory bite. Speaking of cheesy bakes, you absolutely have to check out my recipe for easy cheesy egg bake casserole—you can steal some of those filling combinations!
Honestly, just keep your added ingredients pre-cooked or quick-cooking, and make sure you don’t overfill the cups past that three-quarter mark, and you won’t go wrong!
Make Ahead Breakfast Cups and Freezer Friendly Storage
This is my favorite part about these **Hash Brown Breakfast Cups**, hands down! While they are spectacular hot and fresh from the oven, they are truly designed for busy people. If you make a batch of 12 (and trust me, you should always make a full batch), you won’t finish them all before they start to get sad in the fridge. That’s why we turn them into the ultimate **Freezer Friendly Breakfast**!
First, you absolutely must let them cool completely. I mean it—room temperature! If you wrap them while they are even slightly warm, you’ll end up with condensation, and condensation turns crispy potatoes into soggy mush. Once they are totally cool, you have two wrapping options, depending on how long you plan to store them.
For fridge storage (3–4 days), just place them in an airtight container with a paper towel on the bottom to absorb any stray moisture. If you’re freezing them for later, wrap each individual cup tightly in plastic wrap first. That’s the protective layer! Then, you can toss the wrapped cups into a large zip-top freezer bag. They last great for about two months this way.
When it’s time to eat, reheating is where you need to be smart if you want to preserve that crispy potato shell. The microwave is fast, but it steams them. If you’re in a rush, nuke it for 45 seconds to thaw/heat the center, but then transfer it to a toaster oven or conventional oven at 350°F for about 5–8 minutes to dry out and crisp up that potato border again.
If you aren’t in a giant hurry, skip the microwave entirely! Pop them directly from the freezer onto a baking sheet and bake at 375°F for about 15–20 minutes until they are hot all the way through. It’s worth the wait for that satisfying crunch! Speaking of planning ahead, you should check out how I prep my baked oatmeal for early mornings; the storage philosophy is the same!
Cooking Alternative: Air Fryer Hash Brown Cups
I have to admit, sometimes when I’m just making breakfast for myself and my husband, the big oven feels like overkill. Plus, heating up that giant space on a humid summer morning? No thank you! That’s when I pull out my trusty air fryer, because yes, you absolutely can turn these into **Air Fryer Hash Brown Cups**!
The process is almost identical, but the air fryer cooks things so much faster and more intensely, which means we have to adjust our timing so the potato shells don’t burn before the egg filling sets up. You still need to do that critical pre-bake step for the shells!
So, for the potato nests first: Lightly grease your air fryer basket or use small, silicone muffin liners that fit your basket. Press in your potato mixture tightly. Set your air fryer to 380 degrees Fahrenheit and cook those empty potato shells for about 10 minutes. You’ll want to check them closely; they should look golden and feel firm.
Once those shells are set, carefully remove the basket—be careful, it will be hot!—and add your cheese, bacon, and chives just like we did for the oven method. Then, slowly pour in your egg mixture, making sure not to go over that three-quarter mark. Pop the basket back into the air fryer and cook for another 8 to 10 minutes. Keep an eye on it, because air fryers vary wildly in power. You’ll know they are done when the eggs look puffed up and set, not jiggly at all.
If you have a huge piece of meat you need cooked fast, check out my guide on air fryer whole chicken for general air fryer temp tips. It’s amazing how versatile that appliance is for getting crispy results!
Serving Suggestions for These Grab and Go Breakfast Ideas
So, you’ve pulled your gorgeous **Hash Brown Breakfast Cups** out of the oven, and they look perfect, right? Now what? Since these are designed to be your easy, **Grab and Go Breakfast Ideas**, you want pairings that are just as fast and don’t require a sit-down three-course meal.
The saltiness of the potato and the savoriness of the egg filling really sing when paired with something fresh or tangy. If you’ve got an extra two minutes, a quick side of fresh fruit—like sliced melon or some bright berries—cuts through the richness beautifully. It just feels healthier when it’s balanced out with a little sweetness!
If you’re like me and need a little zing in the morning, you absolutely need a condiment on hand. Drizzling a little hot sauce over the top before you eat it wakes everything up. Sriracha is fine, but I sometimes grab a smoky chipotle sauce if I’ve used sausage instead of bacon.
For a fuller, but still quick, meal, you have to think about avocado. Whether you slice it raw and wedge it right next to the cup, or you make a quick mash, avocado is the perfect creamy foil to the crispy potatoes. If you need a great recipe for a creamy topping that isn’t heavy on the mayo, you must check out my avocado egg salad recipe—you can use that creamy spread *inside* the cup too!
Seriously, these **Hash Brown Breakfast Cups** are so self-contained, you can eat them in the car, at your desk, or while juggling pets. That’s maximum breakfast victory, my friends!
Frequently Asked Questions About Hash Brown Breakfast Cups
I know you might have a few burning questions lingering after going through all those tips and tricks. That’s totally normal! When you’re depending on a recipe to save your morning routine, you want to get every detail right. Here are some of the things people always ask me about making these **Hash Brown Breakfast Cups** perfectly.
Can I skip pre-baking the potato shells?
Oh, please don’t skip it! I mention it a lot, but it’s because it is the absolute bedrock of getting a crispy cup. If you try to fill the raw potato shells with wet egg mixture and bake them all at once, the bottom layer of potato essentially steams itself. You end up with a weird, gummy, undercooked potato patch right where the egg meets the tin. The pre-bake dries out the potato and starts that beautiful browning process so you get a sturdy **Potato Nest Breakfast** shell that can handle the filling!
How do I prevent the Hash Brown Breakfast Cups from sticking?
This is a big one for anyone using non-stick pans that are getting older! Since we rely so much on that crisp exterior, you really want the potato to touch the metal; liners, like paper cupcake liners, actually trap moisture and steam the potatoes, so I usually skip them for the shells. I highly recommend using a good quality cooking spray that contains flour (like Baker’s Joy if you can find it), or you can make your own heavy-duty pan grease.
If you don’t have spray, take a tiny bit of leftover bacon fat or softened butter and literally rub the entire surface of every single cup—bottom and sides—then dust it lightly with flour. Pat that flour down hard, dump out the excess, and *then* press in your potatoes. That extra coating acts like armor against sticking!
Can I use pre-shredded refrigerated potatoes instead of frozen?
Yes, you absolutely can! Most of the time, refrigerated, pre-shredded potatoes that you find near the dairy section have slightly less added moisture than the frozen ones, which can be a small advantage for achieving **Crispy Hash Brown Cups**. However, I still insist you dry them out! Even refrigerated potatoes have excess water clinging to them.
If you use the refrigerated kind, you might notice they look a little softer when you mix them with the butter. Don’t be tempted to add extra butter or moisture! Just squeeze them really well in that towel. They often brown up even faster during that initial 15-minute pre-bake because they are already closer to room temperature. For more tips on recipe adjustments, check out the general policy guidelines on substituting ingredients.
PrintHash Brown Breakfast Cups

Make individual, portable breakfast cups using shredded potatoes as the base, filled with eggs and your favorite additions.
- Prep Time: 15 min
- Cook Time: 30 min
- Total Time: 45 min
- Yield: 12 cups
- Category: Breakfast
- Method: Baking
- Cuisine: American
- Diet: Vegetarian
Ingredients
- 2 cups shredded potatoes, thawed and squeezed dry
- 2 tablespoons melted butter
- 1/4 teaspoon salt
- 1/8 teaspoon black pepper
- 4 large eggs
- 1/4 cup milk
- 1/2 cup shredded cheddar cheese
- 1/4 cup cooked, crumbled bacon (optional)
- 1 tablespoon chopped chives
Instructions
- Preheat your oven to 400 degrees Fahrenheit. Lightly grease a 12-cup standard muffin tin.
- In a medium bowl, combine the dried shredded potatoes, melted butter, salt, and pepper. Mix until the potatoes are evenly coated.
- Press about 2 tablespoons of the potato mixture firmly into the bottom and up the sides of each muffin cup to form a nest shape.
- Bake the potato nests for 15 minutes until the edges start to look golden brown.
- While the nests bake, whisk together the eggs, milk, salt, and pepper in a small bowl.
- Remove the tin from the oven. Sprinkle cheese, bacon (if using), and chives evenly over the bottom of the baked potato nests.
- Carefully pour the egg mixture over the fillings, filling each cup about three-quarters full.
- Return the tin to the oven and bake for an additional 12 to 15 minutes, or until the eggs are set and the potatoes are golden brown and crispy.
- Let the cups cool in the tin for 5 minutes before carefully removing them with a small offset spatula or butter knife.
Notes
- Squeeze as much liquid as possible from the shredded potatoes for the crispiest cups.
- You can substitute the bacon with cooked sausage or diced bell peppers for variety.
- To make these freezer-friendly, cool completely, wrap individually, and freeze. Reheat in the microwave or oven until hot throughout.
- For an air fryer method, bake the potato shells first at 380 degrees Fahrenheit for 10 minutes, then add fillings and cook for another 8-10 minutes until the eggs are set.
Nutrition
- Serving Size: 1 cup
- Calories: 110
- Sugar: 1
- Sodium: 210
- Fat: 7
- Saturated Fat: 4
- Unsaturated Fat: 3
- Trans Fat: 0
- Carbohydrates: 7
- Fiber: 1
- Protein: 5
- Cholesterol: 95