

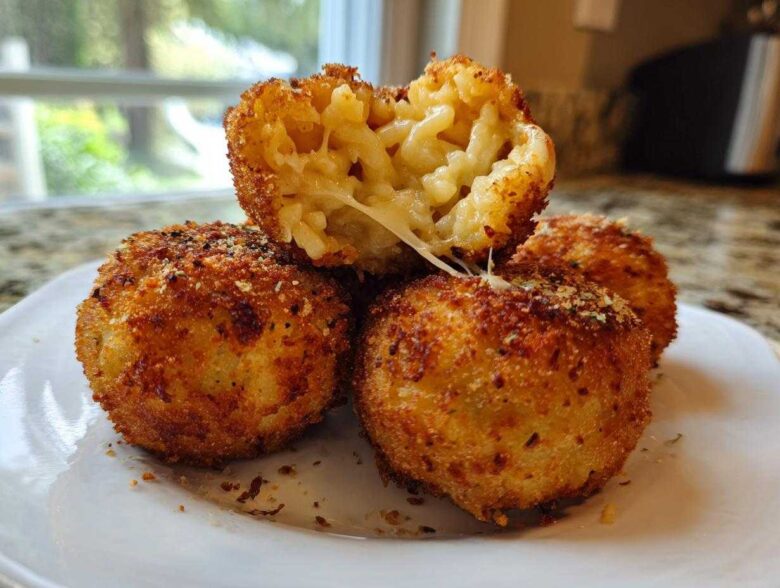
Oh my gosh, are you looking for the ultimate comfort food? Because I’ve got the answer right here! When people hear the term rice balls, they might think of a few different things, but trust me when I say you need to stop what you’re doing and make these Ultimate Cheesy Arancini. Forget every bland, dry version you’ve ever tried. My favorite part of this Italian appetizer is that heart-stopping moment when you bite through that perfectly golden crust and hit that warm, gooey mozzarella center. It’s just pure soul food, and truly, they are easier than you think! If you need to get in touch about this recipe or anything else, don’t hesitate to reach out on my contact page.
Why This Italian Rice Balls Recipe Delivers Comfort Food Perfection
Seriously, these are the standard by which all other Comfort Food Appetizers should be judged. What sets my recipe apart from every other fried snack out there is the contrast. You get the audible crunch of the beautiful crust—it shatters just right! Then, you sink into that rich, savory risotto base, which is savory enough on its own, but then BAM! You hit that pocket of pure, molten mozzarella.
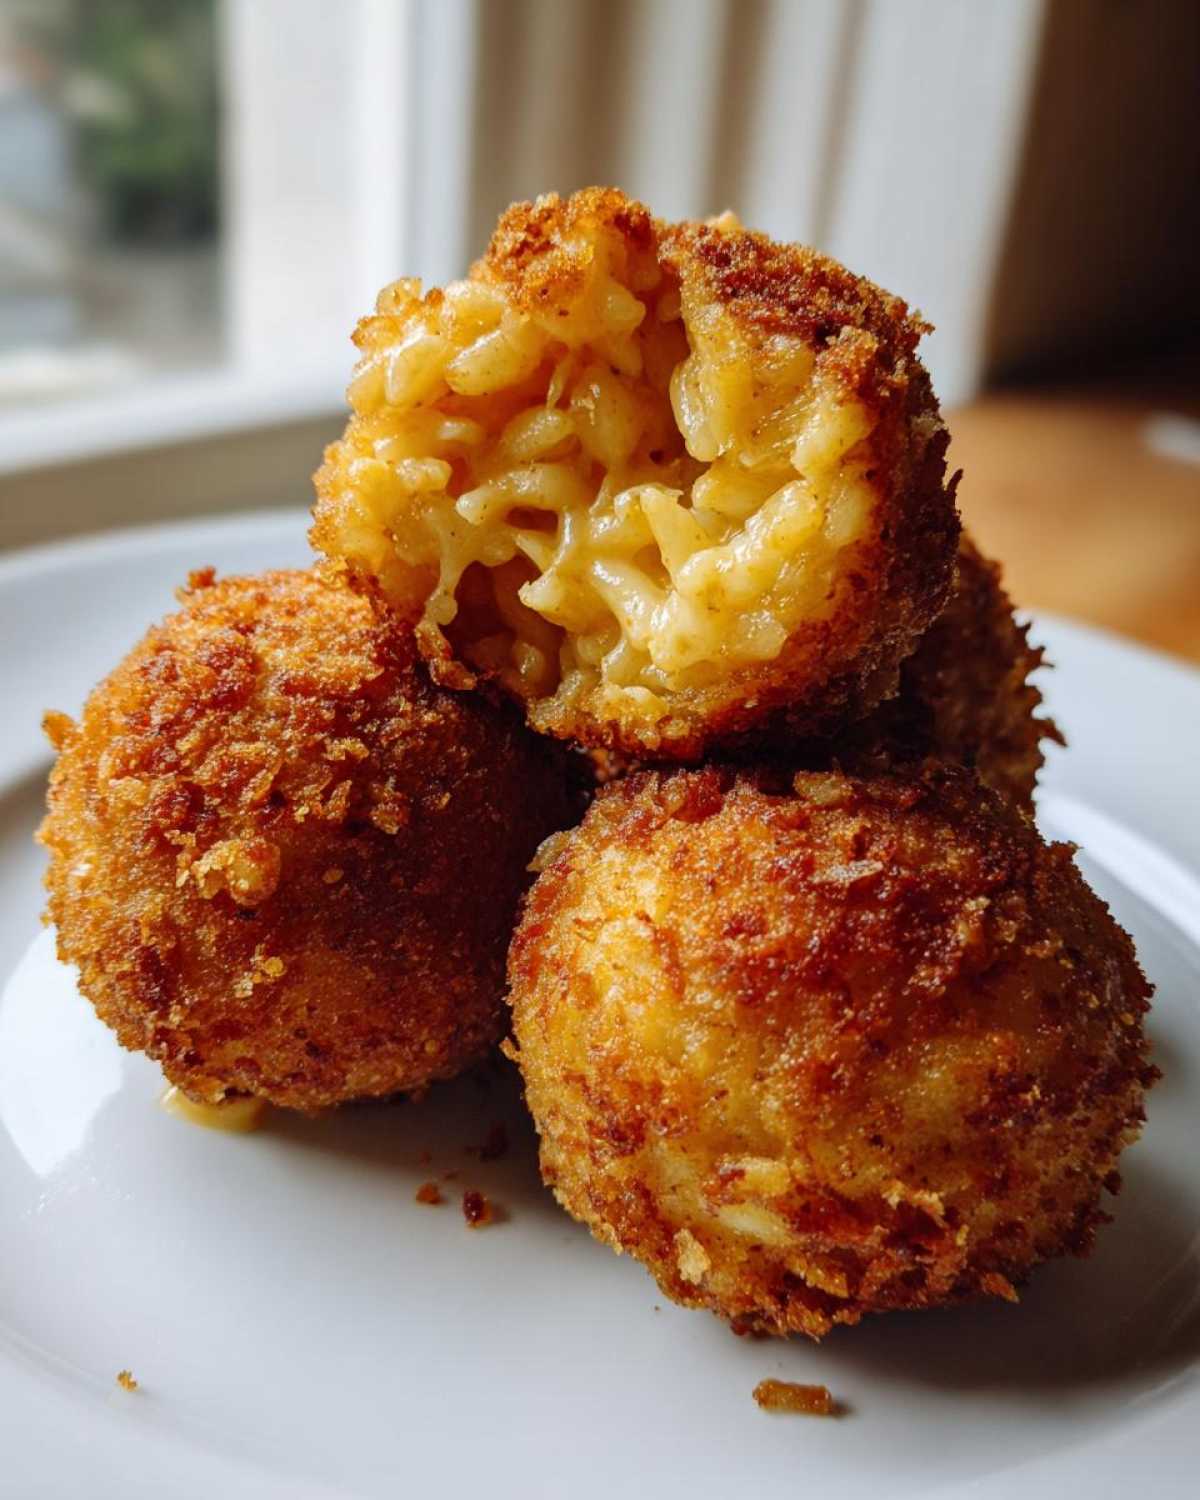
That sensation—the perfect texture combo—is why I call these my ultimate Gooey Center Recipes. Making these homemade arancini means controlling every layer of flavor and texture. If you want to see more of what I’m whipping up in the kitchen, you can always check out my main blog or read a bit about me!
Key Characteristics of Our Cheesy Mozzarella Rice Balls
- Ultimate Crispness: We use quality breadcrumbs and the right frying temperature to lock in that beautiful golden shell.
- Rich Risotto Base: The cold, leftover rice is packed with Parmesan flavor before it even hits the oil.
- The Mozzarella Pull: That amazing moment when you pull two balls apart and the cheese stretches for miles—you just can’t beat it!
Gathering Ingredients for Ultimate Cheesy Arancini Rice Balls
Okay, let’s talk what you need! The ingredient list for these Italian rice balls is super straightforward, which is why they make such an excellent weeknight appetizer or party filler. But listen closely to one of my biggest secrets for success with any Risotto Balls Recipe: the risotto MUST be cold. I cannot stress this enough! If it’s warm or even room temperature, the balls will smear and fall apart the second they hit the hot oil. You want that dense, firm base so the structure holds up during rolling and frying.
We’re filling these beauties with simple, classic flavors. If you’re feeling fancy, grab some high-quality Parmesan. Here’s what you need gathered on your counter before we start shaping:
- 3 cups leftover cooked risotto (cold, seriously, cold!)
- 1 cup shredded mozzarella cheese (low-moisture works best here!)
- 1/2 cup frozen peas, thawed and drained super well
- 1/4 cup grated Parmesan cheese
- 1 large egg, beaten (this is for binding the rice)
- 1/2 cup all-purpose flour (for the first dip)
- 2 large eggs, lightly beaten (for dredging the coating)
- 1 1/2 cups plain breadcrumbs (Panko is my absolute favorite—it gives the best crunch!)
- Vegetable oil, enough for about 2 inches in your pot for frying
- Salt and black pepper to taste
That cold risotto is your anchor, folks. It’s what prevents these from turning into sad, oily puddles. It almost acts like the glue! You’re going to love how easily this comes together once you have everything prepped.
Step-by-Step Guide: How to Make Arancini Rice Balls Perfectly
Alright, deep breath! This looks like a lot of steps, but trust me, once you get into a rhythm, these become second nature. It’s all about that sturdy base we made sure to chill! We are turning that cold risotto into beautiful, golden spheres. I like to put on some good music while I do this part; it’s a little hypnotic once you get going. We need to be careful when we’re forming these so that gorgeous mozzarella stays locked inside all the way until it melts in the hot oil. If you want to check out my policy details after we’re done cooking, feel free to read up on our privacy policy here.
Mixing the Risotto Base for Your Rice Balls
First things first, grab that big bowl of chilled risotto. You’re going to gently mix in the shredded mozzarella, the thawed and drained peas, the Parmesan cheese, and that one beaten egg. You want to mix this just until everything comes together. Don’t beat it up too much! We don’t want to crush all the structure out of the rice grains we worked so hard to keep firm. The Parmesan is really important here; it adds that sharp, salty backbone that cuts through the richness of the mozzarella we’re about to hide inside.
Forming and Stuffing the Crispy Fried Rice Balls
This is where the magic happens. Set up your dredging station: one bowl for flour, one for the remaining two beaten eggs, and a third for your breadcrumbs (Panko for the win!). Take a heaping tablespoon—maybe two if you like a bigger snack—of the risotto mix and roll it firmly between your palms to get a nice, tight ball shape, about an inch and a half across. Now, gently press a small cube of mozzarella into the center. You absolutely must seal the rice all the way around it. Pinch that seal tight! If you don’t seal it perfectly, the cheese will escape when frying, and we want that glorious melt inside, not in our oil!
The Three-Step Breading Process for Golden Fried Snacks
Once they are sealed tight, it’s go time on the breading. Dip each ball first into the flour—shake off any excess so you don’t get lumps. Next, dunk it completely into the egg wash, letting the drip fall off. Finally, roll it generously in the breadcrumbs. When you roll it in the Panko, gently press the crumbs onto the surface with your fingers. This pressure helps the crumbs stick really well, giving you those incredible, sturdy crumbs on your Italian Rice Balls Recipe.
Frying Technique for Perfect Risotto Balls Recipe Results
Time for the heat! Get about two inches of vegetable oil heating up in a heavy pot—a Dutch oven is great for this—until it hits exactly 350°F (175°C). This temperature is key for getting those Crispy Fried Rice Balls without burning the outside before the center heats up. Carefully lower the coated balls into the oil in small batches. Remember, don’t overcrowd the pot, or the oil temperature will drop instantly, and you’ll get greasy arancini! Fry them for about four to six minutes, turning them delicately as they turn golden brown all over. Pull them out with a slotted spoon and immediately set them on paper towels on a wire rack so the bottoms don’t get soggy. Serve these immediately while they are piping hot and that cheese is seriously melted!
Tips for Success When Making Homemade Arancini
Look, anyone can follow instructions, but getting that *perfect* Arancini takes a little insider knowledge, right? My grandmother always said that great cooking isn’t about luck; it’s about understanding the science, even when you’re just frying rice! We already talked about how vital that cold risotto is—that really helps the structure stand up to the shock of the hot oil. But here’s another game-changing trick if you want maximum crunch factor.
If you really want those intensely crisp shells, you have to double-dip! After you do the initial coat (flour, egg, crumbs), just dip it right back into the egg and then—this is key—roll it in the breadcrumbs one more time. This creates a thicker armored shell around that melty center. It looks like extra work, I know, but when you bite in? Totally worth it. If you ever have questions about the reliability of my kitchen wisdom, you can always check out my disclaimer page.
Variations for Your Stuffed Rice Balls
I know, I know, this recipe is dedicated to the classic Italian method, but once you’ve mastered the technique for making these incredible rice balls, you basically have a license to get creative! Because the structure relies on that nice, firmly packed cold risotto, you can swap out the fillings beautifully, as long as you stick to small, flavorful additions.
You absolutely do not need fiddly extra steps to change the flavor profile. For instance, forget the peas sometimes and try adding finely chopped sun-dried tomatoes mixed right into the risotto base. Wow, that adds a lovely punch of tanginess that cuts through the richness of the fried exterior.
If you want something a little meatier but keeping it Italian-style, try crumbling up some cooked prosciutto or bits of spicy salami right into the rice mixture before you roll them. Since the cheese is still the star of the show, these additions just make it more interesting! Don’t try to swap the mozzarella core, though; that gooey melt is what we are aiming for every single time!
Storage & Reheating Instructions for Leftover Rice Balls
Now, these are best served piping hot straight from the oil, but let’s be real—sometimes you have leftovers, right? Don’t worry, they reheat beautifully, provided you treat them right! If you want to keep them for a couple of days, just let the cooked arancini cool completely on the counter, then store them in an airtight container in the fridge. They’ll be fine for about three days like that.
If you’re planning ahead, pop them into a freezer-safe bag after they’ve cooled down. They freeze really well for up to a month! The absolute key, though, is reheating. You cannot, I mean absolutely CANNOT, put these cheesy rice balls in the microwave. They’ll turn into mushy, rubbery disappointment.
To bring back that perfect crackle, use your oven set to 375°F (190°C) or, even better, an air fryer for about 8 to 10 minutes. This heats the interior until the cheese melts again, and crucially, it dries out the crust just enough to make them crispy again. Trust me on this one; skip the microwave!
Serving Suggestions for These Easy Italian Appetizers
What’s better than scooping up a hot, golden orb of cheese and rice? Dipping it in something delicious! These make the best Party Snack Recipes because they are so easy to serve. Forget complicated plating; just pile them high on a platter.
For dipping, you can’t go wrong with a simple, bright marinara sauce. The acidity of the tomato really contrasts nicely with the deep-fried richness. If you want something creamier for contrast, whip up a quick garlic aioli. A squeeze of fresh lemon right over the top before serving also wakes everything up! It’s all about creating layers of flavor that complement the fried rice. For cookie recipes on my site, check out my Cookie Policy!
Frequently Asked Questions About Making Arancini
I totally get it; sometimes the details trip us up when we try a new, amazing Quick Rice Snack recipe. That’s why I pulled together the most common things people ask me about these little fried treasures. We want you to feel confident making these fantastic Italian appetizers! If you need the fine print on how I run this site, you can read my Terms and Conditions.
Can I use freshly made risotto instead of leftovers for these rice balls?
You absolutely can, yes! But that’s where a lot of people run into trouble. Fresh risotto is usually too wet, and trying to form it into tight balls is nearly impossible before refrigeration sets it up. If you must use fresh risotto, you need to cook it slightly firmer than normal—less soupy! Then, spread that warm rice out in a very thin layer on a sheet pan and stick it in the fridge for at least two or three hours until it’s completely solid. That chilling process is what gives you the structure needed to get those perfect shapes.
What is the best way to prevent the cheese from leaking out during frying?
This is *the* most important physical step when making Stuffed Rice Balls! Think of the risotto mixture as armor for that beautiful mozzarella center. You need to take your portion of rice, flatten it in your palm, place the cheese cube right in the middle, and then gently—but completely—fold the rice around it. Really pinch that seam closed! You should finish with a perfectly smooth ball, no visible cheese showing. If you made the balls and they feel a little soft, pop them on a tray in the freezer for 15 minutes before breading. Cold equals structure!
Are these Arancini Recipe balls suitable for vegetarian diets?
Generally, yes, this is a fantastic vegetarian option among Savory Rice Shapes! It’s based on rice, cheese, and vegetables like peas. The one sneaky spot to check is your Parmesan cheese. Traditional Parmesan cheese uses animal rennet in its production, so if you are super strict about vegetarian standards, look for a brand specifically labeled as vegetarian, or use a hard Italian-style cheese alternative that skips the rennet. Otherwise, go ahead and enjoy these crunchy bites!
Nutritional Estimates for This Risotto Balls Recipe
Now, I’m not a nutritionist, so please take these numbers with a big grain of salt—or, in this case, a big grain of Arborio rice! These estimates are what I worked out using standard measurements for two Arancini Rice Balls in one serving size. Because we are frying these gorgeous little things, we know the fat content is going to be a little higher than if we baked them, but honestly, that’s where all the flavor comes from, right? These are a treat, so enjoy them!
This breakdown is based on using whole-milk mozzarella and standard vegetable oil for frying. You can certainly lighten it up if you sneak a bite of the risotto before you chill it, but for the full experience, these are the numbers:
- Serving Size: 2 balls
- Calories: 350
- Total Fat: 18g
- Saturated Fat: 7g
- Carbohydrates: 35g
- Protein: 14g
- Sugar: 2g
- Sodium: 450mg
- Cholesterol: 75mg
It’s important to remember that making substitutions—like using an air fryer instead of frying, or using lower-fat cheese—will definitely change these estimates! I always recommend checking the packaging on your specific ingredients if you need exact counts. This recipe really delivers on satisfying protein and carbs to keep you full, even though it’s listed as an appetizer. If you want to read up on my data handling statements regarding privacy, you can check out my GDPR Compliance Statement.
PrintUltimate Cheesy Arancini Rice Balls

Make classic Italian fried risotto balls filled with mozzarella and peas. These arancini have a crispy exterior and a warm, gooey cheese center.
- Prep Time: 25 min
- Cook Time: 15 min
- Total Time: 40 min
- Yield: 12 servings
- Category: Appetizer
- Method: Frying
- Cuisine: Italian
- Diet: Vegetarian
Ingredients
- 3 cups leftover cooked risotto (cold)
- 1 cup shredded mozzarella cheese
- 1/2 cup frozen peas, thawed
- 1/4 cup grated Parmesan cheese
- 1 large egg, beaten
- 1/2 cup all-purpose flour
- 2 large eggs, lightly beaten (for dredging)
- 1 1/2 cups plain breadcrumbs (Panko recommended)
- Vegetable oil, for frying
- Salt and black pepper to taste
Instructions
- In a bowl, combine the cold risotto, mozzarella cheese, thawed peas, Parmesan cheese, one beaten egg, salt, and pepper. Mix gently until just combined.
- Place a small bowl of flour and a shallow dish of the remaining beaten eggs and a third dish of breadcrumbs nearby.
- Take about 2 tablespoons of the risotto mixture and form it into a tight ball, about 1 1/2 inches in diameter. Press a small piece of mozzarella into the center before sealing the ball completely.
- Roll each rice ball first in the flour, shaking off excess.
- Dip the floured ball into the beaten egg mixture, letting excess drip off.
- Roll the ball thoroughly in the breadcrumbs until fully coated. Press the crumbs onto the surface to adhere well. Place coated balls on a tray.
- Heat about 2 inches of vegetable oil in a deep pot or Dutch oven to 350°F (175°C).
- Carefully fry the arancini in batches, turning occasionally, until they are deep golden brown and crispy, about 4 to 6 minutes. Do not overcrowd the pot.
- Remove the fried balls with a slotted spoon and place them on a wire rack lined with paper towels to drain excess oil.
- Serve immediately while the center is melted.
Notes
- Use leftover risotto that has been chilled for at least 4 hours; cold, firm risotto holds its shape better during rolling.
- If you do not have leftover risotto, cook Arborio rice with extra broth until very creamy, spread it thin on a sheet pan, and chill completely before forming the balls.
- For an extra crispy coating, double-dip the balls: flour, egg, breadcrumbs, then egg again, then breadcrumbs again.
Nutrition
- Serving Size: 2 balls
- Calories: 350
- Sugar: 2
- Sodium: 450
- Fat: 18
- Saturated Fat: 7
- Unsaturated Fat: 9
- Trans Fat: 0.5
- Carbohydrates: 35
- Fiber: 2
- Protein: 14
- Cholesterol: 75