

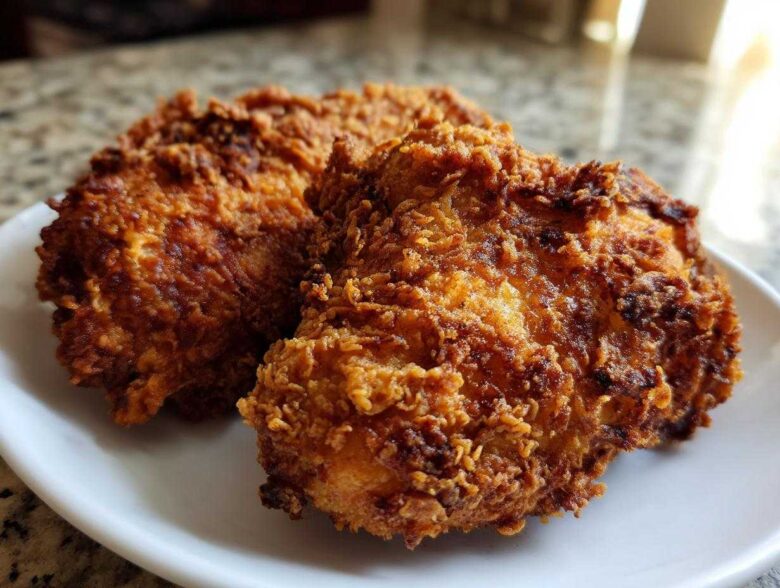
Oh, I know that craving. It’s that deep, soul-satisfying need for chicken that snaps when you bite into it, but the inside is just swimming in hot, salty juice. Forget those dry, disappointing versions you get sometimes! I spent way too long trying to figure out what makes that perfect, craggy crust on the best country-style chicken everywhere. Trust me, I’ve cracked it. This Copycat Country Chicken recipe isn’t just close; it tastes like the real deal you remember from the best southern tables. We nailed the seasoning blend, and the secret is all in the twin soak and dredge combo. If you love sides to match this main event, you absolutely have to check out my recipe for old-fashioned blackberry dumplings! You’re going to love how easy it is to recreate this family favorite right in your own kitchen. It genuinely tastes like perfection!
Why This Copycat Country Chicken Recipe Works
Folks ask me all the time, “What makes your fried chicken taste like it came from that famous spot?” It’s not magic, honey, it’s science paired with good old-fashioned patience! This Copycat Country Chicken recipe checks every box because we treat the chicken right before it even hits the oil. I’m sharing the secrets that make the crust stand up and stay crispy, even after plating. Seriously, seeing that craggy, golden crust makes all the waiting worth it.
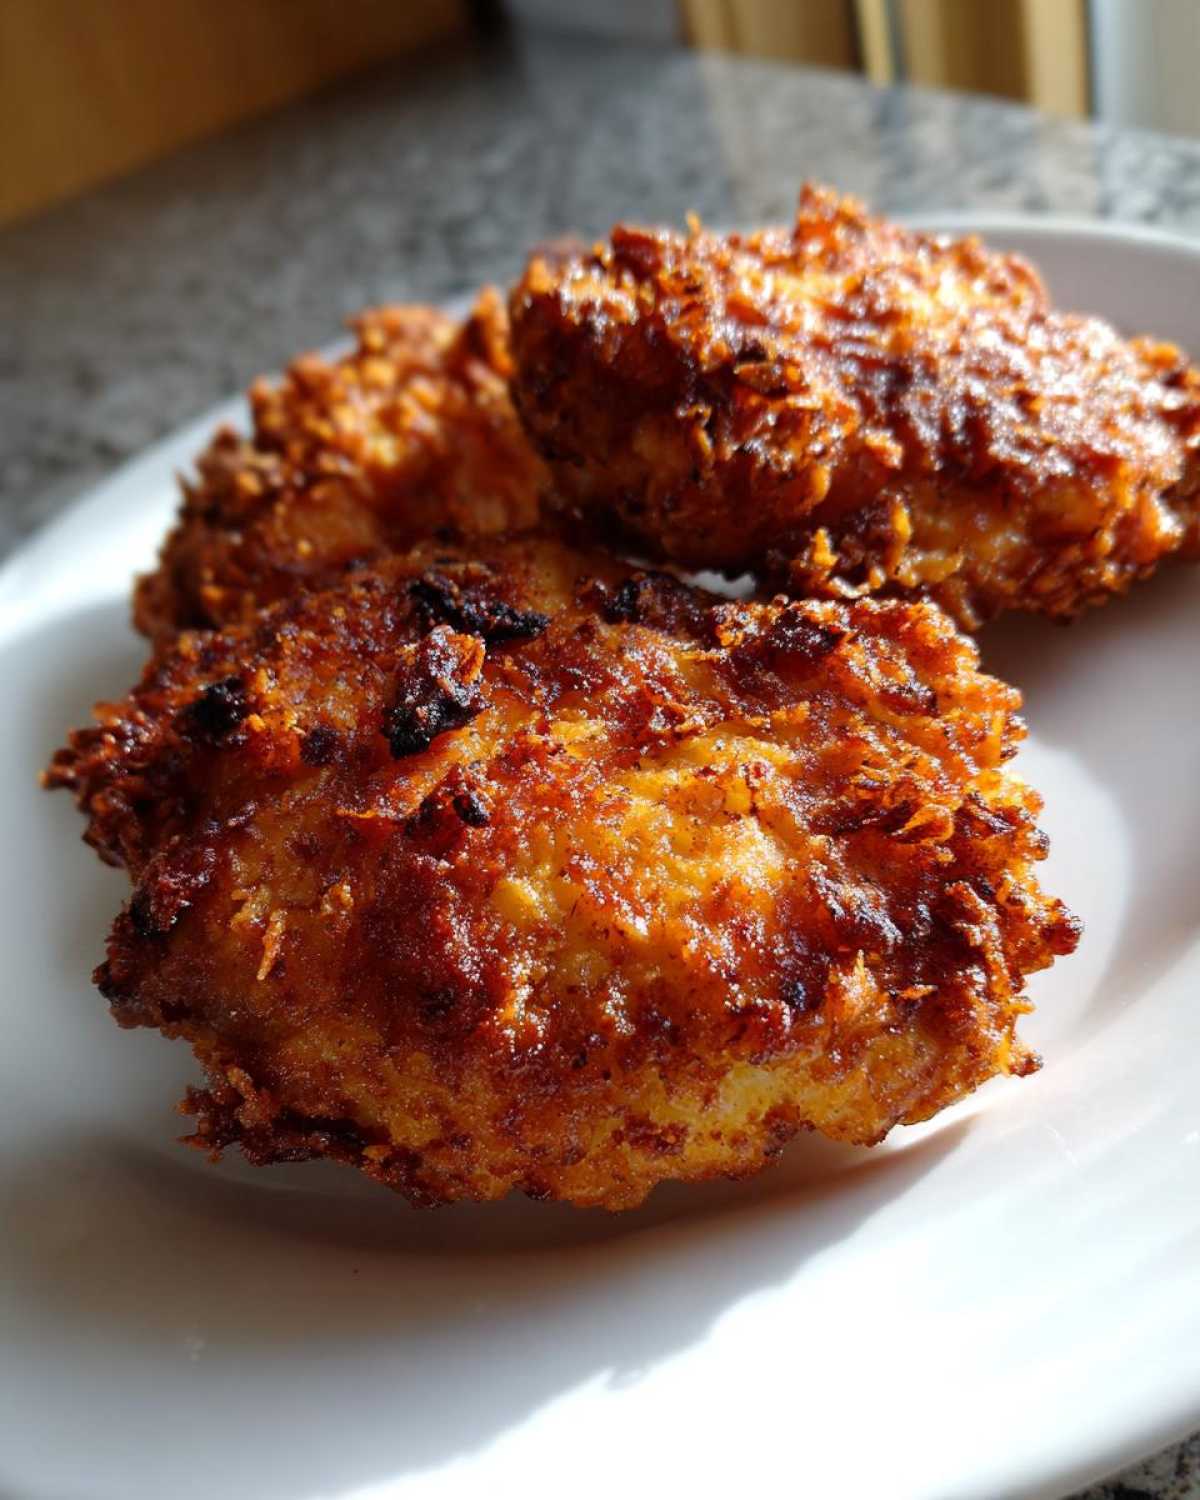
Here’s the breakdown on why this preparation method is non-negotiable for getting that restaurant-quality crunch:
- It relies on a serious buttermilk soak, which tenderizes the meat beautifully.
- We use a double-dredge technique that builds up layers of crunchy texture you can actually see.
- The seasoning blend is key—it hits all those savory notes you are expecting!
Achieving the Ultimate Crispy Coating
The secret to that legendary crunch? Cornstarch! Mixing a little cornstarch right into your flour dredge—like we do here—is what helps those flakes hold on tight and turn shatteringly crisp when they hit the hot oil. After the first dip, we go back in for a second, heavy dredge. This layering process, which you can find loads of details about in my juicy fried chicken technique post, is what makes this a true Crispy Southern Fried Chicken Tutorial. Don’t skimp on pressing that bottom layer of flour on!
The Secret to Juicy Fried Chicken Technique
If you want to Juicy Fried Chicken Technique, you have to marinate. That long soak in the seasoned buttermilk does two important things. First, the acid tenderizes the protein, which is huge for juicy results. Second, that wet coating is crucial because it gives the dry dredge something sticky to grab onto when we double-dip. I only use bone-in pieces, too. The bone adds flavor right into the meat as it cooks low and slow in the oil, ensuring the center stays perfectly moist while the outside gets golden brown.
Ingredients for Perfect Copycat Country Chicken
Alright, let’s talk about what goes into this masterpiece. Getting the right flavor for our **Copycat Country Chicken** means using exactly what the recipe calls for, especially the spices. You can’t just throw paprika in there and call it done! You need the right balance so every bite sings that perfect, savory, Southern tune. And please, please make sure you grab bone-in, skin-on cuts for this. That skin gets incredible, and the bone helps protect the meat from drying out, giving us that fantastic texture.
You’ll notice we keep this fairly tight—it’s all about the chicken doing the heavy lifting, helped by the marinade and the dredge. For those of you planning the whole spread, I’ve got a fantastic recipe for classic southern deviled eggs that would go perfectly alongside this chicken!
Here is what you need to gather. Measure everything out precisely before you start soaking, trust me—it stops panic later on!
- Chicken Pieces: You need about 4 lbs of bone-in, skin-on chicken pieces. Thighs and drumsticks work best because they handle the frying process like champs.
- The Marinade: 2 cups of buttermilk is essential, along with 1 tablespoon of your favorite hot sauce. This is the flavor bath!
- The Dry Dredge Mix (This is the key to the taste!):
- 2 cups all-purpose flour (level scoops, please!)
- 1/2 cup cornstarch (that’s our secret weapon for crispiness!)
- 2 tablespoons of salt (don’t be shy, it needs seasoning!)
- 1 tablespoon black pepper
- 1 tablespoon paprika (for color and depth)
- 1 tablespoon garlic powder
- 1 teaspoon cayenne pepper (just a little kick, promise!)
- 1 teaspoon dried thyme
- 1 teaspoon dried oregano
- For Frying: You’ll need plenty of vegetable oil—about 2 inches deep in your pot. Some folks mix in shortening for a richer flavor, which you can totally try if you want to upgrade the experience!
How to Prepare Your Copycat Country Chicken
Okay, now that you have all your ingredients lined up—and believe me, organization is half the battle when frying—we can get to the fun part: turning raw chicken into legendary crispness! Don’t rush these main steps, especially the resting time. That waiting is what builds the structure for the crust. If you’re looking for baked alternatives, I shared a recipe for homemade chicken nuggets that are baked crispy which might give you some inspiration!
The Essential Buttermilk Marinade Step
First things first, we have to tenderize! Take all your beautiful pieces of chicken and toss them right into a large bowl. Now, douse them liberally with that buttermilk and your tablespoon of hot sauce. You want every single crevice coated—seriously, get your hands in there and massage it in. Cover that bowl up tight. This isn’t a quick dip, either; this is serious flavor infusion time. You absolutely have to let this sit for a minimum of four hours in the fridge, but if you can manage it, let it hang out overnight. That time is critical for tenderizing the meat and getting that signature sour tang that defines the best **Copycat Country Chicken**.
Preparing the Old Fashioned Fried Chicken Breading
While the chicken is chilling, whisk together your dry ingredients in a shallow dish. This is where all our key flavor builders—the paprika, oregano, thyme, garlic powder—meet the bulk of the flour and our secret weapon, the cornstarch. Whisk it really well so everything is dispersed evenly without clumps. Once the chicken comes out of the fridge, take a piece, let the excess of that thick buttermilk drip off, but don’t wipe it dry! That wetness is what we need.
Dredge it heavily in the flour mix, pressing down firmly with your hands. This makes sure you get that authentic, craggy coating—this is what defines true Old Fashioned Fried Chicken Breading. Then, for extra serious crunch? Dip it back into the leftover buttermilk for just a second, and immediately back into the flour for a second, heavy press. That double layer is what guarantees crunch!
Frying for the Best Country Style Chicken
Now for the heat! You need 2 inches of vegetable oil heated up in a heavy pot—a Dutch oven is ideal—and you must get it to exactly 325 degrees Fahrenheit. If you don’t have a thermometer, find one; this temperature is everything. If it’s too cool, your chicken gets greasy; too hot, and the outside burns before the middle cooks. Carefully place just 3 or 4 pieces in at a time; do not overload that pot! We’re frying for about 12 to 15 minutes, turning them midway, until they hit an internal temperature of 165°F. When they come out golden brown, pull them immediately and set them right on a wire rack over a baking sheet. Don’t ever use paper towels; they trap steam and ruin that perfect crust on your **Copycat Country Chicken**! Keep the oil temp steady between batches.
Tips for Success with Restaurant Style Chicken Copycat
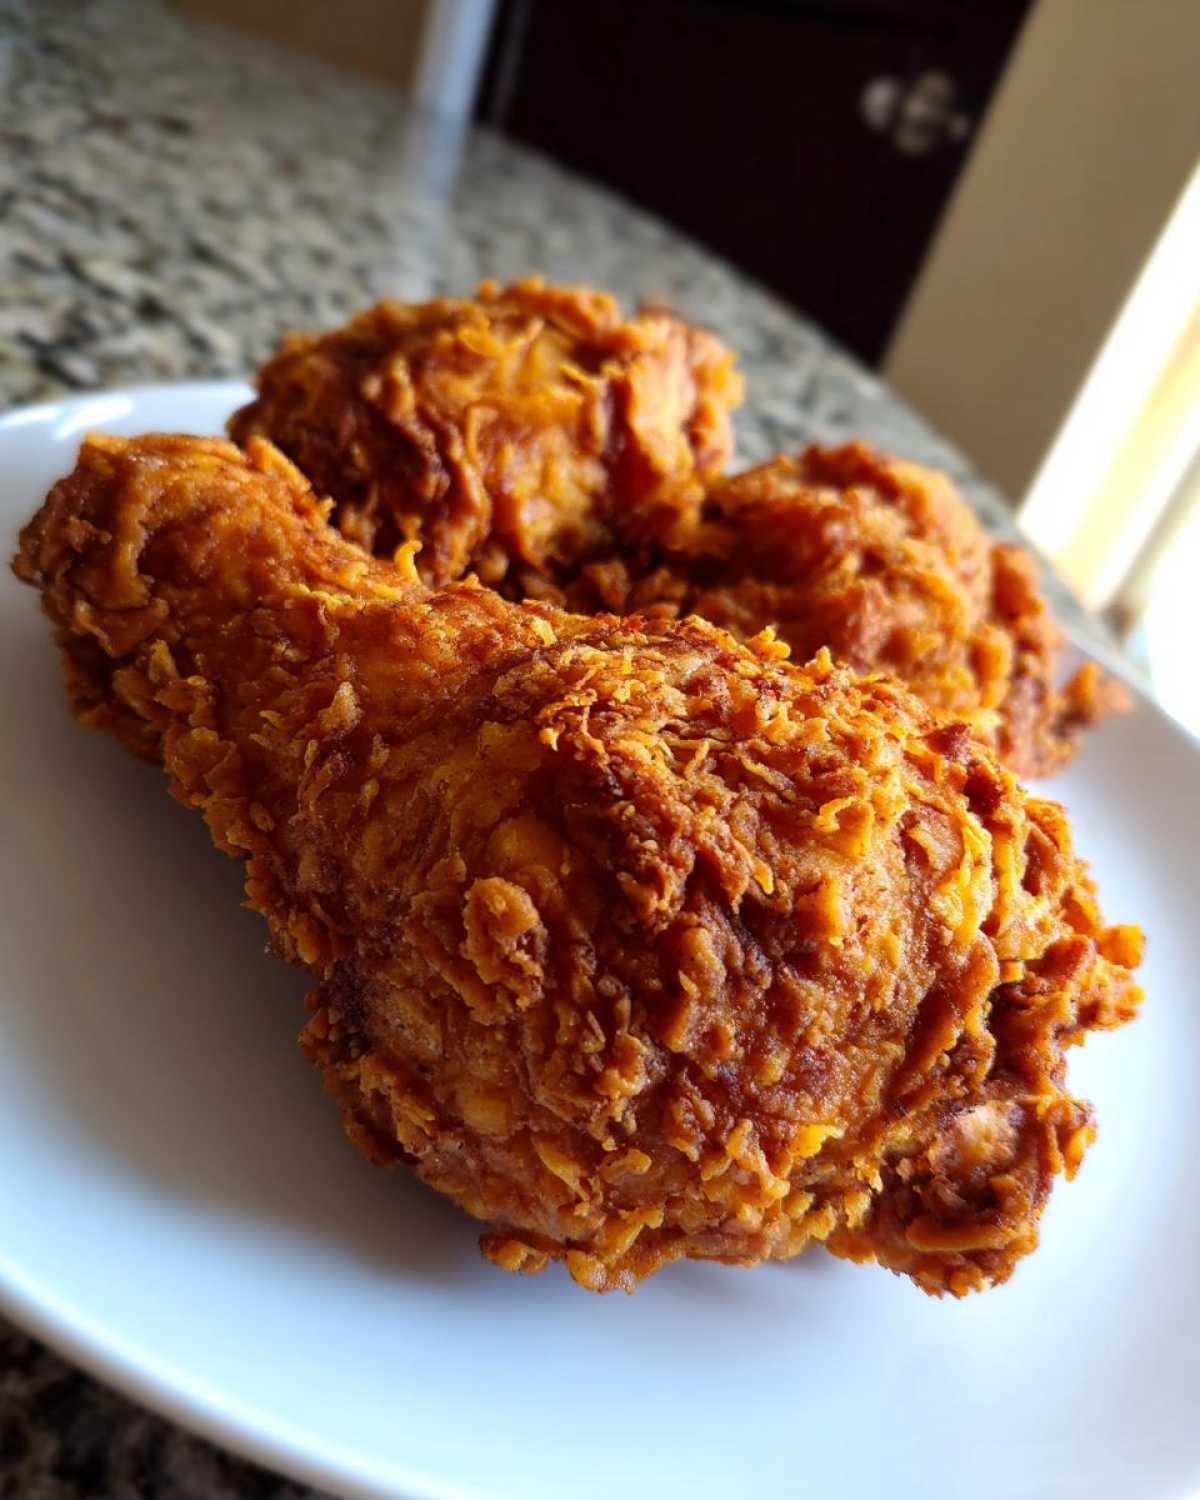
You’ve done the soaking and the double-dredging—great job! But achieving that perfect **Restaurant Style Chicken Copycat** finish often comes down to the tiny things you do right before the chicken hits the oil. If you want that coating to really set up and lock in, you have to let it rest. Seriously, don’t put that freshly coated chicken straight into the fryer!
After that final press into the dry mix, place the chicken pieces on a clean wire rack, and let them sit out on the counter for about 20 minutes. I know, I know, it feels weird letting perfectly seasoned chicken just sit there, but trust me. This resting period lets the flour absorb a little bit of that moisture from the buttermilk underneath. When it hits the hot oil, that coating hydrates just enough to adhere perfectly, leading to that super thick, craggy crust we’re aiming for. It stops the breading from falling off in the pot!
Also, let’s talk about oil blends. While straight vegetable oil is fine, if you want that deeply nostalgic, richer flavor associated with classic diners, try mixing half vegetable oil with half shortening. Shortening has a higher smoke point and adds a depth of flavor that oil alone just can’t replicate. If you’re looking to serve this with something equally mind-blowing, you have to try my sauce recipe—it’s the best burger sauce copycat smash recipe and it’s amazing for dipping chicken!
Remember, consistency is your friend. If you’re frying in batches, always monitor that oil thermometer. If it dips below 325°F after you drop in the next batch, let it come back up before adding the next set of chicken. Maintaining that prime temperature ensures everything cooks through evenly right alongside that beautiful, crispy skin.
Variations for Your Easy Homemade Country Chicken
Deep frying is definitely how we get that absolute, undeniable crispness for the best **Copycat Country Chicken**, but let’s be real—sometimes you just can’t deal with that much oil, or maybe you’re trying to keep things a bit lighter for a weeknight dinner. Totally understandable! The good news is that because we spent so much time putting that perfect seasoning blend and thick dredge onto the chicken, you can absolutely adapt this recipe and still get a fantastic result. This is key for making it your own version of **Easy Homemade Country Chicken**.
If you’re avoiding the deep fryer, I have two main options that work really well while keeping the soul of the flavor intact:
Baking for a Lighter Crispy Southern Fried Chicken Tutorial
If you want to lean into the healthier route, baking works surprisingly well, provided you remember one thing: spray it down! After you finish that second, heavy dredge in the flour mix, don’t just put the chicken on the pan. Arrange your coated pieces on a wire rack set inside a rimmed baking sheet. Then, very generously spray every single nook and cranny of the flour coating with cooking spray—an avocado or neutral oil spray is great here. This mimics the way oil bastes the crust in the fryer. Bake these babies at 400 degrees Fahrenheit. They usually take about 35 to 45 minutes, depending on the size of your pieces. Make sure you flip them halfway through so both sides get golden brown and crunchy!
Using the Air Fryer for Speed
The air fryer is really wonderful if you want that intense heat circulation while using far less oil. It gets closer to that fried texture than the oven does. Again, spray that coating liberally before you place the pieces in the basket. Don’t pile them on top of each other, or the air fry circulation—which is crucial for that crispy exterior—will be blocked. You’ll need to check the internal temperature carefully, but generally, starting around 375 degrees Fahrenheit for about 20-25 minutes does the trick. If you want to see how I handle a whole bird in there, check out my thoughts on air-fryer whole chicken—the principles are the same for these smaller pieces!
Adjusting the Buttermilk Soak
No matter which cooking method you choose, you must keep the buttermilk soak! If you try to skip it, the salt and spice won’t penetrate the meat, and the coating won’t stick properly. If you’re short on time and can’t do the overnight soak, try this trick: soak the chicken for at least two hours, but use ice-cold buttermilk, and add an extra half teaspoon of baking soda to the marinade. The baking soda helps tenderize faster, giving you a quicker route to a tender **Easy Homemade Country Chicken**!
Serving Suggestions for Your Family Favorite Country Chicken
You’ve got the main event—the crispiest, juiciest fried chicken around! Now we need things to sit next to it, right? Because what’s great **Copycat Country Chicken** without the sides that belong with it? You can’t serve this masterpiece alone; it needs its entourage. My absolute favorite thing to pair with this is something sweet to cut through that savory, salty crust. You seriously can’t go wrong with my recipe for the best classic southern candied yams.
If you want to lean into the ultra-comfort side of things, you need something creamy. I always suggest a big helping of my ridiculously good creamy cheesy scalloped potatoes. That creamy texture against the crunch? It’s heaven on a plate. Sometimes, just a simple, cold glass of sweet iced tea and a pile of creamy coleslaw is all you need to make this the ultimate **Family Favorite Country Chicken** dinner!
Storage and Reheating Instructions for Copycat Country Chicken
The best problem to have after making spectacular fried chicken is leftovers! And let me tell you, cold fried chicken is a treat all its own, but we want that crispy texture back for round two. The biggest rule for saving your amazing **Copycat Country Chicken** is keeping moisture away from that beautiful crust. Don’t even think about putting a warm piece of chicken into a sealed container in the fridge—that steam will make the coating soggy instantly!
When you’re done eating, let the chicken cool completely on that wire rack you wisely used for draining. Once it’s totally at room temperature, stack the pieces loosely in an airtight container, but place a layer of paper towel between each piece. This keeps them from sticking and absorbs any lingering moisture. Keep this sealed container in the fridge for up to three or four days. Any longer than that, and the texture really starts to suffer, even in the best conditions.
Now, for reheating—this is where people mess up their perfect crunch! Do not, I repeat, do not use the microwave. Microwaving fried chicken is a cardinal sin; it will make the crust either tough or rubbery, and that’s just sad.
The Only Way to Reheat Fried Chicken for Maximum Crispness
If you want to bring that **Copycat Country Chicken** back to life, you need dry heat. The oven is your absolute best friend here. Preheat your oven to about 375 degrees Fahrenheit. You want it hot enough to crisp up the exterior but not so hot that the inside overcooks and turns dry. Set a wire rack on top of a baking sheet. This is important so air circulates underneath the chicken. If you set it directly on the pan, the bottom side gets steamed because the condensation pools there.
Place the cooled chicken pieces on that rack and put them in the preheated oven. Let them heat through for about 10 to 15 minutes. Keep an eye on them! You’re not necessarily trying to cook it more; you are aiming to evaporate the moisture absorbed during storage and refresh that crispy coating. Peek under one piece—if the bottom is looking brown and crisp again, you’re done! This method gets you about 90% close to fresh-fried, and frankly, it’s the only way to do it justice.
Air Fryer Resurrection
If you still have your air fryer handy, that’s actually an even faster route to crispness! Set it to about 350 degrees Fahrenheit. Pop your leftover pieces in the basket, making sure they aren’t overlapping at all. Air fry them for about 5 to 7 minutes. Because the air movement is so aggressive in the air fryer, it blasts the moisture right off the crust quicker than the oven. This is how I usually revive my fried chicken for lunch the next day. It’s fast, effective, and keeps my beautiful **Copycat Country Chicken** tasting just as good as the first time around!
Frequently Asked Questions About This Copycat Fried Chicken Recipe
When you are trying to nail a specific restaurant flavor, naturally you’re going to have questions! We want this to be your go-to, fail-safe recipe for that perfect bite every time. Don’t worry about sounding silly; the science of frying can be tricky, but once you know these little secrets, you’ll be churning out the **Best Country Style Chicken** without blinking. I even have a note on a perfect vegetable side dish for you at the end, in case you need it! You should take a look at my tips for honey garlic roasted carrots if you want something flavorful but not heavy.
Can I use chicken breasts instead of bone-in pieces for this Copycat Country Chicken?
You totally can, and if you prefer breasts, go for it! However, you have to be very careful with the timing. Breasts are naturally leaner and thicker in parts, so they dry out much faster than bone-in thighs or legs. My big suggestion? If you’re using breasts, make sure they are pounded to an even thickness—say, about three-quarters of an inch thick—before you even start the buttermilk soak. This helps them cook evenly. Because they are boneless, you’ll need to pull them out of the oil much sooner, usually around the 10-minute mark, checking that they hit 165°F internally. You really want to keep an eye on them so you don’t lose the juiciness in your **Copycat Country Chicken**!
What oil temperature is best for the Best Country Style Chicken?
I can’t stress this enough: 325 degrees Fahrenheit is the magic number for this recipe. If you are striving for the **Best Country Style Chicken**, you must use a thermometer and hold that temperature steady between batches. Think about it this way: if your oil is too hot, say 375°F, the outside gets this dark, beautiful color way too fast, but the inside of that thick chicken piece is still raw and pink because the heat didn’t have time to penetrate. You end up with burnt flour and undercooked meat—a total disaster! Conversely, if the oil drops too low, the breading sits in the oil too long without coming up to temperature, and it absorbs a ton of grease, making your crust soggy instead of perfectly crisp. So, 325°F it is!
How can I make this copycat recipe spicier?
Our base recipe gives you just a gentle kick from the cayenne, which is how most of the famous spot’s chicken tastes. But if you want a real heat, don’t just dump more cayenne in the flour! Instead, add a teaspoon of smoked paprika and a pinch of chipotle powder to your dry mix; that gives you a smoky heat that complements the savory elements better than just raw spice. Also, when you are doing your buttermilk soak, adding a dash of that hot sauce right into the marinade is a great flavor booster without changing the texture profile.
Nutritional Estimates for This Perfect Chicken Replication
I always feel a little weird posting nutrition facts, because let’s be honest, if you’re making authentic **Copycat Country Chicken**, you’re doing it for the comfort, not the diet plan! But because I want you to have all the info, I ran these numbers through a standard calculator based on the bone-in pieces and amount of oil absorbed during deep frying. This is the closest we can get to an accurate picture for a single serving.
Please remember this is just an estimate, and your actual values will swing depending on how much oil your specific chicken pieces soak up and the exact brands of buttermilk or spice mixes you use. If you’d like to read all the fine print on how we calculate these things, you can check out my full disclaimer page here!
For one single piece of this incredible chicken, here are the general metrics:
- Calories: Roughly 450 per serving
- Total Fat: Around 28 grams (Yes, that’s where the flavor lives!)
- Protein: About 30 grams (It’s a hearty meal!)
- Carbohydrates: About 18 grams (Mostly from the delicious breading)
- Sodium: Approximately 750 mg (It’s seasoned well, as it should be!)
It’s a rich meal, no doubt about it. But that satisfying crunch and juicy center make this Perfectly Seasoned Crispy Chicken tradition entirely worth it for a special family dinner. Enjoy every bite!
PrintCopycat Country Fried Chicken

This recipe replicates the flavor and crispy texture of popular country-style fried chicken using a seasoned buttermilk soak and double-dredge method.
- Prep Time: 20 min
- Cook Time: 45 min
- Total Time: 4 hours 5 min
- Yield: 4 servings
- Category: Dinner
- Method: Frying
- Cuisine: American
- Diet: Low Fat
Ingredients
- 4 lbs bone-in, skin-on chicken pieces (thighs, drumsticks)
- 2 cups buttermilk
- 1 tablespoon hot sauce
- 2 cups all-purpose flour
- 1/2 cup cornstarch
- 2 tablespoons salt
- 1 tablespoon black pepper
- 1 tablespoon paprika
- 1 tablespoon garlic powder
- 1 teaspoon cayenne pepper
- 1 teaspoon dried thyme
- 1 teaspoon dried oregano
- Vegetable oil, for frying
Instructions
- Place chicken pieces in a large bowl. Pour buttermilk and hot sauce over the chicken. Mix to coat completely. Cover and refrigerate for at least 4 hours, or preferably overnight.
- In a separate shallow dish, whisk together the flour, cornstarch, salt, pepper, paprika, garlic powder, cayenne pepper, thyme, and oregano. This is your dry dredge mix.
- Remove chicken from the buttermilk, letting excess drip off, but do not wipe it dry.
- Dredge each piece thoroughly in the dry mix, pressing the coating firmly onto the chicken.
- For a thicker crust, dip the coated chicken back into the remaining buttermilk for a few seconds, then return it to the dry mix for a second, heavy dredge. Press again.
- Heat 2 inches of vegetable oil in a deep, heavy-bottomed pot or Dutch oven to 325 degrees Fahrenheit. Use a thermometer to maintain this temperature.
- Carefully place 3 to 4 pieces of chicken into the hot oil, ensuring you do not overcrowd the pot, which lowers the oil temperature.
- Fry the chicken for 12 to 15 minutes, turning occasionally, until deep golden brown and the internal temperature reaches 165 degrees Fahrenheit. Smaller pieces cook faster.
- Remove the chicken and place it on a wire rack set over a baking sheet to drain excess oil. Do not place it on paper towels, as this steams the crust.
- Repeat with remaining chicken, adjusting the heat as necessary between batches to maintain 325 degrees Fahrenheit.
Notes
- For extra crispy skin, let the fully dredged chicken rest on a wire rack at room temperature for 20 minutes before frying. This allows the coating to hydrate slightly.
- If you prefer not to deep fry, you can bake this chicken at 400 degrees Fahrenheit for 35-45 minutes, flipping halfway, after spraying the coated pieces lightly with cooking spray.
- Use a blend of half vegetable oil and half shortening for a more traditional flavor profile.
Nutrition
- Serving Size: 1 piece
- Calories: 450
- Sugar: 3
- Sodium: 750
- Fat: 28
- Saturated Fat: 7
- Unsaturated Fat: 21
- Trans Fat: 0
- Carbohydrates: 18
- Fiber: 1
- Protein: 30
- Cholesterol: 105