

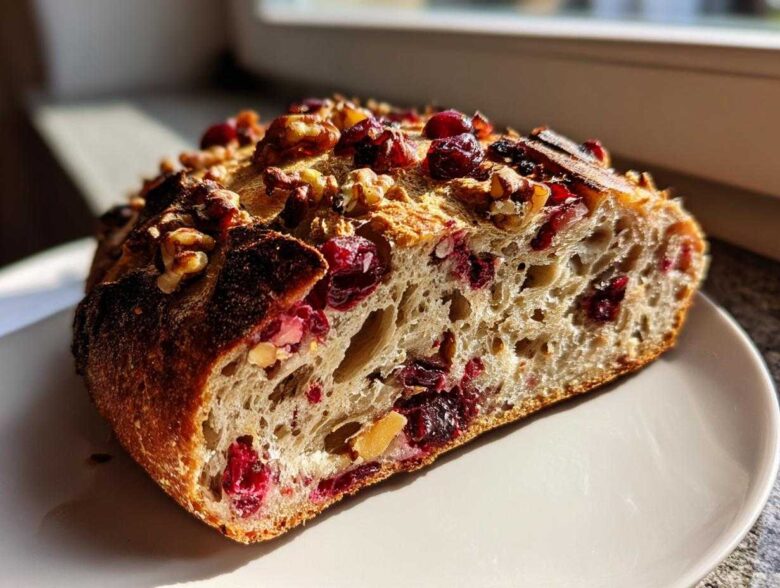
There is just something magical about that first slice of warm, rustic bread during the holidays. You know the one—stuffed with tart cranberries and crunchy walnuts? For years, I thought getting that perfect, chewy crust and soft interior meant hours of kneading and frustration. I almost gave up on making artisan bread at home until I discovered the secret to hands-off perfection. Trust me when I say this cranberry walnut bread is the easiest, most spectacular thing you’ll make all year. It’s nearly foolproof, and honestly, it looks exactly like those fancy loaves you see at the market!
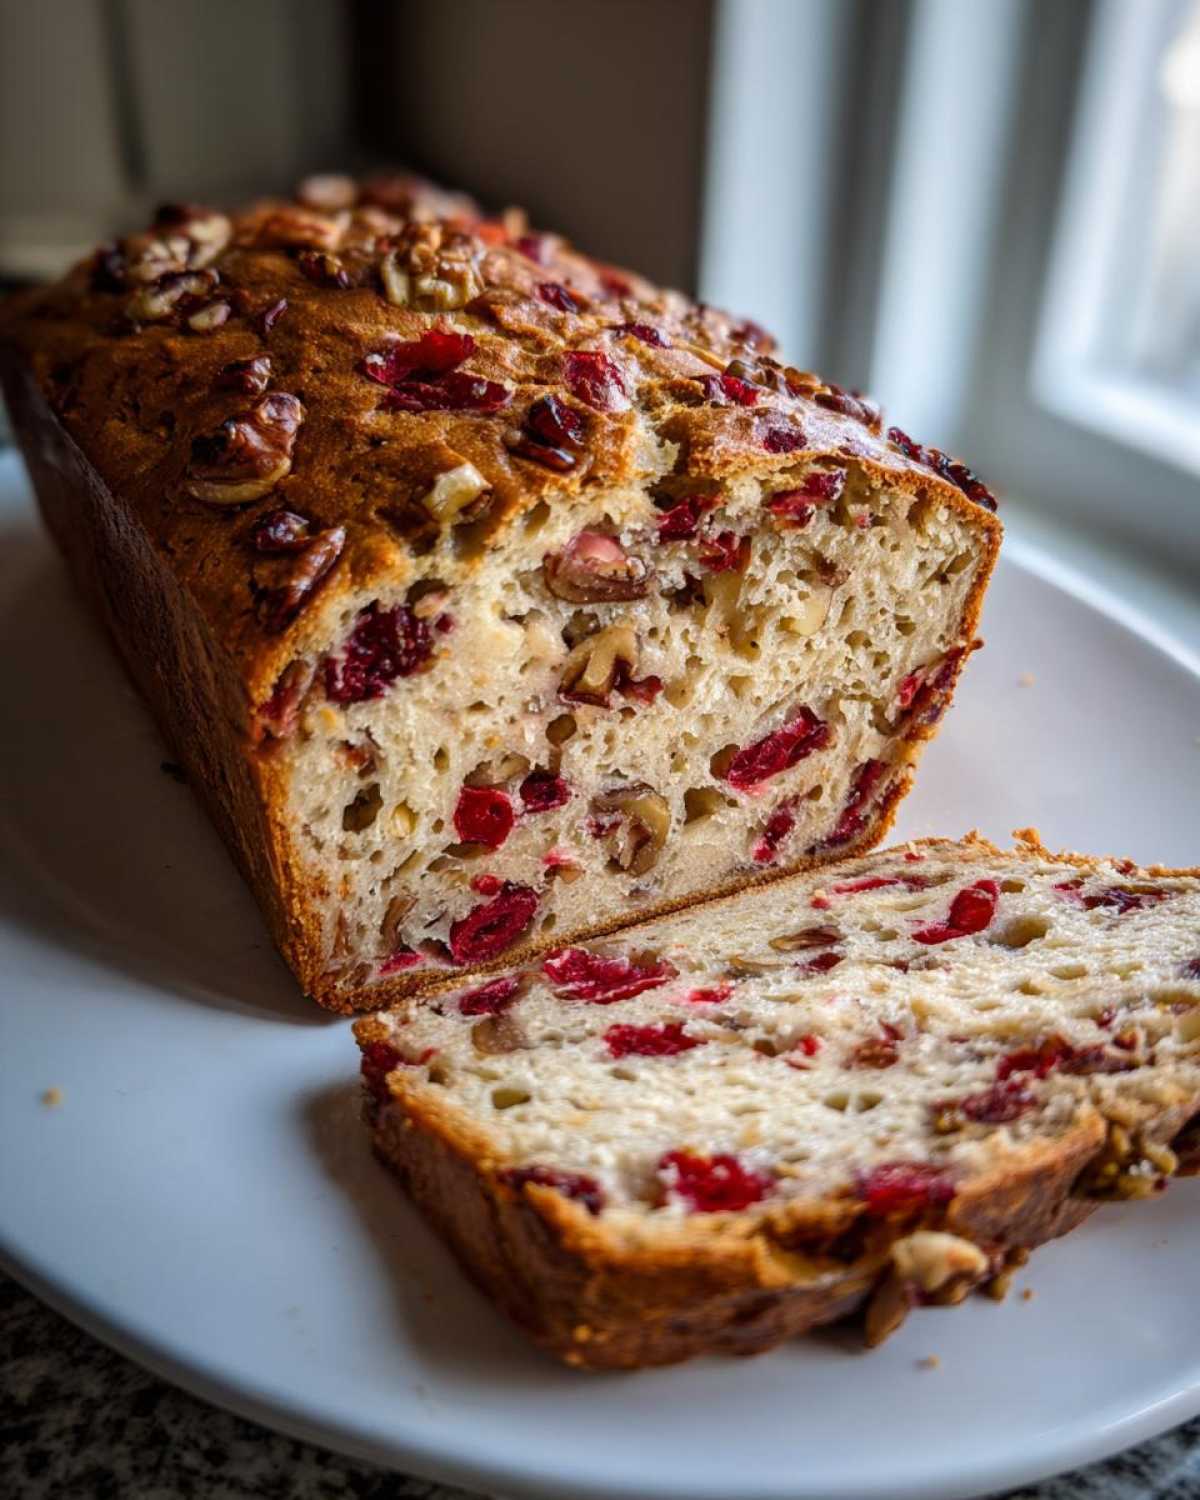
I remember my first attempt at homemade bread ended up tasting more like a dense brick than a loaf. Yikes! But this no-knead method changed everything. It lets time do the heavy lifting, giving you a deeply flavorful, incredibly moist cranberry nut bread that tastes like it came from a high-end bakery. It’s my go-to for gifts now because it looks so impressive but requires almost zero effort from me.
Why This Is the Best Cranberry Walnut Bread Recipe
People go absolutely wild for this loaf. Seriously, it’s often called the best cranberry walnut bread because it delivers that rustic, chewy crust you usually only get from professional bakeries. That’s the magic of the no-knead method we’re using here. It’s truly an artisan cranberry walnut bread that happens almost entirely on its own!
If you’re chasing that famous store-bought texture, you’re in the right place. This recipe creates a stunningly moist cranberry nut bread that rivals any costco cranberry walnut bread copycat you’ve ever tried, but without the extra preservatives.
Achieving Perfect Texture with No Kneading
The secret here is time, not effort. You mix your simple ingredients and then you walk away! That long, slow rest—we’re talking 12 to 18 hours—is what builds those amazing airy pockets in the crumb. The yeast works slowly, developing structure and depth of flavor you just can’t get from a quick-mix recipe. It builds character!
The Perfect Balance in Our Cranberry Walnut Bread Recipe
Flavor-wise, this cranberry walnut bread is just spot on. The cranberries are perfectly tart; they don’t turn into mush. They contrast beautifully with the deep crunch of the walnuts. And if you sneak in that little bit of orange zest I mention later? Wow. It just brightens up the whole thing and makes it taste incredibly festive and fresh.
Ingredients for Your Homemade Cranberry Walnut Loaf
This is where you need to be precise, friends! Since we aren’t kneading, the ratios have to be spot-on, especially when dealing with tricky things like yeast and water temperature. Grab a decent kitchen scale if you can, but measuring cups will certainly work for this cranberry walnut bread recipe. We are using instant yeast here, which is a must for this long, slow rise.
Make sure that water is just warm—think baby bath temperature, around 105 to 115°F—no hotter, or you’ll kill your little yeast friends before they can even start working! Also, get those walnuts chopped up ahead of time; we want nice, coarse pieces, not dust.
Here is exactly what you’ll need:
- 3 cups all-purpose flour
- 1 teaspoon instant yeast
- 1 teaspoon salt
- 1 tablespoon granulated sugar
- 1 1/2 cups warm water (make sure it’s between 105-115°F!)
- 1 cup dried cranberries
- 1 cup chopped walnuts (don’t be shy with these!)
- 1 teaspoon orange zest (This is optional, but seriously, it’s worth the tiny bit of extra effort!)
Step-by-Step Instructions for Easy Cranberry Walnut Bread
Okay, here is the most exciting part: learning how to make this incredibly flavorful cranberry walnut bread without breaking a sweat over kneading! The work here is honestly just waiting. You’re going to be amazed at how little fuss it takes to get a perfect loaf. Remember, the long rest is your secret weapon for that wonderful texture.
Mixing the Dough and Initial Rest
First things first, let’s get everything whisked together. You’re combining the flour, instant yeast, salt, and sugar in a big bowl. Don’t stand there measuring five times; trust the kitchen scales on this one! Now, pour in that warm water and mix it with a wooden spoon until it just comes together into a shaggy, messy-looking ball. Seriously, stop stirring there! The biggest mistake beginners make is overmixing—we don’t want a tough loaf. Cover that bowl up super tight with plastic wrap. Next, you wait. You need to let it sit at room temperature for 12 to 18 hours. You’ll know it’s ready when the top is bubbly and it has visibly doubled, maybe even tripled, in size. It’s going to look wild!
Shaping and Second Proofing of the Cranberry Walnut Bread
Once your dough has happily fermented, lightly flour your counter. Gently scrape the dough out of the bowl—it’ll be sticky and jiggly—and just fold it over itself maybe three or four times lightly. We aren’t kneading; we are just gently coaxing it into a rough ball shape. Put that dough ball seam-side down onto a good piece of parchment paper. Cover it loosely with a clean cloth towel and just let it sit again for 30 minutes while you get your oven ready. This second, short rest is called the proof, and it lets the dough relax right before it hits the heat. I always wipe down my counter right then!
Baking Your Artisan Cranberry Walnut Bread
This next step is totally dramatic, but it’s how we get that incredible crust! Put your Dutch oven—lid and all—right into the oven and let it preheat to a screaming hot 450°F (that’s 232°C). You need that pan blazing hot! Once it’s ready, carefully pull out the oven rack and quickly lift the dough using the parchment paper cradle—gently!—and lower it right into that blazing hot pot. Cover it immediately. Bake it covered for 30 minutes. This steam trapped inside creates the crust. After 30 minutes, take the lid off the Dutch oven. Let it bake for another 15 to 20 minutes uncovered until the crust is a deep, gorgeous golden brown. Be careful when you pull the finished loaf out while using tongs or oven mitts. You can see the difference the high heat made already! For cooling, always let your artisan cranberry walnut bread cool *completely* on a wire rack before you dare slice into it. That helps lock in all that amazing moisture.
Tips for the Best Cranberry Walnut Bread
Even though this is an easy cranberry walnut bread, a few little tricks make the difference between great and absolutely unforgettable. We learned these bits the hard way, so you don’t have to! Paying attention to these small details is what turns a good bake into the perfect quick bread cranberry walnut experience.
Ingredient Notes and Substitutions for Cranberry Walnut Bread
Remember how I said you could skip the orange zest? If you do, definitely toss in 1/2 teaspoon of vanilla extract instead! It adds warmth. Also, if you find yourself running low on walnuts, pecans are a fantastic stand-in—they have a similar sturdy crunch in the finished loaf. And please, hear me on the cooling part: resist the temptation to slice it hot! Slicing too early releases the steam and makes the inside gummy, which ruins that perfect texture we worked so hard for.
Troubleshooting Common Issues in No-Knead Baking
What if things go a little sideways? First, if your dough seems super sticky and almost soupy after 18 hours, it usually means your kitchen was very warm. Don’t panic! Just scrape it out gently onto a floured surface for shaping. If your dough didn’t rise much? Your kitchen was probably cold, or the water wasn’t warm enough for the yeast. You *can* put it somewhere warm (like inside a turned-off oven with the light on) for an extra few hours. If the crust comes out pale, just put the lid back on for five more minutes and then take it off again to crisp up the top color.
Serving Suggestions for This Festive Winter Baking Loaf
Honestly, slicing this beautiful loaf while it’s still warm (after it has cooled completely, don’t cheat!) is pretty perfect on its own. But if you’re serving it up for your next gathering, try dressing it up a little bit! A thick smear of good salted butter is always my first choice; the salt just cuts through the sweetness so nicely.
For a true holiday bread recipe moment, try spreading on some sharp cream cheese or even better, brie! That creamy texture is divine against the tart cranberries in this cranberry walnut bread. Or, serve it alongside your brunch spread with a side of homemade orange marmalade. It’s truly versatile!
Storage and Reheating Instructions for Cranberry Walnut Bread
Because this is a rustic, no knead cranberry walnut bread without the commercial preservatives, it has a slightly different life span than your standard sandwich loaf. You want to keep that gorgeous, chewy crust intact for as long as possible! The absolute biggest “no-no” you can commit is storing it in plastic wrap right away.
Once the loaf has cooled completely, which like I said, takes *forever* but is super important, wrap it loosely in plastic wrap or foil. That loose wrapping traps just enough moisture to keep the inside soft without letting the crust get soggy. You can keep it on the counter like this for about two to three days. Seriously, keep it away from the fridge, though! Cold temperatures make bread go stale faster, believe it or not.
If you know you won’t devour this whole loaf quickly—which is a brave statement, trust me—you absolutely should freeze it. Slice up your cranberry walnut bread first! That way, you only thaw what you need. Wrap the slices tightly in plastic wrap, then pop them into a sturdy freezer bag. It keeps beautifully for up to three months. When you want a slice, just pull one out and let it thaw on the counter for an hour, or—fancy that—toast it right up!
If you want that fresh-from-the-oven experience later, you can reheat whole or halved loaves in a 350°F oven for about 10 minutes. It wakes up all those nutty and fruity smells again. If you need quick slices for breakfast, just pop them right into the toaster. If you need help with questions on substitutions or ingredients, don’t hesitate to reach out via my contact page!
Frequently Asked Questions About Cranberry Walnut Bread
I know bread baking can feel a little intimidating, especially when you’re dealing with a long, slow recipe like this one. But don’t worry! Most questions folks have about their cranberry walnut bread recipe are super easy to fix. Here are a few things that come up most often when people are making their first homemade cranberry walnut loaf.
Can I use active dry yeast instead of instant yeast?
That’s a good question! Since this is a no knead cranberry walnut bread recipe, we really prefer instant yeast because it mixes right in with the dry ingredients. But yes, you can substitute active dry yeast! If you use active dry, you need to “proof” it first. That means mixing the yeast with the warm water and a tiny pinch of that sugar, letting it sit until it gets foamy (about 5 minutes), and *then* adding it to your flour mixture. If it doesn’t foam, your yeast is dead, and you’ll need to start over with fresh yeast!
How do I get a crispier crust on this bread?
The crust is the best part, right? The heavy, steamy baking in the Dutch oven usually gives you a great crust, but if you want it even crispier for your breakfast bread recipe, here is my trick: after you remove the lid for the final 15-20 minutes of baking, turn the oven temperature *down* to 425°F. A slightly lower temperature for the final phase prevents the sugars on the outside from burning while allowing more moisture to steam off, resulting in a crisper shell. It’s a little tweak for a more rustic walnut cranberry loaf!
Can I make this into muffins or smaller rolls?
You totally can! If you want to switch things up from a full loaf, using this batter to make quick bread cranberry walnut muffins is brilliant for grab-and-go snacks. Just fill your muffin liners about two-thirds full. Since the baking time is much shorter, you’ll only need about 20-25 minutes at 400°F. Keep an eye on them; they bake fast when they’re small!
Why is my loaf not as tart as I’d like?
If you prefer a brighter flavor profile than the standard dried cranberries offer—maybe you want something closer to a tart cranberry bread recipe—try soaking your dried cranberries in a little bit of orange juice or even a splash of brandy for about an hour before mixing them in! They plump up and absorb that extra flavor before they ever hit the oven. It really amps up the fruit flavor in the final bake. Just make sure you drain them well before stirring them into the dough! For more information on recipe sources and my general cooking philosophy, please check out my disclaimer page.
Estimated Nutritional Data for Cranberry Walnut Bread
Now, I know what you’re thinking! When you’re baking something this delicious, the nutrition facts can feel like the last thing on your mind. But since we are talking about making a truly informed, wholesome loaf here, I wanted to share the rough estimates for this amazing **cranberry walnut bread**. This data is just a guideline—a friendly suggestion, really!
The breakdown below is calculated based on dividing the entire recipe yield into 14 equal slices. Remember, what kind of flour you use or precisely how much butter sticks to the inside of your Dutch oven can change the final numbers a tiny bit. This is just to give you a general idea for serving up this **homemade cranberry walnut loaf**!
Here are the general estimates for one slice:
- Calories: Roughly 280
- Total Fat: About 8g (with only 1g being saturated fat—hello, healthy walnuts!)
- Carbohydrates: Approximately 45g
- Protein: Around 7g
It’s important to know that these numbers are based on the standard ingredients listed in the recipe. If you decide to add a huge drizzle of honey on top, your calorie count is definitely going to jump up! For the most accurate information relating to my site’s use of your data, please review my privacy policy. Enjoy this marvelous, festive treat!
Share Your Homemade Cranberry Walnut Loaf
Now, the absolute best part of sharing any recipe is hearing how it turned out for you! Did all 18 hours of resting work their magic? Were the cranberries tart enough? I truly live for your baking adventures.
If you made this easy cranberry walnut bread, please hit those stars and leave a rating right here on the page. It helps other bakers know that this recipe is the real deal. And don’t forget to snap a picture of your gorgeous, rustic loaf!
Tag me on social media when you share your results. I love seeing how you’re serving your festive winter baking masterpiece. Did you use pecans instead of walnuts? Did you sneak in extra orange zest? Tell me everything in the comments below!
PrintEasy No-Knead Cranberry Walnut Bread
Make a moist, artisan-style cranberry walnut loaf at home with this simple no-knead recipe, perfect for holidays or breakfast.
- Prep Time: 15 min
- Cook Time: 50 min
- Total Time: 13 hours 5 min
- Yield: 1 loaf
- Category: Baking
- Method: No-Knead Baking
- Cuisine: American
- Diet: Vegetarian
Ingredients
- 3 cups all-purpose flour
- 1 teaspoon instant yeast
- 1 teaspoon salt
- 1 tablespoon granulated sugar
- 1 1/2 cups warm water (about 105-115°F)
- 1 cup dried cranberries
- 1 cup chopped walnuts
- 1 teaspoon orange zest (optional)
Instructions
- In a large bowl, whisk together the flour, yeast, salt, and sugar.
- Add the warm water to the dry ingredients. Mix with a wooden spoon until just combined into a shaggy dough. Do not overmix.
- Stir in the dried cranberries, chopped walnuts, and orange zest, if using.
- Cover the bowl tightly with plastic wrap and let it rest at room temperature for 12 to 18 hours until the dough is bubbly and has doubled in size.
- Lightly flour a work surface. Gently scrape the dough out of the bowl and fold it over itself a few times to form a rough ball.
- Place the dough ball seam-side down on a piece of parchment paper. Cover loosely with a clean kitchen towel and let it rest for 30 minutes.
- While the dough rests, place a Dutch oven (with the lid on) into your oven and preheat to 450°F (232°C).
- Carefully remove the hot Dutch oven from the oven. Lift the dough by holding the parchment paper and gently lower it into the hot pot. Cover with the lid.
- Bake for 30 minutes with the lid on.
- Remove the lid and continue baking for another 15 to 20 minutes, or until the crust is deep golden brown.
- Carefully remove the bread from the Dutch oven and let it cool completely on a wire rack before slicing.
Notes
- For a slightly sweeter loaf, increase the sugar to 2 tablespoons.
- If you do not have orange zest, use 1/2 teaspoon of vanilla extract instead.
- Cooling the bread completely prevents the inside from becoming gummy when sliced.
Nutrition
- Serving Size: 1 slice
- Calories: 280
- Sugar: 8
- Sodium: 250
- Fat: 8
- Saturated Fat: 1
- Unsaturated Fat: 7
- Trans Fat: 0
- Carbohydrates: 45
- Fiber: 2
- Protein: 7
- Cholesterol: 0