

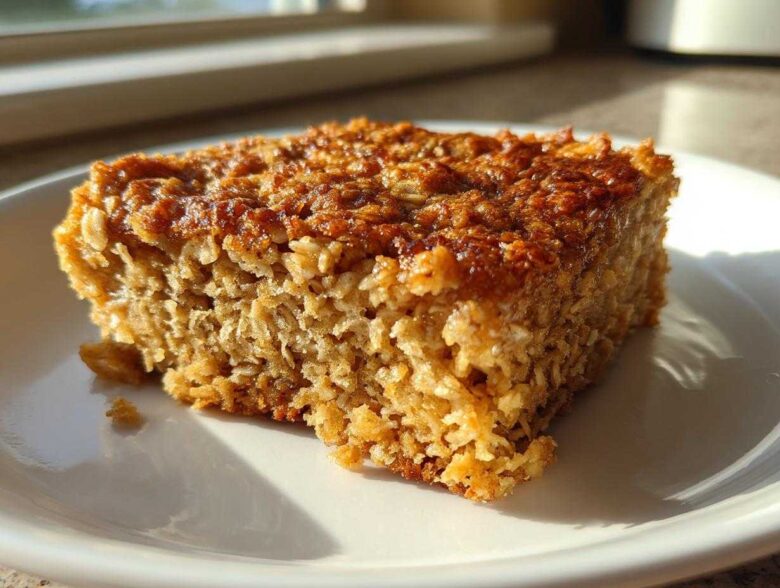
Oh my gosh, you have got to stop burning your toast trying to make breakfast every morning! I know the struggle—weekday mornings feel like a frantic race against the clock, right? That’s why I guard this recipe like a secret treasure map. This is, hands down, the ultimate make-ahead baked oatmeal; you prep it Sunday night, and you’ve got glorious, warm breakfasts ready all week long. It solidifies its spot as a family staple because it’s just so reliable. Seriously, this base recipe for baked oatmeal is a lifesaver when I’m trying to get the kids out the door without serving them sugary cereal!
Why This Classic Vanilla Baked Oatmeal Recipe Works for Everyone
I hear you wanting something that feels like a treat but acts like a grab-and-go necessity. That’s exactly what this recipe delivers! Forget those gummy, gluey baked oatmeal attempts you might have had. We’re hitting that sweet spot here: moist enough to feel decadent from the applesauce, but firm enough that it holds its shape when sliced. That’s crucial for leftovers, trust me!
This isn’t just some trendy new creation; it’s foolproof baking chemistry that makes it the definition of easy baked oats. It’s the one thing I can whip up on Sunday that the whole family actually looks forward to eating straight from the fridge on Tuesday morning. It’s truly my go-to method for make ahead breakfast success.
Benefits of Choosing This Baked Oatmeal Recipe
- It sets up beautifully, so you get perfectly defined squares perfect for stacking in containers.
- It’s incredibly flexible—you can barely taste the vanilla base through added fruits, which is fun.
- Minimal cleanup! Everything happens in one bowl and one baking dish.
- It’s infinitely cheaper and healthier than buying fancy morning pastries down the street.
- It transitions perfectly from an everyday breakfast to a slightly fancier, warm brunch contribution.
Gathering Ingredients for Your Simple Baked Oats
Okay, before we dive into making this stunning baked oatmeal, we need to talk about what we’re putting in the bowl. You don’t need a mountain of exotic supplies; in fact, you probably have everything hiding in your pantry right now. But just like making a great caramel sauce, the quality of the basics really shines through here.
I always try to use the best rolled oats I can find. That matters a lot for setting up correctly, as we’ll discuss! Think of this as your canvas—a simple, delicious vanilla and cinnamon base that invites all sorts of fun messes later on.
Ingredient Clarity and Preparation Notes
Listen closely, because this is where the trust comes in—I want your oats to be perfect! First thing: we need rolled oats, folks, the old-fashioned kind. Definitely skip the instant packets; they dissolve into nothingness. For the sugar, use that beautiful dark brown sugar, and make sure you pack it firmly into that 1/4 cup measure until it’s tight. That molasses flavor is non-negotiable!
Also, about the fat: I generally use unsweetened applesauce because I love keeping this just a little lighter, and honestly, it keeps things wonderfully moist. But I won’t tell if you want to swap it for melted butter sometimes. Both work great, just melt the butter until it’s liquid but not sizzling hot when you add it to your wet mixture.
Step-by-Step Instructions for Perfect Baked Oatmeal
Alright, get that oven preheating immediately! We’re aiming for 375 degrees Fahrenheit. While that’s warming up, grab your standard 8×8 inch baking dish and give it a good quick spray or rubdown with butter. You want zero sticking drama later, especially since we are making this ahead of time!
First, we tackle the dry stuff. In your largest mixing bowl—and I mean the biggest one you have—toss in those two cups of rolled oats, the quick little teaspoon of baking powder (this gives it just a bit of lift!), your cinnamon, the salt, and that sweet brown sugar. Use a whisk to stir this mixture around really well for about 30 seconds. You want the leavening agent and spices evenly distributed throughout all of those oats.
Mixing Wet and Dry Components for Your Oatmeal Casserole
Now for the wet ingredients, which we mix separately. In a smaller bowl, use a fork or a small whisk to beat that single egg lightly first. Then, add in your milk, your applesauce (or melted butter), and that splash of vanilla extract. Whisk until everything looks smooth and unified—no streaks of egg white visible!
Here’s the critical part for a great baked oatmeal texture: pour those wet ingredients slowly over the dry mix. Gently fold everything together with a rubber spatula. I mean gently! You only want to stir until you cannot see pockets of dry oat mix anymore. If you overmix this batter? Oops! You end up with a cakey brick instead of our perfectly scoopable oatmeal casserole. Seriously, a few streaks are fine; stop mixing right away and transfer it to your prepared dish.
Baking Time and Setting the Baked Oats
Pop that dish right into the preheated oven. Our target bake time is usually 30 to 35 minutes. You’re looking for the edges to turn a lovely light golden brown, and when you gently jiggle the pan, the center shouldn’t look like liquid. It should look set, maybe a tiny bit wobbly right in the very middle, but mostly firm.
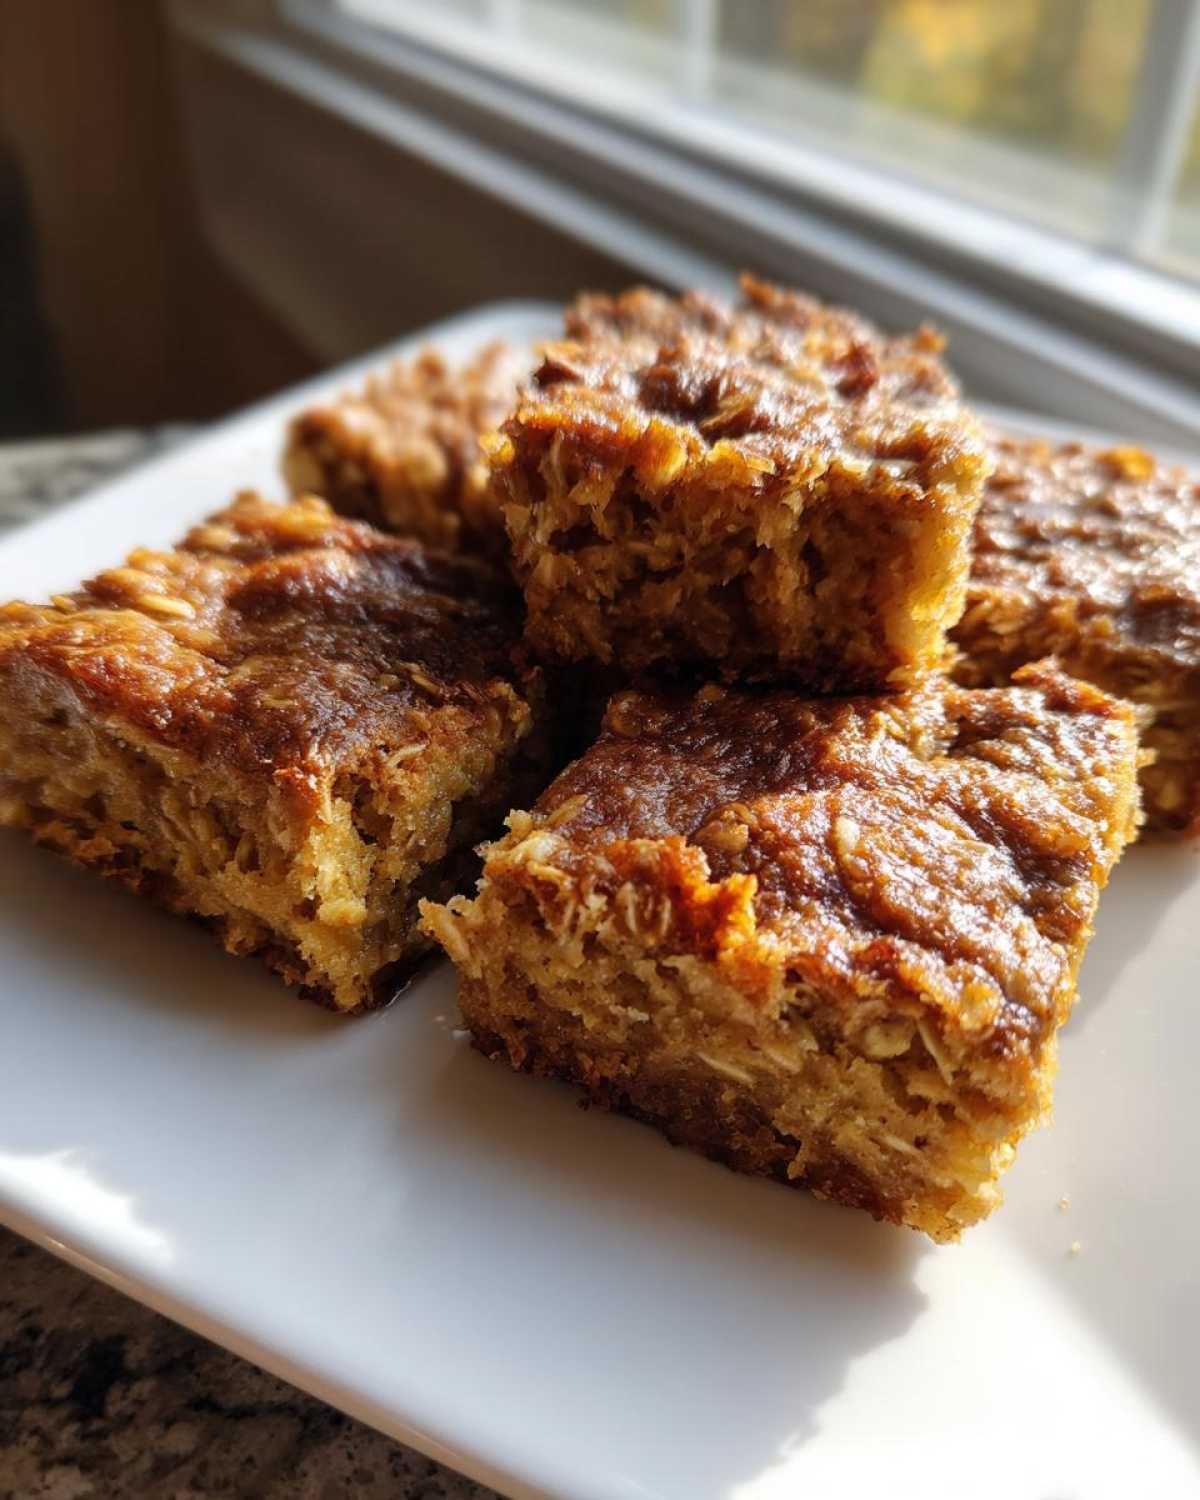
Resist the urge to cut into it immediately! That’s a rookie mistake that leads to crumbly squares. Once it comes out of the oven, let it rest right there on the counter for a solid 5 minutes. This crucial rest allows the oats to soak up those final bits of moisture and firm up beautifully. Then, you can slice it cleanly into squares. If you’re storing these leftovers, make sure they cool completely on a rack first. For more tips on prepping ahead for a big brunch, check out how we handle recipes over at Delish Dreams!
Customizing Your Cinnamon Baked Oatmeal: Flavor Variations
This vanilla base is delicious on its own—it really lets that lovely cinnamon baked oatmeal flavor shine through—but where’s the fun in sticking to just one thing, right? I love treating this like a breakfast building kit! The best part about using this classic formula is how easily you can fold in your favorite fruits right before it heads into the oven.
If you decide to add things like berries or diced fruit, keep an eye on the texture. Fruit brings extra liquid, which might mean your baking time nudges up by about five minutes to ensure the center sets properly. Don’t worry, it’s usually not a big jump, just something to keep in mind if you’re timing it perfectly!
Ideas for Apple Cinnamon Oatmeal Bake Additions
If you’re craving that perfect fall flavor profile, definitely lean into the apples. I dice mine nice and small—about half-inch pieces—so they get soft but don’t sink entirely to the bottom. To really enhance your apple cinnamon oatmeal bake, try sprinkling a tiny pinch of nutmeg into the dry mix before combining everything. It makes the whole house smell incredible!
And hey, if you want it a touch sweeter or bolder when using fruit, don’t forget you can always swap out that sugar or add a drizzle of maple syrup right over the top layer before baking. It caramelizes beautifully around the fruit pieces.
Making Gluten Free Baked Oatmeal
I get asked about this all the time, especially since we live in a world where everyone seems to be avoiding gluten these days! The good news is that transforming this into a gluten free baked oatmeal is incredibly easy, folks. There’s nothing in this recipe that relies on the structure of wheat flour at all. Your only job is ensuring you purchase certified gluten free rolled oats.
Why certified? Because cross-contamination happens easily in processing plants. If you have serious sensitivities, just check that seal on the canister! Otherwise, the technique is identical, and you won’t sacrifice any of that wonderful, sturdy texture we love.
Tips for Successful Meal Prep Oatmeal
If you’re making this specifically for your weekly routine, listen up because this is where we nail the leftovers game. The biggest mistake people make with their meal prep oatmeal is trying to store it while it’s even slightly warm. Don’t do it! If there’s trapped steam, you’re guaranteeing that soft, soggy texture underneath the parts that were crispy.
Once your baked oats have cooled on the counter for that 5 minutes post-oven, let them come completely down to room temperature before you even think about covering them. Place them in an airtight container—I use glass ones, they look nicer when you pull them out! You can safely store these marvelous squares in the refrigerator for up to four full days. That means breakfast is handled from Monday through Thursday!
When it’s time to eat, simply cut a square, pop it on a microwave-safe plate, and zap it for about 30 to 45 seconds. It heats through perfectly and tastes almost as fresh as when it came out of the oven. It’s the easiest breakfast batch cooking strategy I’ve ever adopted!
Serving Suggestions for Your Warm Breakfast Ideas
So, you’ve got your perfect square of baked goodness, and now what? While this stuff is fantastic eaten plain on the go, serving it warm really elevates the experience! Since our base is a classic vanilla flavor, it pairs beautifully with almost anything.
I love a dollop of plain Greek yogurt on top—the tang cuts through the sweetness perfectly. A light drizzle of maple syrup is always a winner, naturally. Or, if you want a little crunch for your warm breakfast ideas, sprinkle on some toasted pecans or slivered almonds right before you dig in. It’s the simplest way to make a week-day oatmeal feel like an absolute treat!
Frequently Asked Questions About Baked Oatmeal
I know that when you’re trying something new, especially for those busy school mornings, you might have a few little worries rattling around in your head. Don’t stress! I’ve cooked this a hundred ways, and I’m happy to clear up any confusion you might have about your next batch of baked oatmeal.
Can I use quick oats instead of rolled oats in this baked oatmeal recipe?
This is probably the most common question I get! While you absolutely *can* use quick oats, I really don’t recommend it if you want that sturdy texture we’ve worked so hard to achieve. Quick oats have already been steamed and rolled thinner, so they break down almost entirely when baked. You’ll end up with what tastes more like a sweet oat pudding than a firm square of oatmeal casserole. For the best structure, stick to the old-fashioned rolled oats!
How do I properly reheat this healthy breakfast bake?
Reheating is so easy, which is why I love this for meal prep oatmeal! You can pop a single square straight into the microwave. I usually cover it lightly with a paper towel so it doesn’t spatter, and heat it for about 35 to 45 seconds on medium-high power. It warms right through.
If you’re feeling a bit fancier or you’re reheating a larger portion for brunch, you can certainly use the oven. Wrap the square loosely in foil, place it on a cookie sheet, and heat it at 325 degrees for about 10 to 15 minutes until it’s hot all the way through. It mimics that fresh-baked feel surprisingly well, making it a fantastic healthy breakfast bake!
Estimating Nutrition for This Baked Oatmeal
Now, I know some of you are tracking macros or just want a rough idea of what fuel you’re putting in your body when you grab a square of this baked oatmeal. It’s important to know what we’re working with! Since we are using simple, whole ingredients like oats and relying on applesauce for moisture, this bakes up surprisingly well balanced.
Here are the estimates based on a standard serving size of one square, using the core recipe ingredients. Remember, this is just a guideline because your milk choice, the exact brand of oats, or if you sneak in extra fruit will change things just a bit. For full transparency, you can always read more about how we approach nutritional estimates over at our disclaimer page.
For one serving, you’re looking at:
- Calories: Approximately 250 – Pretty perfect for a quick morning boost!
- Fat: Around 6 grams total, mostly healthy fats when using applesauce.
- Carbohydrates: About 43 grams—that’s where the slow-releasing energy from the oats comes from.
- Protein: A solid 8 grams, thanks to the eggs and milk keeping you fuller longer.
- Fiber: A fantastic 5 grams to keep things moving smoothly!
I find these numbers are fantastic for something that tastes like a warm, sweet breakfast treat. It’s the perfect energy foundation whether you’re heading to the office or chasing kids around the house!
Share Your Experience Making This Breakfast Batch Cooking Favorite
Whew! Now that you have the secrets to the easiest, most delicious baked oatmeal you’ll ever try, I really want to hear about it! Don’t just tuck this recipe away; put it to work! Let me know how this became your new favorite breakfast batch cooking trick.
Did you try it plain? Did you load it up with those blueberries we talked about? Or maybe you got creative and added pumpkin puree? Tell me everything! Head down to the comments section below and leave me a star rating so others know this recipe is worth the 10 minutes of prep time.
I absolutely adore seeing your pictures! Tag me on social media when you pull a beautiful, golden square out of the oven. If you’ve got questions or need clarification on any step, please drop those in the comments too—I try my best to answer everyone who reaches out via the contact page. Happy baking, and enjoy those stress-free mornings!
PrintMake-Ahead Baked Oatmeal: Classic Vanilla Base
A simple recipe for baked oatmeal that you can prepare ahead of time for easy weekday breakfasts or serving a crowd.
- Prep Time: 10 min
- Cook Time: 35 min
- Total Time: 45 min
- Yield: 6 servings
- Category: Breakfast
- Method: Baking
- Cuisine: American
- Diet: Vegetarian
Ingredients
- 2 cups rolled oats
- 1 teaspoon baking powder
- 1 teaspoon ground cinnamon
- 1/4 teaspoon salt
- 1/4 cup brown sugar, packed
- 1 1/2 cups milk (dairy or non-dairy)
- 1 large egg, lightly beaten
- 1/4 cup unsweetened applesauce or melted butter
- 1 teaspoon vanilla extract
Instructions
- Preheat your oven to 375 degrees Fahrenheit. Grease an 8×8 inch baking dish.
- In a large bowl, mix the rolled oats, baking powder, cinnamon, salt, and brown sugar.
- In a separate bowl, whisk together the milk, egg, applesauce or melted butter, and vanilla extract.
- Pour the wet ingredients over the dry ingredients and stir until just combined. Do not overmix.
- Transfer the mixture to the prepared baking dish.
- Bake for 30 to 35 minutes, or until the top is lightly golden and the center is set.
- Let it cool for 5 minutes before cutting into squares.
Notes
- For a fruit variation, gently fold in 1 cup of fresh or frozen blueberries or diced apples before baking.
- To make this gluten free, use certified gluten free rolled oats.
- Store leftovers covered in the refrigerator for up to 4 days. Reheat individual servings in the microwave.
Nutrition
- Serving Size: 1 square
- Calories: 250
- Sugar: 8
- Sodium: 150
- Fat: 6
- Saturated Fat: 2
- Unsaturated Fat: 4
- Trans Fat: 0
- Carbohydrates: 43
- Fiber: 5
- Protein: 8
- Cholesterol: 30