

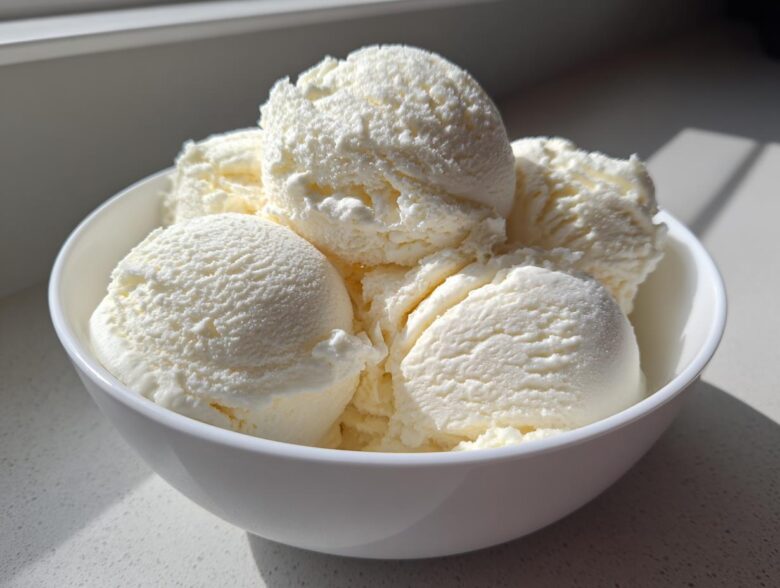
Oh, I know the struggle! You want something sweet, cold, and totally satisfying after a hard workout, but you absolutely do not want to spend an hour churning or end up with something that tastes like icy cardboard. Trust me, I have spent years testing and tweaking recipes in my kitchen trying to nail that perfect sweet spot. I finally cracked the code on the Ultimate High-Protein Vanilla Ice Cream Base! This isn’t just another chalky mess; this is genuinely creamy, scoopable, protein ice cream that tastes like a real treat.
The best part? You don’t need a fancy machine for this one. You can make it completely no-churn! But, because I know how popular those noisy gadgets are now, I built this formula so you can pop it right into your Ninja Creami if you want that extra-fast texture. It’s truly the most versatile and delicious, guilt-free frozen dessert you’ll make all summer.
Head over to my About Me page to see why I focus so much on high-protein dessert balancing. It’s all about maximum flavor with minimal fuss!
Why This is the Best Homemade Protein Ice Cream Base
I’m telling you, ditch the recipes that end up tasting like frozen protein shake sludge! My goal was always ultra-creamy texture, even without churning. This base is brilliant because it sets up beautifully firm without creating those annoying, rock-hard ice crystals you sometimes get with low-fat desserts. It’s truly all about convenience, too!
We are getting seriously good macros in here, too. Seriously, this is where the magic happens!
Benefits of Our Easy Protein Dessert
- Seriously High Protein: We are hitting about 22 grams of protein per serving. That’s the good stuff right there, fueling those muscles!
- Low Fussy Factor: No fancy machine required! Just mix, pour, and freeze. It couldn’t be simpler for a healthy frozen dessert.
- Taste Perfection: Unlike the viral recipes, this one doesn’t need bananas—and we skip the cottage cheese unless you want to add it in the notes! Texture satisfaction guaranteed.
Gathering Ingredients for Your Protein Ice Cream
Okay, now for the fun part: getting the stuff we need! I want to be super clear here—when you’re working with these low-fat, high-protein recipes, the measurements are everything. We aren’t dealing with heavy cream, so every spoon of yogurt and every scoop of powder has to pull its weight for that perfect, creamy finish. Getting your ingredients right is the secret to making this the best protein ice cream base ever.
Ingredient Clarity and Preparation Notes
I’ve listed out exactly what I use, but honestly, the protein powder quality makes a huge difference. If you can find a whey/casein blend, that usually gives the best texture because casein thickens up nicely while freezing. If you are using straight whey, you might need just a tiny splash more milk later on.
- 1 cup plain non-fat Greek yogurt (Make sure it’s the thick kind, not the pourable stuff!)
- 1/2 cup milk (I usually grab unsweetened almond milk, but regular milk is fine too)
- 1 scoop (about 30g) vanilla protein powder (Choose your favorite brand, but watch how much sweetener is already in it!)
- 1/4 cup granulated sweetener (Erythritol, Monk Fruit blend, or even just regular sugar if you don’t mind the extra carbs)
- 1 teaspoon pure vanilla extract (Don’t skimp on the good vanilla, it really shines here!)
- Pinch of salt (This is vital! It balances the sweetness and makes the vanilla pop.)
Ingredient Notes and Substitutions for High Protein Ice Cream Recipes
Listen, not everyone loves the same sweetener, and that’s okay! If you use a liquid stevia or monk fruit drops, remember you are cutting out volume, so you might need to adjust the milk slightly to keep the mixture flowing. Start with less liquid than listed, then add a teaspoon at a time until your whisk slides through easily.
Now, about that cottage cheese—I know some people hate the texture, but if you want extra richness and don’t mind blending an extra step, use half yogurt and half cottage cheese. Just blend the cottage cheese into a silk-smooth paste *before* you add everything else. That little trick adds body and bumps up the protein even more without changing the taste, I promise!
Step-by-Step: How to Make No Churn Protein Ice Cream
This is where we move from theory to delicious reality! This process is totally straightforward—I designed it to be quick because I usually make this right after dinner when I’m craving something sweet immediately. The biggest focus in these first steps is making sure we avoid that dreaded chalky texture that ruins so many batches of protein ice cream. No grit allowed in my house, trust me!
Once everything is mixed, you’ll let the magic of the freezer work. We aren’t churning, but a little preparation during the freeze time makes all the difference for a scoopable result. If you click over to my main homepage, you’ll see my earlier, failed attempts that taught me these crucial freezing lessons!
Mixing the Creamy Protein Dessert No Banana Base
Get your bowl ready. First, toss in the yogurt, milk, sweetener, vanilla, and salt. Now, add your scoop of protein powder last. You need to whisk this mixture like your life depends on it! Seriously, keep going until you feel zero resistance from gritty powder and the whole thing looks like a thick, smooth milkshake. If you see any dry clumps sticking to the whisk, keep whipping. That smoothness is what separates this from ice cubes!
Freezing and Achieving the Best Texture for Protein Ice Cream
Once it’s perfectly blended, pour it into your freezer-safe container. This is a sneaky but vital trick: take a sheet of plastic wrap and press it directly onto the surface of the mixture. Why? It stops air from touching the top, which prevents those nasty freezer ice crystals from forming. Cover the whole container with a lid or foil after that.
Now, stick it in the deepest part of your freezer. The recipe says 6 hours, but for the absolute creamiest finish, try to stir it vigorously after the first 3 hours. Just whip it up for 30 seconds, smooth the top, and put it back. This little bit of effort breaks up the initial forming ice, making the final product taste way more like premium ice cream!
Adapting Your Protein Ice Cream for the Ninja Creami
I totally get it—the Ninja Creami is a game-changer, and if you own one, you should absolutely use it for the best texture! You spent the money, so let’s use it to make the best batch of protein ice cream possible. This base recipe works wonderfully, but you need to follow the Creami’s specific rules about liquid levels.
When you mix up the original recipe, it might look a little too thick for the Creami pint right away. That’s okay! The machine needs a little room to create that vortex, and it also needs slightly more overall volume once frozen to process smoothly. We don’t want it reading “Re-spin” right out of the gate!
The Creami Process: Liquid Levels Matter
If you pour your mixture into the Creami pint right now, it might freeze up extremely dense and hard, leading to that dreaded ‘chalky’ texture or an error message. The key here is ensuring you have enough liquid distributed throughout.
Here’s your quick routine: Pour the mix into the pint, but don’t fill it past the max fill line. If it looks low, top it off with a touch more milk—any kind works! Just make sure the total liquid volume is near the line. Cover it tightly with the special Creami lid.
Processing and Getting That Perfect Scoop
Freeze it solid—we are talking totally hard overnight, just like you would normally do for any Creami base. Once it’s rock solid, put it in the machine. I strongly suggest running it on the **Lite Ice Cream** setting first. That setting is designed for lower-fat, higher-protein bases like ours, so it really handles the thickness well.
If it comes out slightly powdery (which can happen with low-fat desserts), don’t panic! That’s normal. Just add one tablespoon of unsweetened milk, put the lid back on, and hit **Re-spin**. Usually, one re-spin adds back just enough moisture to make it unbelievably creamy, just like real dairy ice cream!
Tips for Success with Homemade Protein Ice Cream
Okay, so you’ve got your smooth base chilling in the freezer, but now you want to play around a bit! That’s my favorite part about having a vanilla bean base like this—it’s a blank canvas for glorious, high-protein indulgence. When we make protein ice cream at home, we need to be smart about additions because adding things like fruit or thick chocolate chips can throw off the freezing balance we worked so hard to achieve.
I’ve learned a few tricks over the years to keep things creamy while packing in that flavor. These tips will stop your dessert from turning into a sad, gritty mess later!
Flavor Variations for Your Protein Ice Cream
Vanilla is classic, but sometimes you need that swirl of chocolate or maybe that cozy spice flavor we all crave when we think of viral frozen treats. The trick here is to add dry or pure liquid flavorings before freezing, not huge chunky things.
For a rich, decadent chocolate version, simply whisk in 1 to 2 tablespoons of high-quality unsweetened cocoa powder right when you are mixing the protein powder in. If you go for 2 tablespoons, you might need to add just a tiny splash more milk because cocoa absorbs liquid.
If you are chasing those nostalgic cereal milk flavors, try adding a teaspoon of cinnamon and a half teaspoon of pure almond extract alongside your vanilla. It gives it this amazing ‘cereal milk’ vibe without needing complicated infusions. For something really fun, add a few drops of salt caramel flavoring if you find some you like—it balances the sweetness beautifully!
Remember to mix these additions in *before* the mixture goes into the freezer. Trying to stir in extracts after it’s starting to harden is just asking for trouble and uneven flavor distribution!
Storage and Serving Suggestions for This Healthy Frozen Dessert
Since this magnificent, simple Guilt Free Ice Cream relies on Greek yogurt rather than heavy cream, storage guidelines are a little different than standard ice cream. You won’t get the same super-hard texture on day one, but that’s actually a good thing because it means you don’t have to wait an eternity for it to soften up again!
The best way to store this remains right in the shallow, freezer-safe loaf pan we used to freeze it, covered tightly with that plastic wrap pressed directly against the surface. This recipe holds up really well for about a solid week in the freezer. After that, the textures can start changing slightly as the natural moisture rearranges itself. It’s still totally edible, but for that perfect creamy scoop, aim to finish it within seven days.
The key, especially when you are eager to dig in, is the tempering time. Because this is a lower-fat recipe, it doesn’t melt slowly like full-fat stuff; it goes from rock solid to slushy faster than you’d think! Set your container on the counter about 10 to 15 minutes before you plan to scoop. No longer than 15, I swear!
When it’s ready, it should yield perfectly to the scoop with medium pressure—that’s when you know you’ve hit the sweet spot for texture. If you accidentally let it sit too long and it gets a bit soupy, don’t toss it! Just scrape it back into a clean bowl and give it a quick 30-second blast in the food processor or run it through the Re-spin cycle on your Creami. It’ll totally bounce back!
If you have any questions about keeping your batch fresh, or if you just want to brag about your flavor creations, please hop over to my Contact Page and drop me a line. Happy scooping!
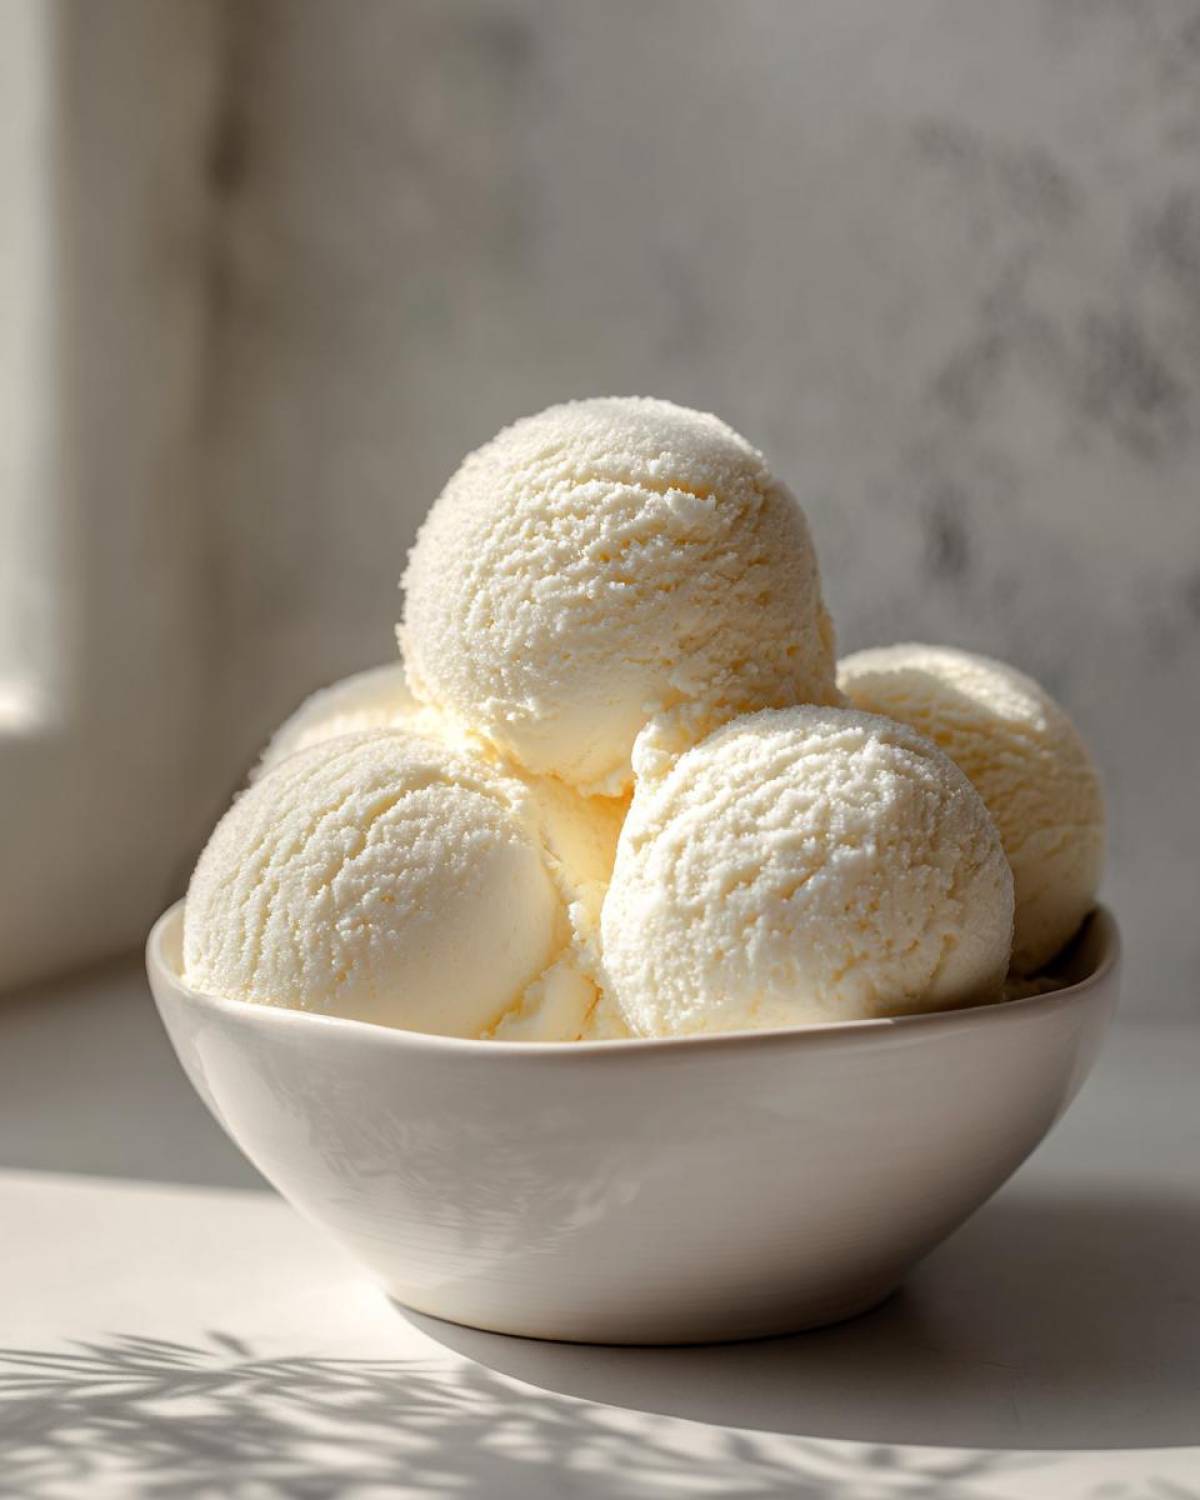
Nutritional Estimates for Low Calorie Protein Dessert
Now, I know for a lot of us, these High Protein Ice Cream Recipes are a way to enjoy dessert without derailing our goals, so let’s talk numbers! I’ve calculated the averages based on the ingredients listed, assuming you use non-fat Greek yogurt and an average vanilla whey protein powder. Remember, this is just an estimate, okay? Your scoop size of protein powder can change everything!
If you’re serious about tracking, you’ll want to factor in your exact protein powder brand, but this baseline should give you a fantastic idea of why this is such a staple in my rotation for a Low Calorie Protein Dessert.
For complete details on how these estimates are calculated, check out my full recipe Disclaimer page. We like to keep things transparent around here!
Estimated Nutrition Per Serving (1/2 Cup)
This is based on the recipe yielding four solid servings. Look at that protein count compared to the fat and calorie total—that’s the sweet spot for a truly healthy sweet treat!
- Calories: Around 140 kcal
- Protein: A whopping 22 grams!
- Fat: 1 gram (Mostly coming from the yogurt, nothing worrying here!)
- Carbohydrates: 10 grams
- Sugar: About 5 grams (Mostly naturally occurring lactose from the yogurt)
I always find it shocking how much protein we can pack into something that tastes this rich and creamy. If you used a flavor like chocolate, those numbers might shift slightly based on the extra ingredients, but the vanilla base is super reliable!
Frequently Asked Questions About Protein Ice Cream
You probably have a few lingering thoughts, especially if you’re new to making your own frozen treats! That’s totally fine. When you search for protein ice cream recipes, you often find conflicting advice, but let me clear up the main things people ask me about this specific base.
Can I make this protein ice cream without Greek yogurt?
That is the million-dollar question! Greek yogurt is my go-to because its thickness is what makes this a fantastic no-churn experience. It carries the flavor so well without turning into a block of ice. If you absolutely cannot use yogurt, the next best option is blending cottage cheese until it is completely smooth—like silk! If you use cottage cheese, you might need just a teaspoon more sweetener because it can be a bit tangier.
If you want to skip both and just use a high-protein shake base, you can, but you might need to rely on a little trick to thicken it up, like adding xanthan gum (just a tiny pinch!) or just accepting that it will be softer, more like a dense soft-serve. But honestly, for creaminess, stick with yogurt or blended cottage cheese!
How much protein is in one serving?
Based on the recipe card I gave you, with one standard 30-gram scoop of powder, you are looking at about 22 grams of protein per serving, based on four servings total. That’s fantastic for a low calorie protein dessert!
Just a heads-up, though: scoop sizes vary wildly between protein brands! A brand that scoops heavy, or one that has a lot of extra fillers, will change things. If you use a slightly smaller scoop, you might land closer to 18 or 19 grams. Always weigh your scoop if you are trying to hit those high targets perfectly!
What is the best protein powder for this recipe?
This is my biggest piece of expert advice for anyone making any “healthy frozen dessert”: the type of protein powder dictates the texture more than anything! If you use a protein that is only whey isolate, it can sometimes freeze up very hard and chalky.
I swear by a blend—a mix of whey concentrate and casein is my absolute favorite for any homemade protein ice cream recipe. Why? Casein gels up and thickens incredibly well when cold, giving you that rich, velvety mouthfeel we are looking for. Avoid powders that feel super powdery or dry when you handle them straight from the tub; those tend to suck up all the moisture from the yogurt during the freeze!
Share Your Ultimate Protein Ice Cream Creations
Alright, that’s the whole process for making the most satisfying, high-protein, guilt-free dessert you’ll ever dig into! I really hope this recipe becomes a staple for you, whether you are eating it straight from the loaf pan or whipping it up in your favorite machine.
Now that you have the ultimate vanilla base, I absolutely want to see what you do with it! Remember, this recipe is built to be played with. Did you try adding cocoa powder for a deep chocolate hit? Did you drizzle some sugar-free hot fudge on top? Tell me everything!
When you make a batch, please come back and leave a rating! Did it deserve five stars for creaminess? Let me know down below. Seeing your reviews and hearing how you customized this protein ice cream honestly makes my whole week!
And hey, if you snap a picture of your fantastic healthy creation, tag me on social media! I love building this community of smart bakers who want dessert without the drama. Your feedback helps everyone else feel confident trying this recipe out.
You can review the site’s policies, like our Privacy Policy, anytime you need. Enjoy every single scoop, and happy healthy baking!
PrintUltimate High-Protein Vanilla Ice Cream Base (No-Churn)
Make a creamy, high-protein vanilla ice cream base without an ice cream maker. This recipe uses Greek yogurt for texture and is easily adaptable for the Ninja Creami.
- Prep Time: 10 min
- Cook Time: 0 min
- Total Time: 6 hours 10 min
- Yield: 4 servings
- Category: Dessert
- Method: No-Churn Freezing
- Cuisine: American
- Diet: Low Fat
Ingredients
- 1 cup plain non-fat Greek yogurt
- 1/2 cup milk (dairy or unsweetened almond)
- 1 scoop (about 30g) vanilla protein powder
- 1/4 cup granulated sweetener (or to taste)
- 1 teaspoon vanilla extract
- Pinch of salt
Instructions
- In a medium bowl, combine the Greek yogurt, milk, protein powder, sweetener, vanilla extract, and salt.
- Whisk the mixture thoroughly until the protein powder is fully dissolved and the mixture is smooth. Ensure there are no lumps.
- Pour the mixture into a freezer-safe container, such as a loaf pan or a shallow plastic container. Cover the surface directly with plastic wrap to prevent ice crystals.
- Freeze for at least 6 hours, or until firm. Stirring every hour for the first 3 hours can improve creaminess, but is optional for a no-churn method.
- For a softer texture, let the ice cream sit at room temperature for 10 to 15 minutes before scooping.
- For Ninja Creami users: Pour the mixture into the Creami pint, top to the fill line with more milk if needed, and process using the Lite Ice Cream setting.
Notes
- For a richer flavor, substitute half the Greek yogurt with low-fat cottage cheese, blending until completely smooth before adding other ingredients.
- If the mixture is too thick to blend easily, add milk one tablespoon at a time until the desired consistency is reached.
- You can substitute vanilla protein powder with unflavored protein powder and add 1/2 teaspoon of extra vanilla extract or other flavorings.
Nutrition
- Serving Size: 1/2 cup
- Calories: 140
- Sugar: 5
- Sodium: 120
- Fat: 1
- Saturated Fat: 0.5
- Unsaturated Fat: 0.5
- Trans Fat: 0
- Carbohydrates: 10
- Fiber: 0
- Protein: 22
- Cholesterol: 5