

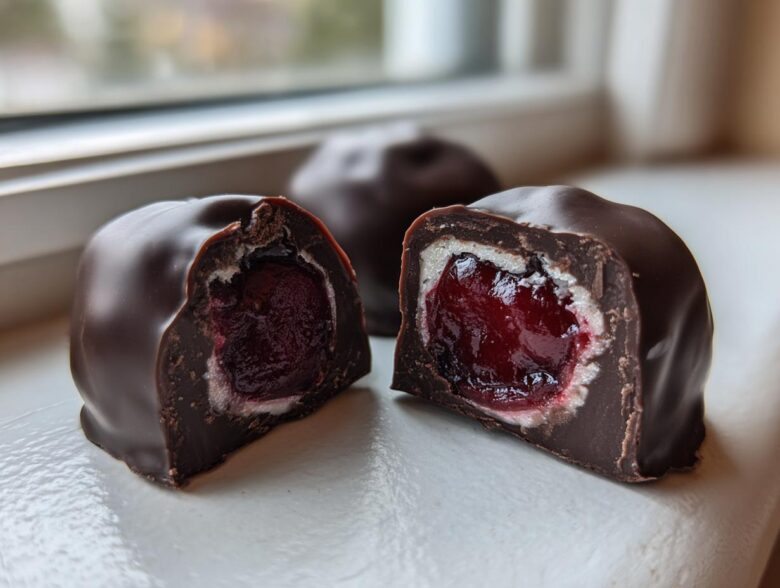
Oh my goodness, if you are looking for that perfectly nostalgic candy that tastes like a holiday memory or a special Valentine’s Day treat, stop right now. Forget the store-bought ones that are rock hard! I’ve spent years perfecting the technique for truly amazing chocolate covered cherries, and the secret is all about controlling that wonderful, soft, sweet fondant center.
I know what you’re thinking: fondant? Sounds complicated, right? Nope! I struggled with that center for forever, but I finally cracked the code, and trust me, this recipe makes it surprisingly easy to get that perfect, slightly yielding filling that turns into that glorious little pool of juice later on. These cherry cordials are meant for gifting, they look so gourmet, but honestly, they are fun to make!
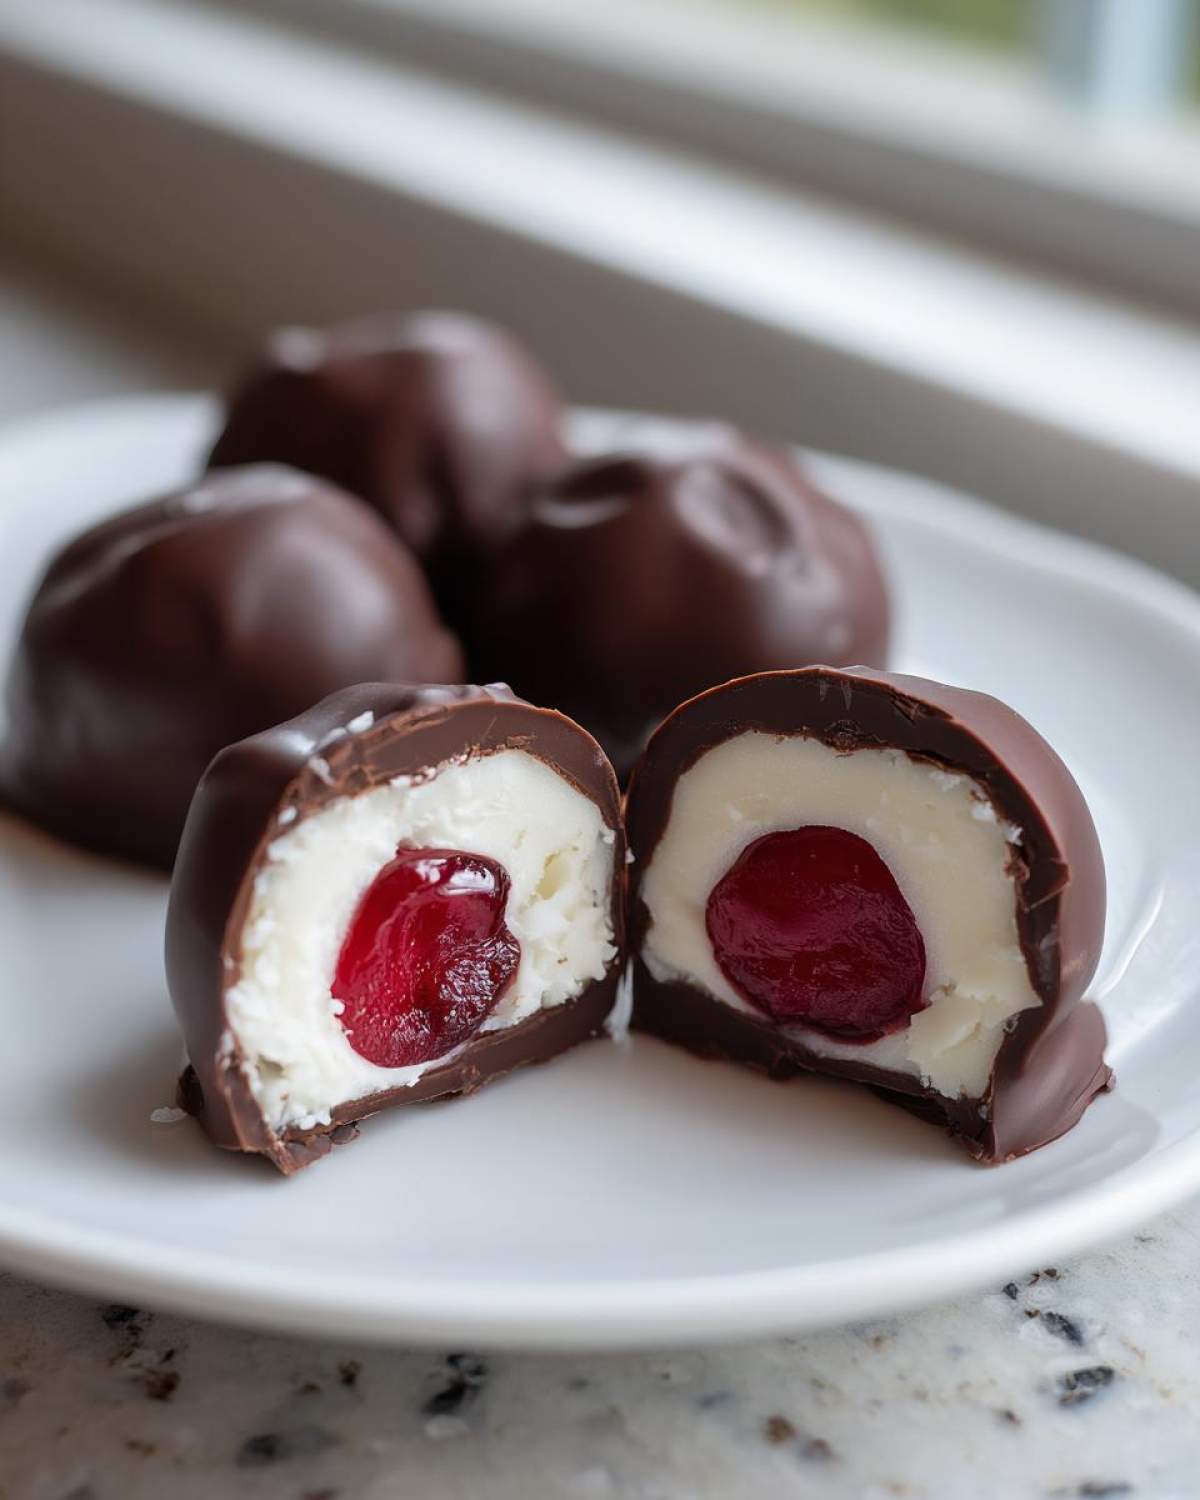
Getting those maraschino cherries dry enough is the real battle, but once you pass that hurdle, you’re home free. I guarantee that once you try these, you’ll never buy a box again. You can check out just why I love making candy in the kitchen over on my About page, but let’s get down to the good stuff!
Why You Will Love These Homemade Chocolate Covered Cherries
Honestly, there are so many reasons you need to stop scrolling and start making these right now! I’ve tried so many holiday chocolate candy recipes, but this one always wins because it’s so customizable.
- They seriously rival the gourmet chocolate gifts you buy in fancy boxes—they look so elegant!
- We nail that nostalgic sweetness every time, hitting that perfect balance of chocolate and fruit.
- You get those sweet and juicy candies you remember, thanks to our simple fondant coating process.
- This is one of those few homemade candy recipes that is surprisingly fast to prep, even though it takes time to set.
- Imagine handing someone a box of these gorgeous treats knowing you made them yourself!
That’s basically it! Five perfect reasons to get mixing, especially if you’re looking for decadent dessert ideas for a party.
Essential Ingredients for Perfect Chocolate Covered Cherries
Trust me when I say that the quality of your initial ingredients dictates how well these turn out. We’re dealing with very simple components here, so you can’t cheat on the specifics! We need to gather everything before we even think about turning on the stove, because candy making moves fast once the heat is on.
Here’s what you’ll need for about three dozen of these incredible homemade chocolate covered cherries. Make sure you have a good candy thermometer handy—it’s non-negotiable for the fondant!
- One (15 ounce) jar of maraschino cherries. And listen up: you must drain these *super* well. Like, press them gently between paper towels well.
- One and a half cups of powdered sugar, plus maybe a little extra just for dusting your hands later if things get sticky.
- A half cup of light corn syrup. This is the backbone of the fondant texture we’re aiming for.
- A quarter cup of water. Needs to be plain old tap water!
- A quarter teaspoon of pure almond extract. This gives that classic cordial kick that contrasts the chocolate perfectly.
- One pound of your favorite chocolate. I usually go with semi-sweet or dark chocolate, either in chip form or chopped nicely.
- One tablespoon of shortening or coconut oil—this is optional, but it helps the chocolate stay smooth for dipping. You can find my guide on making other easy no-cook treats if you want more simple ideas!
The most important part? Those cherries. If they are wet when they hit the syrup, your whole fondant coating is going to weep and slide off, and we absolutely don’t want that heartbreak.
Step-by-Step Guide to Making Fondant Covered Cherries
Okay, here we go! This is where we transform simple syrup into the magic shell around our cherries. I want you to treat this part like a science experiment—precision matters, especially when we get to the temperature stage. Rushing this part means your fondant might turn into crunchy rock candy instead of the soft coating you want for your caramelized onion dip—wait, wrong recipe! Just focus! For the absolute best results in your chocolate covered cherries, you really need that candy thermometer. Don’t try to guess the soft-ball stage; it’s not worth the heartbreak when you’re expecting a luxury candy and get sugar pebbles instead!
Preparing the Cherries: Drying is Key
First up, grab those drained maraschino cherries and place them on a paper towel-lined baking sheet. You need to press them *gently* with another paper towel layer on top to wick away all that extra juice. If the cherries are damp, the hot syrup won’t stick evenly, and you’ll end up with messy, uneven coatings. Gotta get them bone dry!
Cooking the Syrup for Your Chocolate Covered Cherries Center
In a small saucepan, combine your powdered sugar, corn syrup, and water. Heat this gently over medium heat, stirring until that sugar dissolves completely. Once it starts bubbling, STOP STIRRING! This is crucial. Let it boil away until your candy thermometer happily reads 238 degrees Fahrenheit. That specific temperature is the ‘soft-ball stage,’ and it’s what guarantees your chocolate covered cherries center will set up soft but still yield to pressure later on. Pull it right off the heat the second it hits that temp!
Setting the Fondant Coating
Quickly stir in that tiny splash of almond extract once you take the pot off the heat. Now, use a fork or a toothpick to dip each dried cherry completely into that hot syrup, letting the excess drip back into the pan. Pop those coated cherries back onto your paper towel sheet. They need to sit there at counter temperature for about an hour or two until that syrup hardens up into a nice, firm fondant shell around the fruit.
Mastering Chocolate Dipping Techniques for Decadent Chocolate Covered Cherries
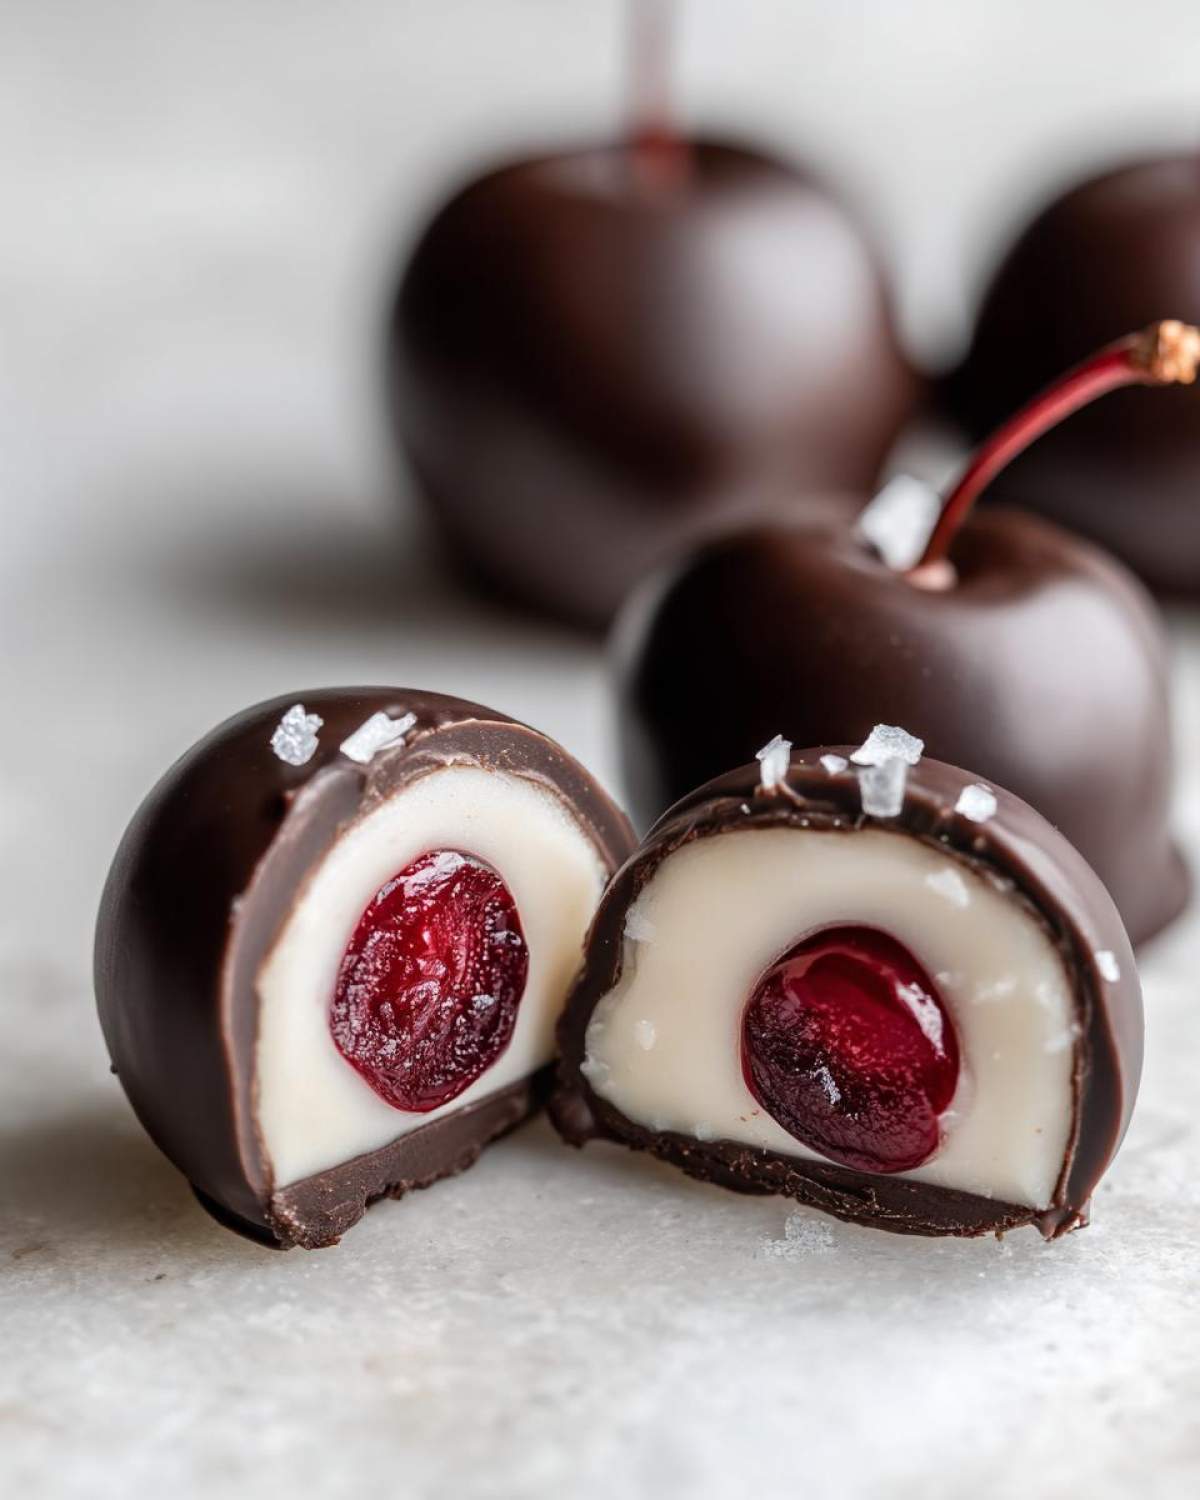
Alright, the hard part—the fondant—is done! Now comes the fun part: giving these beauties their gorgeous, shiny coat. Handling melted chocolate requires a little finesse; if you rush it or burn it, you end up with a grainy mess that won’t cling properly. I always aim for that super smooth texture, which is why I love using a little bit of fat in the chocolate. It makes all the difference in the finish!
These steps ensure you get gorgeous, high-end results for your chocolate eclair cake—wait, wrong recipe again! I mean, for these stunning chocolate dipped treats!
Melting Chocolate for Smooth Chocolate Dipped Treats
You absolutely cannot microwave chocolate without paying close attention, or you’ll scorch it instantly. I highly recommend melting your chocolate either over a gentle double boiler or using 30-second bursts in the microwave, stirring well between every single interval. If you are adding that little bit of shortening or coconut oil, stir it in right at the end until the mixture is creamy and glossy. That little bit of fat is what makes the chocolate stay workable and thin enough for easy dipping.
The Final Dip and Setting the Chocolate Covered Cherries
Once your chocolate is perfectly melted, it’s dipping time! Pick up one of your firm, fondant-covered cherries and drop it right into the chocolate pool. Use a fork—a regular dinner fork works best for me—to roll it around until it’s fully coated. Lift it out slowly, and here’s the critical part: tap the fork gently against the side of the bowl or pot a few times. You want the excess chocolate to drip off so you don’t end up with messy chocolate ‘feet’ around the base of your chocolate covered cherries. Set them right onto a sheet of clean parchment paper to cool and set completely.
Achieving the Liquid Center in Your Chocolate Covered Cherries
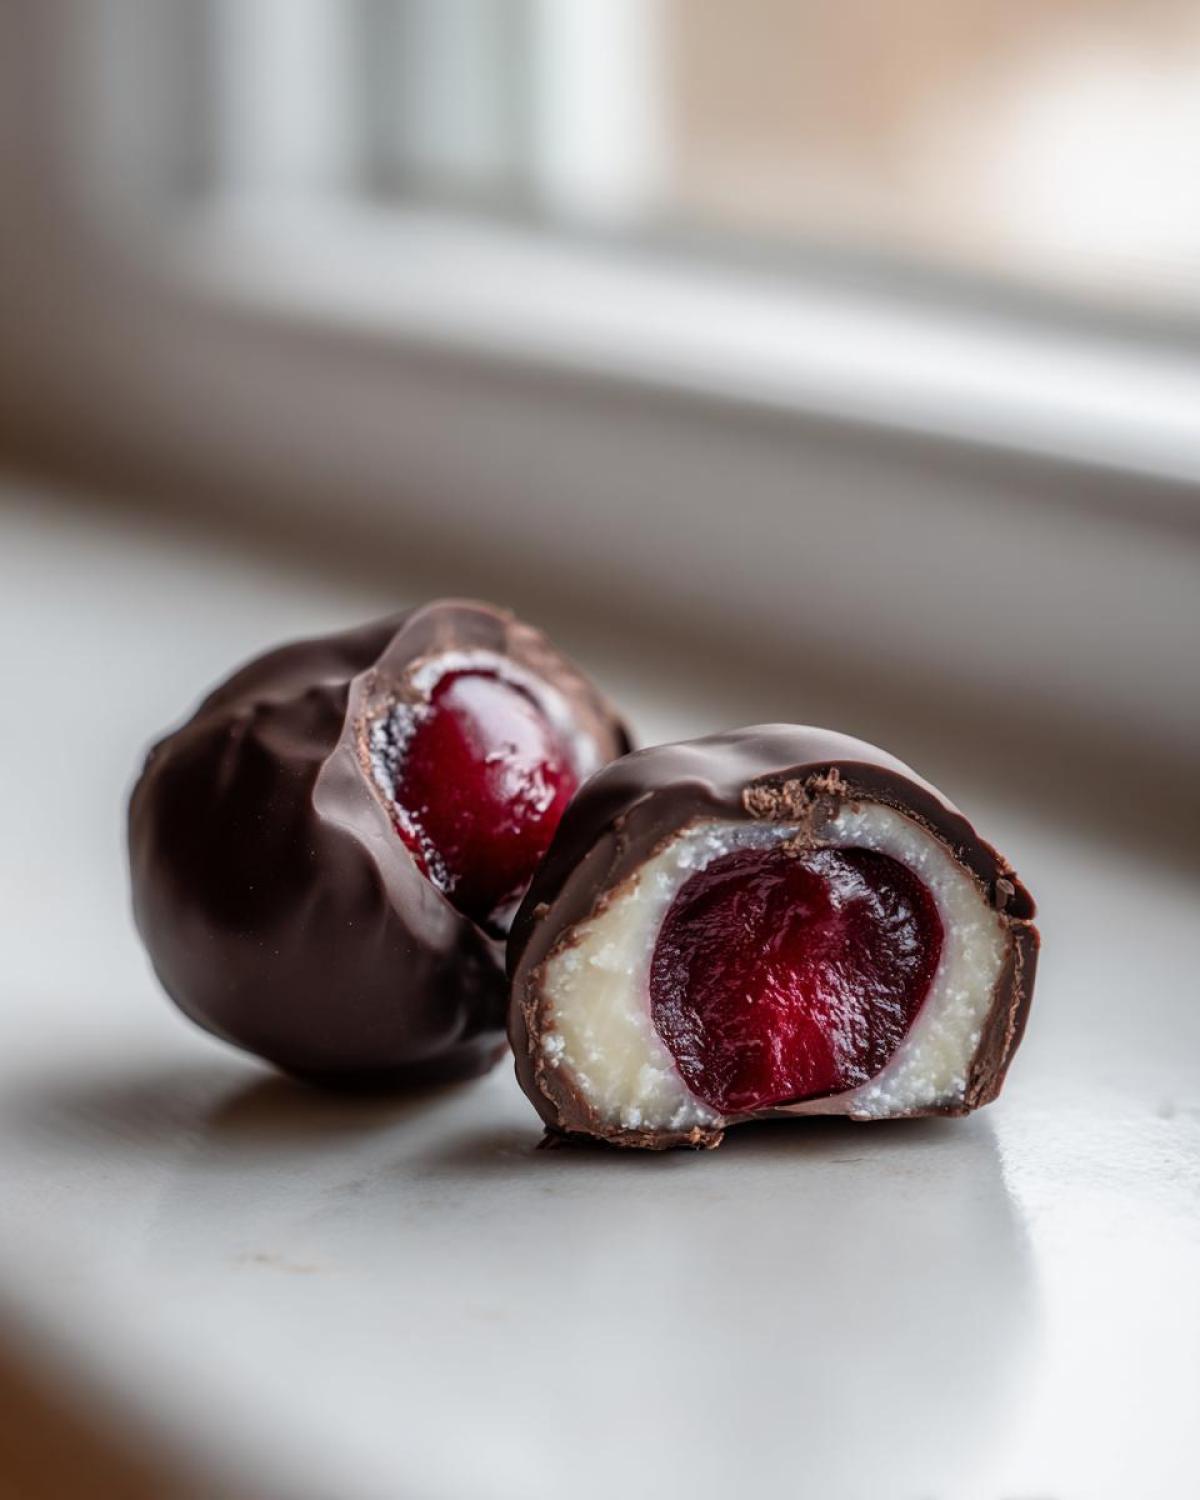
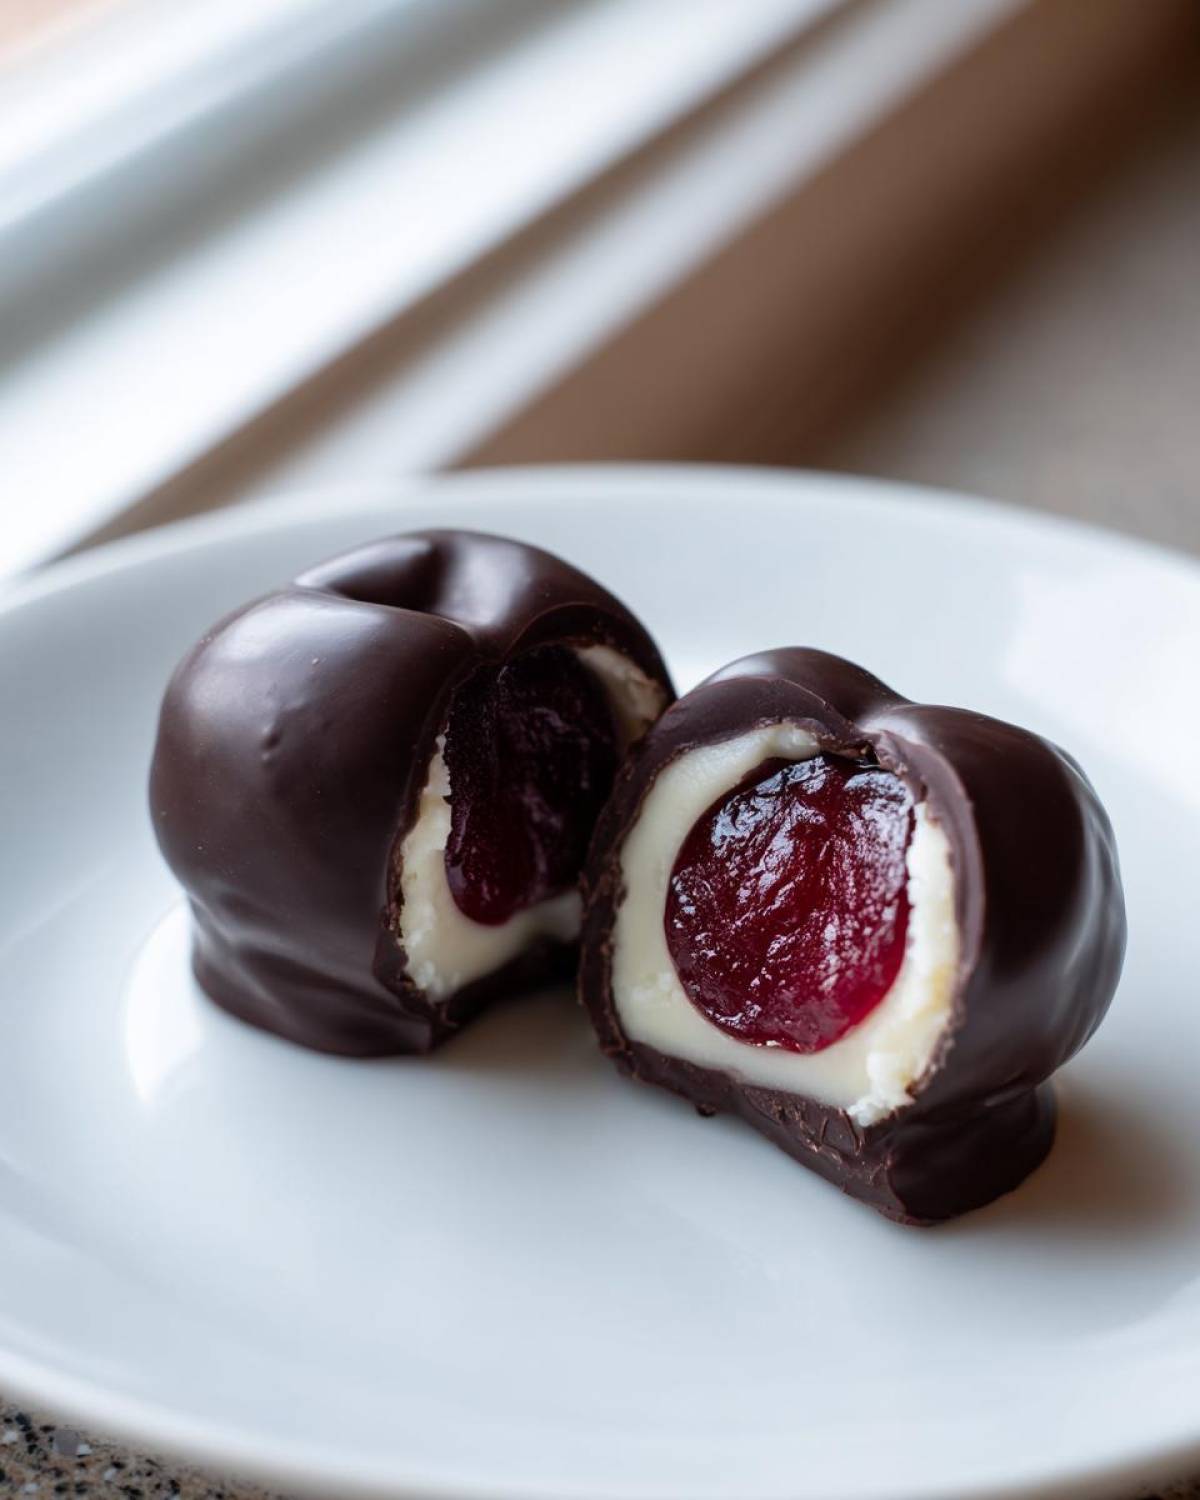
This is the grand finale, folks—the reason we bothered with the fondant in the first place! If you are aiming for those true, authentic, juice-dripping cherry cordials, you absolutely cannot rush this stage. That beautiful liquid center develops naturally over time because the sugar coating slowly draws liquid out of the cherry itself. Don’t put these in the fridge! Refrigeration slows down that entire process.
For the best results in your chocolate covered cherries, you need to store the finished candies in an airtight container at cool room temperature for about one to two weeks before you plan on serving them. This patience pays off big time! If you need them faster, you can find a neat trick for quick chocolate mug cake recipes, but for these candies, time is your best kitchen tool.
Ingredient Notes and Substitutions for Classic Candy Recipes
I get so many questions about tweaking this recipe, and I totally get it—sometimes you’re out of something, or you just prefer a different flavor profile. Since these are such classic candy recipes, getting the ingredients right is important, but you do have a few options if you need them.
Let’s talk chocolate first. I usually swing toward dark chocolate because the slight bitterness cuts through the intense sweetness of the fondant and the syrup of the cherries. Semi-sweet works great too, especially if I’m making them for the kids! Whatever you choose, just make sure it’s good quality. If you want a super velvety finish, using compound coating chocolate instead of pure baking chocolate is an option, though I find the flavor isn’t quite as rich. Stick to the chopped chocolate or quality chips if you can.
What about corn syrup? It’s in there to guarantee we hit that perfect soft-ball stage consistently. If you’re totally against corn syrup, you *can* use golden syrup or an equal amount of light honey—but I have to give you a heads up! Honey has different moisture levels, so you might need to adjust the cooking time slightly, maybe checking the temperature a minute sooner. You’ll find more substitution ideas when I talk about my candied yams recipe, which sometimes calls for swapping out sugars!
Finally, the almond extract—it’s the traditional flavor, but if you hate almond, vanilla extract is a totally fine substitute. You might want to bump it up just a smidge, maybe to a full half teaspoon, since vanilla doesn’t have the same punch as almond, but it still tastes heavenly with the cherry.
Tips for Success When Making Homemade Candy Recipes
We’ve covered the steps, but I want to give you a few extra bits of wisdom that I learned the hard way—usually involving sticky spoons and wasted chocolate! Making any kind of homemade candy recipes, even seemingly simple ones like this, requires respecting a couple of kitchen laws. If you get these small things right, your cherries will be perfect every single time. You can check out some other favorite no-bake ideas on my refrigerator cake guide!
Here are my biggest takeaways for making sure your kitchen stays as sweet as your candy:
- Beware of Humidity: Seriously, look out the window! High humidity is the enemy of candy making. Rainy or very damp days can make your sugar syrup runny or cause the fondant to stay tacky instead of firming up properly. If it’s raining outside, you might want to postpone the syrup cooking stage.
- Stick to the Thermometer: I mentioned this before, but I’m saying it again: use that candy thermometer for the syrup! Home cooks try to eyeball the soft-ball stage, and it rarely works out when you need consistency. It’s the difference between a perfectly formed candy and a mess you have to re-cook.
- Use Parchment, Not Wax Paper: When setting your coated cherries on the trays—whether after the fondant dip or after the final chocolate dip—always use parchment paper. Wax paper often has oils or waxes that melt slightly when the chocolate or hot fondant hits them, and your candies will get stuck to the paper! Parchment lets go every single time.
- Give the Cherries Space: When you are dipping the cherries, place them on the parchment sheet with a little room around them. If they touch while the chocolate is still wet, they’ll fuse together, and that’s no good for neat presentation or gifting.
Follow these tips, and you’ll feel like a professional candy maker in no time. It’s all about those little details!
Storage and Making Ahead for Your Chocolate Covered Cherries
This is a great question because the way you store your finished chocolate covered cherries completely changes the eating experience! If you made these for a party tonight and want to serve them immediately, you can let that final chocolate shell set up at room temperature or speed things up in the fridge for 30 minutes. If you do that, you’ll have a lovely, firm fondant center—still delicious, but chewy.
But if you’re aiming for that show-stopping, totally gooey liquid center—the one that makes these true cherry cordials—you absolutely must plan ahead. These are fantastic Holiday Chocolate Candy contenders because they actually benefit from aging! You need to keep them in an airtight container, but keep them on the counter, not in the fridge. Cool room temperature is the perfect setting for that magic to happen over the next 1 to 2 weeks.
The sugar coating slowly but surely draws the moisture and sugar out of the cherry, turning that firm fondant into that sweet, juicy pool we are looking for. You can certainly make them ahead, but try not to let them sit longer than three weeks once they are finished, just to keep the chocolate looking its absolute best. Honestly, they never last that long in my house anyway! I always bake a backup cranberry orange cake because these disappear so fast!
Frequently Asked Questions About Cherry Cordial Recipe
I get so many messages asking about variations on this recipe, and I love hearing how you all are adapting these classic candy recipes! Because of the specific chemistry involved in setting the fondant, there are a few things that are pretty rigid, but I’ve got answers for your most common issues!
Can I use fresh cherries instead of canned maraschino cherries?
That’s a tough one, and the answer is really no, not for this specific recipe meant to result in a liquid center. Maraschino cherries are preserved in a sugary brine that keeps them soft and sweet already. Fresh cherries are too firm and have way too much water content. If you tried using fresh cherries, your fondant coating would just dissolve into a sticky mess, and you wouldn’t be able to create that lovely firm layer needed before the final chocolate dip. For this particular treat, you need that canned fruit!
What if I absolutely hate the fondant coating? Can I skip it?
Oh, you definitely can skip the fondant step if you want something super quick and easy! If you skip the whole syrup-cooking process, you can go straight to making simple chocolate dipped treats. Just make sure those maraschino cherries are dried *even better* than usual, and dip them directly into the melted chocolate. This is a great option if you want a quicker holiday chocolate candy, but you must remember that without the fondant layer, the chocolate will sit right against the cherry, and you won’t get that two-week liquid development. It’s a different candy entirely, but still tasty!
How long until the center actually becomes liquid?
This is the question I get asked the most! If you want that true, juicy, melt-in-your-mouth experience, you really need to be patient. I find that if I store them airtight on my cool pantry shelf—not the fridge—it takes between 10 days and two full weeks. You’ll notice the fondant shell starting to look a little less rock-hard around day seven. If you’re looking for quick, decadent dessert ideas, you might want to make a batch of my no-bake pumpkin cheesecake instead, because these cordials demand time!
Do I have to use almond extract?
You don’t *have* to, but honestly, the almond is what gives these a classic, slightly sophisticated flavor that elevates them from a simple chocolate covered cherry to a proper cherry cordial. If you can’t stand almond, vanilla works fine, but I highly recommend trying vanilla mixed with just a tiny drop of cherry extract if you happen to have that in your pantry! It works wonderfully with sweet and juicy candies.
Share Your Homemade Chocolate Covered Cherries Experience
I truly can’t wait to hear how these turned out for you! Making homemade candy recipes can feel a little intimidating at first, but I promise, once you master the soft-ball stage, you’ll be hooked. Did you decide to age yours for that liquid center, or did you eat them all immediately with the firm fondant shell?
Let me know in the comments below! If you loved this recipe for chocolate covered cherries, please leave a star rating—it helps other bakers find this recipe! And seriously, tell me where you plan on taking these gorgeous candies. Are they for Valentine Candy Ideas, or maybe just a Tuesday treat?
Serving Suggestions for Elegant Homemade Sweets
These are just begging to be dressed up a little! For gifting, I always use those little fluted paper candy cups, tucking three or four finished treats into a small cellophane bag tied with a velvet ribbon. Talk about elegant homemade sweets! They pair beautifully with a rich, dark coffee or a crisp glass of Prosecco after dinner. If you’re putting together a holiday platter, they look amazing next to something salty, like my favorite cranberry pecan cheese ball. They are definitely my go-to for Valentine Candy Ideas!
Nutritional Estimates for Chocolate Covered Cherries
Okay, let’s talk about the numbers, just in case you’re tracking things! Because these are homemade and we are using real butter and sugar (well, corn syrup and powdered sugar, which are basically sugar royalty here!), they are definitely a treat, not a health food. But that’s okay, right? We deserve indulgence!
I ran the numbers based on the yield of about 30 candies, but please remember that these are just rough estimates. Anytime you substitute chocolate types or use a different brand of maraschinos, those percentages can shift just slightly. You can always check out my full recipe disclaimer page for more details on how I calculate this data!
Here is the general breakdown per single cherry:
- Serving Size: 1 cherry
- Calories: About 120
- Sugar: 18 grams (Yep, that’s where the fun is!)
- Fat: 5 grams
- Saturated Fat: 3 grams
- Carbohydrates: 19 grams
- Protein: 1 gram
You’ll notice virtually no cholesterol or trans fat, which is great, though the sugar content means you should enjoy these little beauties one or two at a time with a cup of coffee. They are truly decadent dessert ideas, meant for savoring!
Share Your Homemade Chocolate Covered Cherries Experience
I truly can’t wait to hear how these turned out for you! Making homemade candy recipes can feel a little intimidating at first, but I promise, once you master the soft-ball stage, you’ll be hooked. Did you decide to age yours for that liquid center, or did you eat them all immediately with the firm fondant shell?
Let me know in the comments below! If you loved this recipe for chocolate covered cherries, please leave a star rating—it helps other bakers find this recipe! And seriously, tell me where you plan on taking these gorgeous candies. Are they for Valentine Candy Ideas, or maybe just a Tuesday treat? I love seeing photos, so feel free to reach out through my contact page too!
PrintEasy Homemade Chocolate Covered Cherries (Cherry Cordials with Optional Liquid Center)

Make classic chocolate covered cherries at home using maraschino cherries and a simple fondant center. This recipe allows the center to liquefy slightly over time for an authentic cordial experience.
- Prep Time: 30 min
- Cook Time: 10 min
- Total Time: 150 min
- Yield: About 30 cherries
- Category: Dessert
- Method: Candy Making
- Cuisine: American
- Diet: Vegetarian
Ingredients
- 1 (15 ounce) jar maraschino cherries, drained well
- 1/2 cup powdered sugar, plus more for dusting
- 1/4 cup light corn syrup
- 1/4 cup water
- 1/4 teaspoon almond extract
- 1 pound semi-sweet or dark chocolate, chopped or chips
- 1 tablespoon shortening or coconut oil (optional, for smoother dipping)
Instructions
- Place the drained maraschino cherries on a paper towel-lined baking sheet. Pat them very dry. Set aside.
- In a small saucepan, combine the powdered sugar, corn syrup, and water. Heat over medium heat, stirring constantly until the sugar dissolves and the mixture boils. Stop stirring once it boils.
- Boil the syrup without stirring until it reaches 238 degrees Fahrenheit (soft-ball stage) on a candy thermometer. This takes about 5 to 7 minutes.
- Remove the syrup from the heat immediately. Stir in the almond extract.
- Dip each dried cherry into the hot syrup mixture, coating it completely. Use a fork or toothpick to lift the cherry out. Let excess syrup drip off.
- Place the coated cherries back onto the paper towel-lined baking sheet. Allow them to set until firm, about 1 to 2 hours at room temperature, or chill briefly. The coating will become a firm fondant.
- Melt the chocolate and shortening (if using) in a double boiler or in the microwave in 30-second intervals, stirring until smooth.
- Dip each fondant-covered cherry into the melted chocolate, ensuring it is fully coated. Use a fork to lift it out, tapping the fork gently on the side of the bowl to remove excess chocolate.
- Place the dipped cherries back onto a clean, parchment-lined baking sheet.
- Allow the chocolate to set completely at room temperature or in the refrigerator for 30 minutes. For a liquid center, store the finished candies in an airtight container at cool room temperature for 1 to 2 weeks before serving.
Notes
- Drying the cherries thoroughly before coating them in fondant prevents the fondant from becoming too sticky.
- If you prefer a quicker, non-liquid center, you can skip the fondant step and dip the dried cherries directly into the melted chocolate.
- For best results when making the liquid center, store the finished candies in a cool, dry place, not the refrigerator, for the liquefaction process to occur naturally.
Nutrition
- Serving Size: 1 cherry
- Calories: 120
- Sugar: 18
- Sodium: 5
- Fat: 5
- Saturated Fat: 3
- Unsaturated Fat: 2
- Trans Fat: 0
- Carbohydrates: 19
- Fiber: 1
- Protein: 1
- Cholesterol: 0