

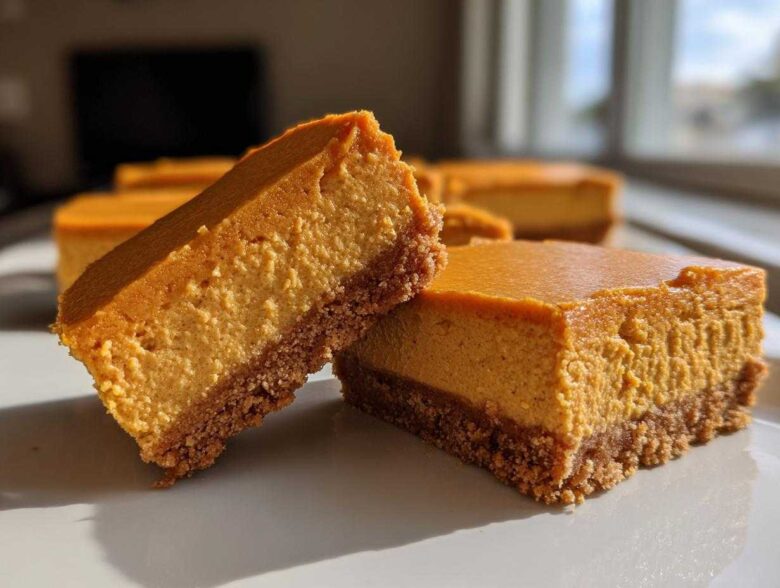
Oh my gosh, fall is officially here, and you know what that means? It’s time to break out the pumpkin spice and make everything nice! I’ve tried so many different versions of pumpkin treats over the years, but I always come back to this one. Seriously, these Rich and Creamy Pumpkin Cheesecake Bars with Graham Cracker Crust are my secret weapon for holiday parties because they look fancy but are ridiculously easy to pull off.
I spent a few autumns chasing the perfect texture—you know, the one that’s velvety smooth but still holds its shape? I finally locked down the measurements that ensure you get that gorgeous, clean square when you slice them. If you’re looking for the definitive pumpkin cheesecake bars recipe, this is truly it. And hey, check out a little more about my baking journey here if you get a second!
Why You Will Love These Easy Pumpkin Cheesecake Bars
Why bother with a whole pie when you can have this perfect handheld treat? These are my go-to every year because they just deliver on every single promise. You are going to adore how simple they are!
- They are so easy! The prep actually takes less than 20 minutes, which is insane for how rich they taste.
- That texture? Absolutely dreamy. We’re talking ultra-creamy, perfectly spiced filling over a buttery crust.
- These pumpkin cheesecake bars are fantastic for feeding a crowd, making them a must-have for Thanksgiving or Halloween gatherings. Plus, they chill like a dream!
Essential Ingredients for Perfect Pumpkin Cheesecake Bars
Okay, for these pumpkin cheesecake bars to hit that rich and creamy note, your ingredients have to be spot-on. I’ve got the exact list straight from my binder. Seriously, pay close attention to the pumpkin situation! You absolutely *must* use pure pumpkin puree—not that sugary pumpkin pie filling stuff. That pie filling has way too much liquid and sugar, and it will totally mess up the beautiful, set texture we are aiming for!
Having everything at room temperature, especially the cream cheese, is the quiet little secret to avoiding lumps. It makes the whole mixing process so much smoother!
For the Buttery Graham Cracker Crust
- 1 1/2 cups graham cracker crumbs
- 1/4 cup granulated sugar (for crust)
- 6 tablespoons unsalted butter, melted
See? Super simple. Just make sure that butter is fully melted so it binds everything together nicely!
For the Creamy Spiced Pumpkin Filling
- 16 ounces cream cheese, softened
- 1 cup pumpkin puree (not pumpkin pie filling)
- 1/2 cup granulated sugar (for filling)
- 1/4 cup packed light brown sugar
- 2 large eggs
- 1 teaspoon vanilla extract
- 1 teaspoon pumpkin pie spice
- 1/4 teaspoon salt
When it comes to the eggs, make sure they are large! They provide the necessary structure for this baked dessert, and remember, beat that cream cheese until it’s perfectly smooth before you even think about adding the other stuff.
Step-by-Step Guide to Making Pumpkin Cheesecake Bars
Alright, let’s get baking! This is the fun part where it all comes together. Don’t rush the cooling and chilling steps, though—that’s my number one trick for getting those beautiful, perfect squares when you serve these pumpkin cheesecake bars.
Preparing the Crust and Initial Bake
First things first: heat up that oven to 350 degrees F. You want to line your 9×13 pan with parchment paper first, making sure you leave a bit of an overhang on the sides. That overhang is your handle later, trust me! For the crust, just toss the crumbs, the crust sugar, and the melted butter in a bowl. Mix it until it looks like wet sand. Then, press it down super firmly into the pan. Seriously, use the bottom of a measuring cup to pack it tight. Pop that base in for a quick 10-minute bake. This short initial bake is key for avoiding a soggy base in your pumpkin cheesecake bars.
Mixing the Rich Cheesecake Layer
While the crust cools a smidge, attack the filling. Grab your biggest bowl and beat that softened cream cheese until it’s silky smooth—no lumps allowed! Now, slowly mix in all your pumpkin, both sugars, the spice, and the salt until it’s just blended. The next part is crucial: add those two eggs one at a time. Wait until the first one is totally incorporated before you add the second. Finally, stir in the vanilla. Stop mixing immediately once the eggs are in. Seriously, do not overmix the batter once the eggs are added, or you’ll whip too much air in there!
Baking and Chilling Your Pumpkin Cheesecake Bars
Pour that gorgeous filling right over that crust you baked earlier and smooth the top. Slide it into the oven for about 30 to 35 minutes. You’re looking for edges that look set, but the very center should still have just a tiny little jiggle, like gelatin. It’s going to firm up as it cools, I promise!
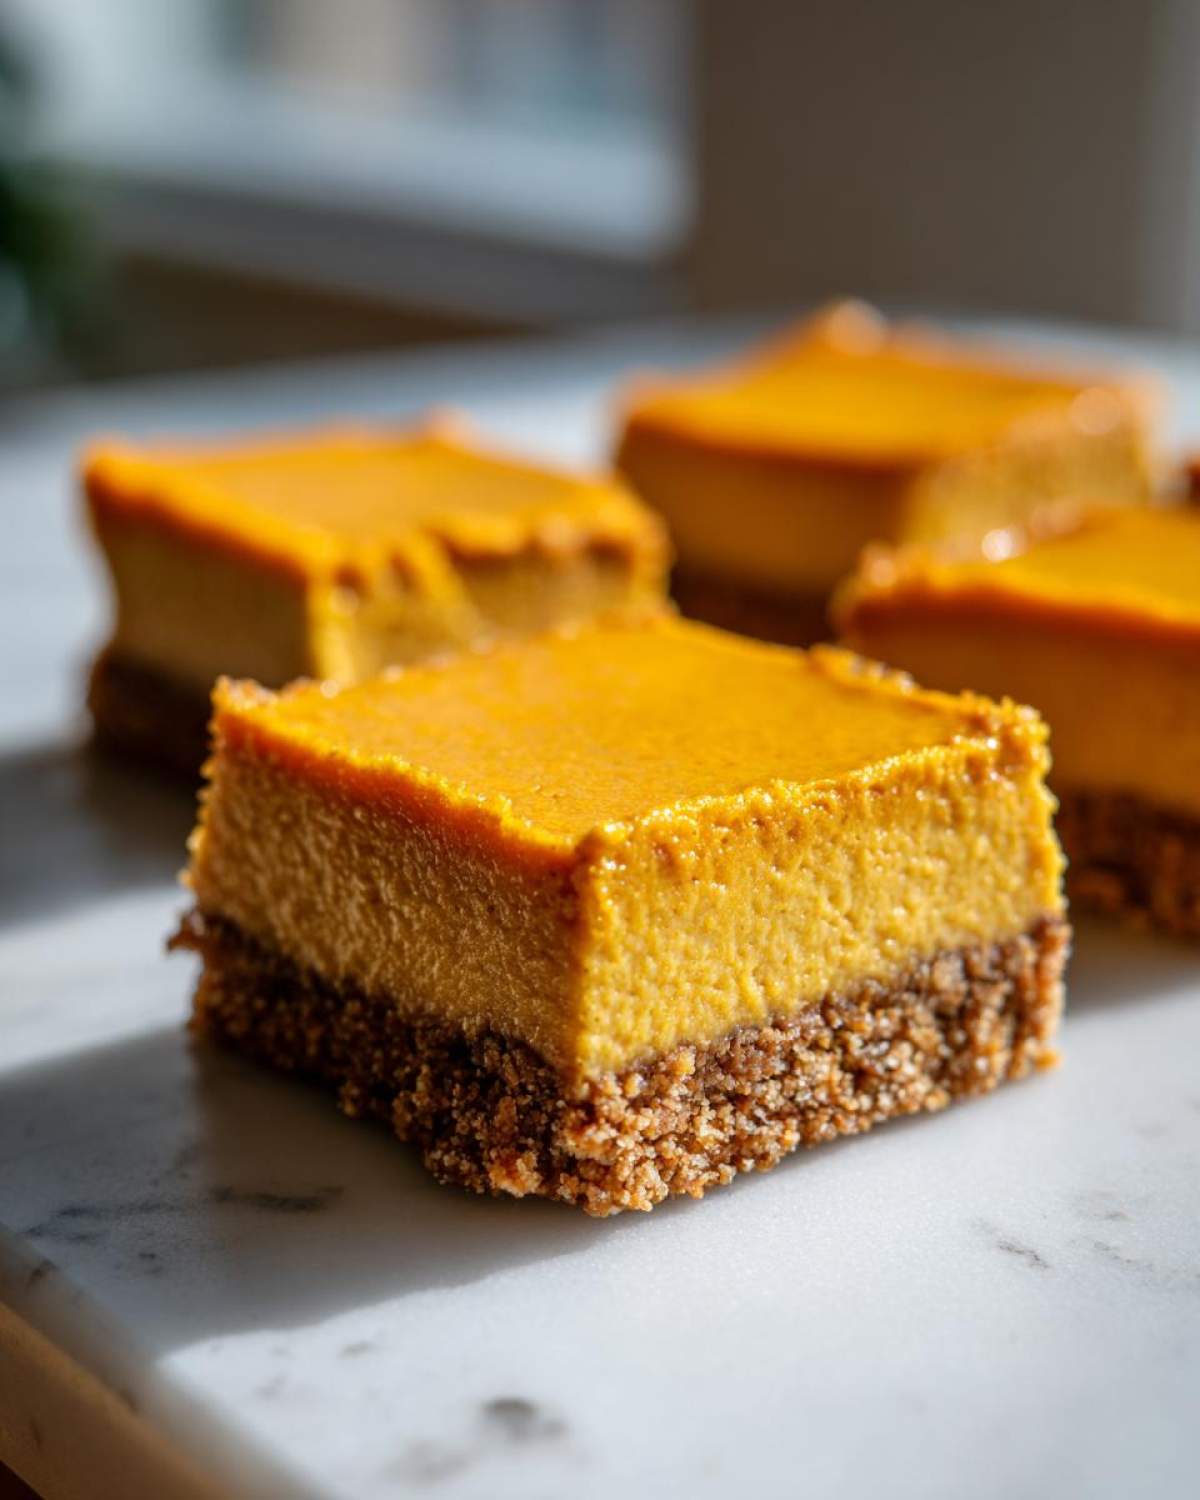
Now for the hard part: patience! Let these pumpkin cheesecake bars cool completely on the counter first. Then, you absolutely must chill the whole pan in the fridge for at least four hours—overnight is even better. This chilling time is what separates a messy square from a perfect slice. Once they are super cold, use those parchment overhangs to lift the whole slab out and slice away!
Expert Tips for Perfect Pumpkin Cheesecake Bars
I’ve got a few little tricks up my sleeve that I learned through trial and error that just guarantee you nail these every single time. You want that creamy texture and those super clean slices, right? Me too!
First off, if you’re worried about cracking, avoid opening the oven door while they are baking. A sudden temperature drop is a cheesecake’s worst enemy! Also, that chilling time I mentioned earlier is non-negotiable for beautiful pumpkin cheesecake bars.
Here’s my favorite way to get those unbelievably neat squares: once your bars are completely chilled, take a long, sharp knife and dip the blade into hot water. Wipe it completely dry, and then make your cut. Wipe the knife again and dip it in hot water before every single slice. It seems fussy, but it melts any sticking bits and results in perfection!
Ingredient Notes and Substitutions for These Fall Dessert Bars
This recipe is pretty solid as is, but I totally get that sometimes you need to make a quick swap based on what you have in the pantry. The good news is that these bars are pretty forgiving, but there are a couple of spots where an honest substitution makes a big difference.
Let’s talk crust first. My recipe calls for graham crackers, which gives you that classic salty-sweet buttery base. But if you’re feeling extra festive, you can totally swap those out for gingersnap crumbs! They give a deeper, spicier note that plays so well with the pumpkin filling. Just use the same amount of crumbs and the same amount of melted butter. It’s such a fun little twist for any fall dessert bars.
Now, can we talk about the cream cheese for a minute? This is where people sometimes stumble. You absolutely need that cream cheese to be at room temperature. I mean it! If it’s cold, you’ll try to mix it, and you’ll end up with tiny white lumps that just won’t beat away, no matter how long you run the mixer. Room temperature means soft and pliable—it should yield easily to your finger but not look oily or melted. It creates that super smooth batter that sets up beautifully dense.
Also, a quick reminder on the pumpkin: stick to pure canned pumpkin. If you grab the can labeled “pumpkin pie filling,” you’re adding spices and sweeteners that aren’t accounted for here, and that will change the whole structure of this creamy dessert. We want that pure, earthy pumpkin flavor front and center!
Storage and Make Ahead Tips for Your Pumpkin Cheesecake Bars
One of the things I absolutely adore about these pumpkin cheesecake bars is that they are actually *better* the next day. Seriously, don’t even think about eating them all the moment they come out of the fridge! They need that time to completely solidify, which locks in all that amazing flavor and guarantees those perfect, clean slices we talked about earlier.
Once you’ve sliced them—and only once they are fully chilled—you just cover that pan tightly with plastic wrap or transfer the squares into an airtight container. They keep beautifully in the refrigerator for up to five days. I always make a batch a day or two before a big event because having one less thing to worry about on the actual party day is a lifesaver.
If you’re worried about them drying out, you can place a piece of wax paper between the layers if you stack them in the container, but honestly, the moisture from the cheesecake layer usually keeps everything perfect. Reheating? Forget about it! These bars are meant to be served cold straight from the fridge. That chilled temperature is what gives you that fantastic, firm texture that distinguishes them from a regular, soft cake.
Serving Suggestions for This Thanksgiving Cheesecake Dessert
You’ve already done the hard work of creating these incredibly rich bars, so don’t let them sit there looking lonely on the platter! Presentation makes such a difference, even for something as humble as a bar dessert.
My absolute favorite way to serve these is when they are ice cold. A simple dollop of good quality, freshly whipped cream on top of each square is elegant enough for any gathering. If you want to kick it up a notch for a real showstopper, grab a bottle of caramel sauce—the salty kind if you can find it—and drizzle it lightly across the plate before setting the bar down. The sweet, salty, and tangy combo is just heavenly with that spiced pumpkin.
If you’re serving these after dinner, definitely have some strong black coffee or a nice dark roast ready to go alongside them. The slight bitterness of the coffee just cuts through the richness of the cream cheese perfectly. These treats are satisfying enough on their own, but a little finish makes them feel truly special!
Frequently Asked Questions About Pumpkin Cheesecake Bars
I get so many messages about texture and slicing, so I figured I’d just put all my best accumulated knowledge right here in one spot for you! If you have a question, chances are someone else is wondering it too when making these creamy pumpkin bars.
Can I make No Bake Pumpkin Cheesecake Bars instead?
That’s a fun question! This recipe is definitely a baked version. The oven does the heavy lifting to set the structure and get that slightly tangy flavor we love. If you’re specifically looking for something that skips the oven entirely, you’ll want to search for a specific No Bake Pumpkin Cheesecake Bars recipe. Those usually rely on gelatin or whipped toppings to set up firm in the fridge. My recipe is the baked classic, though, which gives you that wonderfully dense, rich texture that sets up perfectly when chilled!
How do I prevent my cheesecake layer from cracking?
Cracking cheesecake is such a pet peeve, right? It rarely happens with these bars because the crust anchors everything, but if you are worried, I have two golden rules. Rule number one: Stop mixing as soon as the eggs are just combined. Overbeating after the eggs go in adds too much air, and when that air rushes out during cooling, cracks appear. It’s the same thing that happens when you bake a full cheesecake!
Rule number two, which we already talked about but is worth repeating for this Thanksgiving cheesecake dessert: Cool it slowly! Let it cool completely on the counter after it comes out of the oven before you even think about covering it and moving it to the fridge. Sudden drops in temperature are the real enemy here. Follow those two steps, and your surface should stay beautifully smooth.
If you want more tips on how to get things exactly right in your baking adventures, pop over to my main page!
Estimated Nutritional Information for Creamy Pumpkin Bars
Now, I know that the real reason we bake these gorgeous bars isn’t because they are diet food—they are rich, they are creamy, and they are totally worth every single bite! But I always like to give you an idea of what you are looking at, just so you know what you’re dealing with.
Please remember, since we are working with homemade ingredients and everyone cuts their squares differently, these numbers are just estimates based on the standard volumes of the ingredients we used. Think of this as Option A in the nutritional department!
- Serving Size: 1 bar (out of 24)
- Calories: 230
- Fat: 15g (with 9g of that being saturated fat—that’s the butter working its magic!)
- Carbohydrates: 22g
- Protein: 4g
- Sugar: 18g
- Cholesterol: 55mg
Honestly, for a holiday treat that features cream cheese and a buttery crust, those numbers look pretty reasonable to me! If you’re cutting them into smaller, less ‘bar-sized’ pieces, of course, the numbers will shift down. But go ahead, have two—you deserve it after all that hard work!
PrintRich and Creamy Pumpkin Cheesecake Bars with Graham Cracker Crust
Make easy, rich, and creamy pumpkin cheesecake bars featuring a buttery graham cracker crust, perfect for fall gatherings.
- Prep Time: 20 min
- Cook Time: 35 min
- Total Time: 4 hours 55 min
- Yield: 24 bars
- Category: Dessert
- Method: Baking
- Cuisine: American
- Diet: Vegetarian
Ingredients
- 1 1/2 cups graham cracker crumbs
- 1/4 cup granulated sugar (for crust)
- 6 tablespoons unsalted butter, melted
- 16 ounces cream cheese, softened
- 1 cup pumpkin puree (not pumpkin pie filling)
- 1/2 cup granulated sugar (for filling)
- 1/4 cup packed light brown sugar
- 2 large eggs
- 1 teaspoon vanilla extract
- 1 teaspoon pumpkin pie spice
- 1/4 teaspoon salt
Instructions
- Preheat your oven to 350 degrees F. Line a 9×13 inch baking pan with parchment paper, leaving an overhang on the sides for easy removal.
- Prepare the crust: In a medium bowl, mix graham cracker crumbs, 1/4 cup sugar, and melted butter until fully combined. Press the mixture firmly and evenly into the bottom of the prepared pan. Bake for 10 minutes. Let cool slightly.
- Prepare the cheesecake layer: In a large bowl, beat the softened cream cheese with an electric mixer until smooth. Add the pumpkin puree, 1/2 cup granulated sugar, brown sugar, pumpkin pie spice, and salt. Mix until just combined.
- Beat in the eggs one at a time, mixing well after each addition. Stir in the vanilla extract. Do not overmix the batter once the eggs are added.
- Pour the cheesecake filling evenly over the cooled crust.
- Bake for 30 to 35 minutes, or until the edges are set and the center has only a slight jiggle.
- Cool the bars completely on a wire rack. For the cleanest slices, chill the pan in the refrigerator for at least 4 hours, or preferably overnight.
- Use the parchment paper overhang to lift the chilled bars from the pan. Cut into 24 squares before serving.
Notes
- For easy cutting, run a sharp knife under hot water and wipe dry between each cut.
- If you prefer a gingersnap crust, substitute gingersnap crumbs for the graham cracker crumbs.
- Make these bars a day ahead; chilling improves texture and sliceability.
Nutrition
- Serving Size: 1 bar
- Calories: 230
- Sugar: 18g
- Sodium: 150mg
- Fat: 15g
- Saturated Fat: 9g
- Unsaturated Fat: 6g
- Trans Fat: 0g
- Carbohydrates: 22g
- Fiber: 1g
- Protein: 4g
- Cholesterol: 55mg