

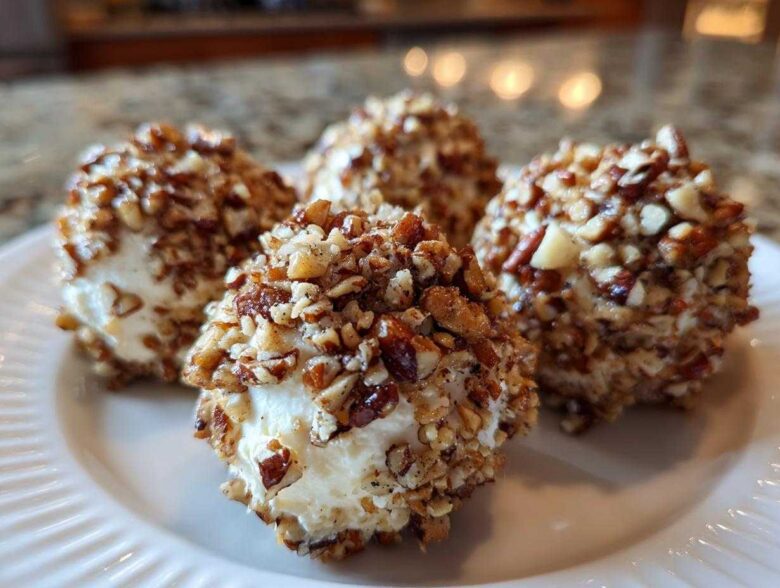
Okay, let’s talk party food because honestly, who has time for fussy appetizers during the holidays? I’m so thrilled to share my absolute go-to spread that never, ever fails to disappear first at any gathering—whether it’s Christmas Eve or just a random Tuesday game night. This isn’t some complicated dip; this is the ultimate cheese ball recipe! It’s almost criminal how simple the ingredients are, but the result is pure savory magic. Trust me, once you make this classic version, you won’t bother looking anywhere else. It’s the definition of a crowd-pleaser!
Why This Classic Cheese Ball Recipe Works Every Time (The Best Cheese Ball Recipe)
I’ve tried fancy dips and complicated hors d’oeuvres, but when the pressure is on for a truly crowd pleasing finger foods situation, I always fall back to this tried-and-true method. What makes this the best cheese ball recipe? Honestly, it’s the sharpness. We’re not messing around with mild cheese here; the blend of tangy cheddar and that little bit of sharp, salty blue cheese creates this unbelievable depth. It stops it from tasting just like… well, cream cheese.
This recipe is brilliant because it’s an appetizer that tastes gourmet but takes zero oven time. It relies purely on the quality of the cheese blend and a little bit of time in the fridge to firm up. That’s it! No baking means less kitchen stress for you, which is just as important as flavor when you’re hosting.
Perfecting the Cream Cheese Appetizer Base
The absolute first rule for any great cream cheese appetizer is temperature control. Your cream cheese needs to be perfectly softened—think spreadable, not melted puddle! I usually leave mine out on the counter for at least an hour before I start mixing. Then, you need to respect the cheese combo: the sharp cheddar gives you that familiar, friendly base, but the blue cheese punches it up and gives it character. Don’t skip the blue cheese unless you absolutely must!
Ingredients for Your Easy Cheese Ball Recipe
This list is short, sweet, and straightforward, which is why this makes such an easy cheese ball recipe. Everything comes together in one bowl, so grab your mixing spoon!
- 8 ounces cream cheese, make sure it’s softened right up to room temperature so it mixes smoothly!
- 4 ounces sharp cheddar cheese, shredded finely—I mean the good, sharp stuff!
- 1/2 cup crumbled blue cheese—you need that salty tang, so measure this one!
- 1/4 cup finely chopped pecans, these go *inside* the mix for a little crunch surprise.
- 1 tablespoon Worcestershire sauce—this is the secret umami kick, don’t skip it!
- 1 teaspoon garlic powder
- 1/2 teaspoon onion powder
- 1/4 teaspoon salt and a good pinch of black pepper
- And finally, for the outside coating: 1 cup of finely chopped pecans or maybe some fresh parsley if you want it greener!
Step-by-Step Instructions for the Cheese Ball Recipe
Getting this cheese ball recipe ready couldn’t be easier since, as you know, there’s no actual baking involved! The main challenge here is patience, waiting for that chill time. But trust me, the mixing part is fast. Make sure all your cheeses are at room temperature so they incorporate beautifully. Grab a solid mixing bowl, maybe one of those sturdy anchor ones, because we’re mixing dense ingredients!
Mixing the Savory Cheese Spread
First up, we combine everything that goes inside! Toss the softened cream cheese, shredded cheddar, the crumbled blue cheese, those initial 1/4 cup of chopped pecans, the Worcestershire sauce, and all your powders—garlic, onion, salt, and pepper—right into that bowl. Now, mix it well! You need to keep going until it’s totally uniform. I mean completely smooth, with no streaks of white cream cheese or little lumps of blue cheese hiding out. That Worcestershire sauce really helps deepen the flavor profile here, giving it that necessary savory backbone. Scrape down the sides a couple of times so everything gets worked in evenly.
Chilling and Coating the Cheese Ball
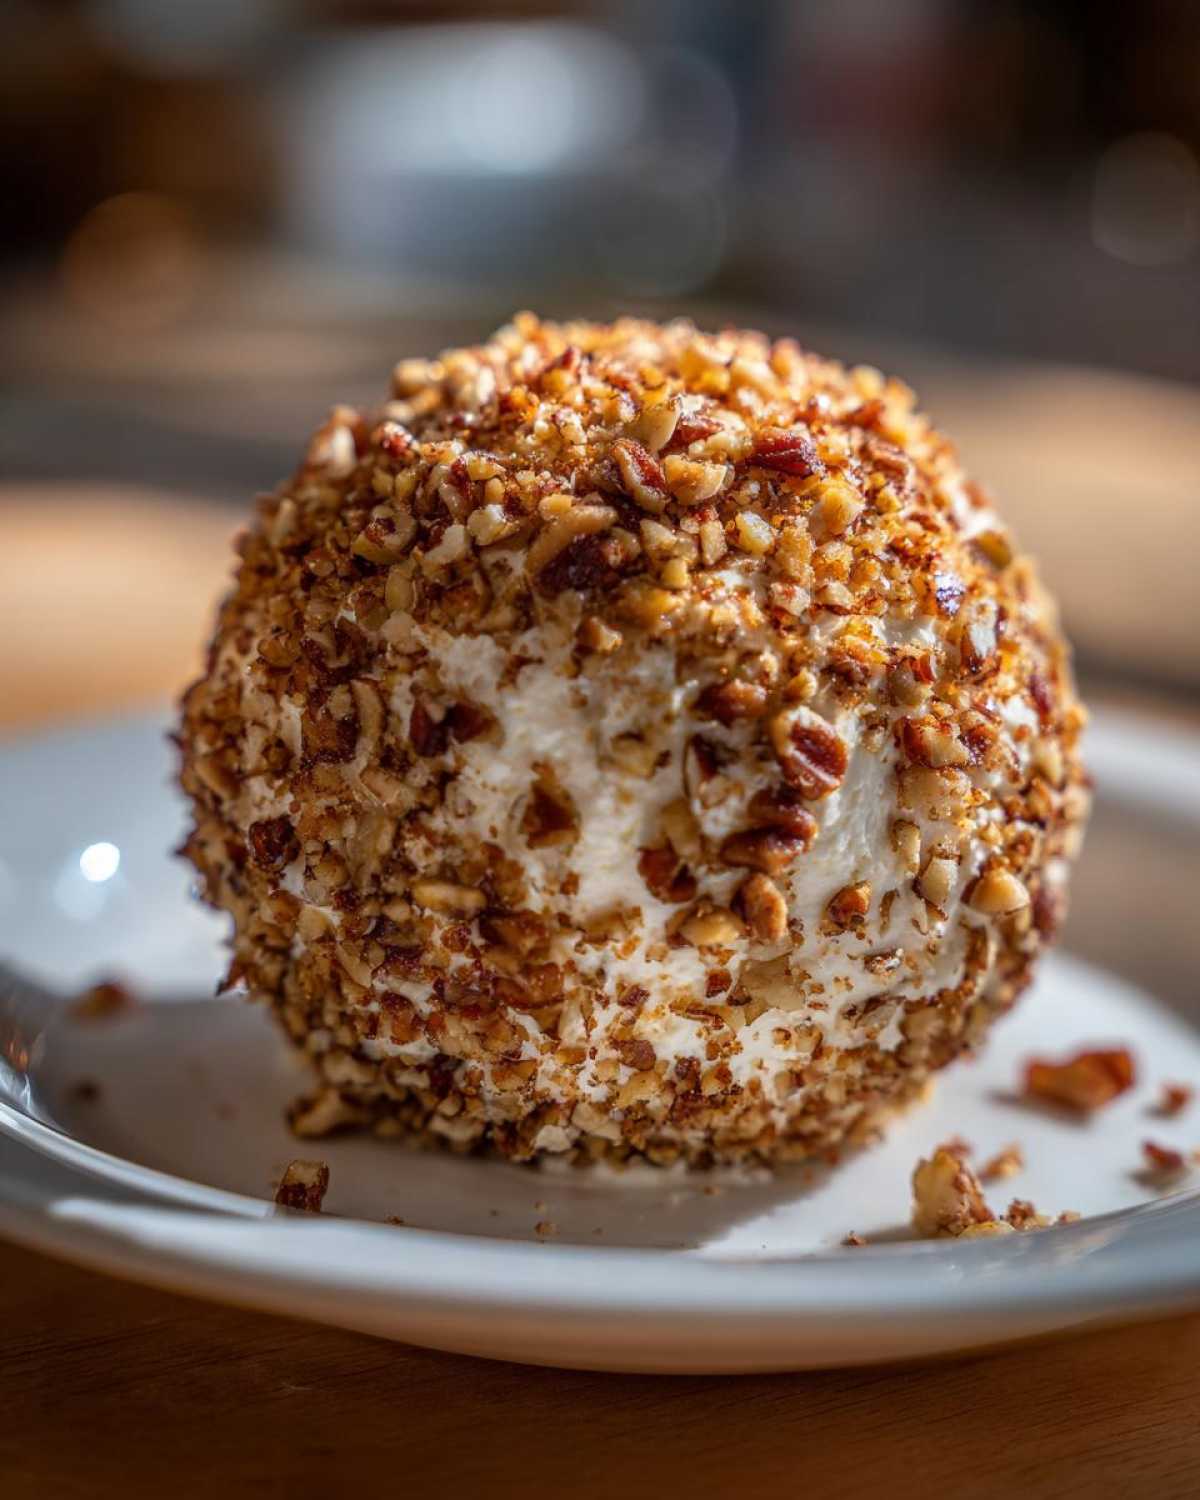
Next, we shape it. Once your mixture is smooth, use your hands—or wrap it tightly first in plastic wrap, which I prefer for a perfectly round shape—and form it into a beautiful ball. Place that onto a serving plate or a fresh sheet of plastic wrap. Now comes the hardest part: waiting! You absolutely must chill this for a minimum of 2 hours before you even *think* about coating it. If you try to roll it when it’s soft, you’re just going to end up with sticky fingers and a lumpy mess. Once it’s rock hard from the fridge, take your remaining 1 cup of coating—whether that’s more crunchy pecans or bright parsley—and roll the chilled ball around until it’s completely covered. You want full coverage!
Tips for Success with Your Homemade Cheese Spread
Making this simple party food look professional is all about two little tricks that I learned the hard way! First, let’s talk about softening that cream cheese again. If you try to mix ice-cold dairy into your cheddar, you’re going to end up with lumps that look like tiny white boulders in your otherwise perfect spread. I swear by leaving it out, but if I’m rushing, I’ll microwave it on 20% power for about 10 seconds, checking constantly. You want creamy, not melted!
The presentation really sells it, so when you’re coating the ball, try to do it on a flat plate with about half an inch of your coating material piled up. Don’t just hold the ball over a pile and sprinkle! Gently roll the chilled cheese sphere around in the pile, pressing just a little bit so that the pecans or herbs stick evenly everywhere. It makes a huge difference in that final, beautiful, rustic look that people expect from a great homemade spread.
Another thing—if you are using nuts on the outside, make sure your chopping is consistent. Big chunks look messy, and really fine dust disappears. Medium-fine seems to be the sweet spot for that perfect, textured crust.
Variations on the Classic Cheese Ball Recipe
While this classic blend of cheddar and blue cheese is my favorite, these unique cheese ball flavors are fantastic when you need something different for the snacks table! Everyone loves customizing things, and this base recipe is so versatile. You just swap out a little bit of the blue cheese or add something extra to the mix before you chill it. This is where you can totally tailor it for your crowd.
Thinking of a big game day? You absolutely should try leaning into that ranch cheese ball vibe! To do that, you skip the blue cheese entirely and stir in about two tablespoons of dry ranch seasoning mix right in with your other spices. It gives you that creamy, herbaceous flavor everyone already loves. It’s seriously an instant hit for any game day appetizers spread!
Making a Spicy Jalapeno Cheese Ball
If you know your guests like a little heat—and judging by what people search for, lots of folks do love that kick—you have to try the jalapeno cheese ball version. Remember that note I made earlier about the jalapenos? You’ll want about 1 tablespoon of finely minced fresh jalapeno. The most important part, the absolute key, is removing all the seeds and the white membrane inside. That’s where all the rough heat is hiding. If you leave the seeds in, you might accidentally make a cheese-sphere of fire!
Just finely dice that pepper until it’s almost mushy, pat it dry with a paper towel (seriously, dry!), and mix it right in when you are combining your cheeses. It adds a wonderful fresh zing that cuts through the richness of all that dairy. It’s a major step up for your winter gathering food menu!
Storage and Make Ahead Appetizers Details
Listen up, party planners! The best thing about this spectacular cheese ball is that it’s one of those magical make ahead appetizers that actually tastes better after it has a day or two to sit and let those flavors meld. You can totally mix this entire thing up two full days before your big event! Just make sure you mix it really well, shape it, and wrap it super tightly in plastic wrap before it goes into the fridge.
When you wrap it, try to press the plastic right up against the surface of the ball, or cover it completely with foil so it doesn’t develop a dry skin in the cold air. Don’t worry about the outside coating yet! Save rolling it in the pecans or herbs until an hour or so before your guests arrive. If you do that, it stays the freshest and crunchiest. If you’re ready to serve, just grab your contact info at this link if you need me!
Serving Suggestions for Appetizer Recipes with Crackers
So, you’ve got this gorgeous, flavorful cream cheese appetizer—now you need the perfect scoop! This cheese ball is phenomenal served simply with sturdy, classic crackers, like a good water cracker or maybe some rye chips for texture. But don’t stop there!
For something heartier, try serving it alongside toasted baguette slices (crostini). If you want healthier options for your appetizer recipes with crackers spread, crisp celery sticks, carrot sticks, or even apple slices work wonders cutting through that richness. Serve it up on a rustic wooden board and watch everyone grab a plate!
Frequently Asked Questions About This Cheese Ball Recipe
When you’re making a staple like this, people always have questions, and that’s totally fair! A good cheese ball recipe should work perfectly for you, so let’s quickly clear up anything that might be tripping you up before you get started on your next big event. I tried to keep this recipe foolproof, but sometimes you just need confirmation on the little things.
If you need more help after this, check out the site disclaimer page—just kidding, I just wanted to use that link! But seriously, ask away in the comments if you’re still wondering about making this the perfect no bake appetizer.
Can I make this cheese ball recipe without blue cheese?
Oh, absolutely! I know not everyone is a blue cheese fanatic, and that’s fine. The blue cheese adds that amazing punch of salty complexity, but if that flavor isn’t for you, you can definitely skip it! The recipe note suggests swapping it with 4 ounces of shredded Monterey Jack cheese instead. If you do that, you definitely get a milder, creamier flavor overall. It leans more heavily toward that classic, simple party food feel, but it’s still delicious and certainly lets the sharp cheddar shine through. Just remember, the flavor profile changes from sharp/tangy to just creamy/cheesy.
How long does the cheese ball need to chill?
This is non-negotiable for a pretty presentation! You need to chill your cheese ball for a minimum of 2 hours. Why? Because you need it rock solid before you roll it in the coating. If you skip this chilling time, the mixture will be too soft, and you’ll end up tearing up the outside or losing the beautiful ball shape. It becomes a messy, soft blob rather than a structured treat. Two hours is the minimum, but honestly, if you can let it chill overnight, that savory cheese spread tastes even better the next day!
Estimated Nutritional Data for This Classic Cheese Spread
I totally get it; sometimes you want a little idea of what you’re serving, even for something super fun like a party appetizer. So, to give you a general idea for planning your snacks and making sure everyone’s happy, here are the estimated numbers for this powerhouse classic cheese spread.
Just remember, this is purely an estimate! We figure this recipe makes about 12 servings, so these numbers are based on one serving size, which is roughly two tablespoons of the finished ball.
- Calories: Right around 120 per serving. Not bad for something that tastes this rich!
- Total Fat: About 11 grams, with 6 of those being saturated fat from that glorious cream cheese and cheddar.
- Protein: A surprisingly decent punch of about 5 grams per serving.
- Carbohydrates: We’re keeping it low here, just about 1 single gram of carbs.
- Sodium: Since we’re using sharp cheddar and blue cheese, expect around 180mg of sodium per serving.
Again, these are just guidelines based on the ingredients listed in the recipe, so if you swap out the pecans for walnuts, or maybe you use a milder cheese? Things will shift a tiny bit! But this gives you a solid baseline for your next big event!
Share Your Experience Making This Party Snack Recipe
Okay, now it’s your turn to tell me everything! I genuinely hope this classic party snack recipes version becomes a staple in your house just like it is in mine. But the fun part of these simple recipes—and this is where we build this little community of home cooks together—is seeing what you all do with it!
When you whip up this amazing no bake appetizer, please come back and leave me a comment below. Tell me how you served it! Did you stick to the pecans, or did you go wild with something completely different for the coating? I need to hear about those successful variations you tried out!
And if you followed the instructions and it came out exactly as planned, give it a solid five stars! It means the world to me knowing that this little piece of kitchen history is still showing up and making people happy at gatherings. Also, don’t forget to check out our privacy policy if you signed up for the newsletter!
PrintClassic Cream Cheese Ball Recipe

Make this easy, no-bake cheese ball for your next party or holiday gathering. It uses simple ingredients and is ready quickly.
- Prep Time: 15 min
- Cook Time: 0 min
- Total Time: 2 hours 15 min
- Yield: 12 servings
- Category: Appetizer
- Method: No Bake
- Cuisine: American
- Diet: Vegetarian
Ingredients
- 8 ounces cream cheese, softened
- 4 ounces sharp cheddar cheese, shredded
- 1/2 cup crumbled blue cheese
- 1/4 cup finely chopped pecans (for mixing in)
- 1 tablespoon Worcestershire sauce
- 1 teaspoon garlic powder
- 1/2 teaspoon onion powder
- 1/4 teaspoon salt
- 1/4 teaspoon black pepper
- 1 cup finely chopped pecans or parsley (for coating)
Instructions
- Combine the softened cream cheese, shredded cheddar, blue cheese, 1/4 cup pecans, Worcestershire sauce, garlic powder, onion powder, salt, and pepper in a medium bowl.
- Mix all ingredients thoroughly until completely combined and smooth.
- Shape the mixture into a ball using your hands or plastic wrap.
- Place the cheese ball on a plate or piece of plastic wrap.
- Chill in the refrigerator for at least 2 hours, or until firm.
- Before serving, roll the chilled cheese ball in the remaining chopped pecans or parsley until fully coated.
- Serve with crackers or vegetable sticks.
Notes
- You can make this cheese ball up to two days ahead of time; cover tightly and refrigerate.
- For a different flavor, substitute the blue cheese with 4 ounces of shredded Monterey Jack cheese.
- If you prefer a spicy version, add 1 tablespoon of finely minced jalapeno (seeds removed) to the mixture.
Nutrition
- Serving Size: 1 serving (approx. 2 tablespoons)
- Calories: 120
- Sugar: 1
- Sodium: 180
- Fat: 11
- Saturated Fat: 6
- Unsaturated Fat: 5
- Trans Fat: 0
- Carbohydrates: 1
- Fiber: 0
- Protein: 5
- Cholesterol: 30