

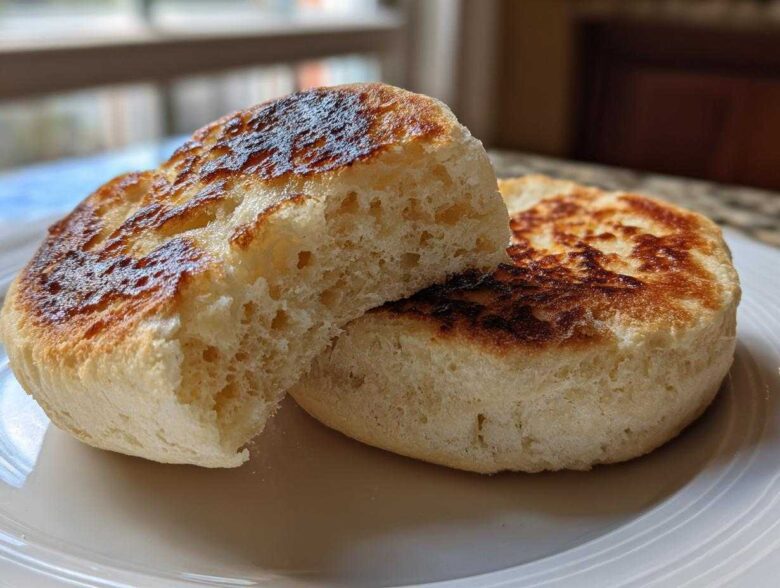
Oh my gosh, stop buying those sad, pre-packaged round things from the grocery store! Honestly, nothing—and I mean *nothing*—compares to biting into a truly fresh, warm homemade English muffin that you made yourself. I spent years trying to replicate that bakery magic found at my favorite spots, and I finally cracked the code. The secret isn’t some complicated overnight sponge or a scary oven bake; it’s all about using buttermilk and mastering the stovetop heat for your **english muffin** recipe.
I’m so thrilled to share this with you because this process is actually genuinely straightforward. If you think bread baking is too scary or time-consuming, this recipe is exactly what you need to jump in. It’s seriously a perfect starting point for anyone new in **Bread Baking for Beginners**, and the payoff—those glorious, airy nooks and crannies—is just incredible. This stovetop method ensures you get the classic texture every single time!
Why This Homemade English Muffin Recipe Delivers the Best Results
If you’ve been searching for the **Best English Muffins from Scratch**, trust me, you’ve found the winning ticket right here! Other recipes make you work way too hard, but this one relies on simple chemistry and the power of a good, dry griddle. We are focusing entirely on getting that soft, **Soft Fluffy English Muffins** texture that store-bought just can’t replicate. It’s all about patient resting and low, slow cooking. It’s almost as rewarding as flipping perfect **buttermilk pancakes**!
The magic happens because we use buttermilk and a tiny bit of yeast alongside baking soda, which gives us a beautiful rise without the kneading marathon. You mix it, you let it rest, and then you cook it. That’s it! It seems almost too easy for the amazing results you get, but that’s the beauty of a perfected recipe.
Achieving True English Muffin Nooks and Crannies
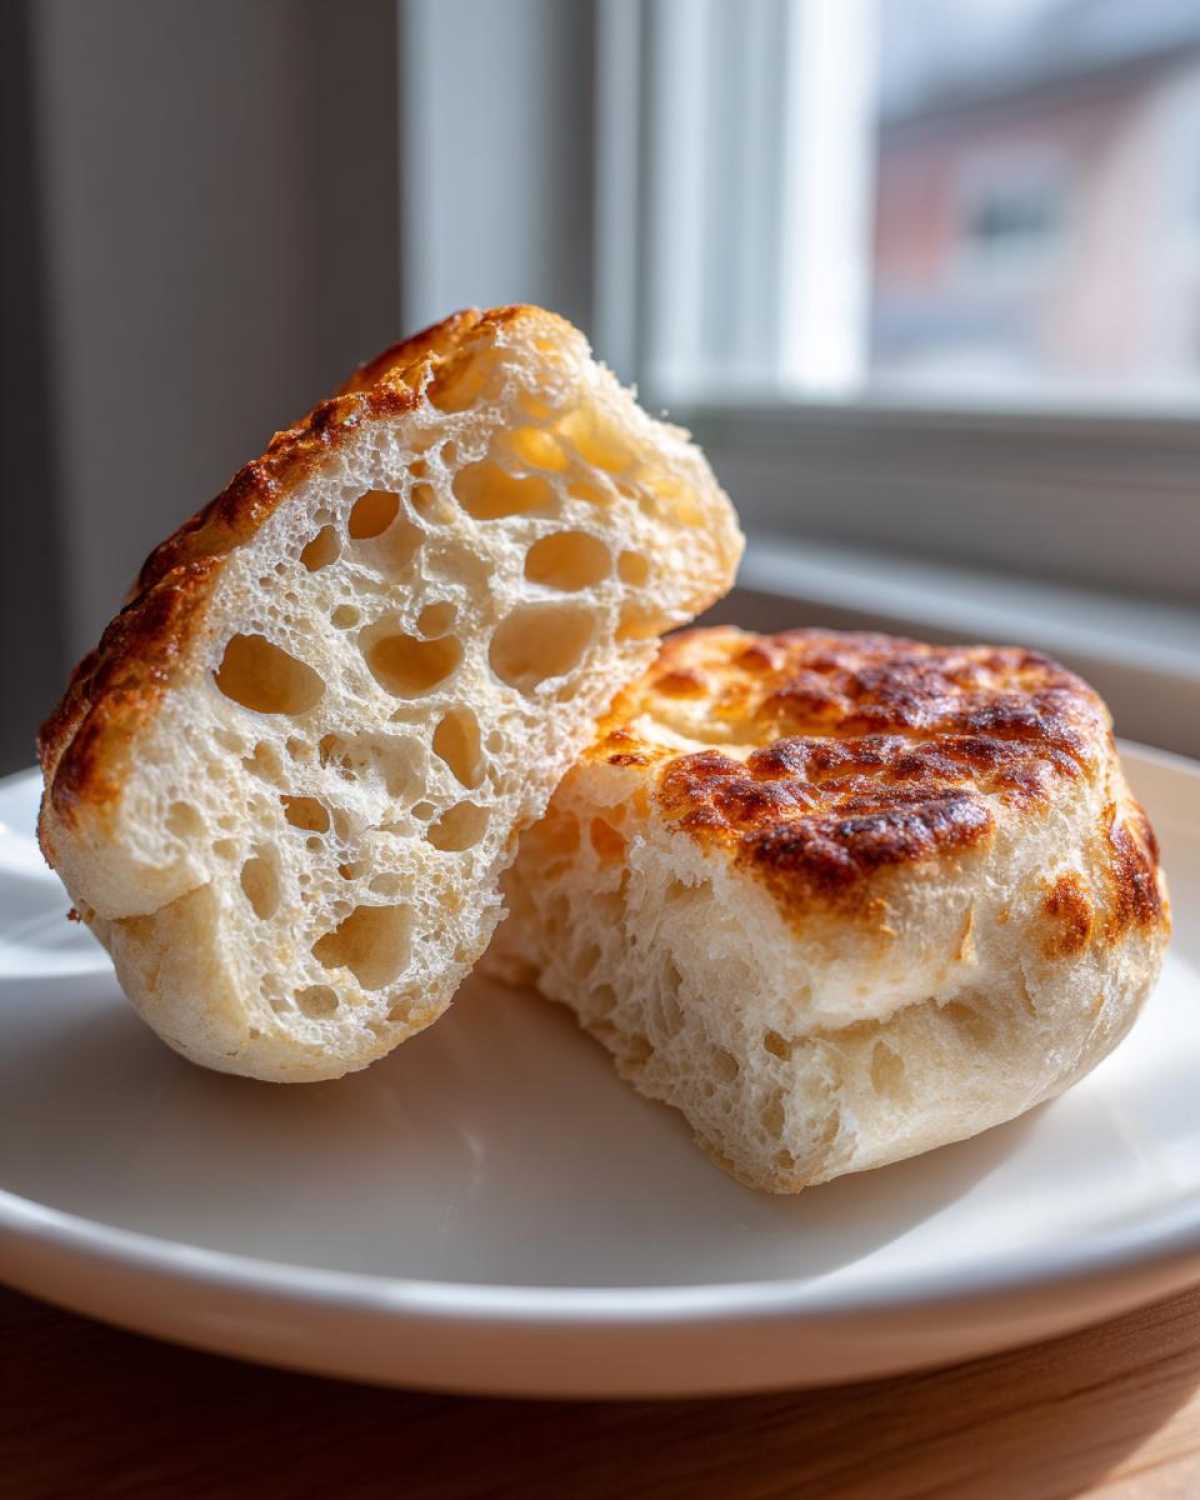
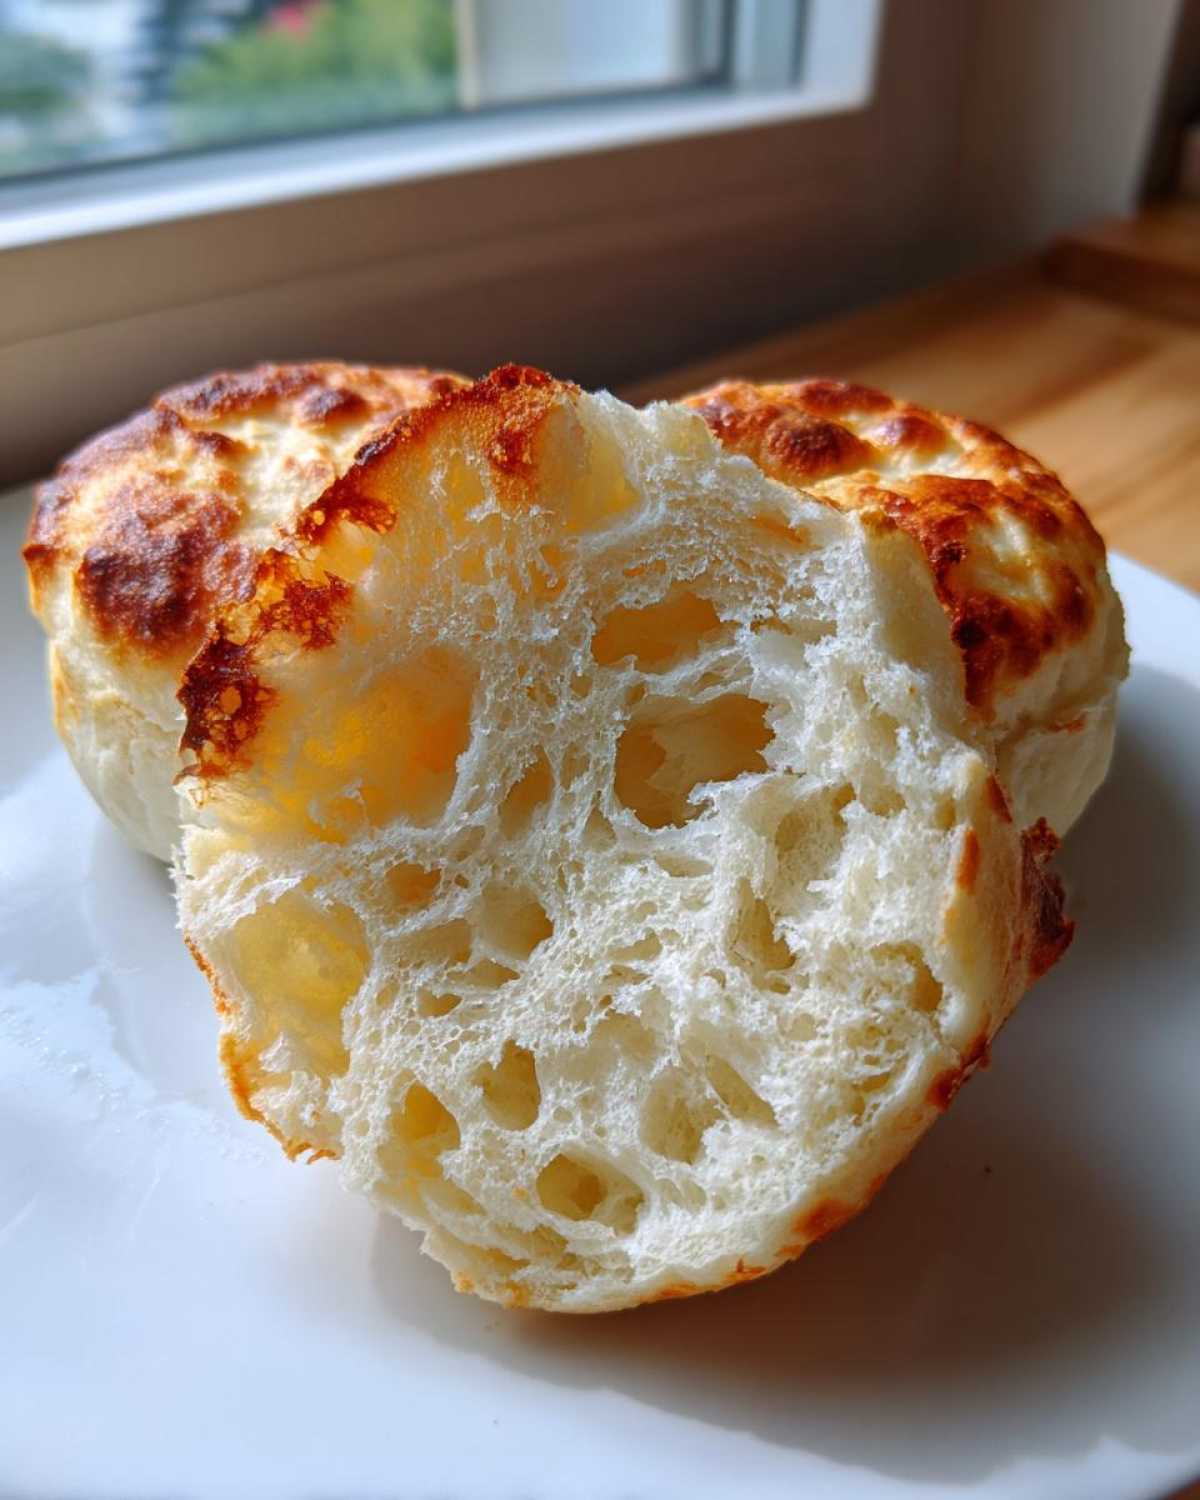
Speaking of magic, the signature air pockets—the famous **English Muffin Nooks and Crannies**—are not an accident! They are created by cooking slowly on a dry, medium-low heat. If the heat is too high, the outside burns before the inside cooks, sealing up those holes. And here’s the *real* pro tip for presentation: never cut the muffin with a knife!
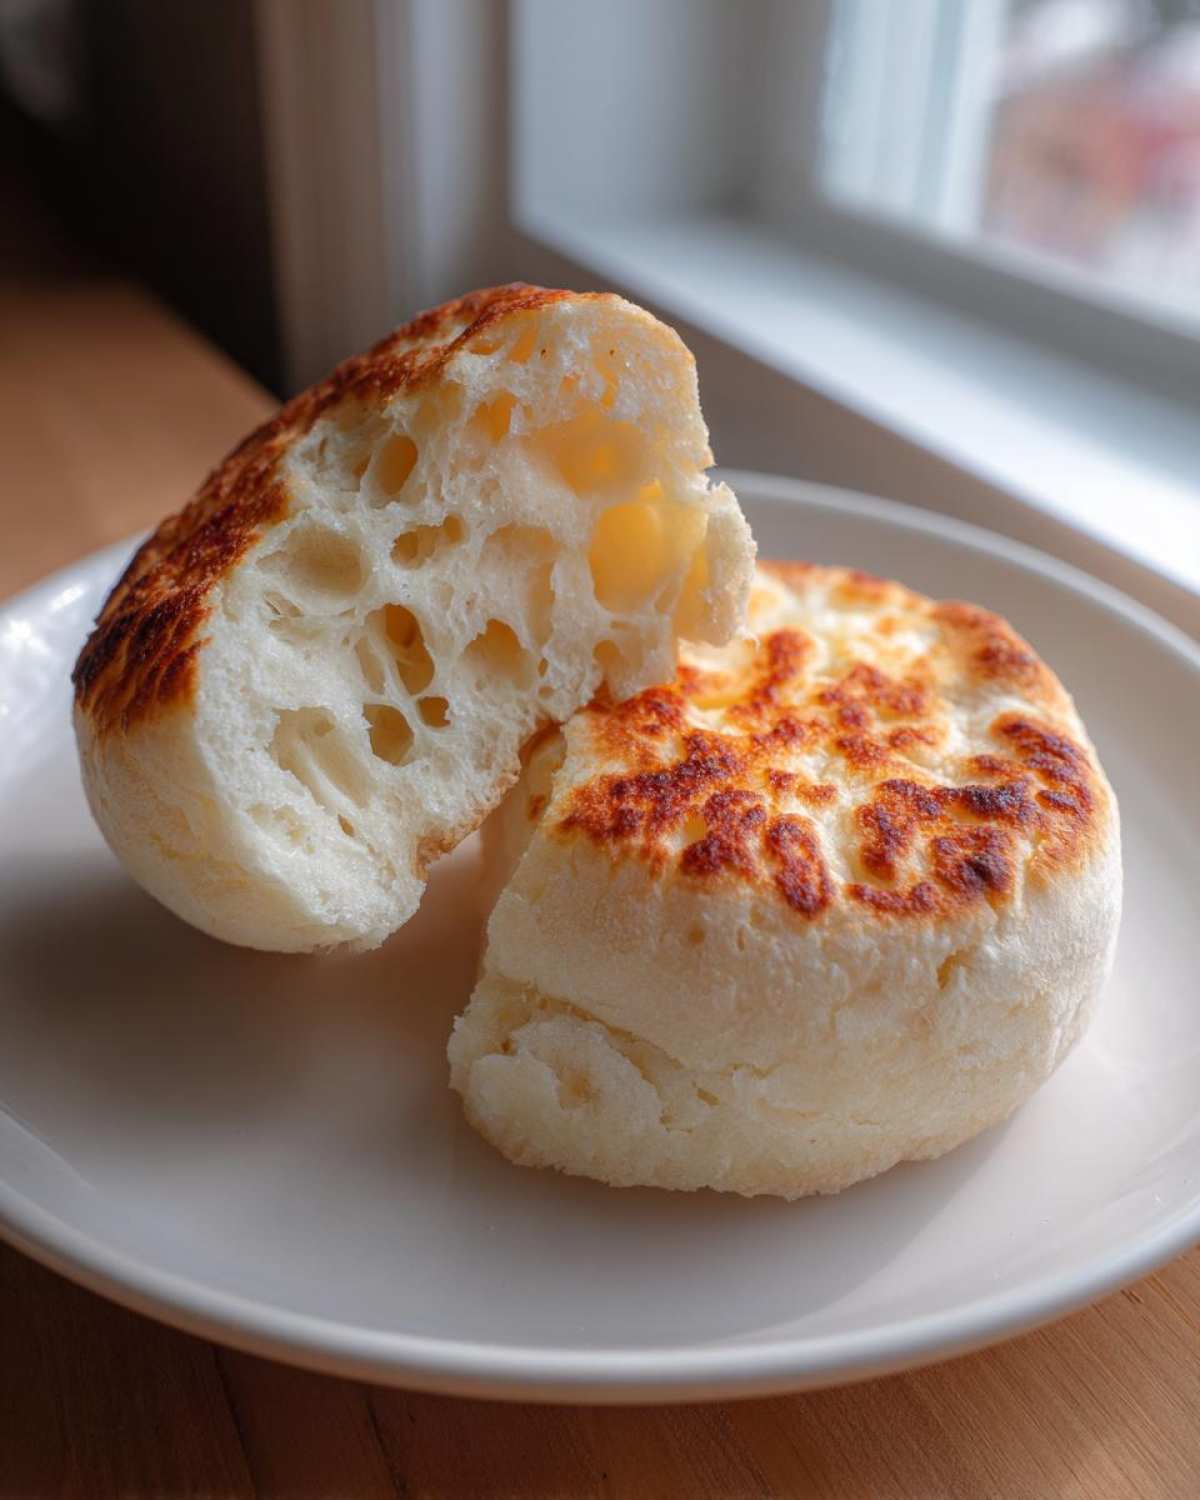
You must always use a fork to gently pull the muffin apart after toasting. Slicing with a knife squashes those delicate air tunnels flat. Using a fork keeps the texture wild and open, ready to soak up all that melted butter. Don’t cheat on this final step!
Gathering Ingredients for Your Easy English Muffin Recipe
You only need a few simple things to get started on these **Homemade English Muffin Recipe** rounds, which I love because it means fewer last-minute trips to the store! The ingredients list is short, but every single item plays a huge role in how soft your final muffin will be. We need standard flour, sugar, salt, and yeast, naturally. Then come the two stars that give us that light, tender crumb we are aiming for.
Get your buttermilk ready, and have some extra flour on hand for dusting the surface later. For a full batch, you’re looking at yielding about 8 beautiful muffins, perfect for a weekend breakfast! If you want to try making these incredible **naan bread** alternatives, gather everything up now.
Ingredient Notes and Buttermilk Substitutions
Now, about that buttermilk—it’s important for that slight tang and helping to keep the crumb tender. But don’t panic if you’re out! If you only have regular milk, you can totally fake it. Just take one cup of milk and stir in one tablespoon of white vinegar or fresh lemon juice. Let that sit on the counter for about five minutes until it looks slightly curdled; that’s your homemade buttermilk right there!
Using an acid like buttermilk reacts perfectly with the baking soda in the recipe, which is crucial for getting that lift and softness in your **english muffin** without needing to knead it like traditional bread dough. It’s a fantastic shortcut for us lazy bakers!
Step-by-Step Instructions for Making English Muffins at Home
Alright, let’s get down to the fun part of **Making English Muffins at Home**! This is where the whole thing comes together, and honestly, it’s much more about gently combining things than aggressive mixing. The dough doesn’t need any tough kneading or wrestling—in fact, less is more here. We are aiming for a very relaxed texture! Learning how to handle dough this way is a great step up from just keeping a **sourdough starter** alive.
Mixing the Dough and First Rest
First, whisk all your dry stuff—the flour, sugar, salt, baking soda, and that yeast—in a big bowl. Make sure everything is happy and combined before you add any liquid. Then pour in your lukewarm buttermilk and that melted butter. Grab a spoon or a spatula and mix it *just* until it all comes together. That’s it! I mean it—do not overmix! We want a shaggy, messy-looking dough, not a smooth ball. Cover that bowl up tightly and seriously, walk away for a whole hour. Letting it rest at room temperature lets the yeast wake up and start doing its bubbly thing; it makes the dough so much easier to handle later.
Cutting and Proofing the Homemade English Muffin Rounds
Once that hour is up, flour your counter—generously! Turn that bubbly dough out onto the floured surface. Gently pat or roll it out until it’s about a half-inch thick. Not too thin, or you won’t get those deep nooks! Now, grab your 3-inch round cutter. Press down firmly to cut out your rounds. Yes, you can gently collect the scraps, dust them, and press them out one more time, but don’t overwork them! Place the cut rounds on parchment-lined baking sheets, dusting them lightly with flour so they don’t stick. Cover these loosely and let them proof again for 30 relaxing minutes.
The Stovetop English Muffins Cooking Method
This is the make-or-break moment for texture! Grab your cast-iron skillet or griddle and put it on the stove over medium-low heat. And here’s a huge tip: you cook these **Stovetop English Muffins** on a *dry* surface. No oil, no butter, nothing! We want them to cook slowly and steam slightly to create those air pockets. Once the pan is gently warm, place your proofed rounds on it, leaving a good amount of space between each **english muffin** because they’ll puff up a tiny bit. Cook them for anywhere from 6 to 8 minutes per side until they are beautifully golden brown. Promise me you won’t press down on them with your spatula; squishing them ruins the whole operation! Just flip them gently when they look set.
Tips for Success with Your Stovetop English Muffins
I know I keep harping on it, but managing that griddle heat is truly the secret weapon for perfect **english muffin** texture. If you see any dark brown scorching marks appearing too quickly, turn your heat down a tick. Medium-low is your best friend here; we want patience, not speed! A slightly pale exterior that’s cooked through is much better than a dark exterior with raw dough inside.
And please, remember the fork splitting! It’s worth repeating before you toast them for your breakfast sandwich. After they’ve cooled completely, grab any dining fork, poke around the edge, and gently twist to pull them apart. This action opens up all those gorgeous tunnels. Then, toast them—maybe even dipping them into some **warm olive oil** first—and watch them soak up butter like nothing else!
Storage and Freezer Friendly English Muffins Instructions
The best part about baking a big batch of **english muffin** dough is knowing you’ve got breakfast sorted for weeks! Don’t worry about eating all of these right away; they are wonderfully **Freezer Friendly English Muffins**. You absolutely must let them cool completely down on a wire rack first—warm muffins in a plastic bag create steam, which leads to sogginess, and nobody wants a soggy muffin!
Once totally cool, just stack them up and pop them into a heavy, airtight freezer bag. They keep beautifully for ages. When you want one later, just take it out of the bag and pop it straight into the toaster. Seriously, they toast up perfectly from frozen!
Serving Suggestions for Your English Muffin Breakfast Ideas
Now that you’ve mastered the bake, what do you *do* with these perfect, hole-filled rounds? Part of the joy of making your own **english muffin** is upgrading your standard breakfast game! Thinking about **English Muffin Breakfast Ideas**, the possibilities are endless once you’ve split and toasted one open. Seriously, a freshly toasted muffin is the best base for anything savory or sweet you can imagine.
If you’re tired of the same old routine, I always suggest trying a few elevated classics. We love using them for weekend brunch when we have extra time. My absolute favorite is making them the base for eggs Benedict, or smothering them in rich, homemade **brown gravy**—it’s heavenly!
Quick English Muffin Sandwich Ideas
For busy mornings, you cannot beat stacking a quick sandwich on these. Forget flimsy store versions; your homemade ones hold up beautifully! Try the classic: a perfectly fried egg, a slice of sharp cheddar, and maybe a thin slice of crispy bacon. It never falls apart!
Another fun use is transforming them into speedy little snacks or lunch items. Have some marinara sauce and mozzarella handy? Top the muffin, maybe add a slice of pepperoni, and broil it for two minutes. You get an amazing, chewy little pizza bite! Or, honestly, just toast them with a smear of cream cheese and use them instead of bread for a basic **stuffed french toast bake** filling.
Frequently Asked Questions About Making English Muffins
I always get questions about this recipe, probably because people worry about messing up the yeast or the heat, but don’t you stress! These are genuine queries I see all the time, so I figured I’d tackle a few right here. If you’ve got more, drop them in the comments section below!
Can I use active dry yeast instead of instant for this easy English muffin recipe?
Yes, you absolutely can! Active dry yeast is lovely, but it just needs a quick wake-up call first since it’s dormier than instant yeast. Before you mix your dry ingredients, mix that active dry yeast into your lukewarm buttermilk (the liquid part of your recipe) and let it sit for about five minutes until it gets foamy. Once it’s bubbly, proceed with the recipe as written. It works just as well for giving your **english muffin** the rise it needs!
Why are my homemade English muffins pale instead of golden brown?
This is almost always about the heat management for your **Stovetop English Muffins**. If they are pale, your griddle wasn’t hot enough! Remember, we cook these on dry heat, so the heat needs to be consistent coming up from below. Turn the burner up just a little—medium-low is the sweet spot. A pale muffin usually means it cooked too fast or too cool, so the outside never got the chance to truly toast and brown up. Give it a few more minutes on each side next time, but keep that heat gentle!
How thick should I make the dough for the English Muffin rounds?
This is key for volume! You want the dough rolled out to about a half-inch thick before you do any cutting. If you roll it too thin—say, less than a quarter-inch—your finished muffins will look flat and sad, and they just won’t have the structure to hold up those amazing nooks. Aim for that half-inch, press firmly with your cutter, and you’ll be rewarded every time you make these!
Can I skip the buttermilk?
Look, I really, really advise against skipping it, because the acid in **Buttermilk English Muffins** is what helps create that tender, fine inside structure when it reacts with the baking soda. But, if you are totally out, use my substitution trick mentioned above (milk plus vinegar/lemon juice). Just don’t substitute it with plain milk, or they might turn out denser than you’d like. For the best bakery-style results, stick to the acidic component!
For finding more great ways to start your day, check out ideas over in the **breakfast category**!
Nutritional Estimate for One Homemade English Muffin
When you’re baking from scratch, it’s always nice to have a rough idea of what you’re eating, right? While I don’t whip out the scales every weekend when I’m making a fresh batch of **english muffin** dough, I wanted to provide you with the estimated nutritional snapshot for one of these beauties. Remember, these are just ballpark figures based on the amounts in the recipe and standard pantry ingredients, so they might shift slightly depending on how much flour you use for dusting!
For one serving—which is just one muffin—here is what we are generally looking at:
- Calories: 180
- Fat: 3g
- Saturated Fat: 2g
- Trans Fat: 0g
- Cholesterol: 10mg
- Sodium: 350mg
- Carbohydrates: 34g
- Fiber: 1g
- Protein: 5g
- Sugar: 2g
See? That’s pretty reasonable for a classic breakfast bread! You’re getting about 5 grams of protein, which is great fuel for your morning. Because we aren’t frying these **homemade english muffins** on the griddle (just cooking them dry!), the fat count stays really low. Slather them with a ton of butter, though, and that number goes up fast! Just something to keep in mind when you start deciding how much of that good salted butter you’re going to pile on top!
Share Your Perfect English Muffin Creations
That’s it! You’ve officially baked up the **Best English Muffins from Scratch**! I really hope you loved the simple process and that your kitchen smells like a proper bakery right now. I live for seeing your results, truly, because knowing I helped you achieve those soft, **Soft Fluffy English Muffins** makes all my testing worthwhile.
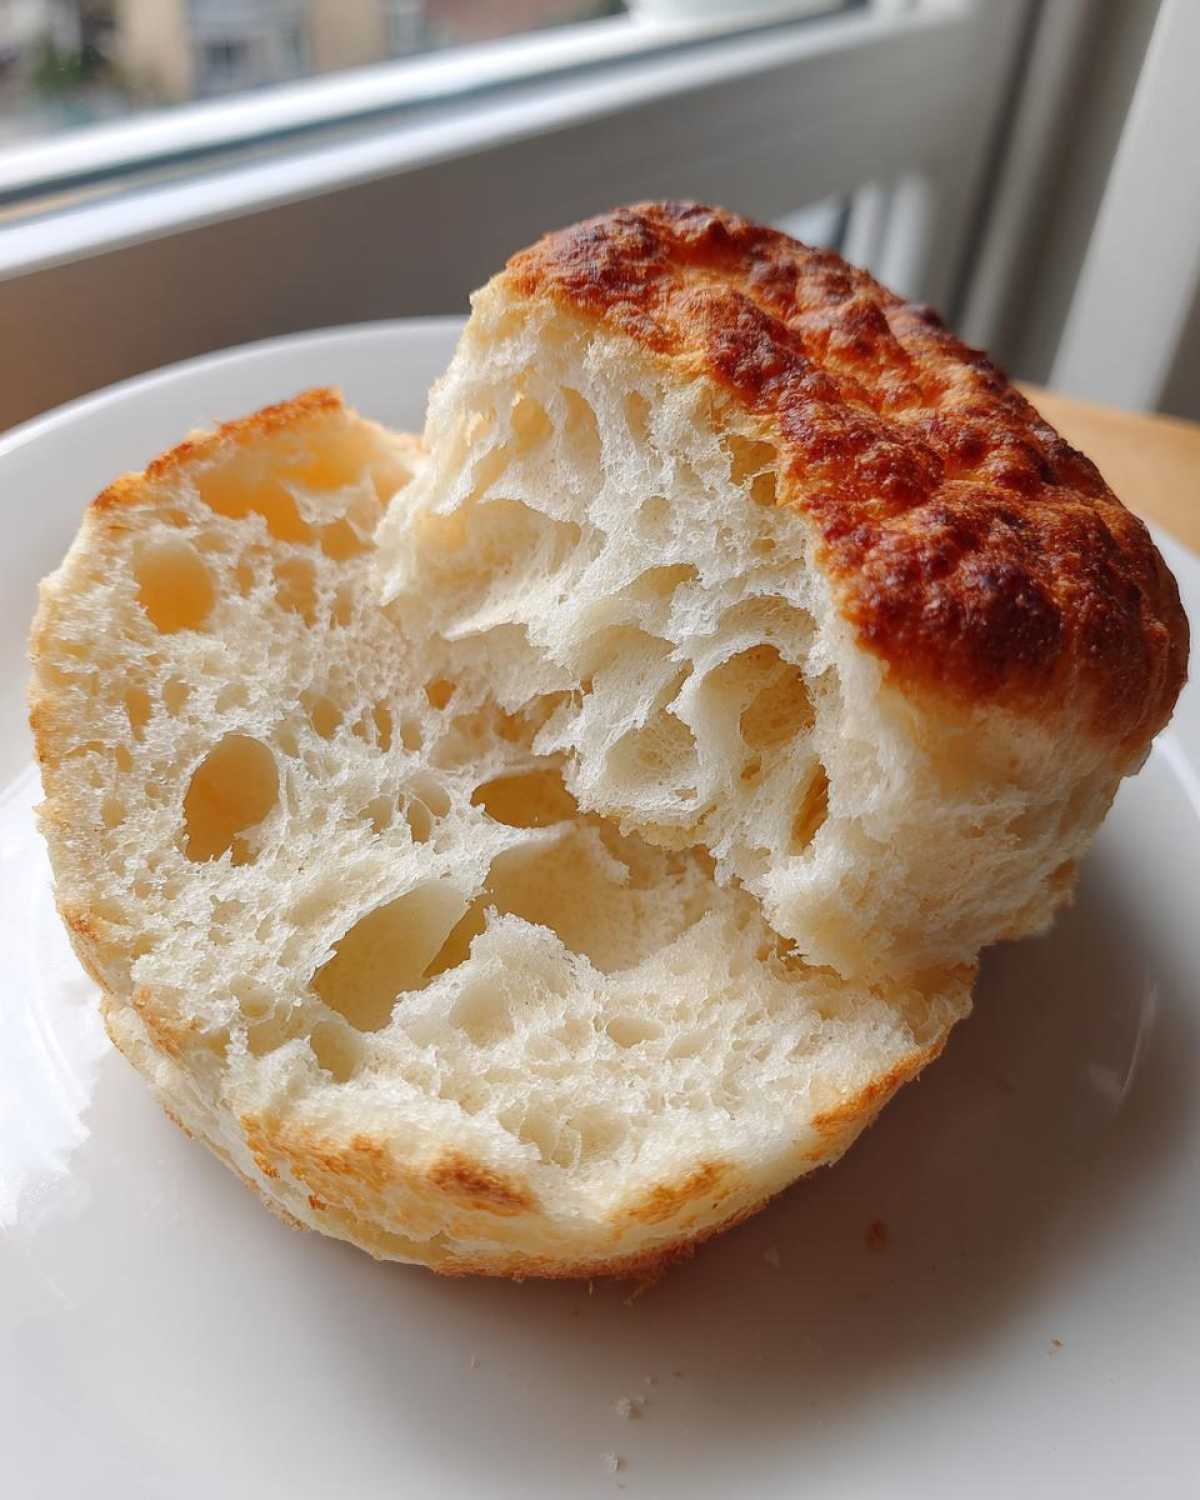
If you loved this **Homemade English Muffin Recipe**, please take a moment to drop a rating down in the comment section below—it helps other bakers find this simple stovetop magic! And please, please send me photos of those beautiful, split-open interiors showing off those **English Muffin Nooks and Crannies**! You can tag me on social media or shoot me a quick note via my contact page. Happy toasting!
PrintFluffy Homemade English Muffins with Perfect Nooks and Crannies

Make soft, fluffy English muffins at home using this simple stovetop method to achieve classic nooks and crannies.
- Prep Time: 15 min
- Cook Time: 20 min
- Total Time: 1 hour 35 min
- Yield: 8 servings
- Category: Breakfast
- Method: Griddle Cooking
- Cuisine: American
- Diet: Vegetarian
Ingredients
- 2 cups All-Purpose Flour
- 1 tablespoon Granulated Sugar
- 1 teaspoon Salt
- 1 teaspoon Baking Soda
- 1 teaspoon Active Dry Yeast
- 1 cup Buttermilk, lukewarm
- 2 tablespoons Unsalted Butter, melted
- Extra flour for dusting
- Butter or oil for griddle
Instructions
- In a large bowl, whisk together the flour, sugar, salt, baking soda, and yeast.
- Add the lukewarm buttermilk and melted butter to the dry ingredients. Mix until just combined into a shaggy dough. Do not overmix.
- Cover the bowl and let the dough rest at room temperature for 1 hour. The dough will become slightly bubbly.
- Lightly flour a clean surface. Turn the dough out onto the surface. Gently pat or roll the dough to about 1/2 inch thickness.
- Use a 3-inch round cutter to cut out the muffins. Rework the scraps once and cut more if possible.
- Dust the cut rounds lightly with flour and place them on a baking sheet lined with parchment paper, ensuring they do not touch.
- Cover the muffins loosely and let them proof for 30 minutes.
- Heat a dry cast-iron griddle or large skillet over medium-low heat.
- Place the proofed muffins on the hot griddle, leaving space between them. Cook for 6 to 8 minutes per side, until golden brown. Do not press down on them.
- Remove the muffins from the griddle and let them cool completely on a wire rack.
- To serve, split them open using a fork, not a knife, to preserve the nooks and crannies. Toast before serving.
Notes
- For best texture, split the cooled muffins using a fork instead of slicing with a knife. This action creates the signature nooks and crannies.
- These muffins freeze well. Cool completely, then place them in an airtight freezer bag for up to 3 months. Thaw overnight or toast directly from frozen.
- If you do not have buttermilk, mix 1 cup of milk with 1 tablespoon of white vinegar or lemon juice and let it sit for 5 minutes before using.
Nutrition
- Serving Size: 1 muffin
- Calories: 180
- Sugar: 2
- Sodium: 350
- Fat: 3
- Saturated Fat: 2
- Unsaturated Fat: 1
- Trans Fat: 0
- Carbohydrates: 34
- Fiber: 1
- Protein: 5
- Cholesterol: 10