

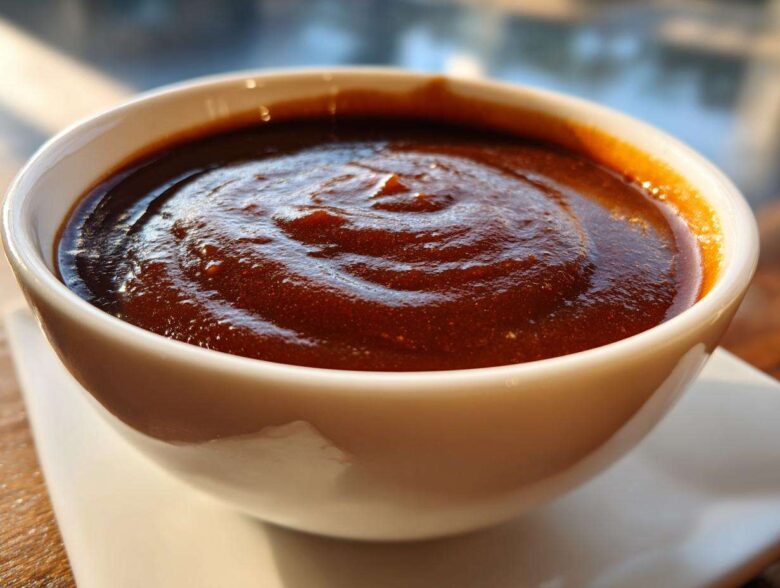
Oh, you know those meals that just hug you from the inside out? Mashed potatoes piled high, maybe a slice of perfect meatloaf? They all need one thing, and that thing is glorious, dark gravy. For years, I struggled trying to get that perfect, restaurant-quality sauce, and honestly? It always depended on having perfect pan drippings, which rarely happened!
But I cracked the code, my friend. I finally developed the absolute best homemade brown gravy that requires absolutely zero drippings. Seriously! This is my secret weapon for a rich, deeply savory sauce made completely from scratch, and we’re talking under 15 minutes total. It makes any comfort food taste epic! I still remember the first time I figured out this from scratch method—I felt like I finally belonged to the culinary club. I truly believe my approach to making a perfect roux gives this sauce the depth you’d expect from something that simmered for hours. If you want to know more about my cooking philosophy, check out my culinary journey here!
Why This Homemade Brown Gravy Recipe Works So Well (No Drippings Needed)
I know what you’re thinking: gravy without drippings? It won’t taste right! Trust me, this is the ultimate game-changer for weeknight meals. This recipe delivers a savory, thick brown gravy that coats your mashed potatoes beautifully, and it comes together faster than ordering takeout.
The whole magic trick relies on mastering the roux base first. That simple combination of butter and flour isn’t just for thickening; it’s where we build the flavor profile.
- Absolute need for speed: This is a true 15-minute wonder, making it the perfect Quick Beef Gravy Recipe when you’re hungry *now*.
- No more waiting for roasts: Since we don’t rely on drippings, you can whip this up anytime you need an Easy Brown Gravy from Scratch.
- Incredible texture: The proper roux technique guarantees no lumps, resulting in that smooth, almost decadent texture everyone craves in a Thick Brown Gravy Recipe.
Speed and Simplicity: Quick Beef Gravy Recipe
Seriously, under fifteen minutes total! The beauty of using a flour and butter roux as the foundation is that it cooks fast. You cook the flour for just a minute or two until it smells nutty, add the liquid, and boom—you start thickening almost instantly. It’s the most dependable shortcut I’ve ever learned.
Achieving Rich Velvety Gravy Flavor
So, if we skip the beef drippings, where does that deep, satisfying flavor come from? It’s all about smart additions! We use a fantastic quality beef broth, which acts as our main backbone. But the secret flavor booster that truly mimics that deep roasted taste is a dash of Worcestershire sauce. It adds that earthy, umami note that makes this a truly Savory Sauce for Mashed Potatoes.
Essential Ingredients for Your Homemade Brown Gravy
Before we get to the stovetop action, we need to talk about the building blocks. When you’re making a homemade brown gravy that doesn’t rely on any drippings for flavor, every single ingredient has to pull its weight! I’m strict about the ratios here because making a good roux—that flour and fat paste—is foundational. If you mess up the ratio, you end up with thin soup or thick glue, and nobody wants that.
For our reliable From Scratch Gravy Sauce, we stick to a classic 1:1 ratio for the flour and fat. We use three tablespoons of unsalted butter and three tablespoons of all-purpose flour. It might seem like a tiny amount, but that’s what gives us the perfect starting point for thickening—no guessing games involved!
The liquid is just as important. You absolutely must use a good quality broth. I always specify low sodium beef broth because the salt content in standard broths can vary wildly, and we want to control the seasoning ourselves. This ensures our final product tastes rich, not like a salt lick!
Ingredient Notes and Substitutions for Brown Gravy No Drippings Needed
Since we’re making this recipe completely flexible, let’s chat about swaps, mainly for the broth, since that’s what dictates the overall color and deepness of the flavor.
If you don’t have beef broth on hand, don’t panic! You can totally use chicken broth or even nice vegetable broth. Just know that a lighter broth will give you a lighter overall gravy color. If you choose a non-low-sodium option, taste before you add any extra salt at the end. Seriously, you might not need any at all! For the very best flavor that rivals any roast dinner you’ve ever had, grab the highest quality broth you can find. It makes a huge difference in this type of Brown Gravy No Drippings Needed recipe.
Step-by-Step Instructions: How to Make Brown Gravy with Broth
Alright, this is where the magic really happens! Making a delicious stovetop gravy relies entirely on correctly preparing the roux first. Don’t rush this part, but don’t linger either! We are aiming for that perfect balance of cooked flour flavor without burning it. Trust me, burned flour tastes bitter, and nobody wants that in their cozy side dish!
If you want to read my full guide on mastering sauces and flavor building, there’s some extra behind-the-scenes stuff over on the main blog!
Creating the Perfect Flour and Butter Roux Gravy Base
First up, get your medium saucepan over medium heat. Melt down your three tablespoons of butter—it should look glossy and smooth. Now, quickly whisk in your three tablespoons of flour. You’re making a paste! Keep stirring constantly for about one to two minutes. You’re looking for it to change color from white dough to a lovely, light peanut butter shade. That means the raw flour taste is gone! If you want a super dark, deep flavor, you can cook it a bit longer, maybe three minutes, but you have to watch it like a hawk because it can go from perfect to burnt way too fast!
Simmering and Seasoning Your Stovetop Comfort Food Gravy
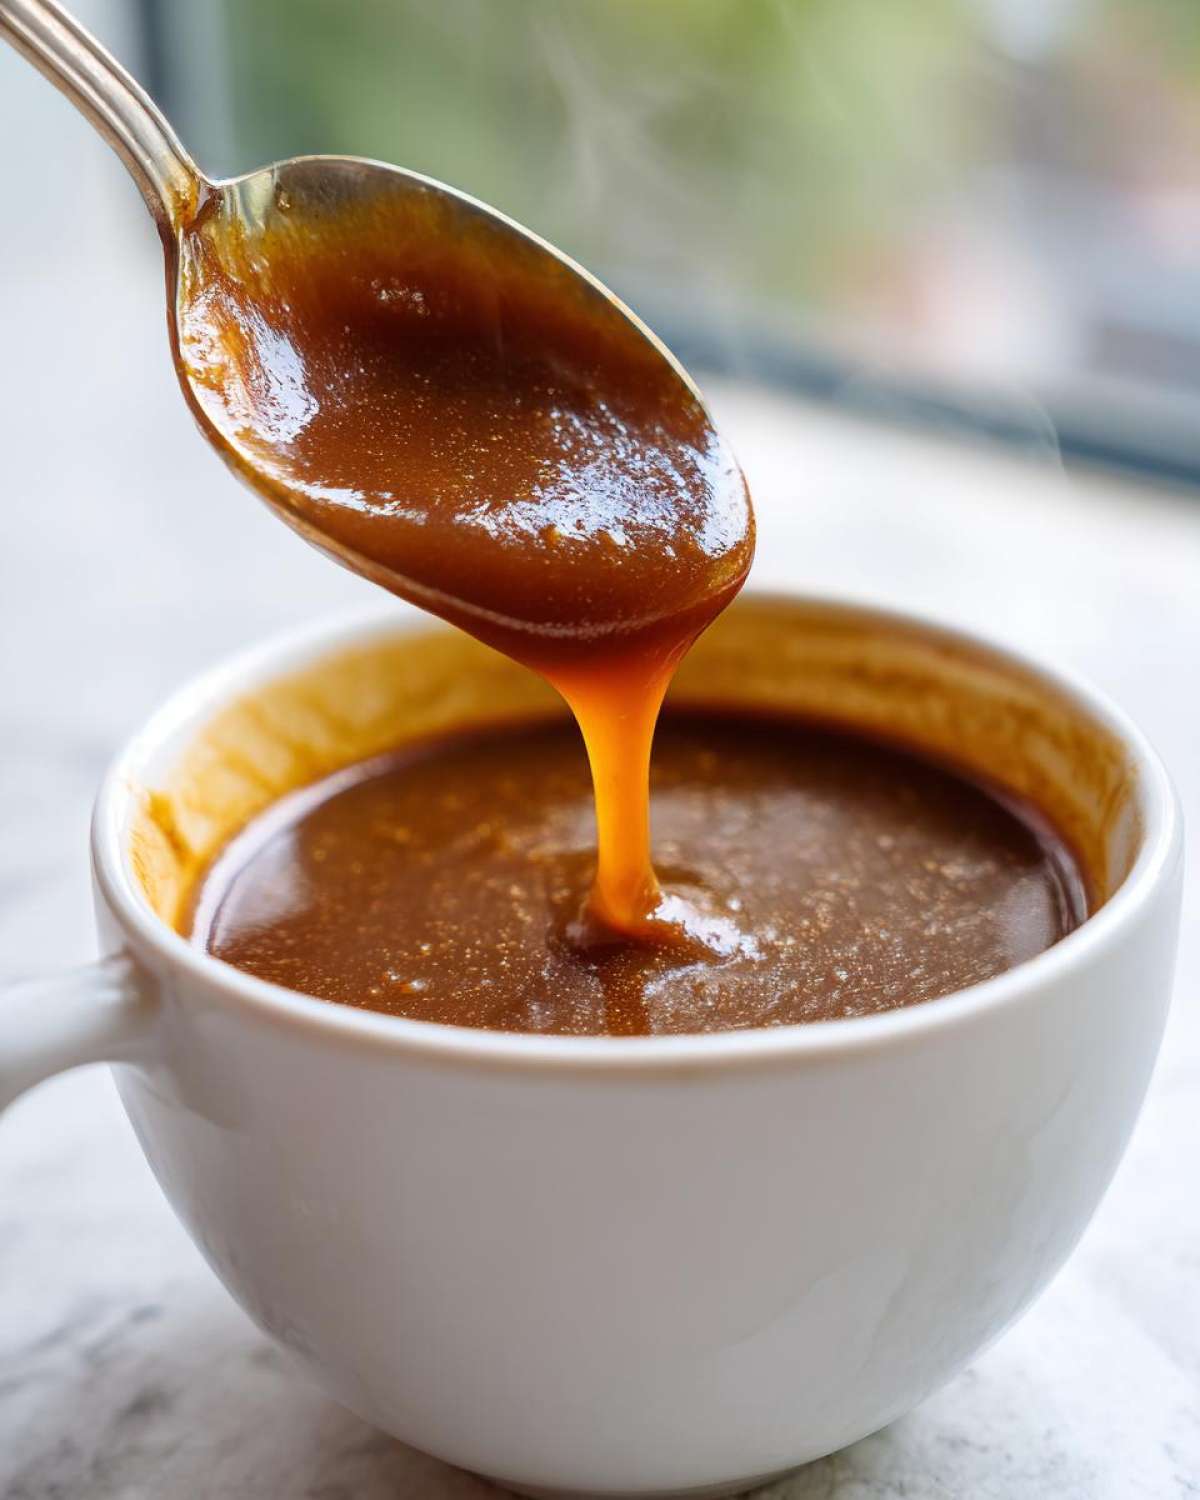
Once your roux is perfectly colored, it’s time to introduce the beef broth. This is delicate! You need to add the broth really slowly, whisking non-stop. Pour in just a small splash, whisk until it smooths out completely, and *then* add another splash. Keep going until all two cups are incorporated and your mixture is silky smooth—zero lumps allowed! Bring that up to a gentle simmer. That’s when you know the thickening process has started. Stir in your Worcestershire sauce right about now, along with the onion powder, garlic powder, and pepper. Let it bubble gently for the final three to five minutes until it’s coating the back of a spoon perfectly. Taste it last, and adjust that salt if your broth was shy!
Tips for the Best Homemade Gravy Every Time
Look, even with the best recipe in the world, gravy can sometimes have a mind of its own! That’s why I always keep these little magician tricks up my sleeve. Achieving that restaurant-quality sheen and perfect thickness isn’t about following the recipe exactly; it’s about knowing how to react when the temperature changes or when you’ve cooked the roux a little too long. Don’t sweat it if it’s not perfect immediately—gravy is forgiving if you treat it right.
Mastering temperature is everything here. If your heat is too high when you add the broth, you risk boiling it too aggressively, which can cause the starches to tighten up too quickly. Keep it at a steady simmer—that gentle bubbling is your friend. It allows the starch molecules in the flour time to fully hydrate and create that smooth, luxurious coat you’re aiming for.
Troubleshooting Common Issues with Homemade Brown Gravy
So, what if you followed the steps perfectly and you still have a liquidy mess? First, don’t panic and don’t add more flour directly to the pot! That’s the fastest way to end up with sticky clumps, and nobody wants that surprise in their Savory Sauce for Mashed Potatoes. Instead, just let it simmer uncovered for a few more minutes. Sometimes, it just needs a little evaporation time to concentrate.
If you’ve simmered it for five extra minutes and it’s *still* too thin, make a slurry. This is my go-to fix. Take one tablespoon of cornstarch (or even a little flour if you prefer) and mix it with two tablespoons of *cold* water or broth in a separate little cup until it’s absolutely smooth—I mean velvety smooth. Then, drizzle that slurry into your gently simmering gravy while whisking constantly. It thickens up incredibly fast, usually within 30 seconds to a minute.
On the flip side, if you cooked your roux just a tiny bit too long, or maybe your broth was just too concentrated, and now your gravy is like wallpaper paste? Don’t throw it out! The fix is simple: add heat until the gravy is warm again, and then whisk in a splash of warm water or warm broth, just a tablespoon at a time. Warm liquid incorporates much better than cold when you are trying to loosen a sauce. Keep adding small amounts and whisking until it reaches the perfect consistency for pouring over your dinner.
Serving Suggestions for Your Brown Gravy for Meatloaf
Honestly, once you have this recipe in your pocket, the gravy possibilities are endless. I mean, yes, it’s designed to be the perfect companion for a hearty Brown Gravy for Meatloaf, but don’t stop there!
This sauce is so robust thanks to that rich roux base; it elevates anything humble it touches. I always make a double batch now because it disappears so fast. It’s truly the definition of Stovetop Comfort Food Gravy.
You HAVE to try it over these classics:
- Mashed Potatoes: Obviously! This is why we made it. It soaks right into those fluffy peaks.
- Roast Beef or Turkey: It’s the only Holiday Side Dish Gravy you’ll ever need if you don’t have drippings.
- Pork Chops: A quick pan-fry on some chops and then smother them in this sauce—perfection!
- Biscuits and Gravy: Swap out the sausage gravy for this savory version for a nice twist.
- Mashed Root Vegetables: Try it over parsnips or celery root for a change of pace.
If you’re making a big roast, remember this is your trusty backup plan. It’s the most versatile sauce, easily transforming any simple plate into a complete, soul-satisfying meal in minutes.
Storage and Reheating Instructions for This Homemade Brown Gravy Recipe
Now, the best part about making a staple like this Homemade Brown Gravy Recipe is that you can totally make it ahead! If you’re planning a big meal, I often whip this up the day before. It saves so much stress when company arrives, I promise you.
Once your gravy has cooled down just a bit—you don’t want to seal in scalding hot steam—transfer it into an airtight container. A glass jar with a tight lid is perfect for this. It keeps wonderfully in the refrigerator for about four days. I’ve pushed it to five, but I find four is the sweet spot for the absolute best flavor.
Don’t Panic When You See It Cold!
Here’s the thing you need to remember about flour-based sauces: they firm up when they cool down. Seriously! When you pull that container out after a night in the fridge, it will look like beige cement. That is totally normal, and that’s why we’re not worried one bit. It just means our roux did its job perfectly!
The key to reheating is adding liquid slowly while you whisk. Do not just try to heat it up solid in the microwave. Take out the amount you need and put it in a small saucepan over medium-low heat. As it starts to melt, whisk gently. If it’s still struggling to flow, add a splash of warm water or warm broth—use what you used initially! Adding warm liquid helps it incorporate smoothly right away.
Keep whisking gently as it heats up until it flows beautifully again. Remember, you’re aiming for that perfect pourable consistency you achieved right off the stove. Since this recipe relies on broth rather than drippings, it tends to reheat even better and smoother than those drippy versions!
Frequently Asked Questions About Making Brown Gravy No Drippings Needed
It seems everyone has a question about getting that perfect sauce without the hassle of pan drippings. I get it! Gravy sauces can be tricky, but once you trust the roux method, you’ll never go back, I promise. Here are the few things folks ask me most often about making this homemade brown gravy!
Can I make this homemade brown gravy thicker?
Oh, absolutely! Sometimes, depending on your broth, it can be a touch thinner than you’d prefer for smothering, say, a giant pile of mashed potatoes! The easiest way is simply to keep simmering it longer. As the liquid reduces, it naturally thickens up. Just keep that heat on medium-low and whisk occasionally.
If you’re in a huge hurry, I recommend the cornstarch slurry trick. Mix one tablespoon of cornstarch with two tablespoons of *cold* water or broth in a separate cup until it’s totally smooth—like milk. Slowly drizzle that into your simmering gravy while you whisk like crazy. It thickens super fast, maybe in 30 seconds, so don’t walk away!
How long does the roux need to cook for the best color?
This is my biggest tip for E-E-A-T—cooking that flour and butter together is where the real flavor develops! For a standard, lighter brown gravy that’s perfect for chicken or poultry, stick to about one to two minutes until it just hits that light peanut butter shade. It should smell nutty, not like burnt toast!
But if you want that deep, rich color—the one you see in steakhouses—you can push it a little further, maybe up to 3 or 4 minutes max. You really have to watch it closely here, though. If you see any black specks, stop immediately and start over, because that bitterness will ruin your whole batch of Easy Brown Gravy From Scratch!
Is this recipe suitable for making a savory sauce for mashed potatoes?
Suitable? Darling, this recipe was practically invented for mashed potatoes! It is the perfect pairing. Because we’ve made sure this Quick Beef Gravy Recipe is rich and velvety, it doesn’t just sit on top of creamy potatoes—it sinks right in and mingles beautifully. It’s the perfect consistency for providing that savory coat that makes mashed potatoes feel like a celebration.
If you ever need a quick way to elevate mashed potatoes for guests, whip up this sauce instead of reaching for the powder packets. You can reach out anytime if you have other sauce questions over on my contact page!
Nutritional Estimates for This Quick Homemade Brown Gravy
Okay, so we all know that when we’re making a beautiful, soul-satisfying, deeply flavorful pan gravy, we aren’t precisely aiming for ‘diet food,’ right? But for those of you keeping track, I compiled the estimated nutrition facts for this recipe. It’s good to know what you’re working with, especially when you’re drizzling this over everything—and trust me, you will want to!
Remember, this recipe makes about two cups total, and I’ve based these estimates on a standard quarter-cup serving size. That feels like a good, hearty dollop for my mashed potatoes, but you can adjust!
Here’s what the numbers generally look like for one serving:
- Calories: ~75
- Fat: ~5g (with about 3g saturated)
- Carbohydrates: ~5g
- Protein: ~2g
- Sugar: Less than 1g
- Sodium: ~250mg
Now, please take these numbers with a massive grain of salt—pun intended! These are just estimates based on standard supermarket shelf ingredients, primarily using low-sodium broth. If you decide to use regular broth—which has higher sodium—or if you use a fancier, richer butter, those numbers are going to shift around a bit, especially the sodium content. For full transparency on how I compile these figures, you can read my full notes on my nutritional disclaimer page.
The big takeaway is that since this is a homemade brown gravy made from scratch with simple ingredients, you control everything! If you’re worried about sodium, cut the added salt entirely, or use vegetable broth instead of beef. Happy drizzling!
Share Your Experience Making This Easy Brown Gravy From Scratch
That’s it! You’ve mastered the **homemade brown gravy**! No more sad dinners or relying on gravy mixes, because you now know the secret to the perfect roux base that works every single time, even without any pan drippings hanging around.
I really, truly want to hear how this turned out for you. Did you use it over a big pile of mashed potatoes? Did you smother your meatloaf in it until it was swimming? Or maybe you even tried that wild idea of drizzling it over roast beef? Tell me everything!
Whenever you have a moment, please leave a quick rating for this recipe right below. Five stars if it saved your dinner, which I suspect it will! And if you snap a picture of your beautiful, silky-smooth sauce, tag me on social media. I absolutely love seeing your creations. Knowing that my little secret for an **Easy Brown Gravy From Scratch** is making someone’s dinner table happier is what keeps me cooking in the kitchen every day!
PrintBest Homemade Brown Gravy Without Drippings

Make a rich, savory brown gravy from scratch using a simple roux base. This recipe requires no meat drippings and is ready in under 15 minutes, perfect for mashed potatoes or roast meat.
- Prep Time: 5 min
- Cook Time: 10 min
- Total Time: 15 min
- Yield: 2 cups
- Category: Sauce
- Method: Stovetop
- Cuisine: American
- Diet: Vegetarian
Ingredients
- 3 tablespoons unsalted butter
- 3 tablespoons all-purpose flour
- 2 cups beef broth (low sodium preferred)
- 1 teaspoon Worcestershire sauce
- 1/2 teaspoon onion powder
- 1/4 teaspoon garlic powder
- 1/4 teaspoon black pepper
- Pinch of salt (adjust to taste)
Instructions
- Melt the butter in a medium saucepan over medium heat.
- Whisk the flour into the melted butter until a smooth paste (roux) forms. Cook this roux for 1 to 2 minutes, stirring constantly, until it turns a light peanut butter color. Do not let it burn.
- Slowly whisk in the beef broth, a little at a time, ensuring no lumps form before adding more liquid.
- Bring the mixture to a simmer, whisking frequently. The gravy will begin to thicken as it simmers.
- Stir in the Worcestershire sauce, onion powder, garlic powder, and pepper.
- Continue to simmer for 3 to 5 minutes until the gravy reaches your desired thickness.
- Taste the gravy and add a pinch of salt if needed, depending on the saltiness of your broth. Serve hot.
Notes
- For a deeper brown color, cook the roux for an extra minute until it is a darker brown shade before adding the broth.
- If the gravy becomes too thick upon standing, whisk in a tablespoon of warm water or broth until it loosens.
- Use chicken broth or vegetable broth for a lighter brown gravy base if beef broth is unavailable.
Nutrition
- Serving Size: 1/4 cup
- Calories: 75
- Sugar: 0.5
- Sodium: 250
- Fat: 5
- Saturated Fat: 3
- Unsaturated Fat: 2
- Trans Fat: 0
- Carbohydrates: 5
- Fiber: 0.2
- Protein: 2
- Cholesterol: 15