

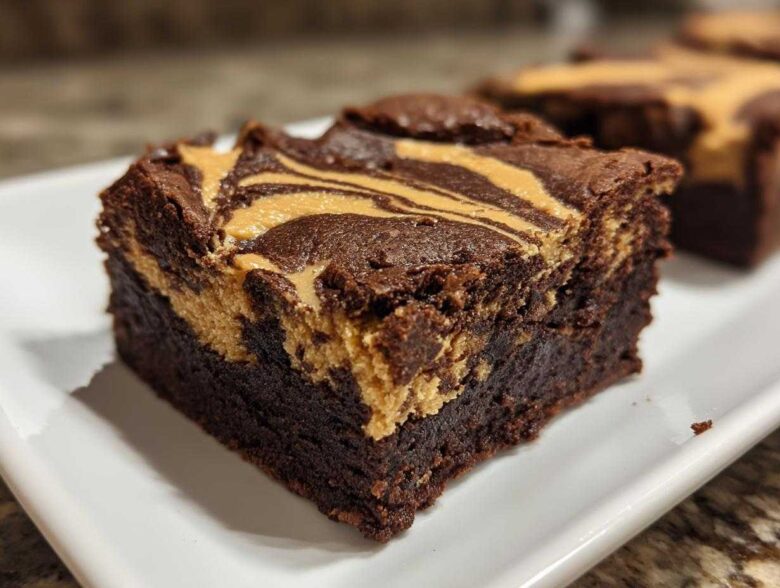
Oh my gosh, listen to me—if you’ve ever chased that perfect brownie texture, you know the struggle. Too much flour and you get cake; too much heat and you get dry dust. But finding that magical spot where the chocolate is dark, rich, and unbelievably gooey? That’s everything. And when you swirl in creamy peanut butter? Magic happens!
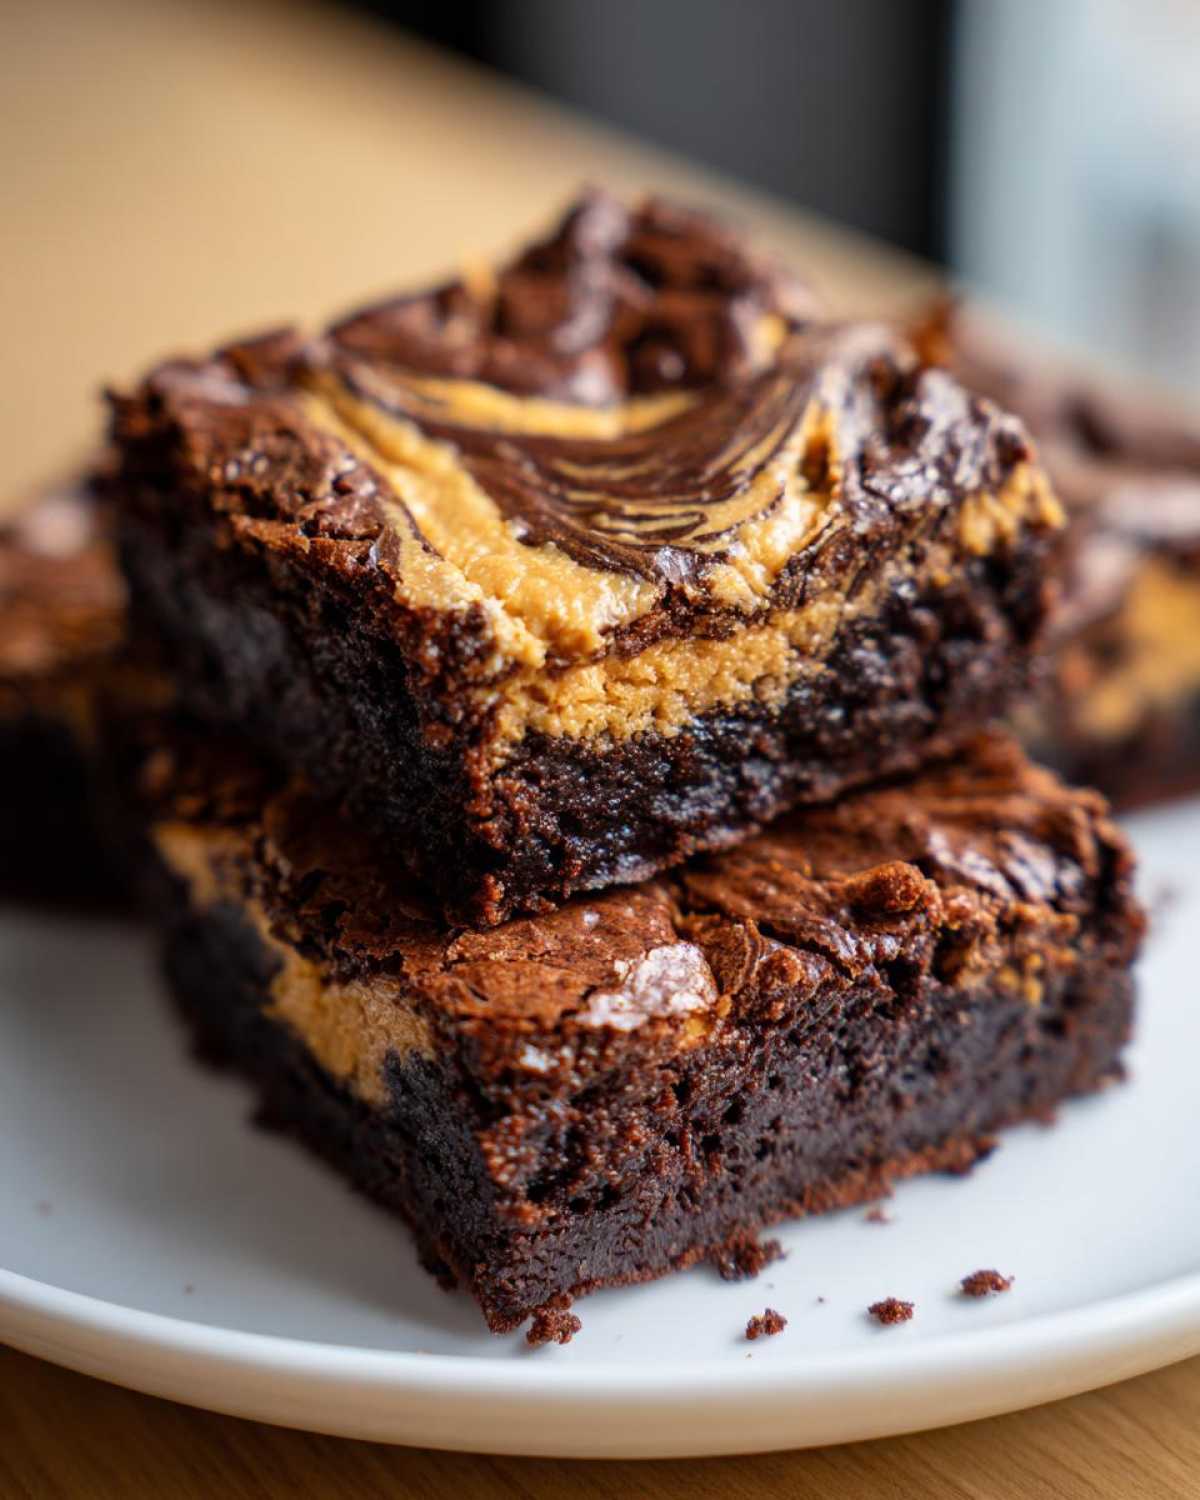
I’ve definitely messed up batches trying to rush the swirl part. But this recipe for peanut butter swirl brownies is totally foolproof. It’s my go-to because it skips the weird ingredients and just focuses on technique. We use melted butter and not too much flour, which is the secret handshake for ultimate fudginess. Trust me, this method of layering the batters is what gives you that gorgeous, marbled effect every single time. It’s pure comfort food baked from scratch!
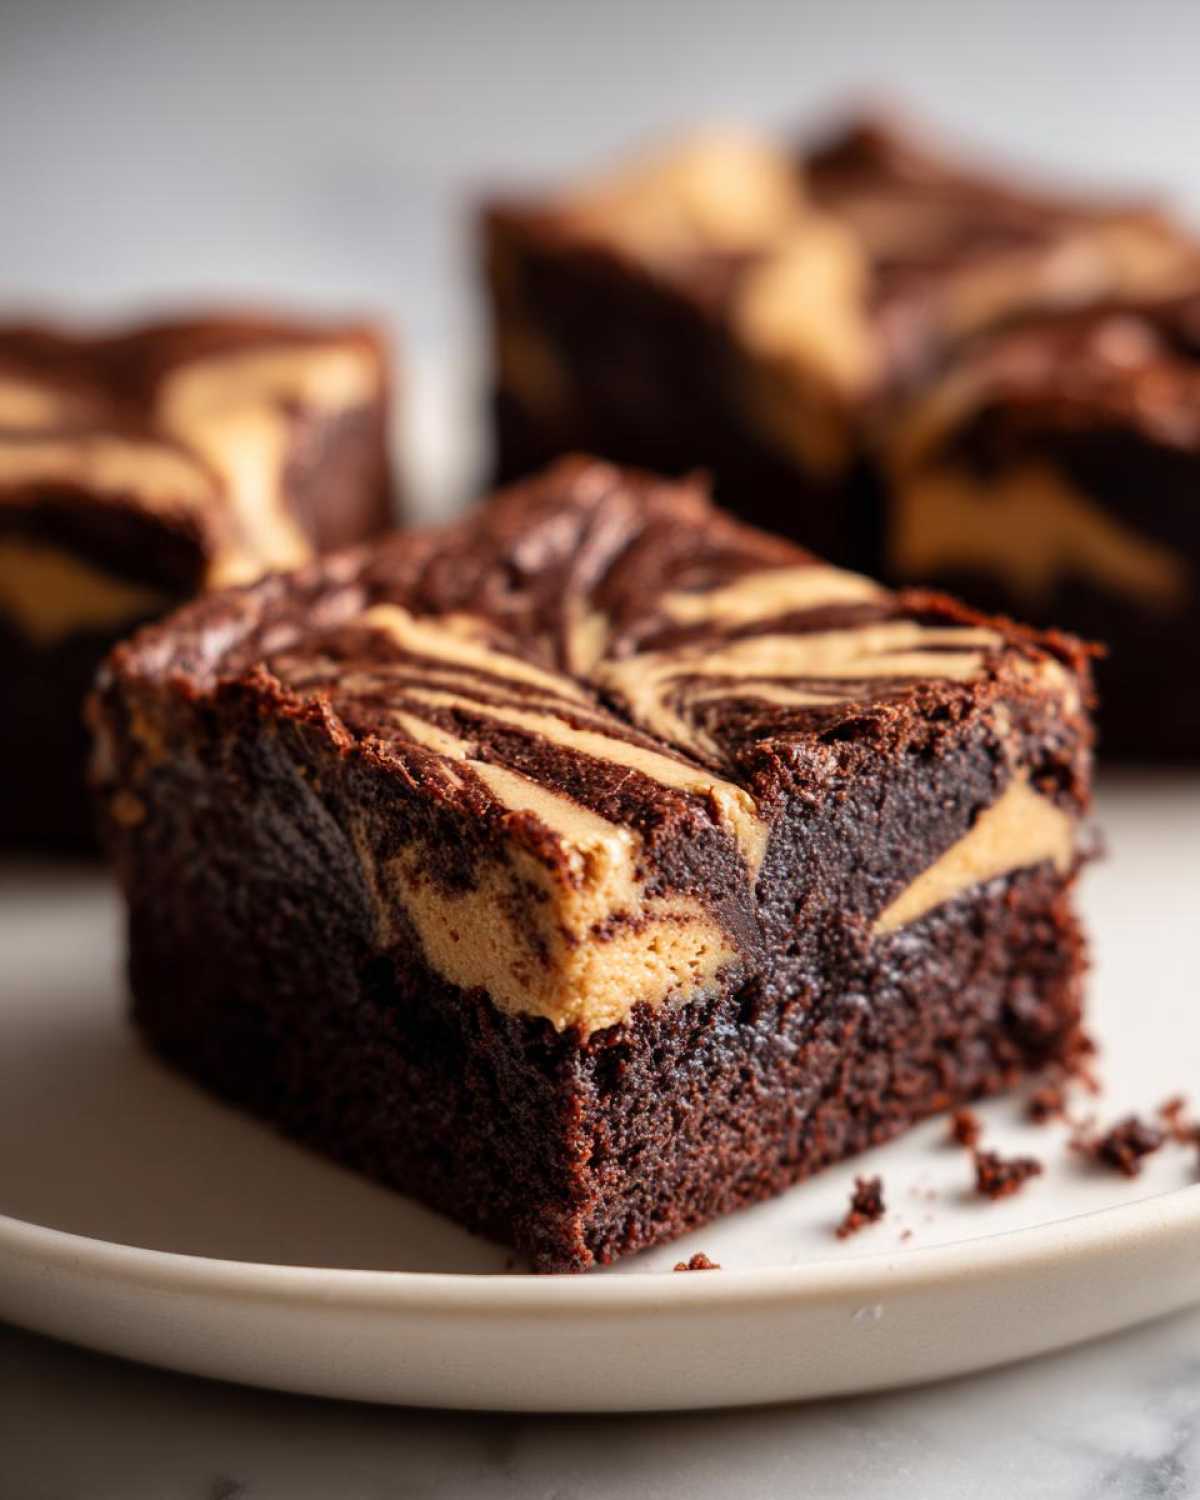
Why You Will Love These Peanut Butter Swirl Brownies
Seriously, why would you NOT love these? I promise you, these are the peanut butter swirl brownies you’ve been searching for. They hit every note:
- They are genuinely fudgy and moist—no dry corners here!
- Minimal effort for maximum visual impact thanks to that beautiful marble.
- We use simple ingredients, so you probably have everything on hand right now.
- They are perfect for movie nights or just when you need a serious chocolate fix.
Essential Ingredients for Perfect Peanut Butter Swirl Brownies
Okay, looking at the list of ingredients might look long, but it breaks down so easily! We essentially have two teams here: the rich, dark chocolate base, and the sweet, salty peanut butter filling. Get these right, and you’re halfway to brownie heaven. Remember that high-quality chocolate makes a huge difference in your final flavor, especially when you’re making something this decadent!
For unbelievable depth of flavor in the chocolate part, make sure you’re using good, unsweetened cocoa powder. I love using Dutch-processed if I have it, but any decent powder works. Also, that slight hint of salt? Don’t skip it! It just makes the chocolate sing louder.
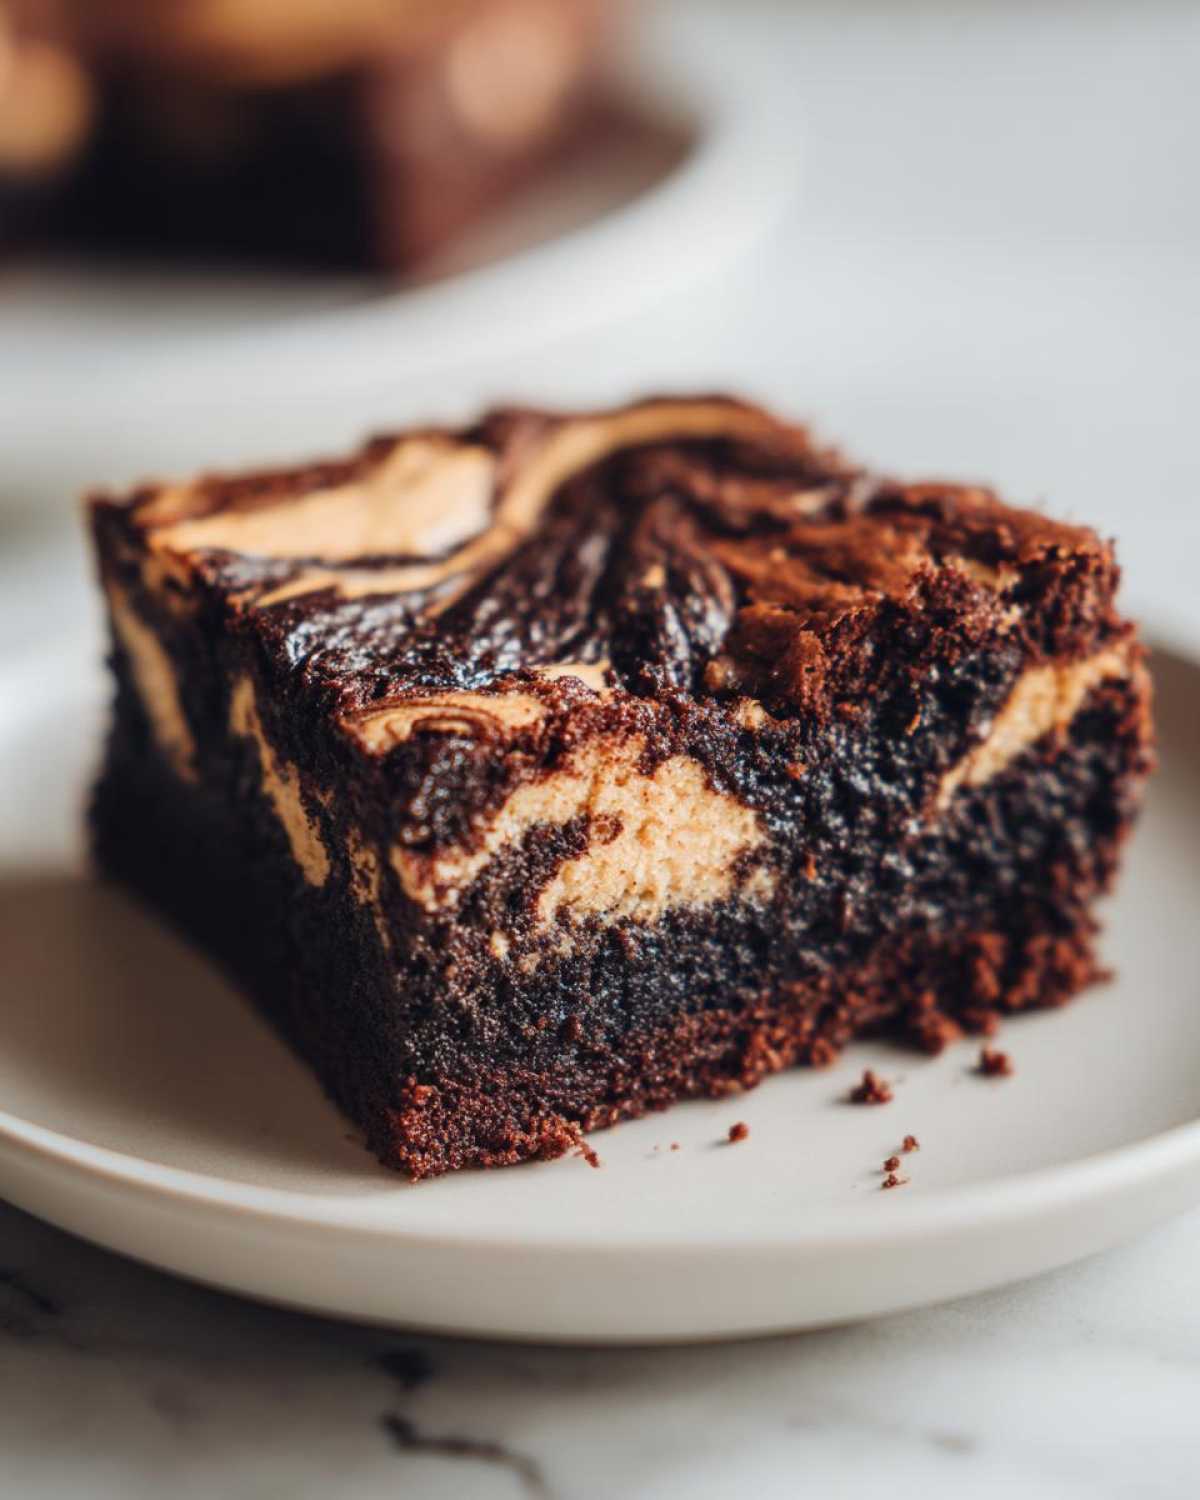
Here’s what you need for the best peanut butter swirl brownies, yielding about 16 squares:
The Chocolate Base Ingredients
This is where all the fudgy magic happens. You need:
- 1 cup (2 sticks) unsalted butter, melted—make sure it’s cooled slightly before mixing!
- 1 3/4 cups granulated sugar
- 3/4 cup packed light brown sugar—that molasses flavor is crucial for depth!
- 4 large eggs—room temperature is always best for smoother mixing.
- 1 tablespoon vanilla extract
- 3/4 cup unsweetened cocoa powder
- 1 cup all-purpose flour
- 1/2 teaspoon salt
- 1 cup semi-sweet chocolate chips—I usually throw in a few dark chocolate chips too, just because!
The Creamy Peanut Butter Swirl
This part is so easy, it feels like cheating! You just need three things:
- 1 cup creamy peanut butter—use creamy, not natural messy style, or it gets too stiff!
- 1/4 cup powdered sugar
- 2 tablespoons milk—I sometimes use a splash of the chocolate milk from my favorite chocolate milk recipe if I’m feeling wild, but regular milk is perfect.
Everything else you need is listed right there! Get your ingredients measured, and we can move on to setting up the pan!
Equipment Needed for Your Gooey Brownie Recipe
You don’t need a fancy stand mixer for these because we are starting with melted butter, which is a huge win! But you still need a few things to make sure the process goes smoothly and you get those gorgeous clean cuts later on. Trust me, preparation matters when you’re dealing with something this rich.
Make sure you have these basics ready before you start melting the butter:
- A sturdy 9×13 inch baking pan. This size is perfect for that ideal ratio of fudgy depth!
- Parchment paper. This is non-negotiable for me. You need that overhang so you can lift the whole block out later.
- Two mixing bowls—one for the wet ingredients and one for the dry.
- A whisk for combining the sugars and eggs, and a rubber spatula for folding in the flour.
- A small bowl just for whipping up that fantastic peanut butter swirl mixture.
- A butter knife or a thin wooden skewer for creating the swirl design itself.
That’s it! No complicated gadgets required. Just good bowls and your two favorite spatulas, and you’re ready to bake some amazing comfort food.
Step-by-Step Instructions for Making Peanut Butter Swirl Brownies
Now for the fun part! Baking these peanut butter swirl brownies is a process, but it’s not a long one. The key to gooey brownies is patience in mixing and cooling—that’s my biggest expert tip to share with you. We are mixing everything in just a couple of bowls, so cleanup isn’t too terrible, either!
Preparing the Pan and Dry Ingredients
First things first: get that oven cranked up to 350°F (175°C). While it’s heating, take that 9×13 inch pan and line it with parchment paper, making sure you leave plenty hanging over the sides. That overhang acts like handles, letting you lift the whole finished block out easily later. Give those paper handles a tiny spritz of cooking spray so the brownies don’t cling anywhere. Set that aside and let’s move on to the mixing bowls.
Creating the Fudgy Brownie Base
Grab your big bowl and whisk together that melted butter with both the granulated and brown sugars. Get them really combined—it should look uniform. Then beat in your four eggs, one by one, mixing thoroughly after each one goes in, followed by the vanilla. Now for the dry stuff! Whisk your cocoa powder and flour together in a separate bowl first. This makes sure the leavening agents and cocoa are evenly distributed. Gradually add these combined dry ingredients into the wet mixture. Stop mixing when you just start to see the flour disappear. Seriously, stop! Overmixing is the enemy of fudgy! Finally, gently fold in those semi-sweet chocolate chips. You want this mixture thick and glossy.
Assembling and Mastering the Peanut Butter Swirl Technique
Before we layer, we need to whip up the swirl topping. In a small bowl, just mix that creamy peanut butter with the powdered sugar and milk until it’s smooth and easily spoonable. Now, take about two-thirds of your amazing brownie batter and spread it evenly into your prepared pan. Drop spoonfuls of your peanut butter mixture all over the top of that chocolate layer. Then, dollop the remaining one-third of the plain brownie batter strategically over the peanut butter spots. This layering locks the peanut butter in place! Now, for the showstopper: Take a butter knife or skewer and gently run it through the layers two or three times total to create that beautiful marbled effect. Do NOT over-swirl, or you’ll just end up with one big tan brick! You want distinct ribbons of chocolate and peanut butter. Pop this into the hot oven for about 30 to 35 minutes. Remember, we’re looking for moist crumbs on a toothpick, not wet batter, like you’d see when making a fudgy mug cake. Once they’re done, let them chill completely before slicing them like those perfect chocolate crinkle cookies.
Tips for Achieving the Best Peanut Butter Swirl Technique
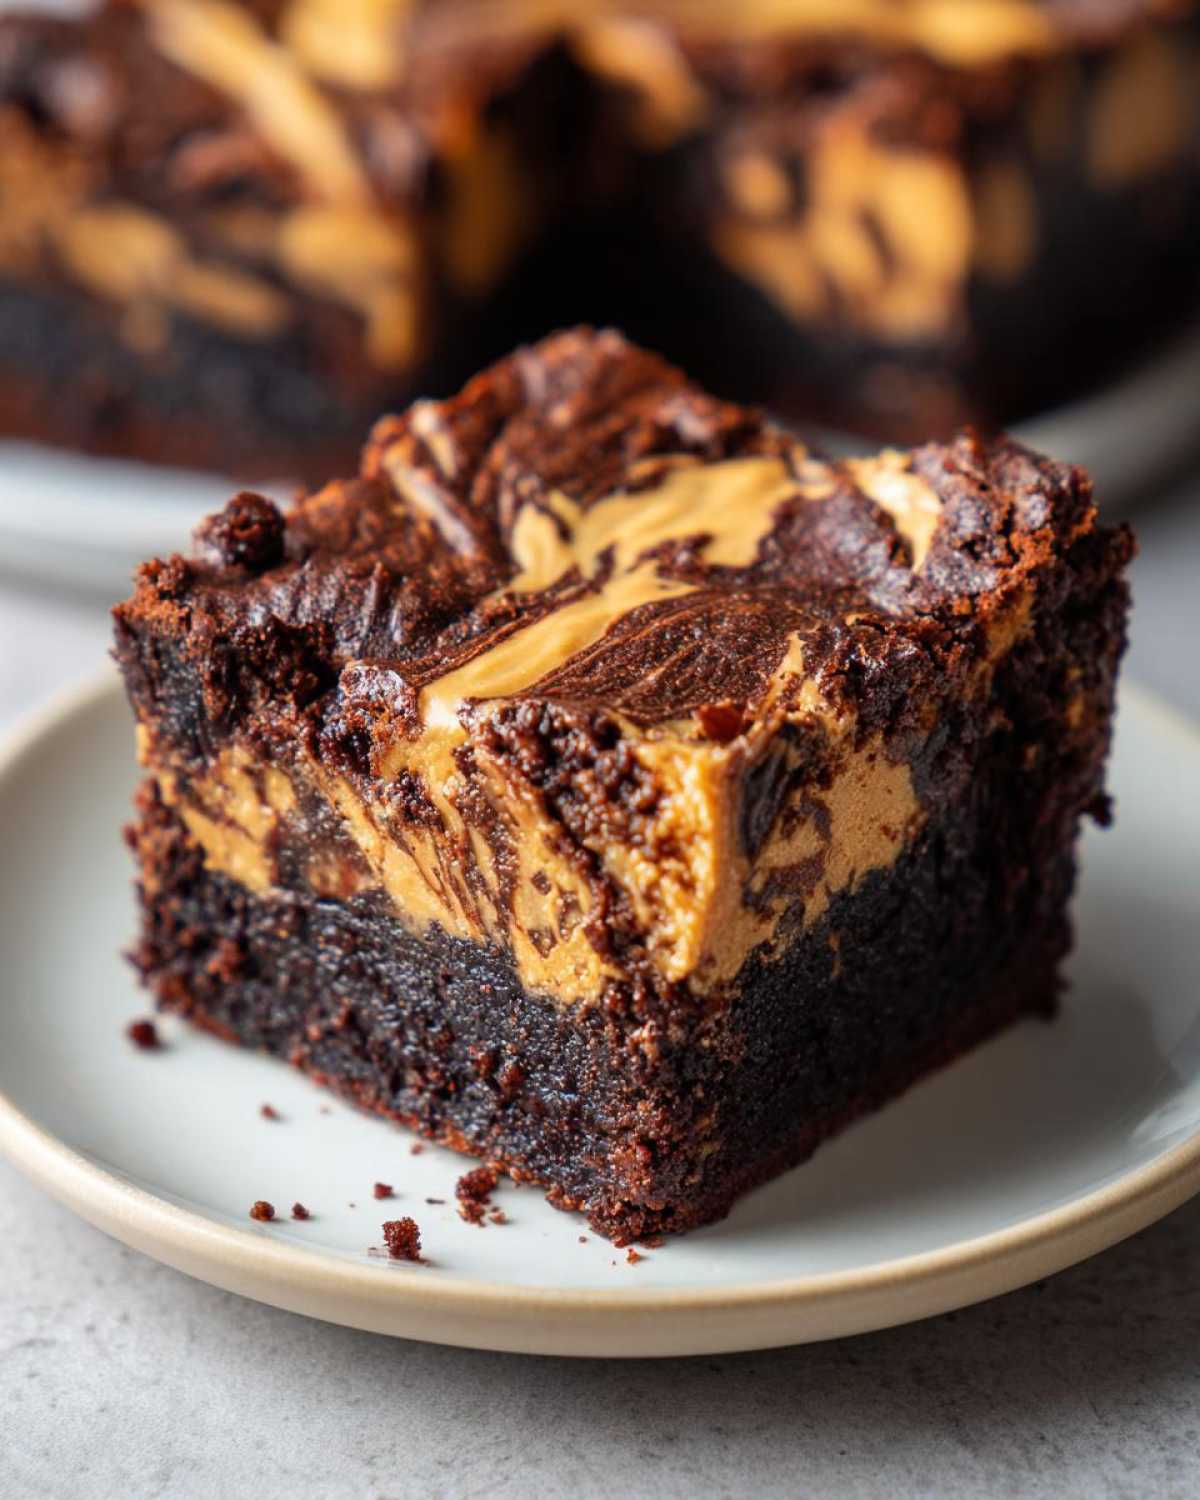
Okay, we’ve mixed, we’ve layered, and now the pan is heading into the oven. But I want to talk for a minute about technique because this is where the difference between a good brownie and a truly spectacular one happens. Getting those gorgeous ribbons in your peanut butter swirl brownies isn’t just about throwing things in; it’s about knowing when to stop!
My biggest piece of advice, and I learned this the hard way making things like my candied yams, is that you must fight the urge to stir too much. When you’re swirling, you’re tempting fate! You want marbling, not a uniform color. If you take that skewer and go through the batter more than three times, you’re going to mix the peanut butter completely into the chocolate base. It’ll still taste great, but you lose that visual pop and the slightly different texture where the two components meet.
Also, let’s talk about cooling. I know, I know, the smell wafting from the cooling rack is pure torture when you’ve just pulled a batch of rich chocolate out of the oven. But if you try to slice these while they are even slightly warm, you’ll end up with chocolate mud. Seriously, don’t do it!
For the absolute fudgiest, cleanest squares, you need patience. Let them cool completely—and I mean completely—on the rack first. If you can manage it, wrap the whole cooled slab tightly in plastic wrap and let it sit on the counter for a few hours, or even overnight. This allows the fats and moisture to redistribute perfectly. When you lift them out using those parchment handles and cut them, they will slice like butter, giving you those perfect, firm, yet incredibly gooey squares of peanut butter swirl brownies.
Finally, remember the peanut butter mixture itself has to be the right consistency. Too runny, and it sinks right to the bottom. Mine has to be thick enough to hold its dolloped shape when I drop it in. If yours seems a little stiff, just add half a teaspoon more milk at a time until it feels like thick frosting. That balance ensures your swirl stays right where you put it on top of the base batter!
Storage and Reheating Instructions for Your Chocolate Peanut Butter Dessert
Okay, so you’ve made the perfect batch—you resisted slicing them warm, you only swirled three times, and now you have a beautiful, marbled pan of pure joy. Now what? We have to protect this masterpiece!
These are so rich that they actually hang onto moisture really well, which is great news for us leftover lovers. For short-term storage, like if you plan on eating them over the next couple of days, keeping them at room temperature is honestly the best way to preserve that fudgy texture. Humidity can be an issue, though, so containment is key.
Grab an airtight container—I use one of those glass Tupperware style ones—and layer the brownies with little squares of parchment paper or wax paper between the layers. This stops the peanut butter swirl part from sticking to the chocolate top of the brownie underneath it. Store this container on the counter for up to three days. They stay perfectly soft and gooey this way!
Can I keep Them in the Fridge?
You absolutely can, but you have to know what you’re signing up for! If you put these rich brownies in the refrigerator, they firm up quite a bit because the butter solidifies. They turn into a wonderfully dense, almost truffle-like square, which some people actually prefer!
If you keep them chilled in an airtight container, they’ll last closer to a week. Just make sure, if you prefer that softer, more gooey texture, you let them sit on the counter for about 30 minutes before serving them cold. You can treat them almost like a refrigerated brownie refrigerator cake!
Warming Them Up for That Fresh-From-The-Oven Taste
Sometimes you just need that warm, melted chocolate moment, right? Reheating is easy, but we have to be gentle to avoid drying them out.
For a single serving, pop the brownie square on a microwave-safe plate. Heat it for just 10 to 15 seconds. If you go much longer, the edges get tough! That quick burst warms the chocolate chips inside and makes the peanut butter layer beautifully melty again without nuking the moisture out of the rest of the bar.
If you’re doing a whole batch or just prefer using the oven, wrap a few squares loosely in foil. Heat them in a 300°F oven for about 8 minutes. The foil traps the steam, keeping everything wonderfully soft while the outside warms up. This is the best way to revive one that’s been sitting in the fridge for a few days!
Common Questions About Making Peanut Butter Swirl Brownies
I get so many emails asking little clarifying questions, which totally makes sense because baking is science! Even with a straightforward recipe for peanut butter swirl brownies, people always wonder about tweaks and tests. I’ve bundled up the most frequent things I hear about achieving that perfect texture.
Can I use crunchy peanut butter instead of creamy for the swirl?
Oh, you totally can! If you love texture, crunchy is a fantastic swap. But here’s my warning: crunchy peanut butter tends to be drier and stiffer than the creamy version we used here. If you use crunchy, you might need to add an extra teaspoon or two of milk to the swirl mixture to keep it soft enough to dollop and swirl properly. You want those beautiful, distinct ribbons, not clumps that break off when you try to marble them!
How can I make sure these are truly Fudgy Brownies and not cakey?
This is the absolute core concern for any brownie baker! We covered a lot of this in the tips section, but let’s recap the fudgy foundation. The secret is the fat-to-flour ratio—we use a lot of butter and melted chocolate chips, and relatively less flour compared to a cake. The most important thing you can do right now, though, is resist overmixing once the flour goes in. Stop stirring as soon as you can’t see dry streaks. If you overdevelop that gluten, you get chewiness, but if you overbake them, you get cakey dryness. Both are the opposite of what we want in these gooey brownie recipes!
How do I know when my Swirled Brownies are done baking?
I preach the three-step test for doneness constantly! The visual cue is that slightly dry edge—the brownie should almost look like it’s just starting to pull away from the parchment paper sides of your pan. The toothpick test is next: I told you to look for moist crumbs, not wet batter. If the toothpick comes out completely clean, pull them out immediately because they will overbake while cooling! Finally, give the pan a very gentle shake. If the center barely jiggles and the edges look set, they’re finished. Remember, they keep cooking outside the oven, so we always err on the side of slightly underdone for the best result.
Can I skip the baking and use a box mix for this Chocolate Peanut Butter Dessert?
Look, I love a shortcut sometimes, especially when I’m whipping up a quick batch of my famous blueberry muffins, but for this specific flavor profile? I really wouldn’t recommend it. Box mixes are often designed to yield a slightly cakier result, and they rarely have enough fat or sugar to support a heavy swirl like this without it sinking straight to the bottom. If you want that true, decadent, homemade vibe, stick to this recipe. You’ve already seen how fast the base comes together—it’s hardly any more work than following box directions!
Serving Suggestions for These Comfort Food Baking Treats
Once you’ve managed the hardest part—waiting for them to cool so you can slice those beautiful marbled brownies—you get to enjoy the best part: the serving suggestion phase! Because these are so incredibly rich with both dark chocolate and salty peanut butter, you don’t need much to dress them up, but a few little additions can take them from great to unforgettable.
If you’re serving these as a standalone snack or packing them up for a party, they are absolutely perfect on their own. The combination of salty and sweet is already doing all the heavy lifting! A simple dusting of powdered sugar right before cutting them is elegant enough for any gathering.
However, if you are making these for a cozy movie night, you have to try them warm! Take a single square, wrap it loosely in aluminum foil, and heat it for about 10 seconds in the microwave. Then, top it with a scoop of vanilla bean ice cream and maybe a tiny drizzle of melted chocolate syrup. That contrast between the warm, gooey brownie and the cold vanilla is just divine. That’s definitely my favorite way to crush a craving!
Honestly, though, the simplest pairing works wonders: a tall, icy cold glass of milk. I know, it sounds basic, but the way the milk cuts through the super-rich chocolate and peanut butter is just spot-on. It’s the ultimate pairing for this type of decadent treat, just like pairing coffee with a good slice of cake.
Estimated Nutritional Data for Peanut Butter Swirl Brownies
I always try to be super transparent about what goes into our treats, even if we agree that sometimes we just eat them anyway because pure joy is worth a few extra calories! These numbers are based on the recipe yielding 16 even squares. Remember, since we’re using real butter and generous amounts of chocolate, these are definitely an indulgent baked good!
Keep in mind that brand choices—especially for the peanut butter—can change these figures a bit, but this gives you a solid baseline for what you’re working with. For the full breakdown, check out the official disclaimer page, but here’s the quick view:
- Serving Size: 1 square
- Calories: 280
- Fat: 16g (with about 8g usually being saturated fat from the butter/chips)
- Carbohydrates: 33g
- Sugar: 28g (Yep, worth every single bite!)
- Protein: 4g
- Sodium: 110mg
It’s a perfect, satisfying square for a special occasion or just when you need that ultimate comfort food baking fix!
Serving Suggestions for These Comfort Food Baking Treats
Once you’ve managed the hardest part—waiting for them to cool so you can slice those beautiful marbled brownies—you get to enjoy the best part: the serving suggestion phase! Because these are so incredibly rich with both dark chocolate and salty peanut butter, you don’t need much to dress them up, but a few little additions can take them from great to unforgettable.
If you’re serving these as a standalone snack or packing them up for a party, they are absolutely perfect on their own. The combination of salty and sweet is already doing all the heavy lifting! A simple dusting of powdered sugar right before cutting them is elegant enough for any gathering.
However, if you are making these for a cozy movie night, you have to try them warm! Take a single square, wrap it loosely in aluminum foil, and heat it for about 10 seconds in the microwave. Then, top it with a scoop of vanilla bean ice cream and maybe a tiny drizzle of melted chocolate syrup. That contrast between the warm, gooey brownie and the cold vanilla is just divine. That’s definitely my favorite way to crush a craving!
Honestly, though, the simplest pairing works wonders: a tall, icy cold glass of milk. I know, it sounds basic, but the way the milk cuts through the super-rich chocolate and peanut butter is just spot-on. It’s the ultimate pairing for this type of decadent treat, just like pairing coffee with a good slice of cake.
If you’re feeling extra fancy after conquering this recipe, you could even try serving a small square alongside something wonderfully fluffy, like my recipe for chocolate eclair cake. But honestly, just eating them plain with a hot cup of coffee while reading a book is my preferred method. They’re just that good!
Estimated Nutritional Data for Peanut Butter Swirl Brownies
I always try to be super transparent about what goes into our treats, even if we agree that sometimes we just eat them anyway because pure joy is worth a few extra calories! These numbers are based on the recipe yielding 16 even squares. Remember, since we’re using real butter and generous amounts of chocolate, these are definitely an indulgent baked good!
Keep in mind that brand choices—especially for the peanut butter—can change these figures a bit, but this gives you a solid baseline for what you’re working with. For the full breakdown, check out the official disclaimer page, but here’s the quick view:
- Serving Size: 1 square
- Calories: 280
- Fat: 16g (with about 8g usually being saturated fat from the butter/chips)
- Carbohydrates: 33g
- Sugar: 28g (Yep, worth every single bite!)
- Protein: 4g
- Sodium: 110mg
It’s a perfect, satisfying square for a special occasion or just when you need that ultimate comfort food baking fix!
PrintRich and Fudgy Peanut Butter Swirl Brownies
Make decadent, gooey brownies with a beautiful marbled peanut butter swirl throughout the rich chocolate base.
- Prep Time: 20 min
- Cook Time: 35 min
- Total Time: 55 min
- Yield: 16 servings
- Category: Dessert
- Method: Baking
- Cuisine: American
- Diet: Vegetarian
Ingredients
- 1 cup (2 sticks) unsalted butter, melted
- 1 3/4 cups granulated sugar
- 3/4 cup packed light brown sugar
- 4 large eggs
- 1 tablespoon vanilla extract
- 3/4 cup unsweetened cocoa powder
- 1 cup all-purpose flour
- 1/2 teaspoon salt
- 1 cup semi-sweet chocolate chips
- 1 cup creamy peanut butter
- 1/4 cup powdered sugar
- 2 tablespoons milk
Instructions
- Preheat your oven to 350°F (175°C). Line a 9×13 inch baking pan with parchment paper, leaving an overhang on the sides for easy removal. Lightly grease the paper.
- In a large bowl, whisk together the melted butter, granulated sugar, and brown sugar until combined.
- Beat in the eggs one at a time, mixing well after each addition. Stir in the vanilla extract.
- In a separate bowl, whisk together the cocoa powder and flour. Gradually add the dry ingredients to the wet ingredients, mixing until just combined. Do not overmix.
- Stir in the chocolate chips.
- Spread about two-thirds of the brownie batter evenly into the prepared pan.
- In a small bowl, mix the peanut butter, powdered sugar, and milk until smooth. This is your swirl mixture.
- Drop spoonfuls of the peanut butter mixture over the batter in the pan.
- Dollop the remaining one-third of the plain brownie batter over the peanut butter layer.
- Use a knife or skewer to gently swirl the two batters together to create a marbled effect. Do not over-swirl.
- Bake for 30 to 35 minutes. A toothpick inserted near the center should come out with moist crumbs attached, not wet batter.
- Let the brownies cool completely in the pan on a wire rack before lifting them out using the parchment overhang and cutting into squares.
Notes
- For the best swirl, ensure your peanut butter mixture is smooth but still thick enough to hold its shape when dropped onto the batter.
- Use high-quality cocoa powder for a deeper chocolate flavor.
- Cool the brownies completely before slicing for clean, fudgy squares.
Nutrition
- Serving Size: 1 square
- Calories: 280
- Sugar: 28
- Sodium: 110
- Fat: 16
- Saturated Fat: 8
- Unsaturated Fat: 8
- Trans Fat: 0
- Carbohydrates: 33
- Fiber: 1
- Protein: 4
- Cholesterol: 65