

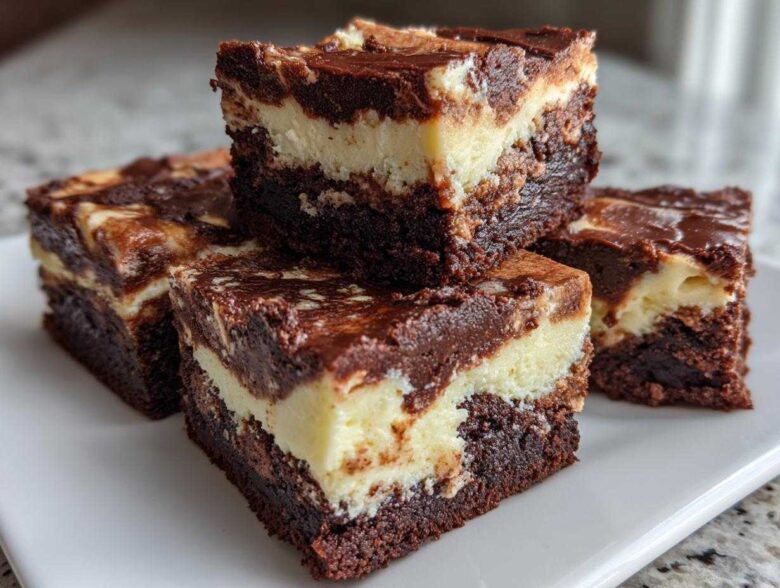
When summer hits, or honestly, whenever I feel a major chocolate craving coming on, the last thing I want to do is deal with a hot oven. That’s why I perfected this brownie refrigerator cake. Trust me when I say this is the ultimate showstopper dessert you assemble in about twenty minutes, and then the fridge does all the hard work! This recipe started because I needed something quick for my cousin’s surprise party, and regular baking just wasn’t going to cut it. The layers of fudgy brownies, tangy cream cheese bliss, and cool chocolate pudding are just incredible. I think you’re going to adore how easy this brownie refrigerator cake is!
Why This Brownie Refrigerator Cake is Your New Favorite Make Ahead Chocolate Treat
Look, I love baking from scratch, but sometimes you just need a dessert that screams elegance without the actual sweat equity. This layered dessert is genuinely the solution for those chaotic weeks. It’s an absolute winner when you need a Crowd Pleasing Chocolate Recipe because everyone assumes you slaved over it for hours!
- It’s the ultimate Easy Chilled Dessert—perfect for when the weather heats up and you want something intensely chocolatey without turning on the stove.
- The structure is amazing! You get distinct layers that hold their shape beautifully when sliced.
- Prep time is ridiculously fast. Seriously, once you cube those brownies, you’re practically done with the heavy lifting.
Effortless Assembly for the Perfect Brownie Refrigerator Cake
The best part? Absolutely no baking involved! You start with store-bought brownies—and don’t tell anyone, but that’s part of the secret to making this ultra-fast. We’re just cubing them up and arranging them sweetly in the pan. It’s pure assembly, like building high-end chocolate LEGOs! Since there is zero oven time, this is a fantastic way to handle last-minute dessert emergencies.
Achieving the Best Texture in Your Layered Brownie Dessert
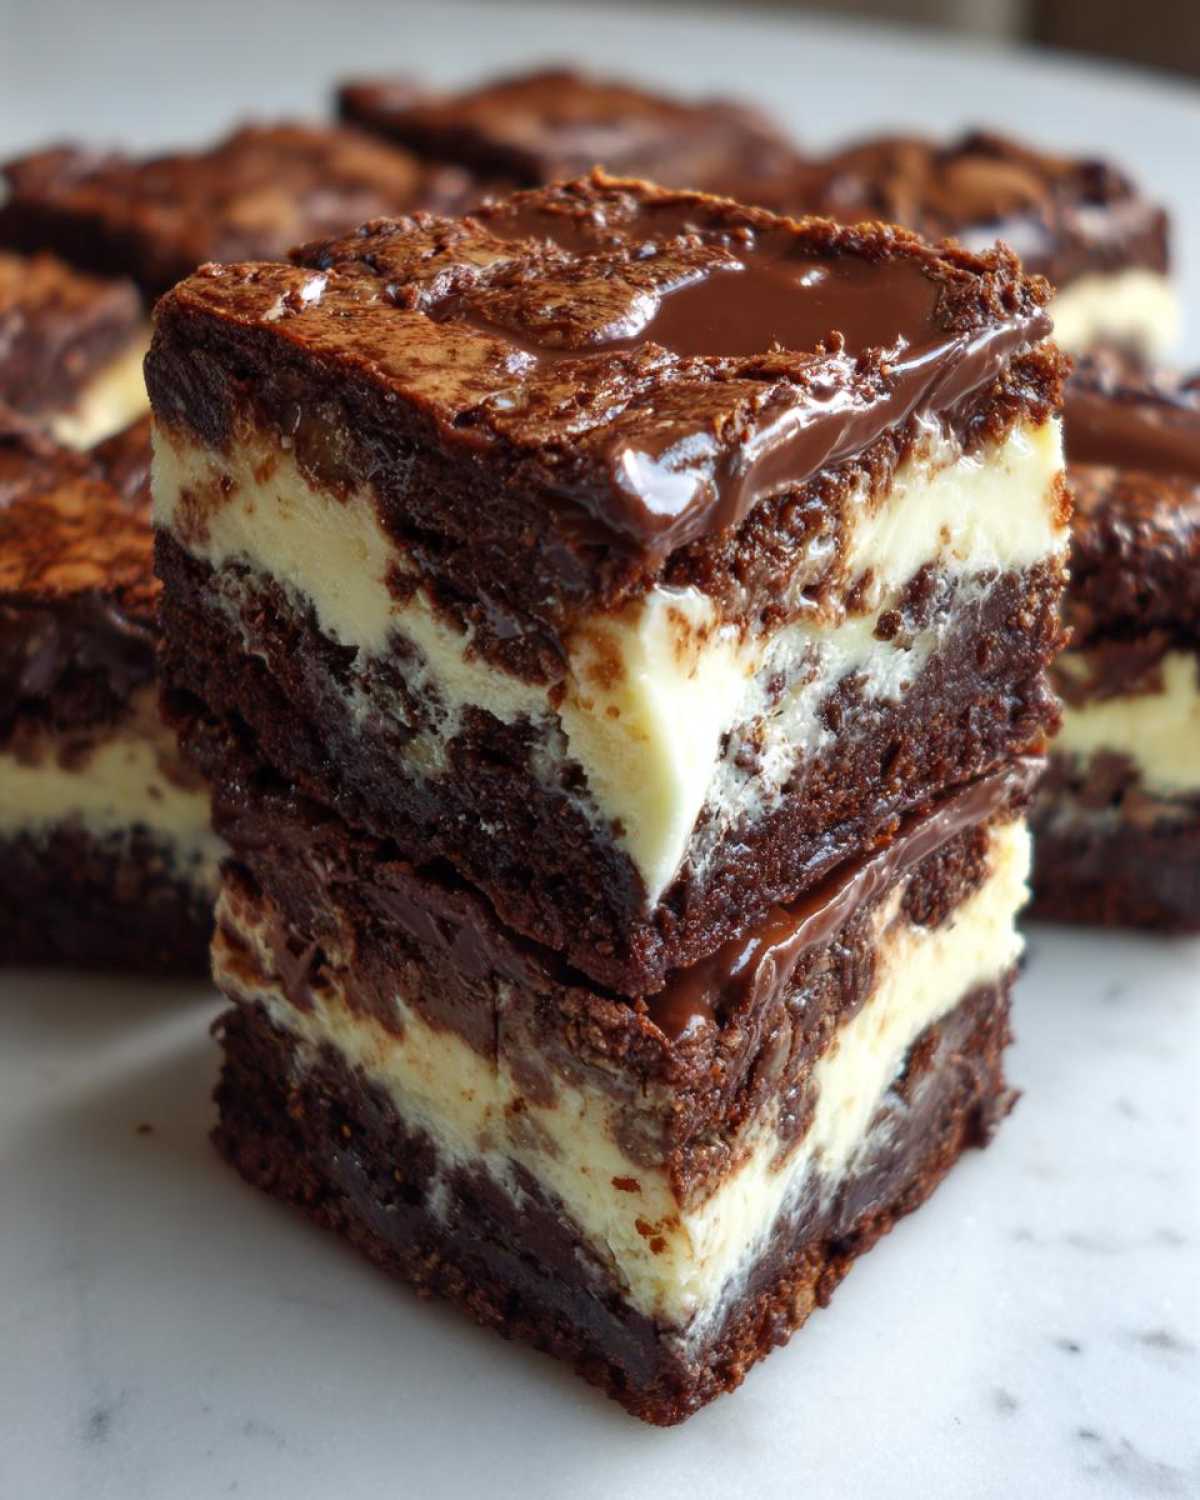
When you chill this creation, magic happens that you just don’t get from a quick-baked item. The layers meld together just enough, but the pudding and cream cheese fillings set up firm and cool. What you end up with is this wonderfully dense, almost melt-in-your-mouth bite. It transforms into a truly Fudgy Refrigerator Cake that is somehow lighter than a traditional fudge cake. It’s pure, decadent bliss when cold.
Gathering Ingredients for Your Brownie Refrigerator Cake
Okay, stopping at the store for these things is seriously half the battle won. Since this is a brownie refrigerator cake, our secret weapon is going to be store-bought brownies—you need about 12 to 16 decent-sized ones, cut them into bite-sized 1-inch cubes, okay? Make sure your cream cheese is fully softened, or you’ll end up with little chunks of hardness in your filling, and we definitely don’t want that!
Ingredient Notes and Substitutions for the Cream Cheese Brownie Layer
Listen, for the dairy components, please stick to full-fat stuff. The structure of this chilled dessert really relies on the fat content in the cream cheese and the whipped topping to set firm. If you have amazing homemade brownies already sitting around, use those! That’s totally fine, just make sure they are completely cool before cubing them up. If you try to substitute instant pudding with the cook-and-serve kind, you’ll end up with soup, not a cake. Stick to the instant mix!
Step-by-Step Guide: Assembling Your Brownie Refrigerator Cake
Alright, time to build this beauty! Laying down that plastic wrap liner in your 8×8 pan is the most important physical first step. You want a good overhang on all sides—that’s your built-in little handle to lift the entire, heavy brownie refrigerator cake out later without breaking anything. Trust me, if you skip that overhang, extracting your masterpiece is going to be a nightmare.
Preparing the Pudding and Cream Cheese Base for the Brownie Refrigerator Cake
First up, you need to get that pudding rich and thick. Whisk your instant chocolate pudding mix with the cold milk for about two minutes until it starts looking like real pudding. Don’t walk away! Set that right aside. Next, in another big bowl, beat your softened cream cheese with the powdered sugar and vanilla until it’s completely smooth—no lumps allowed! Now, you take your thawed whipped topping and gently fold it into the cream cheese mixture. Do not beat it, or you’ll knock all the air out, and we need that fluffiness in our brownie refrigerator cake.
Layering Technique for a Stunning Simple Layered Cake
This is where we put it all together, and timing is everything! Start by placing exactly half of your cubed brownies on the bottom of your prepared pan. Spread half of that lovely cream cheese mixture evenly over those brownies. Then, spread half of your thick chocolate pudding right on top of that cream cheese layer. Now, you just repeat the whole sequence: the rest of the brownies, the rest of the cream cheese, and then top it all off with the remaining pudding. Spread it nice and smooth on top so it looks pristine when it sets!
Crucial Chilling Time for the Perfect Brownie Refrigerator Cake Set
I know, I know. You’re looking at all that glorious chocolate layering and you want to taste it RIGHT NOW. Hold your horses, seriously! The chilling time for this brownie refrigerator cake is non-negotiable, and I’m telling you this as someone who has ruined one by cutting it too early! You need a minimum of six hours in the fridge, but overnight is my golden rule. Why? Because if you don’t let the pudding and cream cheese firmly set up against the brownies, you’ll end up with a glorious chocolate puddle.
This time allows the moisture to distribute perfectly and locks that fudgy texture in place. When you finally lift that whole thing out of the pan, you need it to be fully structured. Patience here means beautiful, clean slices later!
Tips for Success When Making Your No Bake Chocolate Cake
Even though this is super simple, I still have a few little tricks I use every single time I whip up this No Bake Chocolate Cake. These things are based on my own little kitchen oopsies over the years, ha! Follow these, and you’ll guarantee a delicious result without any drama.
- Make sure that milk you use for the pudding is ice cold! Seriously, use milk straight from the back of the fridge. If the milk is lukewarm, the instant pudding just won’t grab that thickness fast enough, and you’ll have a soupy mess when you try to layer it.
- When you are beating the cream cheese and powdered sugar, take your time until it’s completely smooth. I mean, really beat it until you can’t feel any gritty sugar left. This creates the fluffiest base layer for your cake.
- Don’t over-fold that whipped topping into the cream cheese. As soon as it’s just combined—meaning no white streaks of whipped cream are showing—STOP mixing! Over-mixing flattens the structure we worked so hard to fluff up.
- If you are worried about the clean-up on your serving plate, place a thin strip of wax paper or parchment under the edges of the cake before you chill it, leaving the ends sticking out. Once it’s firm, you use those ends like handles to lift the whole thing onto a platter. Super neat slices, instant bragging rights!
Serving Suggestions for Your Crowd Pleasing Chocolate Recipe
Once that beautiful structure is set and you’ve un-molded your chilled creation, it’s time for the grand reveal! While the drizzle of chocolate syrup the recipe suggests is lovely, I always like to add one extra little touch before I bring this beauty out to the table. It just elevates the whole thing from a simple layered dessert to something special.
This Layered Brownie Dessert is incredible on its own, which is why it shines so brightly as one of my go-to Potluck Desserts No Bake options. Nobody brings anything this rich and cool to a potluck! But if you want to dress it up a bit more, here are a few things I love to do right before serving:
- A nice, light dusting of unsweetened cocoa powder over the top gives it a lovely, matte finish that contrasts beautifully with the glossy pudding layer peeking out.
- If you have toasted pecans or walnuts handy, a light sprinkling around the edges right before serving adds a fantastic crunch. It’s a perfect textural counterpoint to all that creamy softness.
- For something bright and fresh, grab some fresh raspberries! The slight tartness of the berries cuts right through the richness of all that chocolate and cream cheese. It makes the whole thing feel a little lighter for a Summer Chocolate Dessert.
Honestly, how you choose to decorate it is up to you. The flavor is already locked in and phenomenal, but a little garnish just makes it look picture-perfect for slicing!
Storage and Reheating Instructions for Leftover Brownie Refrigerator Cake
Listen, if you happen to have any of this amazing brownie refrigerator cake leftover—which, let’s be honest, is a true testament to how delicious it is—storage is super easy. You need to cover that pan or the remaining slices tightly with plastic wrap; you really want an airtight seal to prevent the pudding layers from absorbing any funny fridge smells. Keep it right where it belongs: in the refrigerator for up to four days. DO NOT EVEN THINK about microwaving this!
Reheating a creamy, chilled dessert like this ruins the set texture completely. Instead, if you want the very best slice of brownie refrigerator cake, just pull your portion out about 15 to 20 minutes before you plan to serve it. Letting it sit on the counter just briefly allows the cream cheese layer to soften up *just a bit* so it melts in your mouth instead of being rock hard straight from the cold.
Frequently Asked Questions About the Brownie Refrigerator Cake
I know you’re going to have questions as you plan to make one of these! When I first started making chilled, layered desserts, I had tons of uncertainties too. It’s so different from a traditional baked cake, right? Here are the most common things people ask me when they’re planning their perfect No Bake Chocolate Cake.
Can I use cook-and-serve chocolate pudding instead of the instant kind?
Oh, please don’t try that! If you use cook-and-serve pudding, you’ll have to cook it, and then it needs time to cool down completely before you can even think about folding it into the whipped cream/cream cheese mixture. Even then, it doesn’t set up nearly as firmly as the instant kind does after just chilling. Stick to instant pudding for this recipe; we need that fast, firm set for our Easy Chilled Dessert.
I only have a 9×13 pan. Will it work for this layered brownie dessert?
A 9×13 pan will certainly work, but you need to be prepared for thinner layers. The 8×8 pan gives you that nice, substantial height for each layer, which is really what makes this cheesecake-brownie hybrid look so amazing when you cut into it. If you use the 9×13, just know your yield will be higher, but each slice will be shorter. If you use a 9×13, you might want to make an extra batch of the pudding mixture just to keep the layers looking lush.
What is the absolute best way to get clean slices from this make ahead chocolate treat?
This is a game-changer for a beautiful presentation! Remember how I told you to line the pan with plastic wrap overhang? Use that to lift the whole cake onto a cutting board once it’s firm. Then, grab a long, sharp knife—a chef’s knife works best. Before every single cut, dip your knife into a tall glass of very hot water and wipe it completely dry with a paper towel. The heat melts through the fudgy brownies and the creamy layers cleanly, giving you those Instagram-worthy edges!
Could I use a different flavor of instant pudding, like vanilla or butterscotch?
You absolutely can experiment if you are feeling brave! If you use vanilla pudding, you’ll end up with a sweeter, lighter chocolate layer, making it more of a “Chocolate Mousse Brownie Cake,” which sounds delicious right about now. I actually think a chocolate cheesecake pudding mix (if you can find one!) would be amazing for an extra rich flavor. Just remember, any substitution changes the character, but for your first try, stick to the chocolate for the proper experience!
Estimated Nutritional Data for One Serving of Brownie Refrigerator Cake
I always put this disclaimer in here because, let’s be real, we aren’t making this for health reasons, right? This is pure, unadulterated indulgence! The nutritional values I’m listing below are based on using the exact brand sizes listed in the ingredient section and cutting the cake into 9 equal squares. If you cut smaller squares, or if your store-bought brownies are extra dense, these numbers will shift a tiny bit.
For example, if you use low-fat milk for the pudding, you’ll shave off a little bit of fat, but I still recommend the whole milk for the best texture when making this wonderful brownie refrigerator cake.
| Nutrient | Amount Per Serving (1 Square) |
|---|---|
| Serving Size | 1 square |
| Calories | 380 |
| Total Fat | 19g |
| Saturated Fat | 10g |
| Carbohydrates | 50g |
| Sugar | 45g |
| Protein | 5g |
| Cholesterol | 45mg |
Please remember that this data is an estimate based on the ingredients provided and where you source your ingredients matters! Enjoy every single bite of this incredible brownie refrigerator cake!
Share Your Thoughts on This Easy Chilled Dessert
Okay, you tried it! I hope you loved this rich, cool treat as much as my family does.
Now it’s your turn! I would absolutely love it if you could drop a rating below—five stars if you think this brownie refrigerator cake deserves it! Tell me in the comments how it went. Did you add raspberries? Did you use homemade brownies? I always learn so much from hearing about your successful variations!
PrintNo-Bake Brownie Refrigerator Cake with Cream Cheese Layer
Make this rich, layered brownie refrigerator cake without turning on your oven. This easy, make-ahead dessert sets up perfectly in the fridge.
- Prep Time: 20 min
- Cook Time: 0 min
- Total Time: 6 hr 20 min
- Yield: 9 servings
- Category: Dessert
- Method: No Bake/Chilling
- Cuisine: American
- Diet: Vegetarian
Ingredients
- 1 (18.4 ounce) package chocolate instant pudding mix
- 3 cups cold milk
- 1 (8 ounce) package cream cheese, softened
- 1/2 cup powdered sugar
- 1 teaspoon vanilla extract
- 1 (12 ounce) container frozen whipped topping, thawed
- 1 (18.2 ounce) package pre-made brownies (about 12-16 brownies), cut into 1-inch cubes
- 1/4 cup chocolate syrup (optional, for drizzling)
Instructions
- Prepare the pudding: Whisk the instant pudding mix and cold milk together in a large bowl until thickened, about 2 minutes. Set aside.
- Make the cream cheese layer: In a separate bowl, beat the softened cream cheese, powdered sugar, and vanilla extract until smooth and creamy.
- Fold the whipped topping into the cream cheese mixture until just combined.
- Assemble the first layer: Line an 8×8 inch baking pan with plastic wrap, leaving an overhang on the sides for easy removal later. Arrange half of the brownie cubes in a single layer on the bottom of the pan.
- Layer the fillings: Spread half of the cream cheese mixture evenly over the brownie layer. Top this with half of the prepared chocolate pudding.
- Repeat the layers: Add the remaining brownie cubes, followed by the remaining cream cheese mixture, and finally the remaining chocolate pudding.
- Chill: Cover the pan tightly with plastic wrap and refrigerate for at least 6 hours, or preferably overnight, until the cake is firm.
- Serve: Use the plastic wrap overhang to lift the cake out of the pan. Slice into squares. Drizzle with chocolate syrup before serving, if desired.
Notes
- You can use store-bought fudge brownies or bake your own batch ahead of time and let them cool completely.
- For a richer flavor, use whole milk when preparing the pudding.
- If you do not have an 8×8 pan, a 9×9 pan works, but the layers will be slightly thinner.
Nutrition
- Serving Size: 1 square
- Calories: 380
- Sugar: 45
- Sodium: 350
- Fat: 19
- Saturated Fat: 10
- Unsaturated Fat: 9
- Trans Fat: 0.5
- Carbohydrates: 50
- Fiber: 2
- Protein: 5
- Cholesterol: 45