

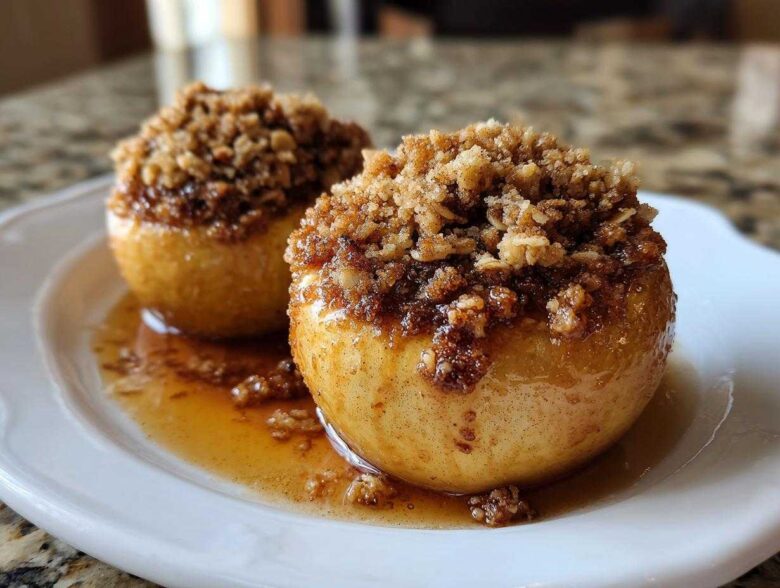
Oh my gosh, can you smell that? That warm, sweet cloud of cinnamon and melting butter means autumn is officially here, or at least, it *should* be in your kitchen! There is nothing that screams comfort food louder than a perfectly tender, spiced fruit dessert, and trust me, I’ve tried every single variation out there. But after years of tinkering—testing mushy apples and dry, crumbly fillings—I finally landed on the recipe for truly show-stopping **baked apples**.
This isn’t some fussy, complicated thing you save for Thanksgiving. This is my go-to, ‘I need dessert in under an hour’ recipe. The beauty here is the stuffing—it caramelizes right down into the apple as it cooks. I’ve been making this specific version of **stuffed baked apples** since I was in college and needed something easy to impress people with. It’s simple, yes, but it tastes like you slaved over it for hours. You just follow these steps, and you’ll see why this recipe has become my permanent marker for fall baking.
If you want to know a little more about where I come from and why I cook the way I do, you can check out my story right here, but for now, let’s get those apples ready!
Why This is the Best Baked Apples Dessert (Quick Review)
Honestly, you need this recipe in your autumn rotation because it solves all the common baked apple problems! It’s ridiculously fast to prep, which is why I call it my favorite quick apple dessert when company shows up unexpectedly.
Here’s why folks rave about this specific version:
- Zero Fuss: Truly, prep takes 10 minutes flat. No fancy slicing or fussing required!
- Perfect Texture: Using the right apples means they get tender but they absolutely *do not* collapse into applesauce.
- Flavor Explosion: That little bit of water in the bottom creates natural steam, making the filling perfectly gooey and tasting like the best baked apples dessert imaginable.
It hits that sweet spot between a simple side dish and a decadent comfort food treat every single time.
Gathering Ingredients for Your Stuffed Baked Apples
Okay, so before we even look at the oven directions, we need to talk apples! This is the most important part of making *any* **baked apples** recipe work. If you pick the wrong kind, you end up with mush right when you want something sturdy. Seriously, don’t skimp on this part!
For structure, I swear by Honeycrisp or Granny Smith. Granny Smiths give you a little tartness to balance the sweet filling, which I love for a lighter feel, but Honeycrisps hold their shape beautifully and taste great no matter how they’re cooked. You need four of them, medium size—nothing too tiny or you won’t have enough room for that amazing filling we’re making.
For the Brown Sugar Baked Apples Filling
This dry mix is where all the magic flavor comes from. It mixes up in about 30 seconds! You are making the classic flavor profile that makes these the ultimate **warm spiced apples** treat. Keep these measurements exact; they work perfectly with the moisture released by the apples during baking.
- Rolled Oats: You’ll need 1/4 cup. Don’t use the instant stuff, we want those nice, chewy texture pockets.
- Brown Sugar: Measure out 1/4 cup, and make sure it’s packed down tight in the cup! That molasses is flavor gold for **brown sugar baked apples**.
- Cinnamon: A full teaspoon of ground cinnamon. This is non-negotiable for that warm, nostalgic scent.
- Nutmeg: Just a pinch, about 1/4 teaspoon of ground nutmeg. It deepens the spice without tasting like pumpkin pie.
Main Components and Liquid Base for Baked Apples
These are the foundational pieces that get everything cooking right. Remember, we aren’t just baking the apple; we are steaming it gently while the topping bakes to a golden crisp. This ensures those **cinnamon baked apples** are tender all the way through.
- The Apples: Four medium Honeycrisp or Granny Smiths, washed and ready for coring.
- The Butter: You need 2 tablespoons of cold, unsalted butter, cut into small, little pebble-sized pieces. These little pieces melt right on top of the filling, basting it slightly.
- The Water: Sounds simple, but vital! Only 1/4 cup total. This water sits at the bottom of the dish and creates the steam that keeps the apples from drying out completely.
Step-by-Step Guide to Making Perfect Baked Apples in the Oven
Alright, now that we have our beautiful ingredients lined up—the sturdy apples, the sweet oat stuffing, and those pats of butter waiting patiently—it’s time to get this **oven baked fruit** into the heat. Watch me closely during the coring step, because that’s truly where most people mess up their **baked apples**!
Remember, we aren’t trying to make apple rings; we are making perfectly stable little bowls for the filling. I always line up my four apples on a cutting board before I start anything else. It helps keep the momentum going, especially since this process only takes about 10 minutes before they hit the oven!
Preparing the Apples and Oven for Oven Baked Fruit
First things first: get that oven nice and toasty! Step one is always preheating to 375 degrees Fahrenheit. While that’s warming up, grab your small baking dish—mine is just a little square Pyrex—and give it a quick little swipe of cooking spray or butter. We don’t want anything sticking later, right?
Now for the coring. This is the secret sauce for successful **baked apples**. You need to scoop out the seeds and the core, but you absolutely MUST stop before you poke a hole right through the bottom of the apple. Think of it like hollowing out a tiny canoe! I use a melon baller—it scoops out the fleshy parts just right—but a teaspoon works too. Just be mindful. If you punch through, all your wonderful, sugary juices will leak out into the pan instead of melting into the apple itself. Leave a solid half-inch wall so that structure stays intact. This level of care is what separates a mediocre fruit dessert from one you want to make every single week.
Mixing the Filling and Stuffing Your Cinnamon Baked Apples
While you’re hollowing out those beauties, take your small mixing bowl that holds your oats, brown sugar, cinnamon, and nutmeg. Just dump them all in there. Don’t even bother washing another spoon; use the same one you used to stir the oats, I promise nobody’s judging!
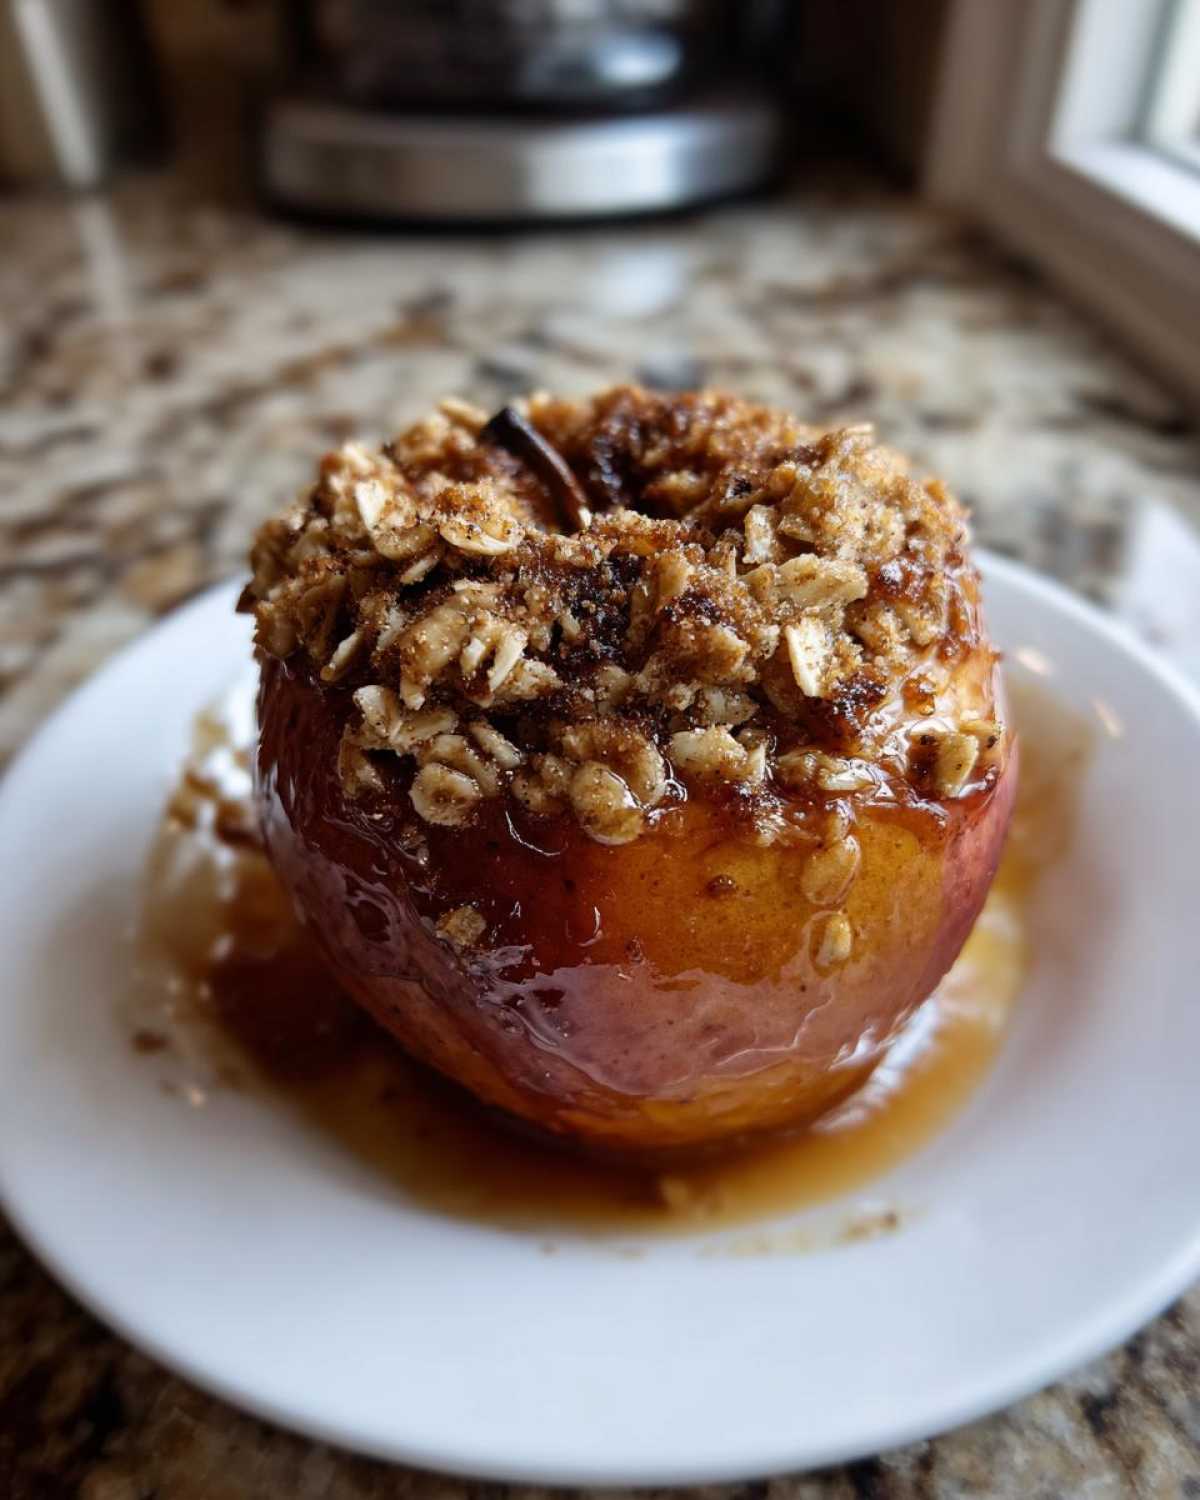
Stir this dry mixture really well until everything looks uniformly brown and crumbly. Then, grab your cored apples. You need to divide that filling evenly by stuffing it straight into the cavity of each one. Don’t pack it down too tightly; let it sit a little loose so it has room to bubble and melt. When you’re done stuffing, each apple should have a nice little dome of sugary oats peaking over the top. That’s perfect!
Baking Time and Testing Doneness for Simple Baked Apples
You’re almost there! Before they go in the oven, it’s time to set them up for success. Take those little pieces of cold butter we had cut up earlier—we need one piece resting right on top of the filling in each apple. This helps that top layer brown nicely and keeps the filling moist.
Next, and this is important for the steam bath: gently pour the 1/4 cup of water into the bottom of the baking dish, making sure the water stays *around* the apples, not *in* them. Now, pop them into the 375°F oven and set a timer for 35 minutes. For the absolute **best baked apples dessert**, I usually let them go a full 40 to 45 minutes. You want them totally tender when you test them. Slide a fork or a thin knife into the side of an apple; if it goes in with zero resistance, they are done! If you feel any stiffness at all, let them bake for another 5 to 10 minutes. They should be soft and fragrant when they come out, ready for a drizzle over at our favorite ice cream shop.
Tips for Success with Your Easy Baked Apples Recipe
I’ve made this **easy baked apples recipe** so many times that I have a few tricks up my sleeve for when you want to customize things or if you’re encountering a little baking hiccup. Remember, every oven is a little different, so watching your apples is just as important as following the time!
My biggest piece of advice? If you prefer a topping that’s almost like a true apple crisp—nice and crunchy—just go ahead and bump those rolled oats up to 1/3 cup in the filling mixture. Instead of 1/4 cup oats, use 1/3 cup. The extra dry ingredients absorb the juices beautifully as they bake and give you that satisfying textural contrast when you bite in. Trust me, it makes the top layer ten times better.
Now, let’s talk about the apple texture. If you are using a very firm apple, or if you just like your **warm spiced apples** soft—almost dissolving on your tongue—you have an easy fix! During the first 20 minutes of baking, just loosely drape a piece of aluminum foil over the baking dish. This traps the moisture and cooks the apples faster and softer. Just make sure you take the foil off for the last 15 minutes so that brown sugar topping gets a chance to bubble up and caramelize nicely.
And hey, sometimes the pantry is low on brown sugar, right? I totally get it! If you need to substitute, maple syrup is your best friend here. It gives the **baked apples** a deep, woodsy sweetness that pairs wonderfully with the cinnamon. If you swap it out, use about 3 tablespoons of pure maple syrup instead of the 1/4 cup of packed brown sugar. You might need to skip the butter pats on top, or just reduce the water slightly in the bottom of the pan, since syrup adds more liquid.
Finally, if your apples are looking a little pale but seem tender when pierced, don’t panic! You can always just place them under the broiler for 60 seconds—but watch them like a hawk! That sugar will burn fast, so stand right there with the oven door open just squinting at them until you get that beautiful golden-brown color on top of your **simple baked apples**.
Serving Suggestions for Warm Spiced Apples
Oh, the best part! When these **warm spiced apples** come out of the oven, they smell incredible, but they are honestly just a blank canvas waiting for the perfect accompaniment. Serving them piping hot is key, as the steam helps carry all that glorious cinnamon scent through the house. You absolutely must serve them immediately for the best experience!
My absolute favorite way to enjoy my **baked apples** is with a big, beautiful scoop of vanilla bean ice cream. The contrast between the hot, caramelized fruit and the icy, creamy vanilla? *Chef’s kiss* magic! The ice cream melts down into the oat filling pools around the bottom of the apple, turning it into the richest little sauce imaginable. It’s decadent, but you deserve it after making such a great dessert!
If you aren’t feeling the ice cream—maybe it’s a bit chilly out and you want even *more* warmth—then whipped cream is the way to go. I whip heavy cream myself with just a tiny splash of vanilla extract; the homemade version is lighter and fluffier than anything from a can, and it doesn’t weigh down the apple after you’ve spent all that time baking it perfectly.
For extra wow factor, especially if you’re serving these **stuffed baked apples** after a big dinner, break out the caramel sauce! A heavy drizzle of store-bought, good-quality caramel right over the top of the butter-melted filling takes these straight to holiday-level indulgence. If you have any extra cinnamon sugar mix left over, sprinkle just a tiny bit more over the caramel for sparkle. It makes your **easy baked apples recipe** look like it came from a fancy bakery!
Storage and Reheating Instructions for Leftover Baked Apples
Now, let’s be real—sometimes you can’t devour all four of these glorious **stuffed baked apples** in one sitting immediately, and that’s okay! These keep surprisingly well, which is what makes them such a great recipe to bake ahead for guests. They are still wonderful the next day, provided you store them correctly.
Once the apples have cooled down to room temperature—and please, don’t try to put piping hot fruit in the fridge; it just creates condensation and mush—transfer them to an airtight container. I usually leave them right in the baking dish, but I make sure to cover the dish tightly with plastic wrap or, better yet, press a layer of plastic wrap right onto the exposed filling before putting the lid on. They should be snug in the refrigerator for up to three days. They’ll hold their shape, though the oats might soften a bit, which is totally normal for leftover **baked apples**.
Reheating is where you want to be careful so you don’t ruin that perfect tenderness we worked so hard to achieve in the oven. The microwave is the fastest route, no doubt. If you’re only eating one, pop it on a plate and zap it for about 45 seconds. It’ll get hot and gooey fast, but be warned: the microwave can make the apple slightly softer than when it was fresh from the oven.
For the absolute best revival, especially if you want that topping to taste nice and crisp again, reheat them in the oven. Place your leftover **cinnamon baked apples** back into that little baking dish (you don’t need to add more water). Roast them at a lower temperature, maybe 300 degrees Fahrenheit, for about 10 to 15 minutes. This warms them slowly and helps any residual moisture evaporate slightly, firming up that oat topping again. They come out tasting almost as good as the first batch!
Frequently Asked Questions About Fall Apple Recipes
I get so many lovely notes about this recipe! It seems everyone is searching for wonderfully reliable **fall apple recipes**, and these **baked apples** always seem to hit the top of the list. Here are a few things folks ask me most often when they are ready to bake!
What if I don’t have oats for the filling?
Oh, that’s a common pantry problem! If you don’t have rolled oats, don’t worry about it one bit. The oats are mainly there to bulk up the filling and give it that nice, slightly crisp texture once baked. You can easily substitute them with crushed graham crackers or even crushed cornflakes—just use the same 1/4 cup measurement. The result will be slightly different, maybe a bit sweeter if you use graham crackers, but they will still be delicious **warm spiced apples**. Just stir the cracker crumbs right in with your brown sugar and spices!
Can I make these vegan?
Absolutely, this is one of the easiest **comfort food desserts** to make vegan! The only real hurdle is the butter, right? You just need to swap out the butter pats on top with a vegan butter substitute, or sometimes I use just a tiny spoonful of coconut oil instead. Coconut oil melts beautifully and works wonders with the spices. As long as you use a plant-based milk if you have any later for drizzling, you’re good to go. It’s such a simple swap for a **healthy baked apples side dish**!
Which apples are best for baking other than the ones you mentioned?
While I swear by Honeycrisp and Granny Smith for their sturdiness, if you have Macounuts or Braeburn lying around, those are fantastic too! The absolute worst apples for **stuffed baked apples** are the ones that cook down too fast, like McIntosh. You want a fruit that resists disintegrating. If you use a softer apple, just watch it closely during baking, as it might be done by the 30-minute mark. Always trust the fork test more than the timer when you’re experimenting with different **fall apple recipes**!
Can I use different fruit instead of apples for this oven baked fruit recipe?
Yes, you totally can experiment with other firm fruits! Pears work incredibly well with this exact same filling, though you might want to add a tiny bit more water to the bottom of the dish since pears are often juicier than apples. Quince is another beautiful option if you can find it, but be warned—quince takes longer to soften, so you might need to bake for a full 50 to 60 minutes, and definitely cover it tightly with foil for the first half of that time. The spices go perfectly with almost any firm **oven baked fruit**!
How quickly can I finish this as a quick apple dessert?
If you prep everything the night before, baking is lightning fast! You can get the apples cored and stuffed, place them in the dish with the water, cover them, and keep them in the fridge overnight. The next day, pull them out 30 minutes before you want to eat, pop them in the 375°F oven, and you’re still looking at a total of 45 minutes baking time, but zero active prep time when everyone is hungry! You can read more about keeping your baked goods fresh on my site disclaimer page, just in case you have questions about using recipes safely!
Estimated Nutritional Data for Healthy Baked Apples Side Dish
Okay, so you’ve got your house smelling like a cozy fall morning, and you’ve just polished off one of these gorgeous **baked apples**. You might be wondering if this wonderful dessert is secretly packing a ton of guilt, but honestly, for what you get—a warm, spiced, fiber-filled fruit treat—it’s pretty responsible!
I always run these quick recipes by my tracking app just to keep myself sane, and the numbers come out looking pretty good for a **healthy baked apples side dish**. This data is based on the recipe making exactly four servings, with each person getting one whole apple as cooked above. But always remember that these are just estimates! Your own apples might be bigger or smaller, and how much water you use in the bottom of the pan can change things too.
Here is what the numbers generally look like per serving for our **cinnamon baked apples**:
- Serving Size: 1 apple
- Calories: About 280
- Fat: Just 10g total (and only 6g saturated, because we used butter sparingly!)
- Carbohydrates: 48g
- Fiber: A healthy 6g! That’s from the oats and the apple peel.
- Sugar: 35g (Mostly natural sugar from the fruit and brown sugar, which is why it tastes so rich!)
- Protein: A sneaky 2g.
- Cholesterol: Around 25mg.
See? Not bad at all for something that tastes this comforting! It’s a great way to end a meal without feeling like you totally ruined your healthy eating goals. If you want to dive deeper into how I approach food safety and tracking on my site, you can check out my privacy policy for general site information, though these numbers are specific to the recipe itself.
Share Your Baked Apples Creations
We’ve reached the end! I really hope you’ve got a baking dish full of bubbling, fragrant **baked apples** sitting on your counter right now smelling up the whole house. Honestly, seeing the result of something so simple turn out so perfect is one of my greatest joys in the kitchen.
Now that you’ve tried this **easy baked apples recipe**, I desperately want to know what you thought! Did you stick to the simple version, or did you try one of my tips? Maybe you swapped maple syrup in, or perhaps you went a little wild with the caramel drizzle? Don’t keep your triumphs—or even your minor questions—to yourself!
Please, take a second and leave a rating down in the comments section. Five stars if they tasted like true **comfort food desserts** fresh from an orchard! If you made any variations on the filling, tell us about them below. Seriously, hearing about your successful or slightly quirky results is half the fun on my side! Happy baking, and I can’t wait to see your beautiful **warm spiced apples**!
PrintSimple Cinnamon Brown Sugar Baked Apples
A straightforward recipe for warm, spiced baked apples stuffed with a brown sugar, oat, and cinnamon filling.
- Prep Time: 10 min
- Cook Time: 40 min
- Total Time: 50 min
- Yield: 4 servings
- Category: Dessert
- Method: Baking
- Cuisine: American
- Diet: Vegetarian
Ingredients
- 4 medium baking apples (like Honeycrisp or Granny Smith)
- 1/4 cup rolled oats
- 1/4 cup packed brown sugar
- 1 teaspoon ground cinnamon
- 1/4 teaspoon ground nutmeg
- 2 tablespoons unsalted butter, cut into small pieces
- 1/4 cup water
Instructions
- Preheat your oven to 375 degrees Fahrenheit. Lightly grease a small baking dish.
- Wash the apples. Use a melon baller or small spoon to core the apples, removing the seeds and leaving about a half-inch thick wall at the bottom of each apple. Do not cut all the way through the bottom.
- In a small bowl, mix the rolled oats, brown sugar, cinnamon, and nutmeg.
- Divide the oat mixture evenly and stuff it into the center cavity of each apple.
- Place one small piece of butter on top of the filling in each apple.
- Pour the 1/4 cup of water into the bottom of the prepared baking dish.
- Bake for 35 to 45 minutes, or until the apples are tender when pierced with a fork.
- Serve warm.
Notes
- For a crispier topping, you can increase the oats to 1/3 cup.
- If you prefer a softer apple, cover the baking dish loosely with foil for the first 20 minutes of baking.
- You can substitute maple syrup for the brown sugar if desired.
Nutrition
- Serving Size: 1 apple
- Calories: 280
- Sugar: 35g
- Sodium: 5mg
- Fat: 10g
- Saturated Fat: 6g
- Unsaturated Fat: 4g
- Trans Fat: 0g
- Carbohydrates: 48g
- Fiber: 6g
- Protein: 2g
- Cholesterol: 25mg