

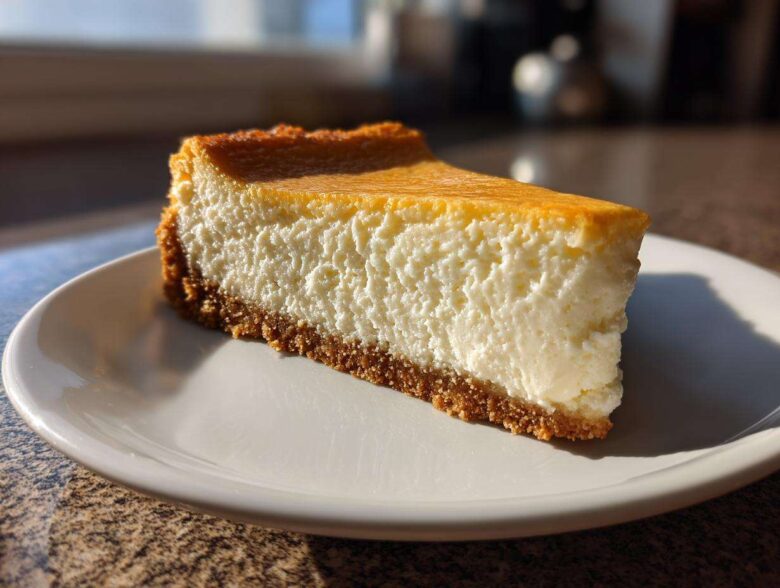
You know that moment when you cut into a slice of cheesecake, and it looks so perfect—so velvety and rich—but then you see that awful, ugly crack running right down the middle? Ugh, I’ve been there more times than I care to admit! But forget the dreaded water bath and the worry lines on your face; I’ve finally nailed down the ultimate cheesecake recipe that gives you that impossibly creamy, pure New York style texture without the stress. After years of practice and frankly, too many failed bakes, I figured out the secrets to mastering this cheesecake recipe to get that consistently smooth, crack-free top every single time. If you want to read a bit more about my journey in the kitchen, check out our story here. Trust me on this one; this guide is all you’ll ever need!
Why This Is the Best Cheesecake Recipe for Creamy Results
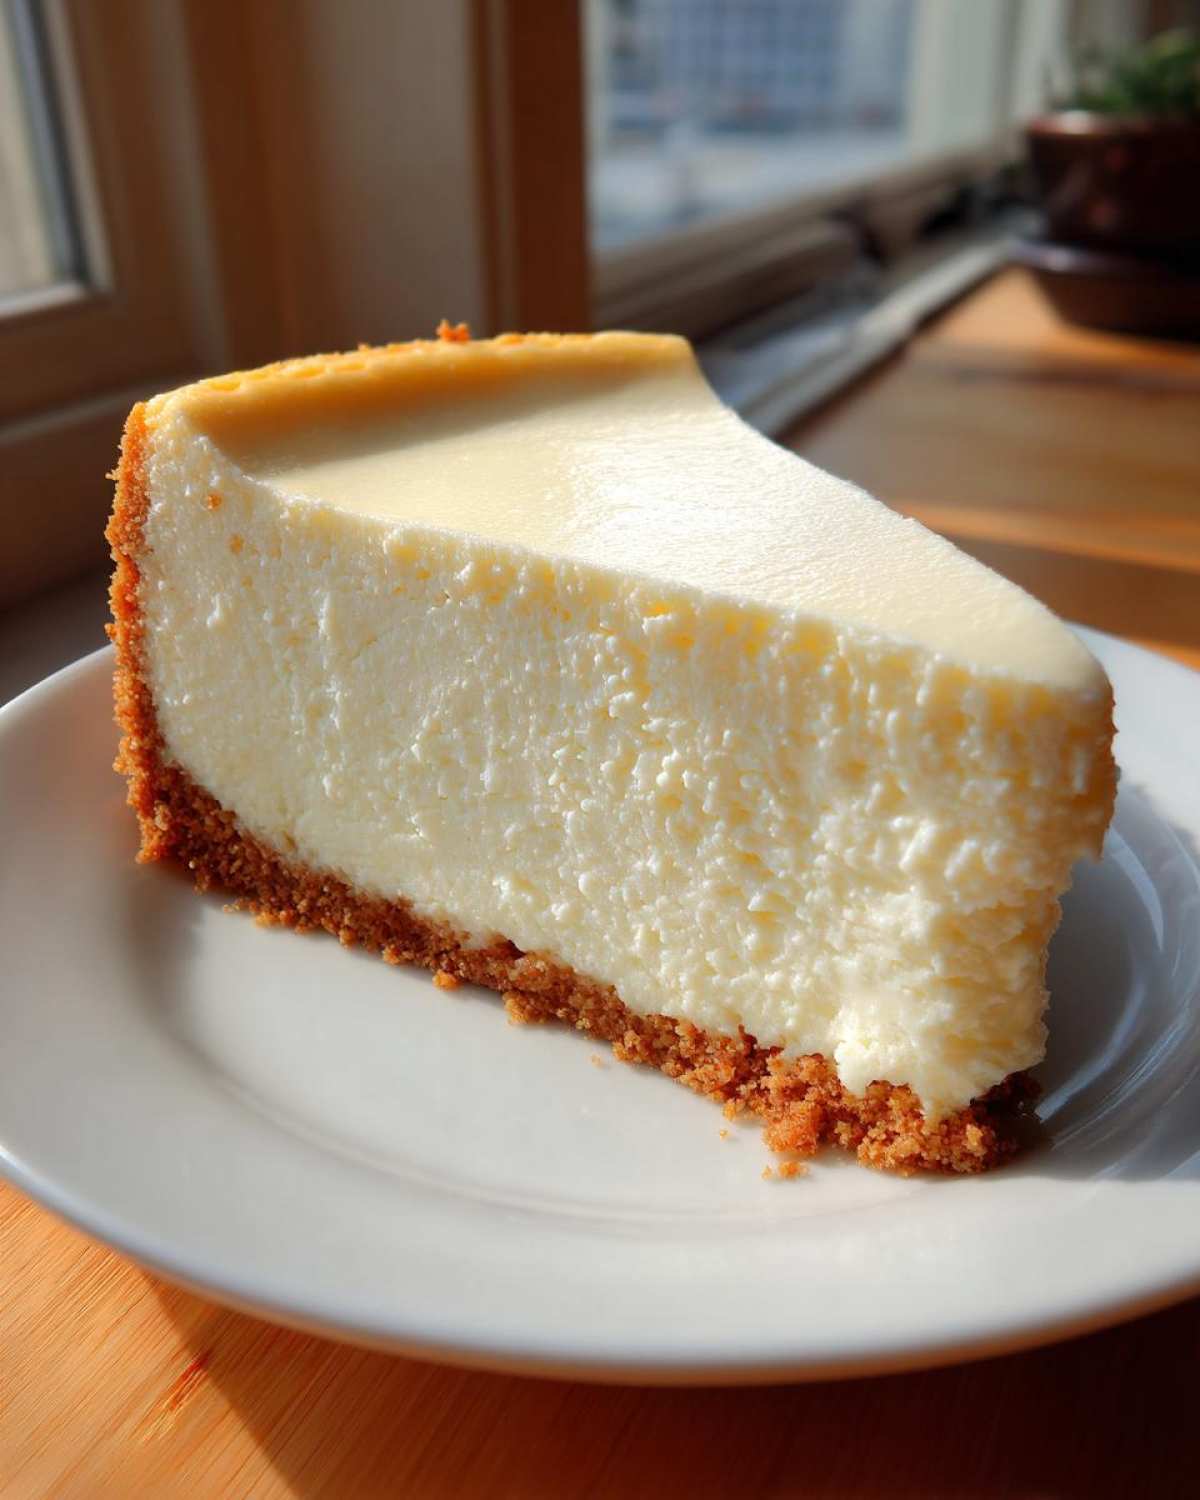
Listen, a true New York style cheesecake isn’t supposed to be light and fluffy like a mousse. It needs that dense, satisfying weight, that truly rich baked texture that melts slowly in your mouth. That’s what makes this the best cheesecake recipe I have ever developed! The key isn’t some fancy, complicated technique involving boiling water; it’s all in the preparation and how gentle you are with the batter. We are aiming for that dreamy, velvety finish that specialty bakeries charge an arm and a leg for.
We use a slightly higher ratio of full-fat cream cheese compared to standard recipes, which immediately guarantees a thicker, more luxurious mouthfeel. Also, we avoid over-beating once the eggs go in—that’s the number one rule for success!
Achieving a No Crack Cheesecake: Essential Preparation Steps
If you want that flawless surface, you must respect the temperature of your ingredients! Pull your cream cheese, eggs, and sour cream out hours before you start. Cold ingredients just do not blend properly, leaving you with lumps that require reckless mixing to correct. Don’t do it!
When you mix the filling, treat it delicately, especially after the eggs are in. You’re mixing just enough to eliminate streaks. We incorporate the air slowly, which means our no crack cheesecake is far less likely to rise too quickly in the oven and collapse later. Trust your mixer—when it looks silky smooth, stop mixing!
Ingredients for Your Perfect Cheesecake Recipe
Okay, let’s get down to the good stuff! The foundation of any amazing dessert is, of course, the ingredients, and for this supreme cheesecake recipe, quality really matters. I’m going to lay out everything you need below. You’ll notice I call for room temperature items for the filling, and I mean it—don’t skip that step! Using cold ingredients is how you end up fighting lumps, and we aren’t going to waste time doing that!
Before you grab your springform pan, double-check you have everything. Everything listed here is essential for that signature New York texture. You can check out what I use for my basic pantry staples over at my main shopping list here!
Graham Cracker Crust Ingredients and Preparation Notes
For the base, we keep it classic and sturdy. You need 1 1/2 cups of those buttery graham cracker crumbs, that quarter cup of sugar to hold everything together, and 6 tablespoons of unsalted butter that’s melted down so it binds tightly. Mix this up really well until it looks like wet sand, and then press it firmly into the bottom of your prepared pan. Now, tip: press it firmly, yes, but stop exactly at the bottom edge. You aren’t making high walls here; we want the focus on that thick, creamy filling!
The Best Cheesecake Filling Ingredients
This is the heart of what makes it the New York style cheesecake you dream about! You absolutely must use three 8-ounce packages of full-fat cream cheese—don’t even try low-fat; it ruins the texture we are aiming for. We sweeten it with 1 1/2 cups of granulated sugar, a teaspoon of vanilla, and just a pinch of salt to balance the richness. Then come the binding agents: four large eggs (room temperature, remember?) and half a cup of room-temperature sour cream for that essential slight tang and incredible smoothness.
How to Make This Classic Cheesecake Recipe
Alright, deep breaths! This is where we bring it all together to create magic. Although we need a bit of time in the oven, the hands-on part of this classic cheesecake guide is surprisingly straightforward once you respect the ingredients. We start by getting your oven warmed up to 325 degrees F, but listen closely: before the springform pan even touches the springform pan, you absolutely must wrap the outside bottom tightly with heavy-duty aluminum foil. This is my fail-safe for keeping any accidental drips out, even if we aren’t using a traditional water bath this time around—it’s just good insurance!
Step-by-Step: Preparing the Cheesecake Crust
First things first, mix your graham crumbs, the crust sugar, and that melted butter until everything is unified. Press that mixture firmly and evenly across the bottom of your foil-wrapped pan. Pop it into the hot oven for just 10 minutes. This quick pre-bake sets the crust so it doesn’t get soggy later. Once it comes out, you have to let it cool down completely before thinking about adding the filling!
Mixing the Creamy Cheesecake Filling
Now, remember those room-temperature stars? Beat your cream cheese on medium speed until it looks like silk—it has to be perfectly smooth before anything else goes in. Scrape down those sides like your life depends on it! Next, slowly add your 1 1/2 cups of sugar, the vanilla, and the salt, beating just until they combine. Here’s the super important part for that creamy cheesecake texture: add the eggs one by one, mixing only until you see that golden yolk disappear. Stop! Then, gently fold in the sour cream. If you overbeat after the eggs are in, you introduce too much air, and that air equals cracks later!
Baking and Slow Cooling for a No Crack Cheesecake
Pour that beautiful batter over your cooled crust and gently tap the pan on the counter just two or three times to knock out any big surface bubbles. Bake it for about 60 to 75 minutes. You’ll know it’s *almost* done when the edges look set for about two inches, but the very center still has a little jiggle. It shouldn’t be liquid, just wiggle slightly when you nudge the pan. This is the crucial end step for our no crack cheesecake: turn the oven OFF, prop the door open about two inches with a wooden spoon, and leave it in there for a full hour! This gradual cooling prevents the massive temperature shock that causes cracking. Seriously, don’t skip this one-hour spa treatment for your dessert!
Ingredient Notes and Substitutions for Your Cheesecake Recipe
So you’ve seen the list, but let me give you the insider scoop on why those specifics matter in this cheesecake recipe. That cream cheese advice I gave you? It’s non-negotiable! You absolutely must use the full-fat blocks because anything lighter doesn’t have the structural integrity needed for that rich New York experience. Trying to substitute that for a light version results in a sad, watery filling, and nobody wants that.
And those room temperature ingredients? It’s totally worth pulling them out ahead of time. If your cream cheese is cold, it will struggle to incorporate smoothly, leaving you with those pesky little lumps no matter how long you beat it. If you are completely out of sour cream, I’ve had success swapping it for heavy cream mixed with a tiny squeeze of lemon juice, but sour cream gives the best tang for my favorite velvety dessert recipes.
Always check the fine print on substitutions, but for the best results here, stick close to the recipe. If you want to read up on my general substitution philosophy before you bake, you can check out my disclaimer policy here!
Serving Suggestions and Make Ahead Dessert Tips
The hardest part of this entire process is waiting for it to chill, but I promise you, it’s worth every second! Since this is such a showstopper, I always plan it as a make ahead dessert for holidays or when I have people coming over. Since we worked so hard to get that perfect texture, you shouldn’t actually decorate it until you are ready to serve it. If you add a fruit topping or chocolate sauce while it’s still soft, it can bleed into that beautiful white surface.
For gorgeous presentation at your next party, a simple topping is often best. Fresh berries—strawberries cut in half or raspberries piled high—look stunning against the rich backdrop. A thin drizzle of good quality dark chocolate sauce right before slicing works wonders too!
Storage and Reheating Instructions
Getting this perfect means you do not want to rush the chill time. You absolutely must refrigerate your cheesecake for a minimum of 6 hours, but I always insist on overnight for the absolute best, firmest texture. Once it’s chilled through, cover the springform pan loosely with plastic wrap or transfer slices to an airtight container. Honestly, cheesecake does not reheat well at all; it’s meant to be enjoyed cold straight from the fridge, so let’s skip the oven reheat and just enjoy that creamy coolness!
Frequently Asked Questions About Perfect Cheesecake
I know you’ve got questions! When you are dealing with a classic dessert like this, everyone wants to make sure they don’t mess up the creamy magic. That’s totally understandable! I wanted to make sure this wasn’t just a great cheesecake recipe, but the ultimate guide. I’ve gathered the questions I get asked most often about texture and baking woes right here.
Can I use low-fat cream cheese in this recipe?
Oh, sweetheart, please don’t! This is the biggest temptation people have when looking at velvety dessert recipes, but you need the full fat here. Low-fat cream cheese doesn’t have the same fat-to-water content required to give you that dense, rich structure. If you substitute it, your cake will be soft, possibly runny, and definitely won’t set up properly in the fridge. Stick to the full-fat blocks for true cheesecake heaven!
What is the difference between this and a New York style cheesecake?
Great question, because I want you to know exactly what you’re making! This recipe—with its high cream cheese content, minimal air incorporation, and dense final texture—is the quintessential New York style cheesecake. It’s heavier and richer than, say, a lighter, fluffier cheesecake you might see, which relies more on whipped cream or gelatin. Our goal is that satisfying slice that holds its shape perfectly and feels incredibly luscious in your mouth. If you want to reach out with any last-minute baking questions, don’t hesitate to look at my contact page!
Estimated Nutritional Data
Now, look, I’m a baker, not a nutritionist, so take these numbers with a grain of salt—or maybe a drizzle of caramel sauce! But for those of you tracking macros or needing some general idea of what you’re serving up when you bring out this amazing dessert, here’s what I’ve estimated based on standard ingredient brands for this unbelievably rich baked cheesecake.
This is just an estimate for one generous slice. If you cut smaller pieces, the numbers will obviously change!
- Serving Size: 1 slice
- Calories: Approximately 450
- Sugar: Around 35g (Hey, it’s cheesecake, we need that sweetness!)
- Fat: Roughly 30g (That’s where the creamy factor comes from!)
- Saturated Fat: About 18g
- Carbohydrates: Close to 40g
- Protein: About 8g
This rich dessert is definitely an indulgence, but totally worth it when you see everyone reaching for seconds! For more information on how I handle user data and privacy on the site, you can review my privacy policy here. Enjoy responsibly!
Share Your Baking Success
Whew, we made it! You are officially armed with everything you need to create what I truly believe is the ultimate, crack-free, creamy cheesecake recipe. Now that you’ve conquered the oven (and beat the dreaded crack monster), I absolutely need to know how it went!
Please, if you made this, drop a rating right below! Tell me how your crust turned out or what topping you went with—did you stick to berries, or did you try a caramel swirl? Sharing your experience helps me know what’s working best for everyone, and frankly, your success stories keep me going in the kitchen!
If you snapped a picture during serving, tag me on social media! Seeing your beautiful, velvety slices makes my day more than you know. Happy baking, and thank you so much for trusting my favorite recipe with your kitchen!
PrintPerfect Creamy, Crack-Free New York Style Cheesecake
This recipe yields a rich, velvety New York style cheesecake with a graham cracker crust. Follow these steps to achieve a smooth, crack-free top without needing a water bath.
- Prep Time: 20 min
- Cook Time: 75 min
- Total Time: 8 hours 35 min
- Yield: 12 servings
- Category: Dessert
- Method: Baking
- Cuisine: American
- Diet: Vegetarian
Ingredients
- 1 1/2 cups graham cracker crumbs
- 1/4 cup granulated sugar (for crust)
- 6 tablespoons unsalted butter, melted
- 3 (8 ounce) packages full-fat cream cheese, softened
- 1 1/2 cups granulated sugar (for filling)
- 1 teaspoon vanilla extract
- 1/4 teaspoon salt
- 4 large eggs, room temperature
- 1/2 cup sour cream, room temperature
Instructions
- Preheat your oven to 325 degrees F. Wrap the outside bottom of a 9-inch springform pan tightly with heavy-duty aluminum foil.
- Prepare the crust: Mix graham cracker crumbs, 1/4 cup sugar, and melted butter. Press the mixture firmly into the bottom of the prepared pan. Bake for 10 minutes. Let cool completely.
- Prepare the filling: Beat the softened cream cheese with an electric mixer on medium speed until completely smooth, about 3 minutes. Scrape down the sides.
- Add 1 1/2 cups sugar, vanilla extract, and salt. Beat until just combined. Do not overmix.
- Add the eggs one at a time, beating only until each egg is incorporated. Mix in the sour cream last until the batter is smooth.
- Pour the filling over the cooled crust. Gently tap the pan on the counter a few times to release large air bubbles.
- Bake for 60 to 75 minutes. The edges should look set, but the center 2 inches should still wiggle slightly when gently nudged.
- Turn off the oven, prop the door open slightly (about 2 inches), and let the cheesecake cool inside the oven for 1 hour. This slow cooling helps prevent cracking.
- Remove the cheesecake from the oven and let it cool completely on a wire rack. Once cool, cover and refrigerate for at least 6 hours, preferably overnight, before serving.
Notes
- Use room temperature ingredients for the filling to ensure a smooth, lump-free batter.
- Do not overbeat the batter once the eggs are added; too much air causes rising and subsequent cracking.
- If you prefer a topping, wait until the cheesecake is fully chilled before adding fruit or chocolate sauce.
Nutrition
- Serving Size: 1 slice
- Calories: 450
- Sugar: 35g
- Sodium: 300mg
- Fat: 30g
- Saturated Fat: 18g
- Unsaturated Fat: 12g
- Trans Fat: 0.5g
- Carbohydrates: 40g
- Fiber: 1g
- Protein: 8g
- Cholesterol: 120mg