

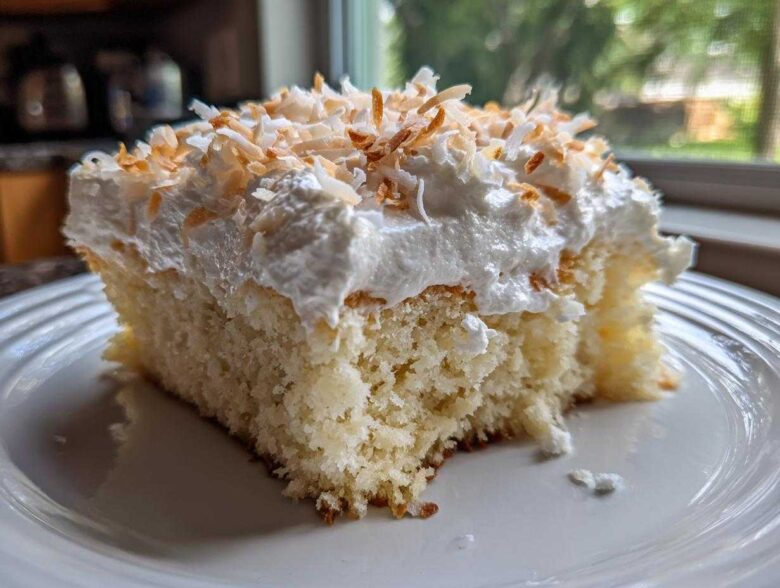
Oh my gosh, when the weather gets warm, I swear my brain just turns off the need for complicated baking! I don’t know about you, but when I need a dessert that’s guaranteed to disappear fast, something impossibly moist and ridiculously easy wins every time. That’s why I have to tell you about my ultimate coconut poke cake. Seriously, this isn’t just moist—it’s practically dripping with creamy goodness because we soak it straight out of the oven! To learn a little bit more about how we bake these amazing treats, check out our story over at why we love kitchen adventures.
I always make this for neighborhood barbecues because it’s a total no-fail dessert for parties. You just bake a simple white cake, poke holes all over it, and pour in this magical sweet coconut soak. It sets up looking gorgeous—super creamy and decadent—but takes almost no real effort. Trust me, if you want happy faces around your table fast, this is the recipe you need in your rotation!
Why This Easy Coconut Poke Cake is a Crowd Favorite
There’s a reason this recipe has saved my summer potlucks plans more times than I can count. It’s just so incredibly simple, but everyone assumes you spent hours on it. It’s my go-to easy coconut poke cake because it hits all the right notes for a crowd.
- It’s the definition of a quick dessert to make—bake time is standard, and the soak comes together while it cools slightly.
- The texture is just unbelievable. It’s an ultra-moist coconut cake recipe; you won’t get any dry edges here, period.
- It travels beautifully! It’s sturdy enough for a picnic basket, yet tastes like a fancy layered cake. It’s a true no-fail dessert for parties.
- It feeds a crowd! Baking it in a 9×13 pan means you get tons of servings without needing to stack things up like a wedding cake.
Key Features of Our Coconut Cream Poke Cake
What really sets this apart from other sheet cakes? It’s all about that soak! We aren’t just using water or sugar syrup here. We are using the heavy hitters: sweetened condensed milk and cream of coconut. That’s where the magic happens, folks.
When that warm cake absorbs that mixture, you end up with this beautifully dense, yet strangely light, almost pudding-like layer right under the topping. It creates that amazing creamy coconut dessert texture that makes people ask for the recipe immediately. You take one bite, and you realize why people go crazy for this Coconut Cream Poke Cake.
Gathering Ingredients for Your Moist Coconut Cake Recipe
Okay, let’s talk supplies! The great thing about making this moist coconut cake recipe is that you probably have half of this stuff already lurking in your pantry. We are keeping this super straightforward, using a white cake mix as our base because, hey, easy is right in the name!
Here is everything you need nestled together for your coconut poke cake adventure:
- One box of good quality white cake mix (plus the eggs, oil, and water the box calls for!)
- One can (14 ounces) of sweetened condensed milk—this is totally crucial for sweetness!
- One can (15 ounces) of cream of coconut. I repeat, this is NOT the same as standard coconut milk, don’t grab the wrong one!
- Just one little teaspoon of coconut extract to boost that flavor.
- One cup of boiling water—this helps the soak dissolve perfectly.
- One cup of sweetened shredded coconut—we need this for toasting later!
- One whole tub of thawed frozen whipped topping (the 8-ounce kind works perfectly).
Ingredient Notes and Substitutions for Your Coconut Poke Cake
Let’s dive into the tricky parts so your cake turns out exactly as creamy as mine! First, that cream of coconut: you want the thick, syrupy kind you sometimes find near the cocktail mixers, often sold in a can, which is heavily sweetened. If you only grab standard coconut milk, your cake will be watery, not rich!
Also, please don’t skip toasting your shredded coconut! It adds the best little crunch and deep flavor contrast to the soft cake underneath. Spread it on a baking sheet and pop it into the oven for just a few minutes—watch it like a hawk so it doesn’t turn black overnight instead of golden brown!
Finally, if you are bringing this to a very hot picnic or just prefer something heartier than whipped topping, you totally can swap it out. I’ve made this using a simple, firm cream cheese frosting instead, and it holds up like a champion. It’s still delicious, just changes the whole vibe slightly!
Step-by-Step Instructions for the Perfect Coconut Poke Cake
Alright dear baker, this is where the magic truly happens for our coconut poke cake! Don’t let the steps scare you; these are all super quick actions that lead to maximum reward. Remember that the entire goal here is saturation, so timing matters a little bit, but it’s so forgiving. You can find tons of other simple baking guides over at our main baking page, but this one is special!
Baking and Poking the Cake Base
First things first, mix up that white cake batter exactly as the box tells you to for a 9×13 pan. Pop it in the oven and bake it until it’s done—use your usual toothpick test. The absolute most important moment comes right when it comes out: while the cake is still piping hot from the oven, you need to poke holes everywhere!
Grab a wooden spoon handle—it gives you a nice wide hole—or even a sturdy fork. Poke deeply all over the surface, spaced about an inch apart. Don’t be shy! If you wait until the cake starts cooling down, the soak won’t penetrate all the way to the bottom, and we need every bit of that creamy goodness soaking in!
Creating the Sweetened Condensed Milk Cake Soak
While you’re waiting for the cake to cool just slightly (maybe 10 minutes so you don’t burn yourself!), whisk up the soak. In a medium bowl, toss in your sweetened condensed milk, that thick cream of coconut, your coconut extract, and the cup of boiling water.
Whisk vigorously! You want this mixture to be completely smooth—you’re looking for that point where everything is totally combined and looks uniform. If you see streaks of milk or coconut clinging to the bottom, keep whisking! This golden liquid is what turns that plain cake into the most delicious creamy cake you’ve ever had.
Soaking, Cooling, and Topping Your Coconut Poke Cake
Now for the pouring stage! Slowly drizzle that prepared soak all over the warm surface of the cake. Watch it disappear right into those holes you made—it’s so satisfying! Let the cake hang out on the counter until it’s completely cool to the touch. This usually takes an hour or two.
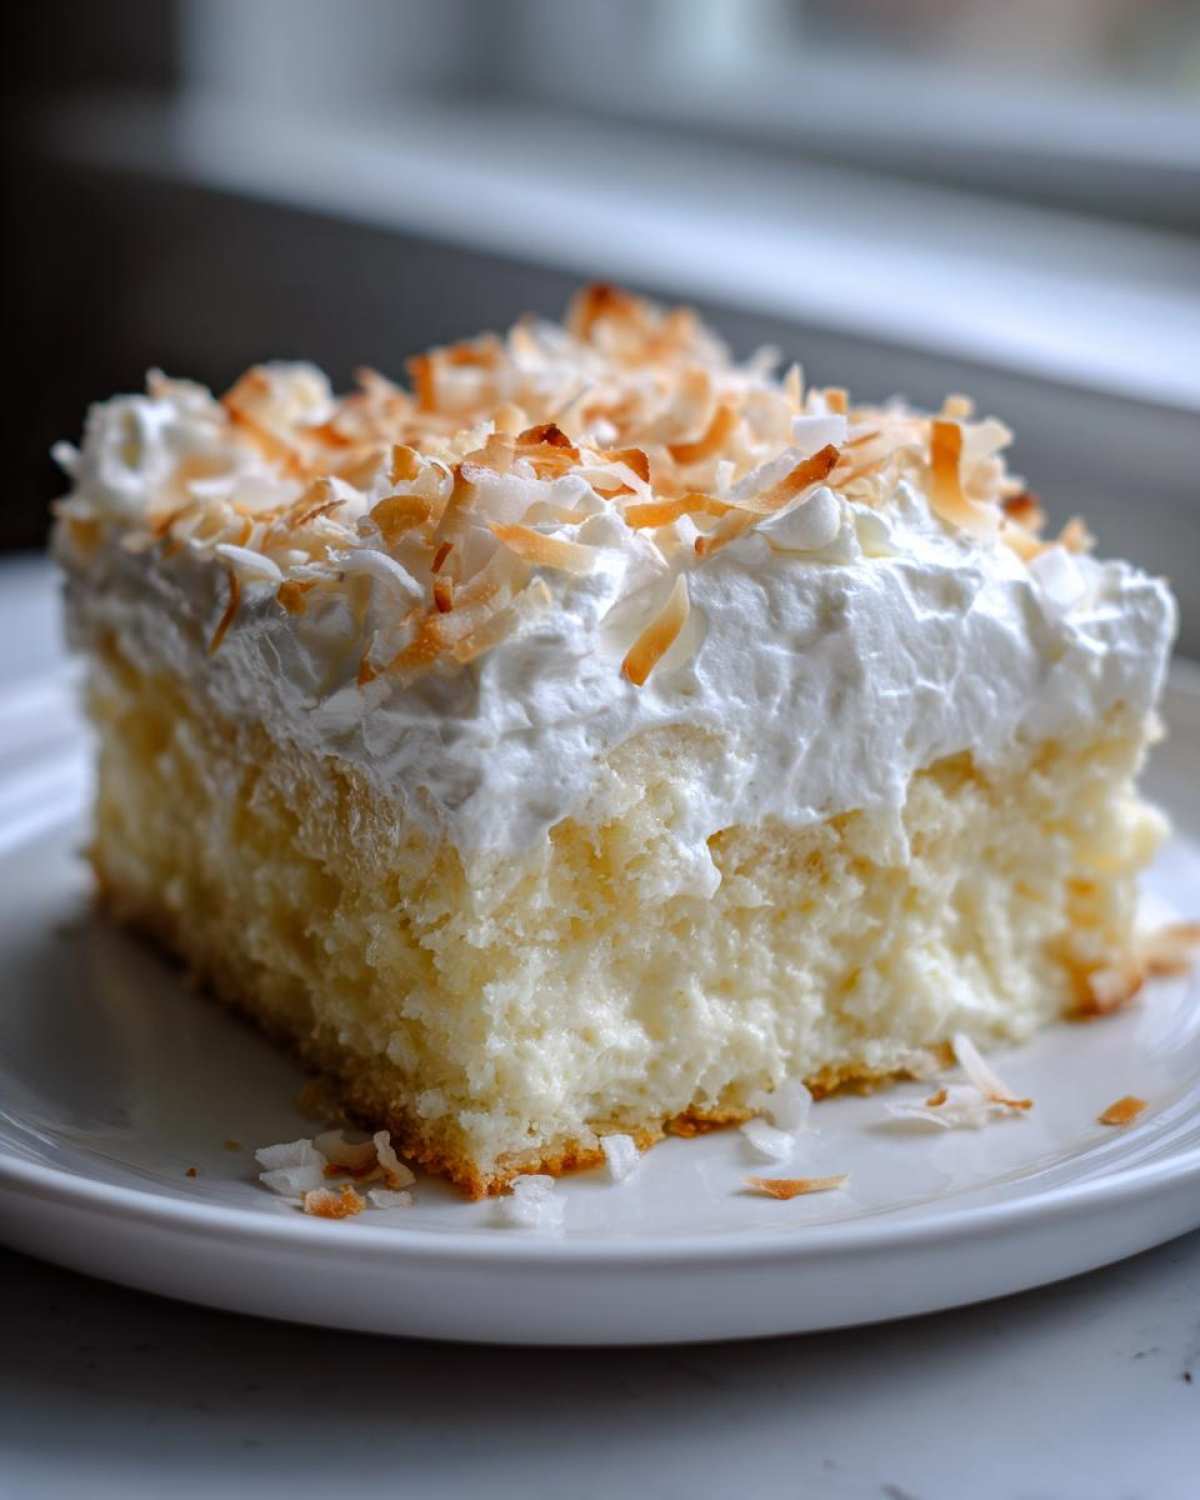
Once it’s thoroughly cooled down, spread that thawed whipped topping right over the top, smoothing it out nicely. That’s the base for our cloud-like finish! Finally, sprinkle all that perfectly toasted coconut over the top. The very last, most crucial step for achieving supreme texture is chilling. Pop the whole pan into the fridge for at least two hours before slicing. I promise you, this quiet chilling time is what solidifies the soak and makes the cake perfectly decadent for serving!
Tips for Success with This Creamy Coconut Dessert
I’ve messed this recipe up enough times that I’ve learned a few little tricks to make sure every single coconut poke cake I make is absolutely perfect—and I mean *perfectly* creamy. The magic isn’t just in the ingredients, it’s in the tiny details that guarantee success.
First off, let’s talk about the chilling time again because I can’t stress this enough: Do not rush the chill! If you try to serve this cake an hour after you whip the topping on, it will be messy and the soak won’t have set up properly. You really need that minimum of two hours in the fridge so the sweetened condensed milk layer turns into that soft, sticky, creamy foundation we are looking for.
When it comes to toasting your coconut, this step makes or breaks the visual appeal of the topping! You have to dedicate your eyes to that oven. Coconut burns shockingly fast once it decides to brown. I usually set a timer for five minutes, check it, toss it lightly, and then go back for another two minutes max. If you see even a few dark spots, take it out immediately; residual heat will keep those edges going dark!
Also, be gentle when you poke those holes! You want the liquid soak to seep down, not create big tunnels that let the whipped topping sink right through. Use a gentle press-and-twist motion rather than brutally shoving the utensil down every time. This keeps the integrity of the cake base intact, ensuring a beautiful, uniform sweetness across the whole pan of your creamy coconut dessert.
Lastly, if you are preparing this for a party the next day, you can actually apply the topping and the coconut the morning of or even the night before. The moisture in the soak actually helps keep the whipped topping soft and delicious, not weeping or weeping! It’s truly one of the easiest make-ahead desserts you’ll ever encounter.
Serving Suggestions for Your Tropical Poke Cake Ideas
Once your beautiful coconut poke cake has chilled and is ready to go, you might be wondering the best way to present this slice of the tropics! Honestly, it’s fantastic all on its own straight from the fridge, but sometimes a little garnish makes it feel extra special for a gathering.
Since this is such a rich, sweet cake, I find that pairing it with something slightly tart or refreshing really cuts through that sweetness perfectly. Think about serving it alongside a nice, ice-cold glass of black coffee—the bitterness plays so nicely against that condensed milk soak!
For presentation, you just can’t beat fresh fruit. Grab some sliced mango or wedges of fresh pineapple. They don’t even need to be mixed in with the cake itself; just arranging a little pile of bright, juicy fruit next to each serving makes the whole plate just sing “summer vacation!”
If you happen to have been experimenting with the Piña Colada version—maybe you added a splash of rum to the soak—then a little wedge of lime on the plate actually looks fantastic and hints at those bright tropical flavors. Keep it simple, though. The charm of this cake is that it’s already so loaded with flavor, it doesn’t need much fuss!
Storage and Reheating Instructions for Leftover Coconut Poke Cake
Now, the sad but necessary part: what to do when you actually have leftovers! Since we are using that lovely, light whipped topping on this coconut poke cake, we run into a little storage issue that you won’t see with a traditional buttercream dessert.
You absolutely must keep this cake chilled. Since the whipped topping needs the cold to stay fluffy and firm, transfer any leftovers into an airtight container and place it in the refrigerator right away. On the bright side, the cold actually helps the soak firm up even more, making the cake even denser and more flavorful the next day!
How long does it last? Honestly, the cake itself would probably be fine for four or five days, but because of the whipped topping, I really push it only to three days maximum. After day three, the topping starts looking a little sad and deflated, even in the sealed container.
And reheating? Oh honey, no. Please don’t even try it! You can’t microwave something with a whipped topping unless you want a soupy, melted puddle. If you made this cake and decided after a day that you wanted a *warm snack*, you’d have to slice off the topping, reheat just the cake base gently (maybe 10 seconds!), and then go out and buy a fresh tub of whipped topping to put back on top. It’s way easier just to eat it cold, straight from the fridge!
Frequently Asked Questions About Making a Coconut Poke Cake
I always get so many questions when people try this recipe for the first time, and that’s great! It means you’re serious about mastering this easy coconut poke cake. Here are the things I hear most often:
Can I make this a Hawaiian Pineapple Coconut Cake variation?
Oh, I love that idea! You absolutely can turn this into one of those wonderful Hawaiian Pineapple Coconut Cake versions people rave about! Since the base soak is already so creamy and sweet, you have two great options for adding that tropical tang. You can either stir about half a cup of well-drained crushed pineapple directly into your sweetened condensed milk soak before pouring it over the warm cake.
Or, if you want a cleaner soak, just sprinkle canned crushed pineapple (well-drained, remember!) right over the cake immediately after you poke all the holes, and then pour the traditional soak over that. When you add the whipped topping later, maybe even garnish with a maraschino cherry wedge? It instantly turns into a fantastic tropical poke cake idea, and it stays a reliable no-fail dessert for parties!
What is the difference between cream of coconut and coconut milk?
This is the number one confusion point, and getting this wrong means you won’t get the right sweet, thick texture! Please listen up: Cream of Coconut is very thick, syrupy, and heavily sweetened. It usually comes in a can and is often found near drink mixers or international foods. This provides the richness and helps carry the coconut flavor deep into the cake. Think of it like condensed milk, but coconut flavored.
Regular coconut milk, on the other hand, is much thinner, like regular dairy milk, and it usually isn’t sweetened unless the can specifically says so. If you substitute standard coconut milk for the cream of coconut, your cake will end up thin, watery, and mildly flavored. To make sure you have the best possible outcome for this delicious creamy cake, grab the sweetened cream of coconut!
How long does this cake need to chill before serving?
I know everyone is eager to dig in, especially since this is such a quick dessert to make, but chilling is non-negotiable! While you can frost it after it’s cooled to room temperature, you really need a minimum of two hours in the refrigerator. This time allows that amazing condensed milk mixture to fully penetrate every crumb and firm up slightly beneath the whipped topping. If you cut it too soon, it can weep a little, and you’ll lose some of that glorious moisture. Give it the time it asks for, and it will reward you!
Can I use a different cake mix instead of white cake?
While I champion the white cake mix because it provides a very neutral, sweet backdrop for the coconut flavor to shine, you can certainly experiment if you want to make a small change! If you’re aiming for a slight citrus kick—or maybe you’re leaning into that Piña Colada vibe mentioned earlier—a yellow cake mix works beautifully as a substitute.
I’d probably avoid chocolate cake mix for this specific recipe, as mixing chocolate and coconut in this very specific creamy way just doesn’t turn out as balanced. Stick to white or yellow if you want that classic, bright taste perfect for summer potluck desserts!
Estimated Nutritional Data for This Delicious Creamy Cake
Now, before you dive face-first into this glorious mound of coconut heaven, let’s just talk quick numbers. Because this cake is made with sweetened condensed milk and cream of coconut, it is definitely a treat, not an everyday snack! These figures are based on my best estimates for a single slice from the 9×13 pan version, but remember, everyone’s slice is probably a little different around my house!
For more detailed information on how we calculate these figures and our general approach to recipe transparency, please feel free to look over our official nutritional information disclaimer.
Here is a quick snapshot of what you can expect per serving (one slice):
- Serving Size: 1 slice
- Calories: 350
- Sugar: 45g (Yes, it’s sweet, that’s the point!)
- Sodium: 250mg
- Fat: 16g
- Saturated Fat: 12g
- Unsaturated Fat: 4g
- Trans Fat: 0g
- Carbohydrates: 50g
- Fiber: 1g
- Protein: 4g
- Cholesterol: 25mg
See? A wonderful, rich slice of comfort that uses simple ingredients to deliver huge impact. It’s worth every single calorie when you get that perfect bite that screams summer potluck dessert!
Share Your Homemade Poke Cake Experience
Whew! We’ve made it through the baking, the poking, and the chilling. Now that you’ve created your own delicious, ultra-moist coconut poke cake, I really want to hear what you think! Honestly, nothing makes me happier than seeing my readers recreate these family favorites successfully.
Did you have any extra tips or tricks you discovered while making your own batch? Was it an instant hit at your latest gathering? Did you try the pineapple variation, or did you stick strictly to the coconut cream soak? I’m dying to know!
If you served this creamy coconut dessert to friends or family, please leave a rating right below this section! Your feedback helps other readers decide if this quick dessert is right for their next big event. We all learn from each other in the kitchen, and seeing photos of your finished cakes truly makes my day.
If you have any troubleshooting questions that didn’t get answered in the FAQ—maybe something about that tricky whipped topping or toasting the coconut—don’t hesitate to reach out! You can always send us a quick note over at our contact page.
Go share the love, and let the world know how incredible a simple, made-from-a-box-mix coconut poke cake can truly be when you treat it right!
PrintEasy Coconut Cream Poke Cake

Make this simple, moist coconut poke cake using sweetened condensed milk for a creamy, rich dessert perfect for any gathering.
- Prep Time: 15 min
- Cook Time: 35 min
- Total Time: 50 min
- Yield: 12 servings
- Category: Dessert
- Method: Baking
- Cuisine: American
- Diet: Vegetarian
Ingredients
- 1 box white cake mix (plus ingredients listed on box)
- 1 can (14 ounces) sweetened condensed milk
- 1 can (15 ounces) cream of coconut (not coconut milk)
- 1 teaspoon coconut extract
- 1 cup boiling water
- 1 cup shredded sweetened coconut, toasted
- 1 tub (8 ounces) frozen whipped topping, thawed
Instructions
- Prepare the cake mix according to package directions for a 9×13 inch pan. Bake as directed.
- While the cake is still warm, use the handle of a wooden spoon or a fork to poke holes across the entire surface, about 1 inch apart.
- In a medium bowl, whisk together the sweetened condensed milk, cream of coconut, coconut extract, and boiling water until fully combined.
- Slowly pour the liquid mixture evenly over the top of the warm cake, allowing it to soak into the holes. Let the cake cool completely at room temperature.
- Once cool, spread the thawed whipped topping evenly over the cake surface.
- Sprinkle the toasted shredded coconut over the whipped topping.
- Chill the cake for at least 2 hours before slicing and serving.
Notes
- To toast the coconut, spread it on a baking sheet and bake at 350 degrees Fahrenheit for 5 to 8 minutes, watching closely to prevent burning.
- For extra coconut flavor, substitute half of the required water in the cake mix with coconut milk.
- You can substitute the whipped topping with a simple cream cheese frosting if you prefer a sturdier topping.
Nutrition
- Serving Size: 1 slice
- Calories: 350
- Sugar: 45g
- Sodium: 250mg
- Fat: 16g
- Saturated Fat: 12g
- Unsaturated Fat: 4g
- Trans Fat: 0g
- Carbohydrates: 50g
- Fiber: 1g
- Protein: 4g
- Cholesterol: 25mg