

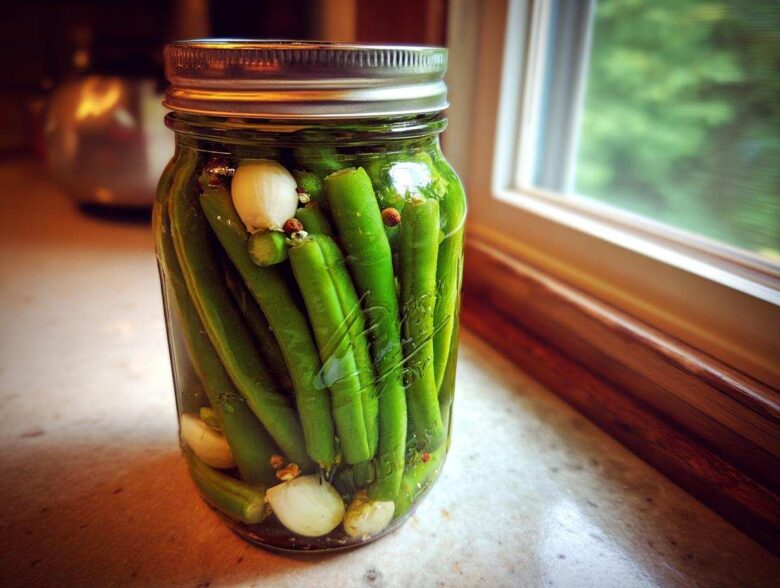
Oh my gosh, when summer hits and you have a mountain of gorgeous, firm green beans staring at you, you absolutely HAVE to make dilly beans! Seriously, nothing beats that tangy, garlicky crunch. I spent years messing around, trying to figure out if I preferred canning them for pantry space or keeping them quick in the fridge, and I finally cracked the code for unbelievable texture.
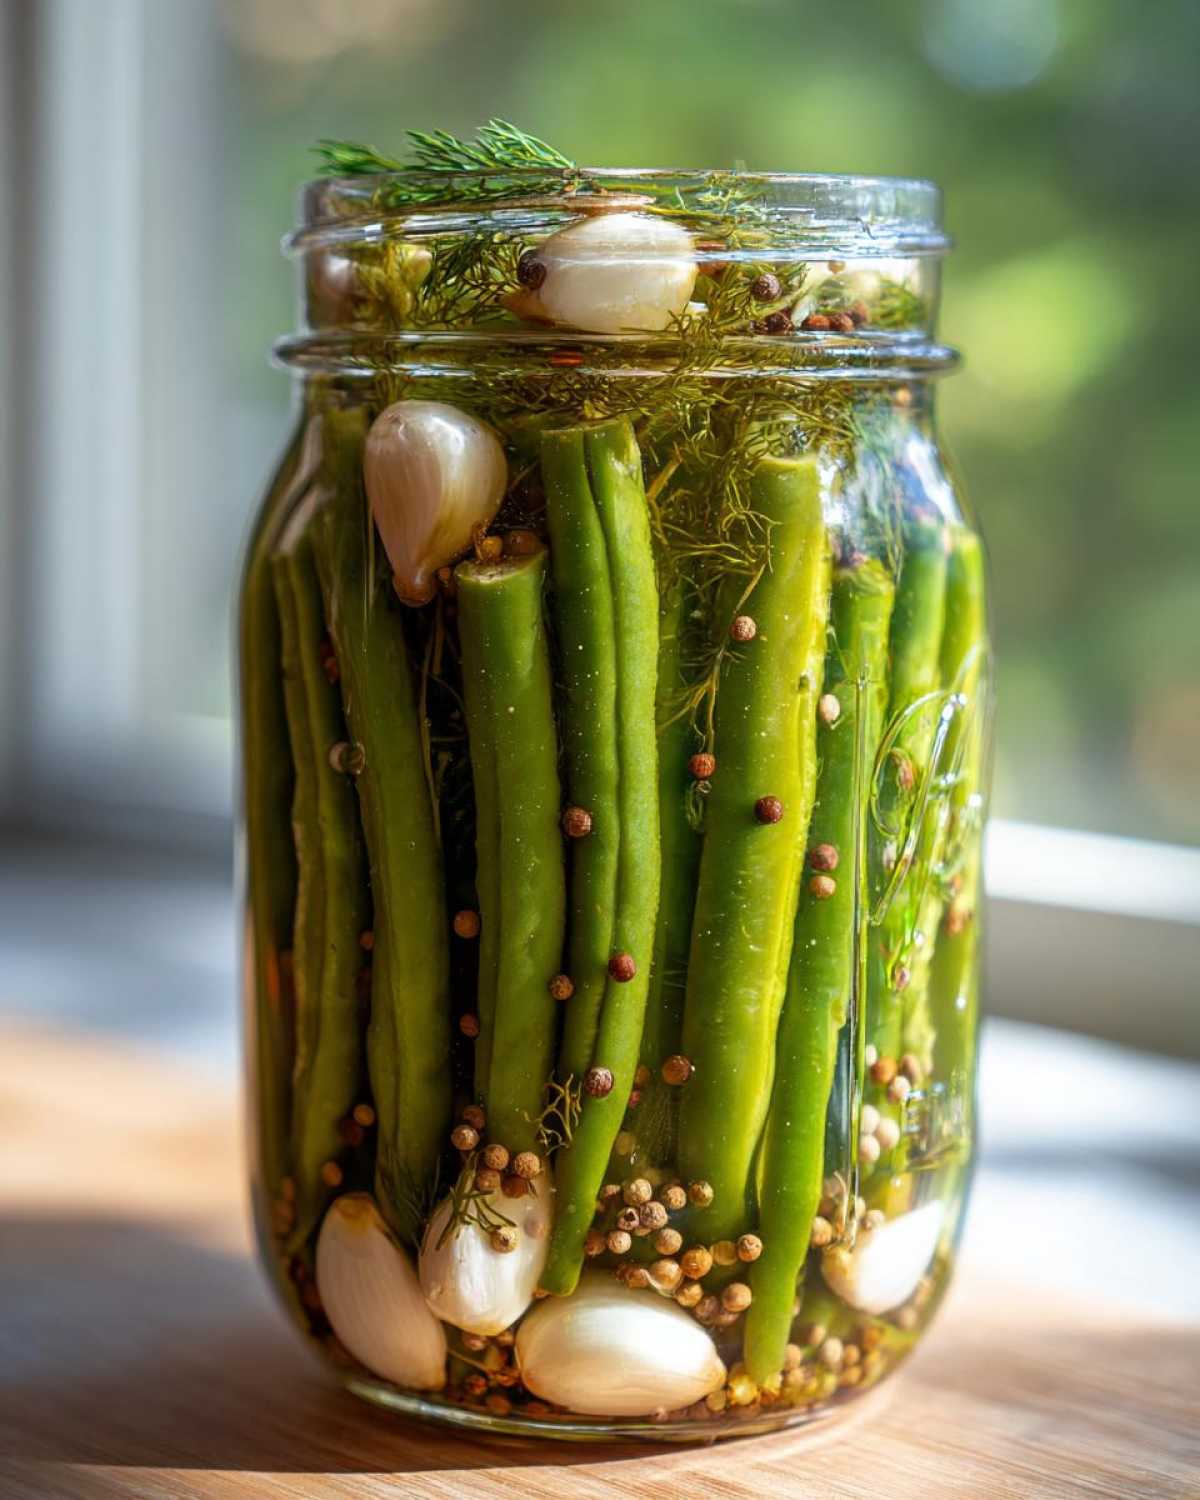
The best part? I’m going to show you both ways to do it perfectly. Whether you’re looking for a super easy, fast refrigerator pickles method or you want to seal those beauties up safely for winter storage, this guide covers everything. Trust me, getting that satisfying *snap* every single time is the magic we are aiming for here!
Why This Crunchy Dilly Beans Recipe Works for Everyone
I designed this recipe to be foolproof, even if you’ve never touched a canning jar before! It’s the perfect beginner pickling guide for preserving summer green beans. You get that classic, sharp garlic dill flavor that just sings, and we nail the texture every time.
- You choose your own adventure: quick fridge pickles or shelf-stable jars.
- The brine recipe delivers maximum tanginess without being overpowering.
- The techniques used guarantee those beans stay beautifully crisp!
Quick Preparation Details for Your Dilly Beans
You’ll be shocked how fast this comes together. The prep time is sneaky because you’re just trimming beans, but the hands-on total time is really manageable.
Prep Time: 30 min
Cook Time: 15 min
Essential Ingredients for Perfect Dilly Beans
When making your homemade pickles, the quality of your base ingredients makes a huge difference. We keep things super simple here, focusing on quality. You’ll need about 2 lbs of green beans, and please make sure they are trimmed! Nobody wants floppy ends floating around in their jar.
For the brine, it’s vital that you use 4 cups of white vinegar that is exactly 5% acidity—no less! We mix that with 4 cups of water and 4 tablespoons of true pickling salt. We don’t mess around with regular table salt here; it has anti-caking agents that can make your brine cloudy.
Ingredient Notes and Substitutions for Dilly Beans
The flavor really comes down to the garlic and dill. I always try to snag fresh dill heads—they are incredible for that signature aroma. But if you can’t find them, 2 teaspoons of dried dill seed works just fine for that garlic dill pickles base in each quart jar.
Also, look at those peppercorns! Don’t skip them. And that little bit of optional red pepper flake? That’s how you turn it into a fantastic spicy pickled snack without ruining the classic profile. Keep it fresh, keep it simple!
How to Prepare Crunchy Dilly Beans: Step-by-Step Instructions
Okay, let’s get down to the nitty-gritty! This is where we make the magic happen. Remember how I stressed using fresh beans? Well, here’s a little insider trick before we even touch the stove: soak those trimmed beans in an ice bath for about 30 minutes! It shocks them and makes them extra ready to capture that satisfying snap we’re after. After that bath, drain them really well.
Preparing the Brine for Your Dilly Beans
Now for the brine—this is the flavor foundation. Grab a large, non-reactive pot—stainless steel is perfect, don’t use aluminum! Combine your vinegar, water, and pickling salt. Put it on high heat and bring it up to a full, rolling boil. Keep stirring it until you see every last grain of salt disappear into the liquid. Once that salt is dissolved, kill the heat immediately. We want that brine hot for packing, but we don’t want it boiling over!
Packing Jars for Flavor: Garlic Dill Pickles Base
This layering is key for that deep, wonderful flavor. Into the bottom of each clean quart jar—whether you’re canning or just making quick pickled vegetables—you’re first adding your flavorings. That means one halved garlic clove, one teaspoon of peppercorns, and one teaspoon of your dill. If you’re rocking the spicy version, toss in that little pinch of red pepper flakes right now too!
Next, stuff the jars! Pack those green beans in tightly, standing them up vertically if you can. They should be snug, but don’t mash them so hard they break. Once they are packed, the hot brine comes next, poured right over all those delicious spices sitting at the bottom.
Choosing Your Preservation Method: Canning vs. Refrigerator Pickles
This is the big decision point, isn’t it? Do you want immediate gratification or pantry longevity? I do both, depending on how many beans I have! If you want these tangy vegetable snacks on hand all year, you’ll want to learn how to can dilly beans safely.
When canning, pour that hot brine over your packed jars, making absolutely sure you leave exactly a half-inch of space at the top—that’s your headspace. Wipe the rims, put the lids on finger-tight, and get them into a boiling water bath for 10 minutes. Don’t forget to adjust that time if you live high up in the mountains!
But if you just want to snack on them tomorrow? Go the route of refrigerator pickles! Pack your hot brine right up to that half-inch headspace, screw the lids on loosely, let them sit on the counter to cool down a bit, and then get them into the fridge. They are technically safe to eat after 48 hours, but honestly, they taste way better after a full week of marinating!
Expert Tips for Achieving the Best Crunchy Dilly Beans
Okay, let’s talk crunch. This is literally my favorite part of making crunchy dill beans. If you want that perfect snap, you can’t just hope for it; you have to force the issue! Remember that ice bath I mentioned earlier? That’s tip number one. Shocking those green beans right after trimming and before they even see the brine helps them hold their structure like champions.
But if you’re canning and you want serious, long-term crispness? You need an extra little trick up your sleeve. My grandmother always swore by adding a single grape leaf to the jar right before putting the lid on. The tannins in the leaf are natural crisping agents! If you can’t find grape leaves, you can use a tiny pinch of pickling lime—just be sure you research that method first so you rinse things properly.
The absolute key, though, is starting with beans that are not old and floppy. Use them the same day you pick them if you can! That freshness is the foundation for truly amazing, crunchy dill beans.
Serving Suggestions for Tangy Vegetable Snacks
So, you’ve jarred your dilly beans, and now you’re wondering how fast you can get through them! These spicy or classic garlic dill pickles are so much more than just a side dish; they are the perfect flavor punch for pretty much anything you’re eating.
Honestly, they are fantastic straight out of the jar as a quick, healthy, crunchy snack when you’ve got that afternoon craving. But here are a few ways I always serve my batch of tangy vegetable snacks:
- Elevate Sandwiches: Forget those sad, limp pickle chips! Stuffing a few whole dilly beans onto your next turkey club or grilled cheese adds the best texture contrast. They cut right through rich cheese or fatty meats.
- The Ultimate Charcuterie Addition: Seriously, ditch the olives for a day. Load these up on your next cheese board next to some sharp cheddar or salty prosciutto. They work just as well as capers!
- Bloody Mary Garnish: This is non-negotiable if you ask me. They make the absolute best garnish for a Bloody Mary. They are crunchy, spicy (if you made the hot batch), and frankly, they are better than the celery stalk.
- Tuna Salad Secret: If you’re making tuna or chicken salad, finely chop up three or four of these beans and stir them in. That little bit of vinegar and dill makes the whole thing taste brighter and fresher.
You’ll find yourself reaching for these jars constantly once you realize how many ways you can use them!
Storage and Reheating Instructions for Homemade Pickles
Keeping your homemade pickles fantastic means understanding how to store them once they are processed. If you canned them using the water bath method, sealed jars can sit happily in a cool, dark pantry for up to a year. Just make sure you hear that satisfying *pop* when you open them later on!
For the refrigerator pickles, those wonderful dilly beans absolutely must stay zipped up in the cold environment of your fridge. Once they’re in there, they are best consumed within about two months. They won’t last long, though—I promise you that!
Frequently Asked Questions About Dilly Beans
I know you have questions! When you start preserving summer green beans, sometimes the canning part seems a little mysterious. Don’t worry one bit! Most of the time people ask me about texture or ingredient swaps. I’ve gathered the top things people always ask me about my pickled green beans recipe right here.
Can I use dried dill seed instead of fresh dill heads for my dilly beans?
Yes, you absolutely can! My recipe calls for 4 teaspoons of fresh dill heads per quart jar, but if the dill heads aren’t available where you shop, just switch over to 2 teaspoons of dried dill seed for that same jar. The dried seed gives a slightly more intense, sharp flavor, but it works perfectly fine for achieving that classic garlic dill pickles base. Just use what you have on hand!
What is the best way to ensure my refrigerator pickles stay crisp?
If you are making the quick version—the refrigerator pickles—the crispness is often easier to maintain in the short term. The #1 thing I recommend for guaranteed crunch with these is that 30-minute ice bath soak *before* you pack the beans into the jar. That cold shock really locks the structure in place before the hot brine hits them. Make sure you use young beans too; older ones just won’t snap the same way!
Another question I get a lot is about making them slightly sweeter. If you want your tangy vegetable snacks mellowed out, you can definitely reduce the salt slightly or swap out about half a cup of the vinegar for water, but if you start messing with the acid balance too much, you definitely can’t can them safely anymore. For the fridge version, feel free to add a tiny bit of sugar to the brine if you like a milder flavor!
Estimated Nutritional Information for Dilly Beans
I always feel a little funny sharing nutrition facts for something that is basically vinegar, salt, and veggies, but I know a lot of you track this stuff! Remember, since these are homemade and you control the salt amount, these numbers are just a baseline estimate for a standard serving size of the classic dill flavor profile.
If you are making dilly beans using the brine recipe provided, here’s what you can generally expect, based on a half-cup serving size:
- Calories: 25
- Fat: 0g
- Saturated Fat/Trans Fat: 0g
- Cholesterol: 0mg
- Carbohydrates: 5g
- Fiber: 2g
- Sugar: 1g
- Protein: 1g
- Sodium: 350mg (This is the big one to watch, so taste your brine carefully!)
A little disclaimer here to keep us all honest: these are estimates based on the ingredients as listed. If you go wild adding tons of sugar or use more pickling salt than suggested, those numbers might change a bit! But generally, these are fantastic, low-calorie, healthy crunchy snacks when enjoyed in moderation.
PrintCrunchy Dilly Beans: Refrigerator and Canning Methods
Make crisp dilly beans using either a quick refrigerator method or traditional water bath canning. This guide provides a classic dill flavor profile and a spicy variation.
- Prep Time: 30 min
- Cook Time: 15 min
- Total Time: 45 min
- Yield: 4 quarts
- Category: Preserves
- Method: Canning or Refrigeration
- Cuisine: American
- Diet: Vegetarian
Ingredients
- 2 lbs fresh green beans, trimmed
- 4 cups white vinegar (5% acidity)
- 4 cups water
- 4 tablespoons pickling salt
- 4 cloves garlic, peeled and halved (for each quart jar)
- 4 teaspoons whole black peppercorns (for each quart jar)
- 4 teaspoons fresh dill heads or 2 teaspoons dried dill seed (for each quart jar)
- 1/2 teaspoon red pepper flakes (optional, for spicy version)
Instructions
- Wash the green beans thoroughly. Trim the ends off each bean. For best results, use small to medium-sized beans.
- Prepare your jars: Sterilize four quart-sized canning jars if canning, or simply wash them well if using the refrigerator method.
- Prepare the brine: In a non-reactive pot, combine the vinegar, water, and pickling salt. Bring the mixture to a rolling boil, stirring until the salt dissolves completely. Remove from heat.
- Pack the jars: Place the garlic halves, peppercorns, dill, and red pepper flakes (if using) in the bottom of each jar. Pack the trimmed green beans tightly into the jars vertically.
- For Canning: Carefully pour the hot brine over the beans, leaving 1/2 inch headspace. Remove air bubbles with a non-metallic utensil. Wipe rims clean, apply lids and bands fingertip tight. Process in a boiling water bath for 10 minutes (adjust time for altitude). Cool and check seals.
- For Refrigerator Pickles: Pour the hot brine over the beans, leaving 1/2 inch headspace. Remove air bubbles. Wipe rims clean, apply lids loosely. Let cool on the counter, then refrigerate. Wait at least 48 hours before eating.
- To keep beans crunchy, soak them in ice water for 30 minutes before packing, or add 1/2 teaspoon of pickling lime or grape leaves to each jar (if canning).
Notes
- For the crunchiest beans, use very fresh, young green beans.
- If you do not have fresh dill heads, use dried dill seed for a strong flavor.
- If canning, always follow current USDA guidelines for safe processing times.
- Refrigerator pickles must be kept cold and are best consumed within 2 months.
Nutrition
- Serving Size: 1/2 cup
- Calories: 25
- Sugar: 1
- Sodium: 350
- Fat: 0
- Saturated Fat: 0
- Unsaturated Fat: 0
- Trans Fat: 0
- Carbohydrates: 5
- Fiber: 2
- Protein: 1
- Cholesterol: 0