

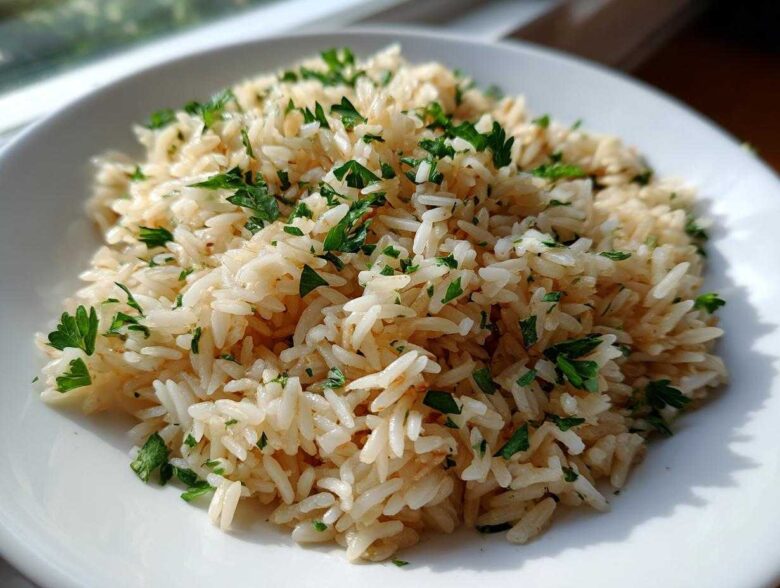
Oh, listen to me, you need to stop serving sad, gummy rice! Side dishes are where meals fall apart or become truly memorable, and I’ve finally perfected something that makes everyone ask for the recipe. Forget everything you thought you knew about cooking rice on the stove; this rice pilaf recipe uses a simple trick that guarantees perfectly separate, fluffy grains every single time. Trust me, mastering the art of toasting the pasta and the rice first was a game-changer in my kitchen. Honestly, when I first tried this method, I almost cried because it was just so good and so easy. It’s my go-to for everything! If you want to read more about my kitchen adventures, you can check out my philosophy here.
Why This Homemade Pilaf Technique Guarantees Fluffy Rice Pilaf
The secret to getting this Best Rice Pilaf Technique right isn’t about fancy equipment; it’s purely about a crucial couple of minutes right at the start. We are actually making a proper Toasted Rice Recipe here! You have to sauté the orzo until it’s golden brown before doing anything else—that little bit of color adds a depth of nutty flavor you just can’t get otherwise. Then, we take the time to lightly toast the Basmati rice grains in that delicious fat mixture. This step is non-negotiable because it coats the starch, telling each grain, “Stay separate, friend, don’t clump up!” That’s what gives you that light, airy texture.
Quick Prep and Cook Time for Your Weeknight Rice Recipe
And the best part? This isn’t one of those sides that takes all afternoon. Seriously, you’re looking at only 10 minutes of active prep time, and the whole thing is done in about 35 minutes total. That makes this an ideal Weeknight Rice Recipe when you need something special fast but don’t have time for complicated stovetop stirring. We let the lid do all the hard work once it starts simmering, so you can focus on your main course!
Gathering Ingredients for Your Flavorful Rice Dish
Before we get to the magical toasting part, we need to make sure our pantry is stocked with the right stuff. For a truly savory rice side, the quality of your broth really matters. I always try to use a good quality chicken or veggie broth because it infuses the whole dish with so much flavor as it cooks—don’t skimp here, it makes all the difference!
Key Components of This Rice Pilaf
We aren’t just using plain rice here; we’re adding orzo pasta into the mix. I love how that little bit of pasta gives the texture something extra to chew on! You’ll also need some fresh aromatics like onion and garlic to build that initial delicious base before the rice even hits the heat. Get these ready before you start because things move fast once you turn on the stove!
Step-by-Step Instructions for Perfect Rice Pilaf
Okay, now for the fun part where we actually put everything together to create the best rice pilaf you’ve ever had! This stovetop method is so reliable, but you absolutely have to follow the sequence I lay out here to guarantee those beautiful, separate grains. First things first, get your oil and butter melted down in a good, heavy saucepan over medium heat. This is where the flavor journey starts, so keep an eye on it! Next, we move into the crucial layering process that makes this dish shine. Remember, patience during the sautéing pays off big time later.
The Crucial Step: Toasting Orzo and Rice for Rice Pilaf
Don’t just dump everything in at once—that’s the cheating way, and we don’t do cheating ways here! Start by adding just the orzo pasta to the hot fat. Stir it constantly until it’s glowing a lovely light golden brown, which usually takes about three to five minutes. Then toss in your chopped onion and cook until it’s soft. Once the garlic goes in, you only give it about a minute until you can really smell it. Now, for the big payoff: add the Basmati rice and stir it like you mean it for a full two minutes! That toasting is what locks in the structure and gives you that amazing Fluffy Rice Pilaf texture.
Simmering and Resting: The Simple Rice Cooking Method
Once everything is smelling heavenly and toasted, pour in your broth, salt, and pepper all at once. Bring that mixture up to a rolling boil. As soon as it hits that boil, you need to dial the heat down immediately to the *absolute lowest setting* your stove offers. Cover it with a tight-fitting lid and walk away! You must let it cook for exactly 15 minutes without cheating and peeking—seriously, don’t do it! After that 15 minutes, take the entire pan completely off the heat and let it sit, still covered tightly, for another 10 minutes. This resting is the actual secret to the Simple Rice Cooking Method, as it lets the steam finish the cooking process evenly. Once you lift that lid after the full rest, just fluff gently with a fork. If you want to see how I manage my cookware budget for delicious recipes like this one, check out my main site.
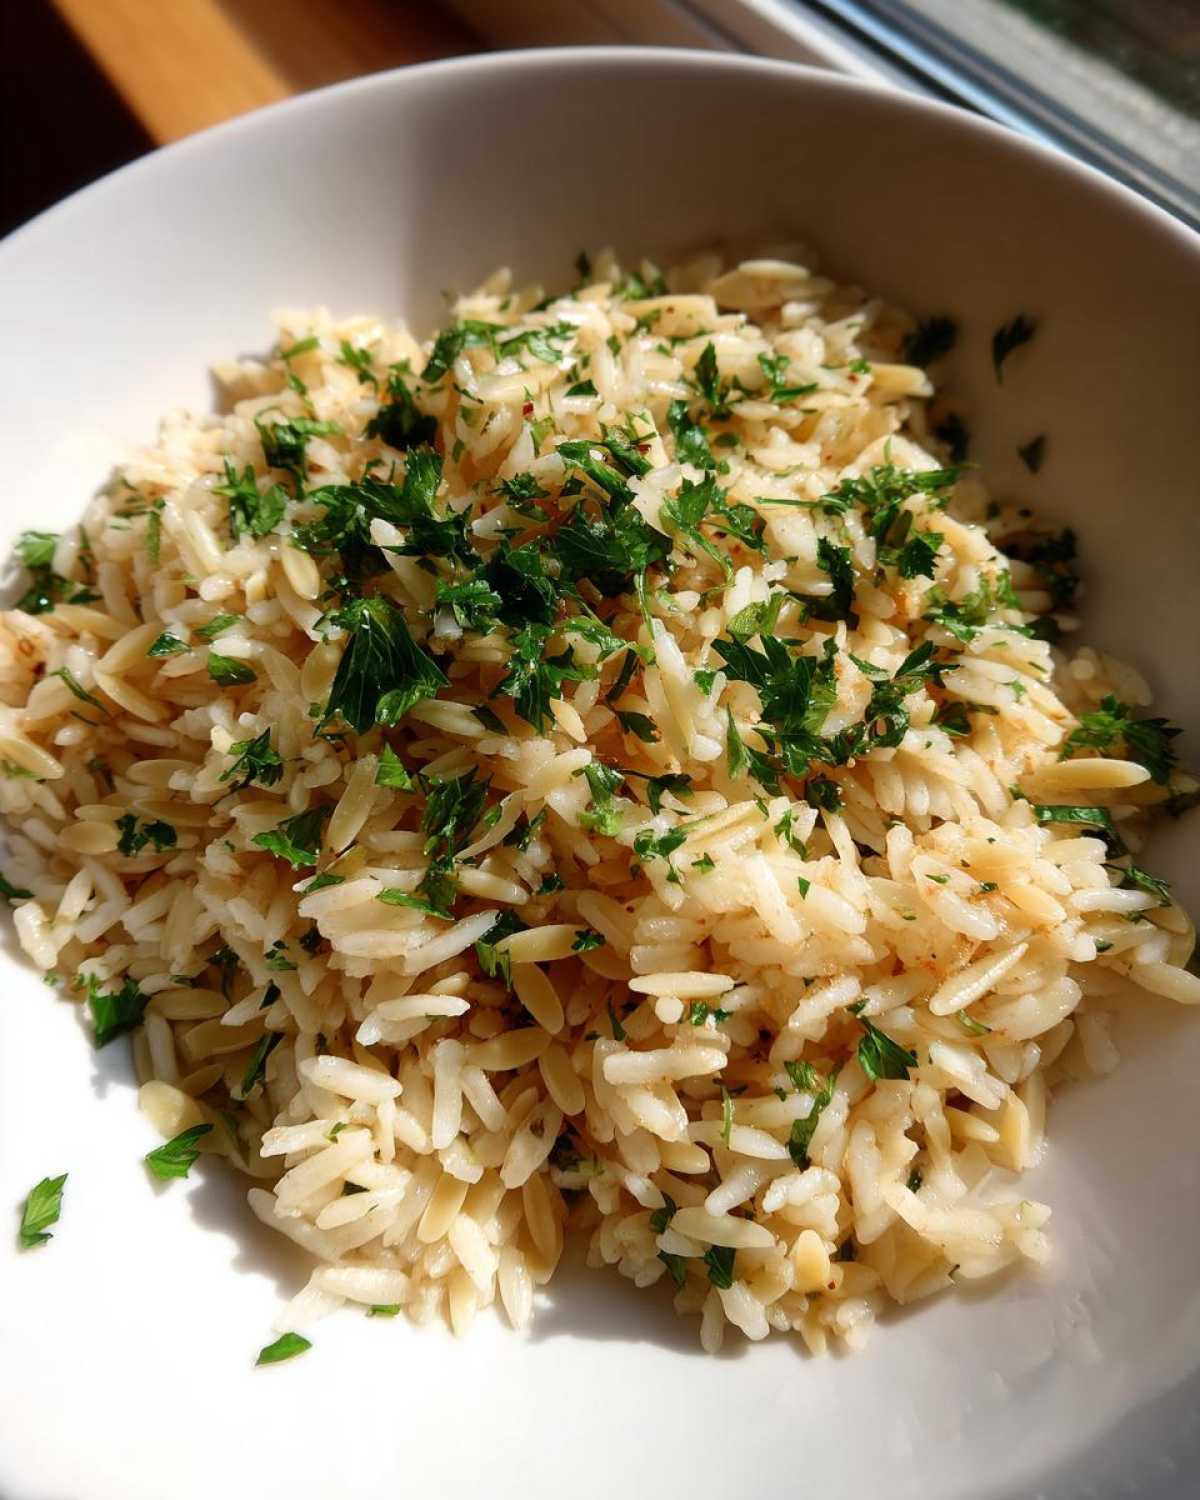
Tips for Success with Your Basmati Rice Pilaf
I want you to nail this every time, so let me give you a couple of pro pointers to avoid those common, sad, gummy rice disasters. First off, about the ingredient quality: I highly recommend using Basmati rice. It has a naturally long grain that really does stay separate better than standard long-grain white rice, which just makes for a superior Basmati Rice Pilaf. If you use stale rice, you’re going to have trouble, no matter how perfectly you toast it!
Another thing people mess up is the fluffing! You’ve done all that hard work toasting and resting, so don’t ruin it by smashing the grains with a wooden spoon. Get a simple dinner fork and use a gentle raking motion across the top. That light touch is what separates the grains beautifully, turning it into a true savory rice side rather than a single, giant lump. If you ever run into a problem, feel free to reach out to me directly; I love troubleshooting texture issues!
Making Rice Pilaf Variations for Different Dinners
I love that this basic rice pilaf recipe is practically a blank canvas! It’s so tasty on its own, but it’s also so easy to pivot based on whatever main dish you’re serving. If you’re making roast chicken or a simple baked white fish, this pilaf is naturally the perfect partner. But we can jazz it up so easily! Remember those notes I put in the recipe? You absolutely must try adding a quarter cup of slivered almonds or some tart dried cranberries right when you fluff it at the end. They give the texture such a wonderful surprise.
And oh my goodness, if you want a brighter flavor that screams Mediterranean, don’t be shy about swapping out some of that chicken broth for lemon juice. It cuts through richer meats beautifully and makes it the best Side Dish for Chicken Dinner. It totally elevates the dish without adding any real work.
Creating a Garlic Herb Rice Pilaf
If you are leaning toward something earthier—maybe serving this alongside a hearty beef stew—you have to try turning it into a proper Garlic Herb Rice. You can toss in a teaspoon of dried thyme and maybe a half-teaspoon of dried rosemary right when you add the broth in Step 6. The herbs bloom beautifully as the rice steams. If you have fresh herbs, even better! Just snip some parsley or chives right over the top when you go to fluff it. That fresh aromatic element makes all the difference as you serve it up.
Serving Suggestions for This Easy Side Dish Recipe
This Easy Side Dish Recipe is almost too versatile! I find myself making it three or four times a month now that I know the trick to keeping it fluffy. Seriously, this pilaf doesn’t compete with the main event; it happily sits alongside it and makes the whole meal feel more put-together. You don’t need a huge holiday spread for this to feel special.
For weeknight planning, I have three go-to pairings depending on what I’m doing. If you’re roasting a simple chicken—maybe throwing some lemons in the cavity—this rice is the perfect backdrop. The savory notes of the broth soak up all those lovely pan drippings, honestly. It’s a natural fit!
When I’m serving something richer, like slow-cooked pot roast or even some pan-seared pork chops, this pilaf shines because it won’t feel heavy like mashed potatoes sometimes do. You just let the rice do its job, fluffy and light. And for fish? A quick salmon fillet cooked simply with salt and pepper is perfectly matched by the simple, aromatic nature of this rice. It’s dependable and delicious every single time!
Storage and Reheating Instructions for Leftover Rice Pilaf
You know how leftovers are? Sometimes they turn into sad little bricks of rice, but not this batch! Because we took such care to get the moisture balance perfect upfront, this pilaf holds up really well. If you have any left—which is rare in my house, watch out when you leave the room!—you need to put it away properly so it’s great the next day.
Make sure that rice has cooled down a bit before you seal it up. Don’t put a piping hot container right into the fridge, or you’ll create steam condensation and make the rice soggy later. Once it’s room temperature, pop it into a shallow, airtight container. Storing it this way on the fridge shelf means it should stay perfectly good for about three to four days. Any longer than that and the texture really starts to suffer, in my opinion.
Now for reheating, because this is key to keeping that fluffy texture! Never, ever just blast it in the microwave dry—that just turns it into rock-hard rice bits. When you scoop out the portion you want, put it in a microwave-safe bowl, and this is the important bit: add maybe a teaspoon or two of broth or even just plain water over the top of the rice. It doesn’t need much, just enough to create some moisture when it heats up.
Cover the bowl loosely with a damp paper towel, or use a lid that’s slightly ajar, then heat it in short bursts. Check it every 30 seconds and give it a stir. That little bit of extra liquid turns into steam, which rehydrates the grains beautifully, bringing the rice right back to that nearly-fresh texture. If you ever want to read my thoughts on proper food safety when dealing with starches, you can find my disclaimer page here. It’s all sensible stuff, really!
Frequently Asked Questions About Rice Pilaf
It’s funny how many people ask me about rice! We all grew up eating rice one way or another, but when you want that perfect texture, questions pop up. Here are some of the things I get asked most often about making this simple stovetop version.
What is the difference between rice pilaf and plain steamed rice?
Oh, this is the most fundamental question! Plain steamed rice is basically just rinsed rice cooked with water, and that’s fine, but it’s very basic. The difference with rice pilaf is all about building a flavor base first! We sauté the aromatics, we toast the orzo until it’s nutty, and then we toast the rice itself in that fat. That toasting process creates a huge depth of flavor that plain steaming just skips entirely. It moves the dish from being “plain starch” to a true, savory side!
Can I make this rice pilaf in an Instant Pot or rice cooker?
You absolutely can try to convert this to an electronic gadget, because who doesn’t love an Easy One Pot Rice method when life gets hectic? I mean, I developed this specific recipe for the stovetop because I find it gives you more control over the toasting, which is my favorite part, but conversions are doable. If you use an Instant Pot, I recommend toasting the orzo and onions on the Sauté setting first, then adding the rice with the liquid, but you must reduce the liquid slightly from the stovetop ratio—maybe cut the broth down by a quarter cup—and use the standard pressure cooking time for white rice. Just promise me you’ll still lift the lid at the end to fluff it gently, okay?
Nutritional Estimates for This Aromatic Rice Side
I know some of you are watching macros or just curious about what you’re serving up, so I pulled together some estimates for this wonderful side dish. Since we are loading this up with flavor from the broth and the orzo, it’s a little more robust than plain steamed rice, but it’s still a fantastic choice for balancing out a heavier main course. This is a really satisfying Aromatic Rice Side that won’t throw your dinner plans totally off track.
Keep in mind these numbers are just a starting point! If you use vegetable broth instead of chicken broth, your sodium might change a bit, and tossing in those almonds or cranberries we talked about will shift the fat and carb counts. These values are based on one serving size being about 3/4 cup cooked, using standard ingredients across the board.
- Calories: Right around 280 per serving. That’s pretty good for something this flavorful!
- Fat: About 6 grams total. Most of that comes from the initial tablespoon of butter and olive oil we use for sautéing, which is totally worth it for the flavor base!
- Carbohydrates: We are looking at about 48 grams here, mostly from the rice grain itself and the tiny orzo pasta.
- Protein: You get a nice little boost, around 7 grams, thanks to the orzo absorbing that protein-rich broth.
- Sodium: Generally around 450mg, highly dependent on how much salt you add or if you use low-sodium broth.
- Fiber: Around 2 grams—not super high, but every little bit helps!
I always feel better knowing what’s on the plate, even when it’s just a simple side dish. If you’re ever unsure about the ingredients or need to track something specific, remember you can always review the exact amounts or contact me through my privacy policy page—I like to keep things transparent around here!
Share Your Thoughts on This Quick Rice Side
Now that you’ve got the absolute foolproof method for making the fluffiest, most aromatic Quick Rice Side known to humankind, I desperately need to hear from you! Seriously, this recipe transformed my weeknight dinners, and I hope it does the same for yours.
Did you try it? Were you skeptical about toasting the orzo? I bet you were! Head down to the comments below and give this rice pilaf recipe a star rating so others know what I already know—it’s a winner. But more than that, tell me how you jazzed it up!
Did you go for the lemon zest, or maybe you tried adding a handful of toasted pecans instead of almonds? I’m compiling a master list of Rice Pilaf Variations based on reader feedback, so don’t hold back your brilliant ideas. Cooking is all about sharing and experimenting, so show me what you came up with for your version of this savory side dish!
PrintEasy Homemade Fluffy Rice Pilaf

Follow this simple technique to make perfectly fluffy, flavorful rice pilaf using orzo and broth, ideal for any weeknight meal.
- Prep Time: 10 min
- Cook Time: 25 min
- Total Time: 35 min
- Yield: 4 servings
- Category: Side Dish
- Method: Stovetop
- Cuisine: General
- Diet: Vegetarian
Ingredients
- 1 tablespoon olive oil
- 1 tablespoon butter
- 1/2 cup orzo pasta
- 1 small yellow onion, finely chopped
- 2 cloves garlic, minced
- 1 1/2 cups long-grain white rice (Basmati recommended)
- 2 1/2 cups chicken or vegetable broth
- 1/2 teaspoon salt
- 1/4 teaspoon black pepper
- 1 tablespoon fresh parsley, chopped (for garnish)
Instructions
- Heat the olive oil and butter in a medium saucepan over medium heat.
- Add the orzo pasta and cook, stirring frequently, until it turns light golden brown, about 3 to 5 minutes. Watch carefully to prevent burning.
- Add the chopped onion to the pan and cook until softened, about 4 minutes.
- Add the minced garlic and cook for 1 minute until fragrant.
- Add the rice to the pan. Stir constantly for 2 minutes to toast the rice grains lightly. This step helps keep the rice fluffy.
- Pour in the broth, salt, and pepper. Bring the mixture to a boil.
- Once boiling, immediately reduce the heat to the lowest setting, cover the saucepan tightly with a lid, and simmer for 15 minutes without lifting the lid.
- Remove the pan from the heat and let it stand, covered, for an additional 10 minutes. Do not lift the lid during this resting period.
- Fluff the rice gently with a fork before serving. Garnish with fresh parsley.
Notes
- For a richer flavor, use homemade broth instead of store-bought.
- To add texture, toast 1/4 cup of slivered almonds with the orzo, or stir in 1/4 cup of dried cranberries after fluffing.
- Substitute half the broth with lemon juice for a brighter, Greek-style flavor.
Nutrition
- Serving Size: 3/4 cup cooked
- Calories: 280
- Sugar: 1
- Sodium: 450
- Fat: 6
- Saturated Fat: 2
- Unsaturated Fat: 4
- Trans Fat: 0
- Carbohydrates: 48
- Fiber: 2
- Protein: 7
- Cholesterol: 5