

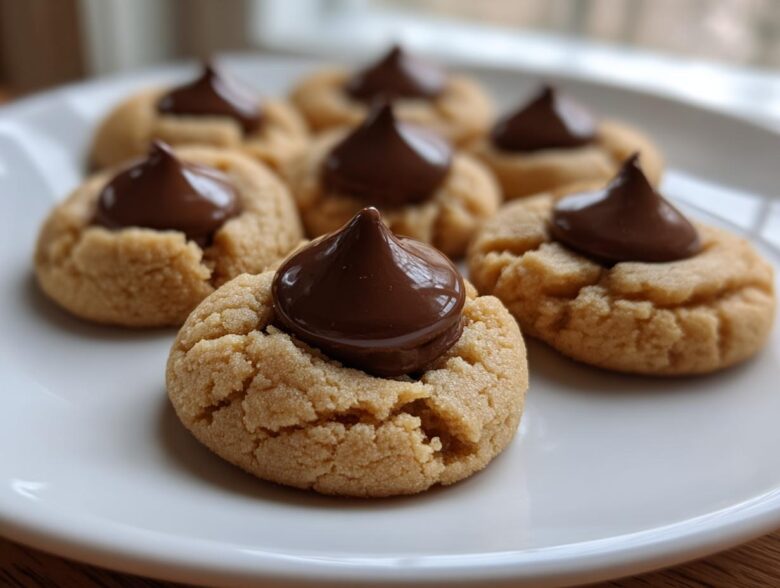
Oh, you guys! If the smell of cinnamon and sugar could hug you, that’s exactly what happens when these babies come out of the oven. Every year, around the first chill in the air, my kitchen goes straight into overdrive making batches and batches of that perfect holiday staple: the **kiss cookies**. I remember the first time I ever saw them—my Aunt Carol brought a massive platter to Christmas Eve dinner, and that little chocolate crater just seemed like magic!
Forget those complicated layered desserts; trust me when I say these Peanut Butter Blossoms are the absolute best, easiest recipe you’ll ever need for what I affectionately call classic **kiss cookies**. They practically make themselves! They are soft, they’re chewy, and they are genuinely melt-in-your-mouth good. If you want to know the story behind my obsession with baking, just check out our little corner of the internet. We made these last week, and I barely managed to save enough for the photo shoot. Come look at the details—I promise you can tackle this!
Why This is the Best Peanut Butter Blossoms Recipe (The Ultimate Kiss Cookies)
Listen, I’ve tried about ten different versions of this beloved Christmas cookie, and I can tell you right now—this one wins, hands down. If you’re looking for the **Best Kiss Cookie Recipe**, this is it. They come out perfectly every single time, no fuss needed!
- They stay wonderfully **Soft and Chewy Kiss Cookies**, even a day or two later.
- Seriously, zero chilling time required! You can mix, roll, and bake these in under 45 minutes total.
- That classic salty-sweet peanut butter flavor underneath the smooth chocolate is just unmatched.
- They look incredible on any holiday cookie tray, making you look like a baking genius!
Key Details for Perfect Kiss Cookies
Knowing the timing upfront helps me plan my baking marathon during the holidays. I always make sure my butter is ready before I start mixing everything else.
- Prep Time: 20 min
- Cook Time: 10 min
- Total Time: About 30 min (After cleanup!)
- Yield: About 6 dozen cookies (Yes, you need to make this many. They disappear fast!)
Gathering Your Ingredients for Classic Kiss Cookies
Okay, so before we even think about turning on that oven, we need to get our ingredients lined up. This is where I always tell people to check their pantry *twice*. A good **Peanut Butter Blossoms Recipe** relies on quality staples, and since this is a simple recipe, every single ingredient shines!
Don’t swap out that brown sugar for anything else—it has that lovely molasses depth that white sugar just can’t touch. And I mean creamy peanut butter, folks! Crunchy will mess up our beautiful soft dough texture we are aiming for. Here’s the exact manifest I use every time. Write this down!
- 1 cup unsalted butter, make sure it’s softened—not melted, softened!
- 1 cup granulated sugar, plus some extra for rolling later.
- 1 cup packed light brown sugar (Don’t pack it too tight, just scoop and level it off).
- 2 large eggs—room temperature is always best if you remember!
- 1 teaspoon vanilla extract (Use the good stuff, it makes a difference here).
- 1/2 cup creamy peanut butter (Yes, Jif or Skippy works perfectly here, no need for gourmet).
- 2 1/2 cups all-purpose flour
- 1 teaspoon baking soda
- 1/2 teaspoon baking powder
- 1/2 teaspoon salt
- About 72 Hershey’s Kisses, unwrapped and ready to go!
See? Nothing scary! Just simple things that turn into absolute magic later on. Now that we have our setup ready, we can jump into the mixing!
Step-by-Step Instructions for Soft and Chewy Kiss Cookies
Getting these **Soft and Chewy Kiss Cookies** perfect comes down to mixing and timing. Don’t rush the creaming part (we covered that earlier!), but once the flour goes in, move quickly! Here’s exactly how I put this symphony together:
- First things first, get that oven preheated to 375 degrees F. I also line all my baking sheets with parchment paper. This prevents sticking and makes cleanup a dream later on!
- We start with the wet ingredients: In your big mixing bowl, cream that softened butter, granulated sugar, and brown sugar until it looks light and fluffy—like pale sunshine!
- Beat in your eggs one at a time. Wait until the first is fully mixed before adding the second one. Then, mix in the vanilla and that creamy peanut butter until everything is smooth and happy throughout.
- Now for the dry team! In a separate bowl, quickly whisk the flour, baking soda, baking powder, and salt together.
- Gradually add the dry ingredients into the wet ingredients. Here is my big texture tip: Mix only until you see the last streaks of flour disappear. Seriously, stop mixing! Overmixing means tough cookies, and we want melt-in-your-mouth goodness.
- Roll the dough into little 1-inch balls. We’re going old-school here: roll each ball in a little bit of that reserved plain sugar until it has a light, sparkly coating.
- Place these beauties about 2 inches apart on your prepared sheets. They spread a bit, so give them space!
- Bake them for 8 to 10 minutes. This is key: the edges should *just* be setting, but the centers need to still look a tiny bit soft and puffy. This ensures that incredible chewiness!
- Take the sheets out, and this is the moment of truth. Immediately press one unwrapped chocolate kiss right into the center of each hot cookie.
- Let them sit right there on the hot pan for about 5 minutes. This little five-minute rest lets the heat soften the chocolate perfectly before you try and move them to the cooling racks. If you try to move them too soon, you’ll get a sad, cracked cookie!
If you want to see how I get my flour mix just right, you can check out my general baking tips over at my baking hub. It’s all about getting those dry ingredients incorporated without activating too much gluten!
The Secret to Pressing in the Chocolate Kiss
This next step is non-negotiable for perfect **kiss cookies**; you absolutely cannot skip it or try to save time! You must press that chocolate Kiss into the cookie *immediately* after it comes out of the oven. If you wait even two or three minutes, the cookie surface sets up hard, and when you try to press the chocolate in, the entire cookie top will crack right down the middle.
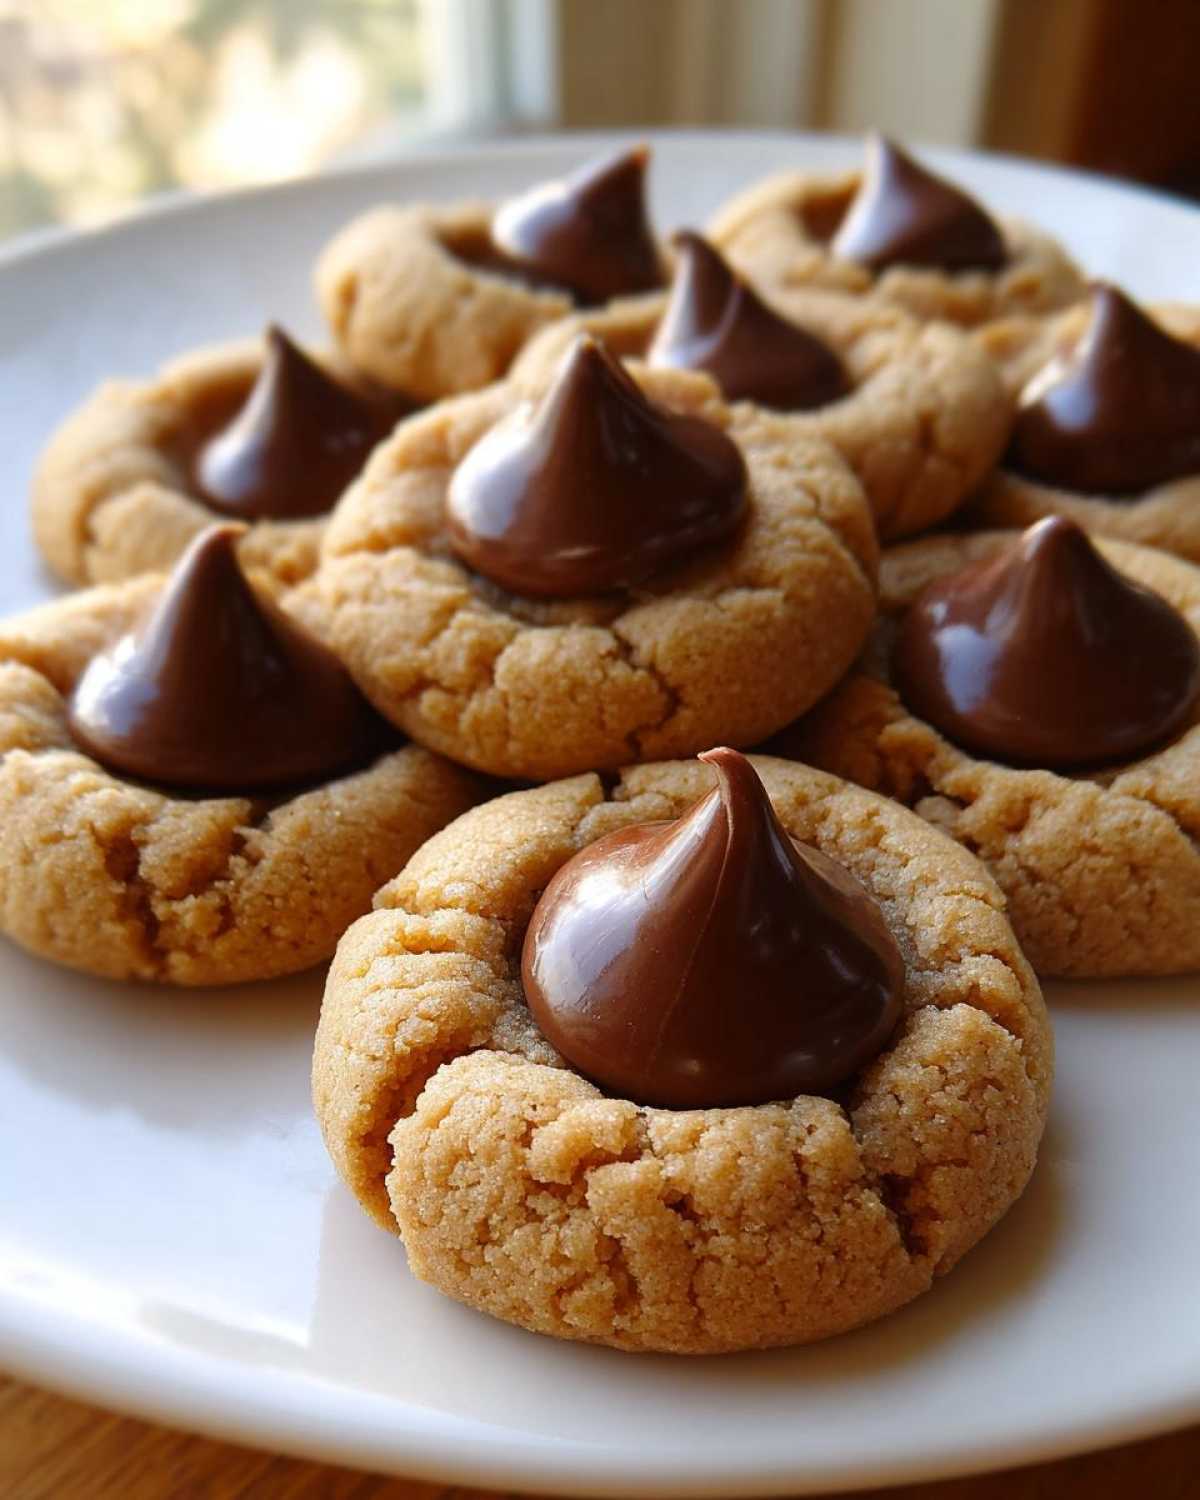
We want that gentle softening, not a full melt. The few minutes the cookie spends on the hot baking sheet is just enough heat transfer to let the little Hershey’s Kiss sink in beautifully, creating that iconic look without having the chocolate melt and run everywhere. If you see a little halo crack forming around the chocolate, that means you did it right! Just be gentle, and let that residual heat do the work for you!
Tips for Making the Best Homemade Candy Kiss Cookies
Now that you have the basic steps for these fantastic **Homemade Candy Kiss Cookies** down, let’s talk about those little kitchen details that take them from “good” to “amazing.” My biggest piece of advice, which applies to almost all baking, is watching your ingredients’ temperature! If your butter is straight out of the fridge, it won’t cream right, and you’ll end up with a dense cookie.
Also, check those leavening agents! Baking soda and baking powder only stay active for so long once opened. If your cookies are coming out flat and sad instead of puffing up nicely, go buy a new container! Fresh ingredients give you the best chance for success with any **Holiday Cookie Recipes**.
These little tips help me every time, especially when I’m trying to whip up a huge batch for the neighborhood kids.
Troubleshooting Common Kiss Cookies Issues
It happens to the best of us—even when you follow the recipe perfectly, sometimes the cookie gods aren’t smiling on you. Usually, problems with **Kiss Cookies** come down to two things: spreading or cracking.
If your cookies are spreading out like pancakes before they even get a chance to puff up, your dough was probably too warm when you rolled it. Next time, pop the dough balls in the freezer for 10 minutes before baking. That chill time matters!
If the cracks are appearing when you press in the Hershey’s Kiss, you waited too long! I know I stressed this before, but it bears repeating: the Kisses must go on *immediately*. If you press too hard, you’ll push the soft center out the sides, causing a crack. Aim for a firm but gentle push right onto the softened top. If you’re making **Simple Holiday Baking** a tradition, you’ll memorize these little fixes in no time!
Variations on Classic Kiss Cookies for Holiday Cookie Trays
While the peanut butter version is my ride-or-die—truly the king of all **kiss cookies**—I love switching things up when I’m making an absolutely massive platter for parties. Why stick to one flavor when you can have a whole rainbow of chocolate-topped goodness?
You can take this basic dough structure and swap out the peanut butter for some other incredible things. It’s like having a secret menu for your holiday baking!
-
Sugar Cookie Kiss Recipe
Instead of using peanut butter, just leave it out of the recipe (you might need to add an extra tablespoon of milk if the dough seems too dry). Roll the plain sugar cookie dough in sprinkles instead of plain sugar before baking. Then, press in your chocolate Kiss! These are so pretty and fun for the kids.
-
Red Velvet Kiss Cookies
This one looks stunning! I usually adapt my favorite Red Velvet recipe, adding just a teaspoon of cocoa powder to the basic peanut butter dough structure if I want a slight cocoa taste, or just using the standard dough and adding a few drops of red food coloring during the wet ingredient stage. Bake as normal, and top with a white chocolate raspberry Kiss for a gorgeous holiday look!
-
Chocolate Cherry Blossom Cookies
For a richer base, try swapping the peanut butter for almond extract and adding about half a cup of cocoa powder to the dry ingredients. They bake up dark and decadent. After baking, press in a dark chocolate Kiss, or even better, a raspberry-filled chocolate candy for a sophisticated twist on your **kiss cookies**.
It’s amazing how one simple chocolate topping can transform half a dozen different cookie bases. Have fun experimenting, but don’t forget to leave me a comment on which variation you loved the most!
Storage and Reheating Instructions for Kiss Cookies
These cookies are really best eaten fresh, but let’s be real—when you bake six dozen of them, you need a plan for the leftovers! The good news is that these hold up wonderfully, provided you give them the right home.
The one thing you absolutely have to do is let them cool completely before sealing them away. If you try to put a warm cookie into a storage container, you’ll end up with sweaty, messy chocolate—yuck! You want that bottom chocolate piece fully set.
Once they are totally cool, stack them gently in an airtight container. I usually put a piece of wax paper between the layers just to make sure the chocolate doesn’t stick, but often, they are fine without it if they cooled properly.
Keep them stored at room temperature. Never, ever put these in the refrigerator! The cold air dries out the peanut butter cookie part instantly, and you’ll lose that soft texture we worked so hard for. They should stay tasty at room temperature for about four to five days.
As for reheating? Honestly, I don’t bother! They are perfect right out of the container. But if you really want that ‘just baked’ feel, just let them sit on the counter for about 15 minutes to come up to room temperature before eating. That’s my best advice for keeping them perfect!
Frequently Asked Questions About Kiss Cookies
I get so many questions about these perfect little treats! Since this is such a classic recipe, people always want to know if they can tweak it for their pantry or their family’s tastes. Here are the sticky points I hear about most often:
Can I use crunchy peanut butter instead of creamy?
This is a classic debate! You *can*, but I strongly suggest against it if you want the texture described here. We are aiming for **Melt in Your Mouth Cookies**, and those little peanut chunks interfere with the smooth dough structure. If you use crunchy peanut butter, the resulting cookies will be much coarser and might spread more. Keep it creamy for the softest results!
Do I really have to roll the dough balls in sugar?
Honestly, you don’t *have* to, but you should! Rolling them in plain granulated sugar serves two big purposes. First, it gives the exterior a slightly crisp, beautiful sugary shell that contrasts nicely with the soft interior. Second, and more importantly for the look, it gives you those lovely little cracks around the edge where the cookie spreads, which is the hallmark of **Old Fashioned Kiss Cookies**. If you skip it, they look a little plain and might stick together more easily!
Are these considered good kid-friendly cookie recipes?
Absolutely! If you see a recipe as **Kid Friendly Cookie Recipes**, this HAS to be on the list. Why? Because the dough isn’t wet, it’s easy for little hands to roll into balls. The one step you have to supervise is pressing in the chocolate Kiss. If they do it right after you pull the tray out, it’s a wonderfully safe and rewarding task for children to help with!
How do I prevent the chocolate from cracking when I press it in?
I covered this in detail above, but here’s the quick rundown: timing is everything! You must press the chocolate Kiss into the cookie within about 60 seconds of taking the tray out of the oven. If the cookie has cooled for even five minutes, the structure becomes too firm, and when you push down, the surface cracks. Just work quickly and gently!
Can I make these ahead of time for Christmas?
Yes! Since these are **Christmas Cookies** that need to last for a busy holiday weekend, the dough itself freezes beautifully. Roll your dough balls, coat them in sugar, and place them on a baking sheet lined with parchment paper. Freeze them solid, then immediately transfer those frozen spheres into a zip-top bag. When you’re ready to bake, just add 2–3 minutes to the baking time. You can talk to me about making your holiday baking easier by reaching out through my contact page if you have any further questions!
Estimated Nutrition for Classic Kiss Cookies
Okay, let’s talk numbers for a second. I know we aren’t baking these solely for their nutritional value—they are holiday cookies, after all! But I always like to be straight with you about what’s going into these glorious **Peanut Butter Blossoms**. I always keep a careful tally, especially since these are so easy to sneak a second (or third) of!
Because we are using creamy peanut butter and a good amount of butter, they have a decent fat and sugar content, as you’d expect from a traditional favorite. It’s good to keep that in mind when you’re stacking up the cookie plate!
Here is the breakdown based on the standard recipe yielding about 6 dozen cookies. This is just an estimate, of course, based on the ingredients I use and a single cookie serving size.
- Serving Size: 1 cookie
- Calories: 130
- Sugar: 11g
- Sodium: 75mg
- Fat: 7g (Of which 3g is saturated)
- Carbohydrates: 16g
- Protein: 3g
Remember, these figures don’t account for any variations you might try, like using natural peanut butter or swapping out the sugar coating. For the official word on how these estimates were calculated, you can always peek at our standard nutritional disclaimer page. Enjoy them responsibly—or don’t! It’s the holidays, after all!
Share Your Favorite Kiss Cookies Creations
Wow, we made it! You’ve got the secrets to the absolute best, softest, chewiest **kiss cookies** on the block. Now that you’ve got your hands dusted with peanut butter and sugar, I just have to see what you came up with!
Did you stick to the perfect classic Peanut Butter Blossoms, or did you get wild and try the Red Velvet variation I mentioned? I want to hear all about it! Please, please, please come back here and leave a rating below and tell me how they turned out.
Honestly, seeing your pictures brightens my whole week. Baking is so much better when we share the results, so don’t be shy! Tag me in your photos and let the whole world see your spectacular **kiss cookies**!
PrintClassic Peanut Butter Blossoms (Kiss Cookies)
Make these classic peanut butter cookies topped with a chocolate kiss. This recipe is simple and perfect for holiday baking.
- Prep Time: 20 min
- Cook Time: 10 min
- Total Time: 30 min
- Yield: About 6 dozen
- Category: Dessert
- Method: Baking
- Cuisine: American
- Diet: Vegetarian
Ingredients
- 1 cup unsalted butter, softened
- 1 cup granulated sugar, plus extra for rolling
- 1 cup packed light brown sugar
- 2 large eggs
- 1 teaspoon vanilla extract
- 1/2 cup creamy peanut butter
- 2 1/2 cups all-purpose flour
- 1 teaspoon baking soda
- 1/2 teaspoon baking powder
- 1/2 teaspoon salt
- About 72 Hershey’s Kisses, unwrapped
Instructions
- Preheat your oven to 375 degrees F. Line baking sheets with parchment paper.
- In a large bowl, cream together the softened butter, granulated sugar, and brown sugar until light and fluffy.
- Beat in the eggs one at a time, then mix in the vanilla extract and peanut butter until combined.
- In a separate bowl, whisk together the flour, baking soda, baking powder, and salt. Gradually add the dry ingredients to the wet ingredients, mixing until just combined. Do not overmix.
- Roll the dough into 1-inch balls. Roll each ball in extra granulated sugar to coat lightly.
- Place the sugared balls about 2 inches apart on the prepared baking sheets.
- Bake for 8 to 10 minutes. The edges should be set, but the centers should still look slightly soft.
- Immediately upon removing the cookies from the oven, gently press one unwrapped chocolate kiss into the center of each warm cookie. The heat will slightly soften the chocolate.
- Let the cookies cool on the baking sheet for 5 minutes before transferring them to a wire rack to cool completely.
Notes
- Do not press the chocolate kiss into the cookie until after the cookies come out of the oven.
- If the dough seems too soft, chill it for 15 minutes before rolling.
- Store the finished cookies in an airtight container at room temperature.
Nutrition
- Serving Size: 1 cookie
- Calories: 130
- Sugar: 11g
- Sodium: 75mg
- Fat: 7g
- Saturated Fat: 3g
- Unsaturated Fat: 4g
- Trans Fat: 0g
- Carbohydrates: 16g
- Fiber: 0g
- Protein: 3g
- Cholesterol: 18mg