

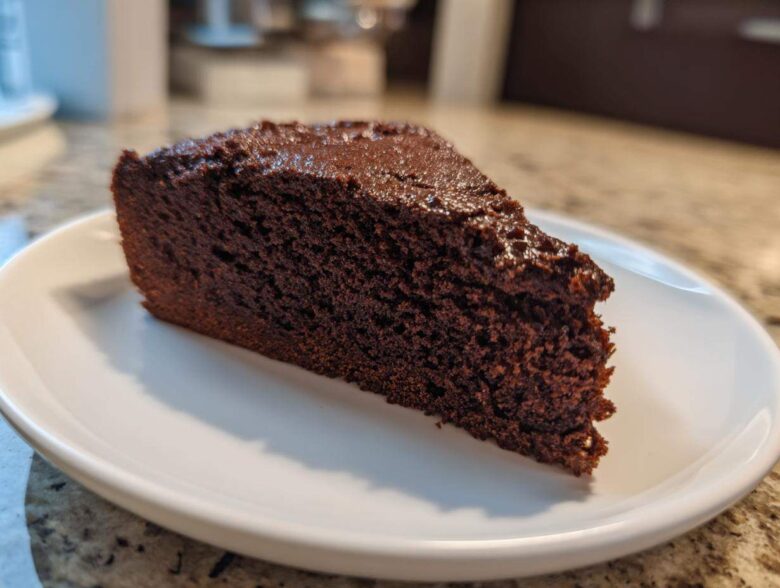
If you are anything like me, you’ve been on a lifelong quest for the truly perfect moist chocolate cake. Not just good, not just pretty, but that absolute showstopper that stays perfectly soft for days. Well, stop looking! After years of testing, tweaking, and trying every trick out there, I finally landed on my winner: the Ultra Moist, One-Bowl Chocolate Cake. Trust me; this recipe is simple enough for a Tuesday night but rich enough for any big celebration.
I’ve spent so long perfecting the ratios here—it’s become part of our family’s baking history, just like my grandmother’s secrets. We even talk about this cake over on our About Us page! This version uses just one bowl, meaning less cleanup and more time enjoying that decadent cocoa flavor. If you’re ready for a cake so tender it practically melts, let’s get started!
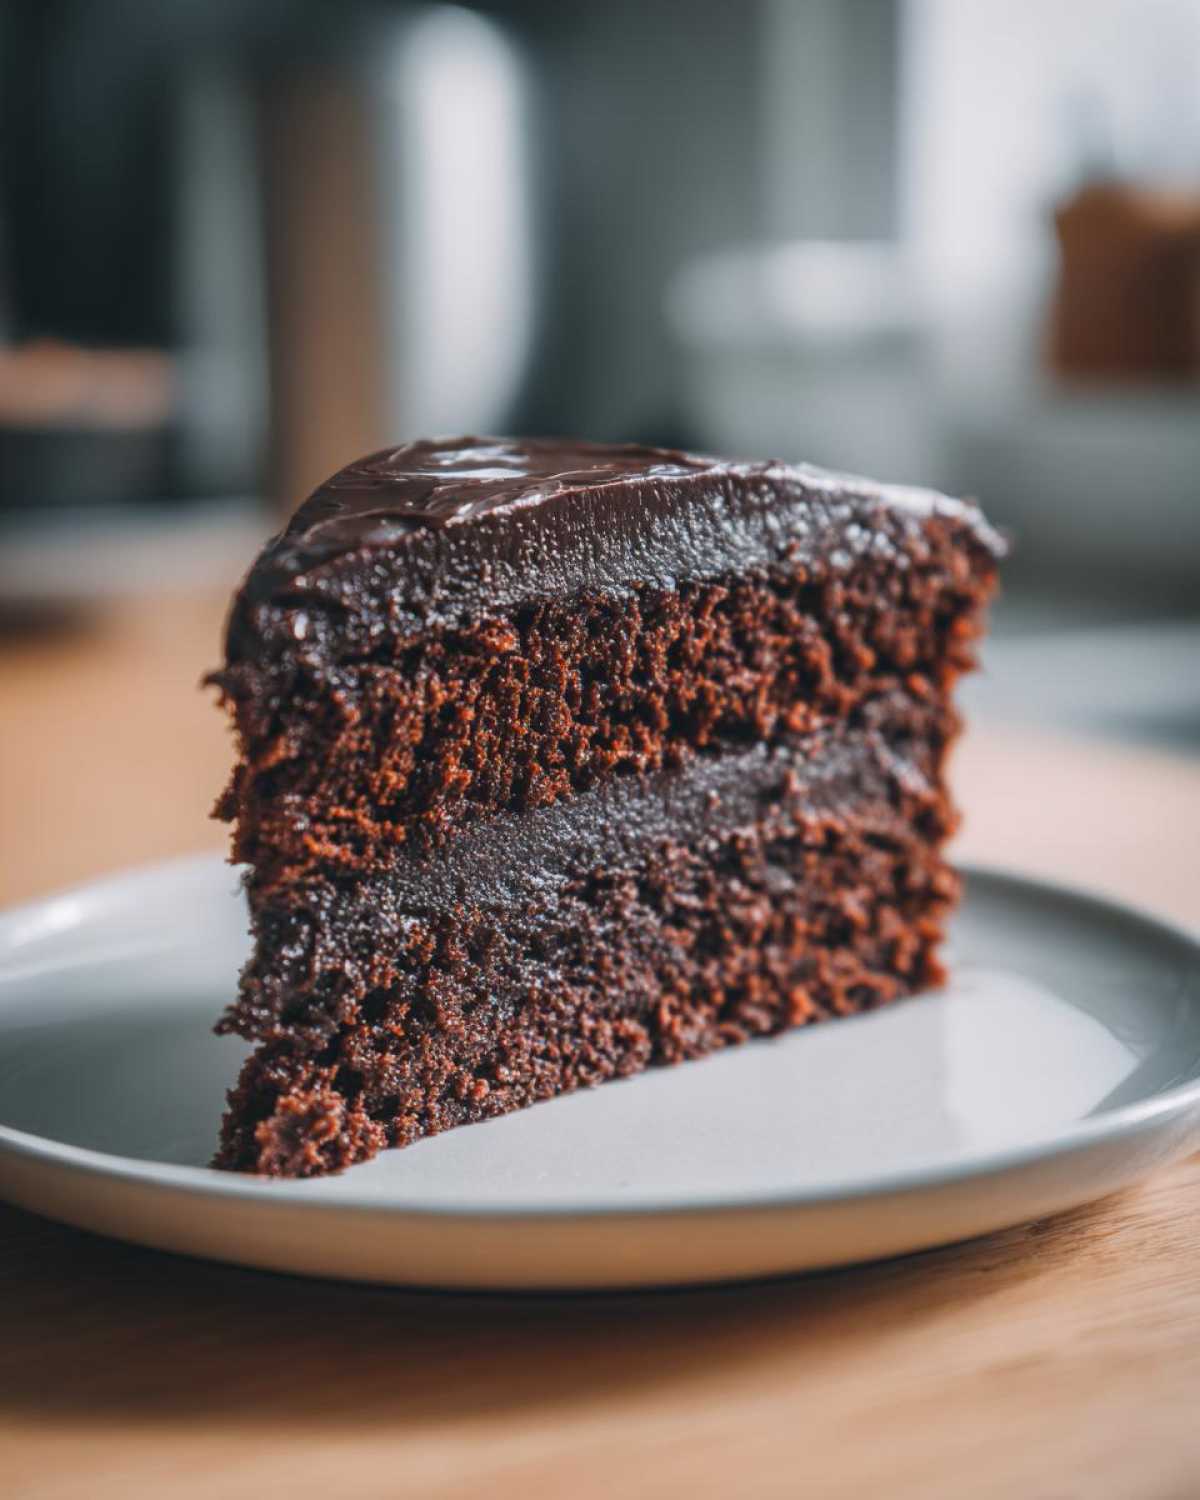
Why This Is the Best Chocolate Cake Recipe for Guaranteed Moisture
People always ask me, ‘What is the secret to getting that intensely moist chocolate cake flavor without having to mess around with sour cream or mayonnaise?’ It’s not magic, honestly; it’s just chemistry working for us! This recipe relies on three main heavy-hitters that ensure your final product is the definition of a Tender Crumb Chocolate Cake. You’ll never go back to your old recipe after seeing how easy this is.
- Oil over Butter: While I love butter for flavor, vegetable oil stays liquid at room temperature, which is a huge win for keeping the cake soft long after it cools.
- The Buttermilk Fizz: Buttermilk is slightly acidic, and it reacts with the baking soda to create lift, but more importantly, it tenderizes the gluten structure. That’s how we keep the crumb soft!
- The Hot Liquid Finish: Adding that cup of hot water or coffee right at the end is the game-changer. It blooms the cocoa powder, intensifying the dark chocolate flavor, and helps dissolve the sugar perfectly.
The Secret to a Deeply Moist Chocolate Cake
If you want that unbelievably Deeply Moist Chocolate Cake result, the hot liquid is non-negotiable. Most recipes just call for room temperature water, but trust me, the heat wakes up the cocoa powder. I always use hot, freshly brewed coffee if I can manage it, not because I want a coffee flavor, but because it pushes the chocolate notes way deeper. Seriously, it’s like giving your cocoa powder a jump start!
Also, don’t skimp on the cocoa powder quality here. Since this cake is so rich in moisture, the flavor has to carry the show. I found that when I switched to a higher-quality Dutch-processed cocoa powder, the resulting cake tasted instantly more professional, even though the process is still just dump-and-mix!
Gathering Ingredients for Your One Bowl Chocolate Cake
Okay, now that we know *why* this cake is so gloriously soft, let’s talk about getting everything ready. Since this is an Easy Chocolate Cake From Scratch, the ingredient list isn’t scary, which is part of the fun. We are using common pantry staples, but measuring them precisely is key, especially when aiming for that perfect texture for our moist chocolate cake.
You’ll need a couple of cups of flour and sugar, naturally, along with the cocoa powder. But pay close attention to the liquids—we have buttermilk, oil, eggs, vanilla, and that crucial cup of hot liquid. Don’t worry about mixing them separately; that’s the beauty of the one-bowl method!
Ingredient Substitutions for Your Moist Chocolate Cake
I always try to keep the ingredients exactly as listed because this balance achieves the best result, but life happens! If you look in your fridge and realize you’re fresh out of buttermilk—don’t panic! I have a great fix for you. Just take one cup of regular whole milk and stir in one tablespoon of white vinegar or lemon juice.
Let that sit on the counter for about five minutes until it starts to look slightly curdled. That’s your homemade buttermilk right there! Also, remember what I said about the liquid? If you don’t have hot coffee, hot water works perfectly fine. The coffee just pushes that deep chocolate flavor up a notch, but either liquid activates the baking soda beautifully to keep that crumb unbelievably tender.
Step-by-Step Instructions for an Easy Chocolate Cake From Scratch
If you want a Simple Chocolate Layer Cake that tastes like you slaved over it all day but only takes about 15 minutes of actual work, this is your playbook. First things first: make sure your oven is warmed up to 350°F (175°C) before you even open the cocoa tin! You’ll also want to grease and flour your two 9-inch cake pans. This preparation step is crucial if you want a clean release later.
Now for the best part—the one bowl magic! We dump everything in and mix. It really is that straightforward. I usually start by whisking all the dry stuff together first just to make sure everything is distributed evenly. Then in go the buttermilk, oil, eggs, and vanilla. Don’t worry, the batter will look thick at this point, but hang tight!
Mixing the Batter for a Tender Crumb Chocolate Cake
Once the wet and dry ingredients come together, you grab your mixer—or stand mixer if you’re feeling fancy—and beat it on medium for exactly two minutes. This is where we capture some air to help that Tender Crumb Chocolate Cake rise nicely. But here’s where you absolutely must listen: after those two minutes, you carefully stir in your cup of hot water or coffee. It will thin out immediately, and I mean *thoroughly* thin out—this is a very runny batter, so don’t panic!
The number one rule for Foolproof Chocolate Baking is this: stop mixing once that hot liquid is incorporated. If you keep beating it after the liquid goes in, you risk developing the gluten too much, and that’s how you lose your incredible moisture. Just stir until smooth and move to the pans immediately!
Baking Times and Testing Your Moist Chocolate Cake
Divide that thin batter evenly between your prepared pans and slide them into that preheated oven. They usually need 30 to 35 minutes at 350°F (175°C). You’ll know they are ready when you insert a wooden pick right into the center, and it comes out clean or just with a few moist crumbs clinging to it. That’s how you know you nailed the perfect moist chocolate cake.
Resist the urge to flip them out right away! Let them cool in the pans on a wire rack for about 10 minutes. This lets them set up just enough so they don’t tear. After 10 minutes, gently invert them onto the rack to cool completely before you even think about frosting them. If you want to check out some quick frosting ideas, I have a few favorites documented over on our main site!
Tips for a Foolproof Chocolate Baking Experience
I’ve made this cake hundreds of times, and honestly, most problems people have come down to just a few little details. I want your experience to be totally foolproof! Since this batter is naturally very thin, you have to be mindful about how you handle it, or you risk losing that beautiful structure we worked so hard for.
- Never Measure Cocoa by Scooping: When measuring your cocoa powder, never pack the cup down. Spoon the cocoa gently into your measuring cup and then level it off with a knife. Packing it adds way too much dry ingredient and will instantly dry out your cake!
- Pan Prep is Everything: Because this recipe is slightly sticky—thanks to all that sugar and oil—don’t trust just a quick spray. Make sure you grease the pans *and* dust them with flour or cocoa powder. It’s a small step that prevents a giant headache later.
- Don’t Glance at the Timer Too Soon: I know it’s tempting to check at 25 minutes, but resisting that temptation is key. Opening the oven too early lets that concentrated heat escape, which can cause the center to fall dramatically. Let it bake through its suggested time block!
Serving Suggestions for Your Rich Dark Chocolate Cake
Now that you have this incredible, dark, and unbelievably moist cake cooled completely—the hardest part is over! But a cake this good deserves a beautiful crown. Since the cake itself delivers such intense chocolate flavor, you don’t have to get too wild with the frosting, though you certainly can if you’re feeling ambitious!
For a truly beautiful presentation that keeps the ease factor high, I always lean toward a simple, shiny chocolate ganache. It looks incredibly fancy, but honestly, it’s just heavy cream poured over chopped dark chocolate. It flows beautifully down the sides of your Simple Chocolate Layer Cake, giving it that professional, glossy finish.
If you prefer something a bit tangier to cut through all that richness, a classic cream cheese frosting is fantastic. The slight sour note is amazing next to the deep, dark cocoa. It’s also super easy to spread, which means less smoothing stress for you!
But what about serving? This is the kind of dessert that shines even when dressed down. If you’re having a casual weeknight treat, just slice it thick and serve it warm with a scoop of good vanilla bean ice cream. The cold melting into the cake is just divine.
For a celebration, try piling fresh raspberries or sliced strawberries on top of the frosting. The bright red fruit with the deep brown cake? It’s stunning visually, and the burst of fresh acidity cuts through the fat and sugar perfectly. It turns this easy cake into an Ultimate Chocolate Dessert ready for any table!
Storage and Reheating Instructions for Moist Chocolate Cake
Okay, you made the moist chocolate cake, and it is perfect. Now, the real challenge: keeping it perfect! Since this recipe is so full of moisture from the oil and buttermilk, it actually lasts longer than a traditional layer cake, but you still need to treat it right.
For short-term storage, if you plan on eating the entire thing within two or three days, room temperature is the way to go. Just wrap each layer tightly in plastic wrap—I mean *really* tightly, like you’re suffocating it a little bit—and then place it in an airtight container. This traps all that natural steam inside, keeping it soft.
I like to keep it on the counter, away from any windows or heat, for up to three days. Any longer, and I worry about freshness, even though this cake is pretty hearty!
Keeping This Decadent Cocoa Cake Fresh in the Fridge
If you need it to last longer than three days, or if you live somewhere really warm and humid during the summer, the fridge is safer. But refrigeration is the enemy of moisture, so we have to be careful!
The trick here is double-wrapping. Wrap the completely cooled cake layers separately, then put them into a sturdy, airtight plastic container. The air inside the container acts as a buffer against the dry air of the fridge. When you take it out, it might feel a bit dense, but don’t worry!
Let it sit out on the counter for at least an hour before serving, still wrapped, to let it come back up to room temperature. This allows the oil to soften again, and you’ll get that tender crumb back right away!
Reheating a Slice for the Best Fudgy Chocolate Dessert Experience
Sometimes you just need *one* slice, right now, and you want it warm and gooey. For reheating, I highly recommend the microwave, but you have to work in small bursts. Heating a whole layer solidifies the frosting, which is no good!
Take a single slice and place it on a microwave-safe plate. I sometimes place a tiny dab of water near the edge of the plate, just to create a little steam environment in the microwave. Heat it for about 10 to 15 seconds on 50% power. This gentle warming coaxes out the moisture and makes it taste like it just came out of the oven. It really turns it back into that gorgeous, Fudgy Chocolate Dessert we perfected!
Frequently Asked Questions About Making a Moist Chocolate Cake
I know baking can sometimes feel like a science experiment gone wrong, especially when you are chasing that elusive, perfect texture. Folks send me tons of questions about this recipe, and that’s totally okay! I love making sure this is the go-to source for your moist chocolate cake needs. Here are a few of the things I get asked most often about achieving that deep, dark, tender flavor you see in the pictures.
Can I make this a Fudgy Chocolate Dessert instead of a layer cake?
Oh, absolutely! If you want something denser and more intensely chocolatey—leaning into that Fudgy Chocolate Dessert vibe—you just need to change how you bake it. The batter is designed to be light and fluffy when spread across two shallow pans. If you want fudginess, use a single 9×13 inch pan, or better yet, use an 8×8 square pan.
When you put all that batter into a smaller, deeper pan, it bakes slower, and the structure compresses slightly. Keep your oven at 350°F (175°C), but instead of 30–35 minutes, you’ll be looking more toward 45 to 55 minutes. Test it gently—you might find it’s done when the toothpick still has a few wet, dark crumbs clinging to it. That’s your sign for a truly decadent, fudgy bite!
What is the best pan size for this recipe?
I designed this recipe, the Easy Chocolate Cake From Scratch version, specifically for two 9-inch round cake pans. That ratio of batter to surface area yields those perfect middle-of-the-road layers that are easy to stack and frost. It makes the best Moist Birthday Cake Recipe if you ask me!
If you only have 8-inch rounds, that works fine too, but you definitely need to bake them longer—probably closer to 40 or 45 minutes—because the edges set while the center takes longer to cook through. Always rely on that toothpick test rather than the clock when changing pan sizes!
If you’re looking for cupcakes instead of a layer cake, just line up your muffin tins and fill them about two-thirds full. Cupcakes bake super fast, usually done in 18 to 22 minutes. They are a great way to sample the recipe without committing to a full layer cake, though you won’t get that same Tender Crumb Chocolate Cake structure since cupcakes cook so much faster!
If you have any other questions while you’re baking up this amazing dessert, don’t hesitate to reach out via our Contact page. Happy baking!
Estimated Nutritional Information for This Ultimate Chocolate Dessert
I know some people are really focused on tracking what they eat, even when it comes to something as indulgent as a fantastic slice of chocolate cake. Since this is such a rich treat, I wanted to give you a rough idea of what you’re getting into—but please take this with a big grain of salt!
The numbers below are estimates based on using standard ingredients for one slice, assuming you divided the whole thing into 12 servings and didn’t add any frosting on top. Frosting adds a whole other level of sugar and fat, so keep that in mind if you are loading up on the ganache!
Here’s a quick rundown of the nutrition for this Ultimate Chocolate Dessert slice, based on the recipe card totals:
- Serving Size: 1 slice
- Calories: 350
- Sugar: 45g (Yep, it’s a treat!)
- Fat: 16g
- Saturated Fat: 3g
- Trans Fat: 0g
- Carbohydrates: 50g
- Protein: 5g
- Cholesterol: 45mg
Important Disclaimer on Cake Nutrition Facts
I have to be super clear about this because I’m a baker, not a certified nutritionist! These figures are just estimates, plain and simple. They are based on the most common versions of the ingredients listed in the recipe instructions—things like the type of oil you use or the exact brand of cocoa powder can nudge these numbers around, believe it or not.
If you are using alternative flours or substituting the sugar, your results will look very different. This information is here just to give us a ballpark figure for planning our week, not for strict dietary tracking. For more details on how we handle site estimations, you can always check out the official disclaimer over on our disclaimer page. Enjoy every bite!
Share Your Experience with This Moist Birthday Cake Recipe
Whew! We made it to the end, and now you have the keys to the kingdom of moist chocolate cake! Honestly, seeing your results is what keeps me baking and sharing these treasured family secrets. You’ve witnessed just how easy it is to whip up this decadent treat in one single bowl!
I really want to hear how it turned out for you. Did you stick with the hot water, or did you try brewing that strong coffee for that extra deep chocolate kick? Never be shy about leaving a comment below! Tell me what frosting you chose, or if you served it plain with just a dollop of whipped cream. Your feedback helps other bakers feel confident trying this recipe!
If you took a picture—and you totally should have, because this cake always looks amazing—please share it on social media! Tag me so I can see your beautiful creation. Knowing I helped you make a fantastic, simple, and unbelievably moist cake for a birthday or just because is the best compliment I could ever receive.
Before you go, just a quick reminder about keeping things safe and secure around here. We really take our user privacy seriously, so if you’re curious about how we handle your information when you leave a comment, you can always check out our Privacy Policy. Now go enjoy that incredible slice of rich chocolate goodness!
PrintUltra Moist, One-Bowl Chocolate Cake
This recipe yields a deeply moist chocolate cake with a rich cocoa flavor, prepared easily in a single bowl.
- Prep Time: 15 min
- Cook Time: 35 min
- Total Time: 50 min
- Yield: 12 servings
- Category: Dessert
- Method: Baking
- Cuisine: American
- Diet: Vegetarian
Ingredients
- 2 cups all-purpose flour
- 2 cups granulated sugar
- 3/4 cup unsweetened cocoa powder
- 2 teaspoons baking soda
- 1 teaspoon baking powder
- 1 teaspoon salt
- 1 cup buttermilk
- 1/2 cup vegetable oil
- 2 large eggs
- 1 teaspoon vanilla extract
- 1 cup hot water or hot brewed coffee
Instructions
- Preheat your oven to 350°F (175°C). Grease and flour two 9-inch round cake pans.
- In a large bowl, whisk together the flour, sugar, cocoa powder, baking soda, baking powder, and salt.
- Add the buttermilk, oil, eggs, and vanilla extract to the dry ingredients. Beat with an electric mixer on medium speed for two minutes.
- Carefully stir in the hot water or coffee until the batter is smooth. The batter will be thin.
- Pour the batter evenly into the prepared cake pans.
- Bake for 30 to 35 minutes, or until a wooden pick inserted into the center comes out clean.
- Let the cakes cool in the pans for 10 minutes before inverting them onto a wire rack to cool completely before frosting.
Notes
- Using hot coffee instead of hot water deepens the chocolate flavor without making the cake taste like coffee.
- Do not overmix the batter once the wet ingredients are added; mix just until combined.
- Buttermilk helps create a tender crumb; if you do not have buttermilk, mix 1 cup of milk with 1 tablespoon of white vinegar and let it sit for 5 minutes.
Nutrition
- Serving Size: 1 slice
- Calories: 350
- Sugar: 45g
- Sodium: 320mg
- Fat: 16g
- Saturated Fat: 3g
- Unsaturated Fat: 13g
- Trans Fat: 0g
- Carbohydrates: 50g
- Fiber: 3g
- Protein: 5g
- Cholesterol: 45mg