

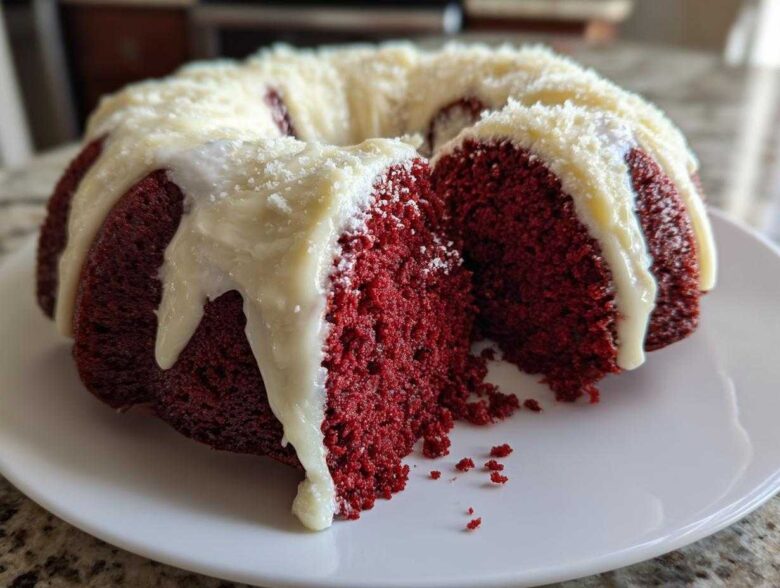
There is just something about a cake baked in a Bundt pan, isn’t there? The beautiful ridges and the way it holds a thick cascade of frosting? It always looks instantly fancy, perfect for holidays or just making a Tuesday night feel special. But we’re not just making any old cake today; we are tackling the ultimate showstopper: the **red velvet bundt cake**. I’ve tried so many versions, and what I found is that too many recipes end up dry or dense, which is a tragedy when you’re dealing with that gorgeous, deep red cocoa flavor. Trust me when I say this recipe is the one. It stays unbelievably moist, and yes, it has that signature, necessary tangy cream cheese element. The secret weapon? A little bit of boiling water stirred in right at the end. It sounds crazy, but it gives us the most wonderfully tender **red velvet bundt cake** you’ll ever make. You can read a little bit more about our baking philosophy over here at Delish Dreams!
Why This Moist Red Velvet Cake Recipe Stands Out
Honestly, what makes this **Moist Red Velvet Cake** recipe the absolute best? It’s the combination of convenience and unbelievable texture. I want elegance without the headache, and this recipe delivers that perfect bakery style right in your home kitchen. It’s designed to be fuss-free but look like you spent hours on it!
- It guarantees a deep, rich cocoa flavor underneath that beautiful red.
- The resulting cake is always wonderfully **Tender Red Velvet**.
- It pairs perfectly with the bright, tangy cream cheese drizzle—never too sweet!
Achieving the Signature Tender Red Velvet Texture
The tenderness here comes mostly from using oil instead of all butter. Oil stays liquid at room temperature, making every bite smoother and moister. Couple that with the acidity of buttermilk reacting with the baking soda, and you get lift! And that final addition of boiling water? It blooms the cocoa and dissolves the sugar, ensuring a fine, melt-in-your-mouth crumb. Happy baking!
Essential Ingredients for Your Red Velvet Bundt Cake
Okay, grabbing your apron! Getting a truly spectacular **red velvet bundt cake** is all about having the right players on the field. Since this is a From Scratch Bundt Cake, we need precision, especially with the coloring. Don’t skimp here—the look is half the fun! Everything is grouped below so you can organize your mise en place before you even turn on the mixer. Trust me, having these bowls ready makes the whole process feel super smooth and quick.
For the Red Velvet Bundt Cake Batter
This is where the magic happens before we even bake it. Getting these measurements right guarantees that deep cocoa flavor and the right amount of color. Always use good quality red gel coloring if you can find it; the liquid stuff just doesn’t pack the punch needed for that iconic red hue!
- 2 1/2 cups all-purpose flour
- 1 1/2 cups granulated sugar
- 1 teaspoon baking soda
- 1 teaspoon salt
- 1 tablespoon unsweetened cocoa powder (just a little bit goes a long way!)
- 1 cup vegetable oil
- 1 cup buttermilk (it needs to be room temp, remember?)
- 2 large eggs
- 1 teaspoon white vinegar
- 1 teaspoon vanilla extract
- 2 tablespoons red food coloring (gel preferred!)
- 1 cup boiling water
For the Tangy Cream Cheese Glaze for Bundt Cake
This topping seals the deal. You absolutely need the cream cheese and butter softened for this part. If they are cold, your glaze will be lumpy, and nobody wants a lumpy drizzle flowing down their gorgeous cake! We want silky smooth goodness.
- 1/2 cup cream cheese, softened
- 1/4 cup unsalted butter, softened
- 2 cups powdered sugar
- 1 teaspoon vanilla extract
- 1 tablespoon milk (maybe a tiny bit more if needed)
Step-by-Step Guide to Baking the Perfect Red Velvet Bundt Cake
Alright, deep breath! We are moving from ingredients readiness to actual baking magic now. Follow these steps exactly, especially regarding mixing times, and you’ll end up with one of the **Best Bundt Cake Recipes** you’ve ever tried. Remember, this isn’t just cake; this is a visually stunning centerpiece! For more fantastic tips on cake structure, check out our main site here.
Preparing the Pan and Mixing the Batter
First things first: Preheat your oven to the perfect 350°F (175°C). Now, the Bundt pan! This is critical. I swear by making my own pan release—it is way better than relying on greasy sprays. Take a little shortening, some flour, and smear it everywhere—the crevices are where cake goes to hide and stick! Make sure you get every nook and cranny, or you’ll curse my name when you try to flip it! Once the pan is ready, whisk your dry stuff together in the big bowl. In another bowl, mix up all the wet ingredients and that gorgeous red color. Then, pour the wet into the dry and mix only until barely combined. I can’t stress this enough: Do not overmix! Just combine it, then gently fold in that cup of boiling water. The batter will look thin, almost wrong, but that’s exactly what we want for a **Classic Red Velvet Recipe**.
Baking and Cooling the Tender Red Velvet Cake
Pour that thin, beautiful batter into your greased pan and pop it in the oven. It needs about 45 to 55 minutes to bake. You know it’s getting close when you peek in and the edges start pulling away from the sides of the pan just a tiny bit. To test for doneness, use the wooden pick test. Stick it right in the thickest part; if it comes out with moist crumbs clinging to it—not wet batter—you’re good! Let that lovely **Tender Red Velvet Cake** rest in the hot pan for exactly 15 minutes. No more, no less! After 15 minutes, flip it out onto your cooling rack to finish cooling completely. If you try to glaze it while it’s warm, the drizzle just melts away!
Creating the Cream Cheese Drizzle
While the cake chills out, let’s make the essential topping. Get your softened cream cheese and butter whipped up until they are light and fluffy—no lumps allowed! Then, slowly beat in the powdered sugar, one cup at a time, followed by the vanilla. Now, the final touch for the perfect consistency for this **Cream Cheese Glaze for Bundt Cake**: start adding milk, just a teaspoon at a time. You want something thick enough to coat the back of a spoon but thin enough to happily drizzle down those Bundt curves. If you accidentally added too much milk and it’s looking watery, just whisk in another spoonful of powdered sugar until it thickens right back up. Easy peasy!
Tips for a Showstopper Bundt Cake Presentation
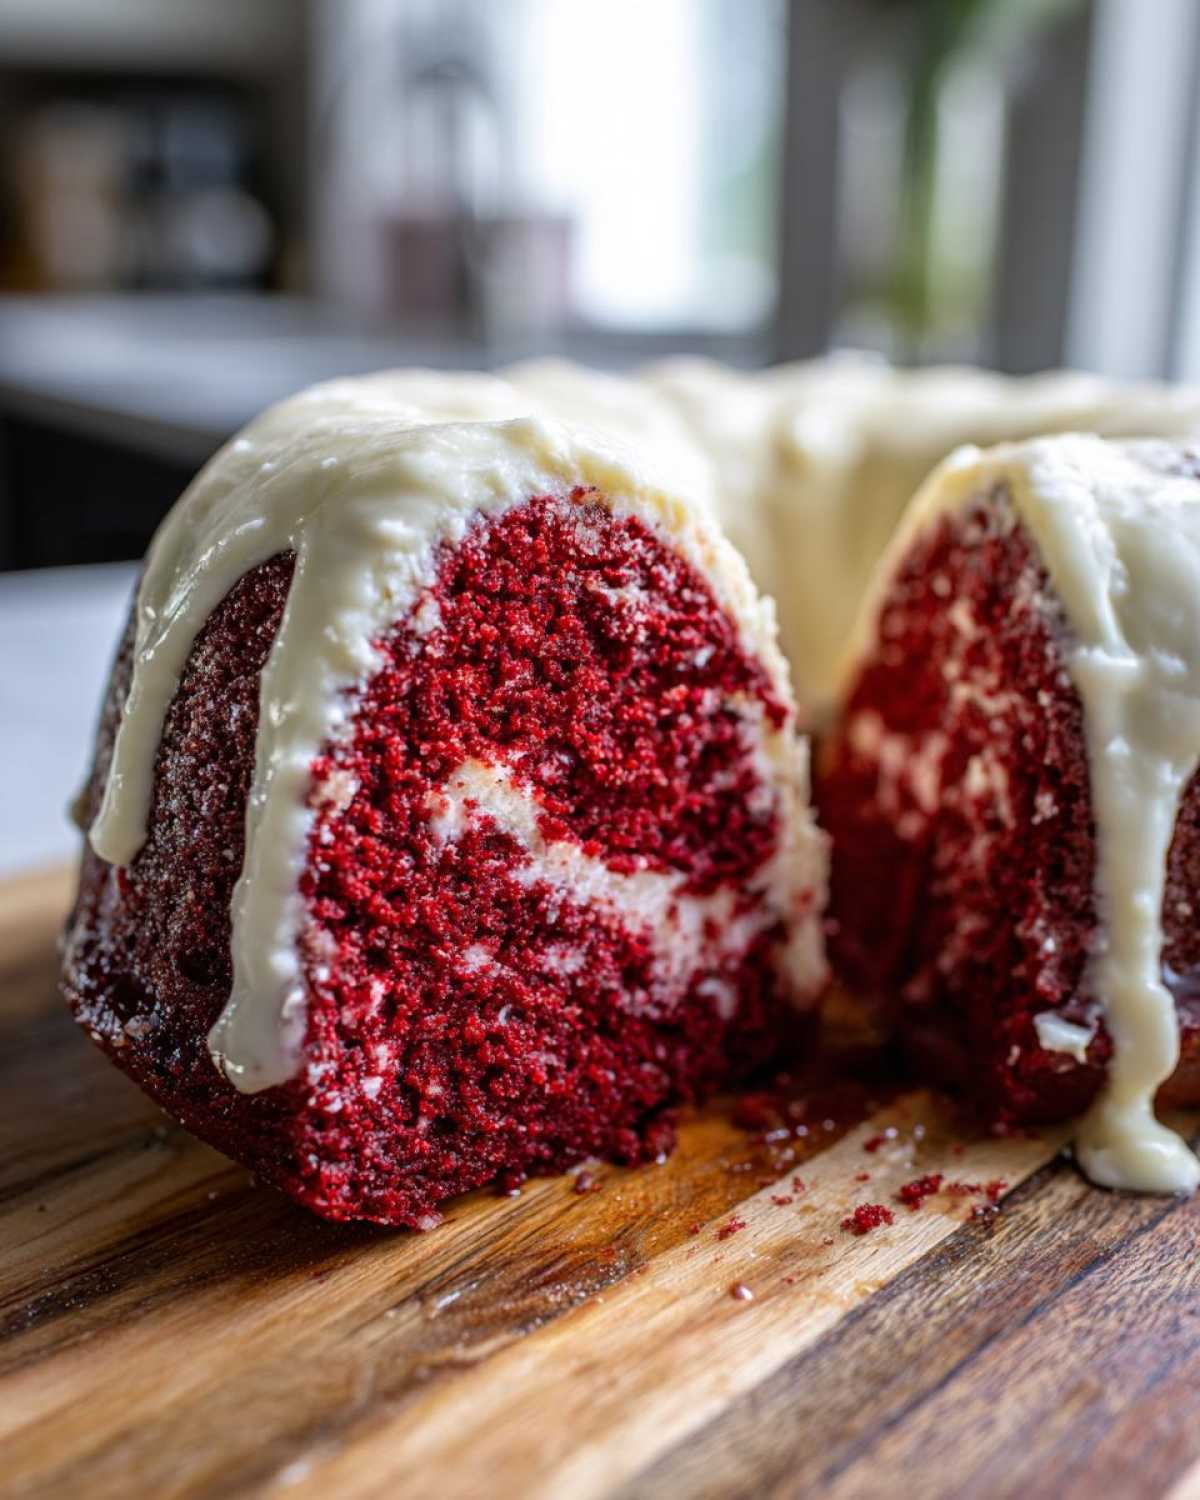
You’ve successfully baked a perfect, rich, and moist **red velvet bundt cake**, now we need to make it look like it belongs on the cover of a magazine! Because this is such an iconic cake, presentation really elevates it from a simple dessert to a true Showstopper Bundt Cake. Don’t overthink it; the Bundt shape does most of the heavy lifting for free. We just need to finish it with confidence and that incredible cream cheese topping so everyone knows exactly what amazing flavor they are about to enjoy.
Techniques for Applying the Cream Cheese Glaze
This is crucial: the cake MUST be completely, totally cool before you touch it with the glaze. If it’s even slightly warm, that beautiful, thick drizzle will soak right into the cake or run off entirely, leaving you with sad, pale spots instead of gorgeous rivers of white.
Once it’s cool, start drizzling! My favorite way to do this is to hold your spoon high up over the center of the cake and just let the glaze fall. Move your spoon slowly around the top curve; this creates long, dramatic streaks that let the red color peek through. You can also use a small offset spatula to guide the glaze if you want a thicker ribbon effect, but honestly, a free-poured drizzle looks the most rustic and beautiful for this specific cake. Don’t worry about drips down the side—those are just little welcome signs for the next person!
Ingredient Notes and Substitutions for Your Red Velvet Bundt Cake Recipe
Whenever I bake something classic like a **red velvet bundt cake**, people always want to know if they can swap things out. That’s totally fair! I want you to be able to make this any time you get a craving, even if you’re missing one weird item. Knowing what each ingredient does really helps, though, especially when you are trying to nail that perfect moist texture we talked about. Making smart substitutions shows you really know what you’re doing in the kitchen, which is what a **Classic Red Velvet Recipe** deserves!
The Importance of Buttermilk in a Moist Red Velvet Cake
Buttermilk is non-negotiable if you want that truly tender crumb people expect in a good red velvet. It’s not just about adding liquid; it’s about the acid! The acidity in the buttermilk reacts beautifully with the baking soda, creating those lovely tiny bubbles that give the cake its lift without making it too spongy. It’s essential for keeping the cake soft and rich.
Now, what if the store sold out? Don’t panic! You can easily make a substitute buttermilk at home. Just take your regular milk—any kind works—and add about a tablespoon of white vinegar or lemon juice for every cup of milk. Stir it a tiny bit and then let it sit on the counter for about five minutes. It will curdle slightly, and voilà! You have makeshift buttermilk ready for action. It works almost every single time for my **red velvet bundt cake** recipe.
I’ll always recommend checking our site updates and disclaimers here, just to make sure you have the latest baking thoughts from our kitchen!
Storage and Reheating for Your Classic Red Velvet Recipe
We finally got this gorgeous **red velvet bundt cake** finished, glazed, and looking like a centerpiece! The hard part is over, unless you have teenage boys downstairs—then the hard part is making sure it lasts long enough to serve! Because we’ve used that delicious, tangy cream cheese glaze, storage rules change a little bit compared to a plain cake. You can’t just leave it out uncovered for days on end.
If you plan on serving this **Classic Red Velvet Recipe** within 24 hours, leaving it lightly covered on the counter is usually fine. Just make sure it’s wrapped in a cake dome or covered loosely with plastic wrap so the glaze doesn’t pick up any weird kitchen smells. Room temperature is best for texture when you eat it!
However, if you want this beauty to last longer, say three to five days, you absolutely need to refrigerate it. The dairy in that cream cheese glaze requires chilling. Store your cooled, glazed cake in an airtight container. Don’t wrap it too tightly with plastic wrap directly touching the icing, or it might get sticky.
When you pull it out of the fridge to serve later, remember that cold cake tastes a little harder and less flavorful, right? Nobody likes cold cream cheese! So, plan ahead. Pull the whole cake out about an hour before you plan to slice it. Let it sit on the counter to come back to room temperature. This lets the oil and the pound cake structure soften up again, making it taste freshly baked. If you’re in a huge rush, you can microwave a single slice for about 10 seconds—but don’t go longer, or you’ll lose that beautiful moisture we worked so hard to achieve!
Frequently Asked Questions About Red Velvet Bundt Cake
It is totally normal to have questions when you’re taking on a majestic cake like this **red velvet bundt cake**! Baking is always better when you feel confident, so let’s tackle the most common things readers ask me about before they dive in. If you follow these tips, you’ll have a gorgeous, photo-ready dessert ready for any gathering.
Can I make this red velvet bundt cake without red food coloring?
Oh, you absolutely can! But you have to know what you’re giving up. The flavor of the cake remains exactly the same—that lovely, subtle cocoa flavor—because we only use one tablespoon of cocoa powder. Without the red coloring, you’ll just end up with a lovely, rich brown cake. It won’t look like the traditional showstopper, but it will taste just as comforting and delicious. Nobody complains about a chocolate cake, trust me!
What is the best pan size for this recipe?
For this specific **Red Velvet Bundt Cake Recipe**, you really need a standard 10-cup Bundt pan. The recipe yields just the right amount of batter to fill that pan perfectly about two-thirds full, which gives you room to rise without touching the top of the center tube. If you try to put this amount of batter into a smaller pan, say an 8-cup, you run a high risk of overflow, and that makes a huge sticky mess in your oven! Stick to the 10-cup for the best results.
Estimated Nutritional Data for This Red Velvet Bundt Cake
We have to talk a little bit about the numbers, don’t we? While I bake primarily with love and instinct, I know some of you are tracking things, and it’s just good baking practice to know what’s going into our amazing treats! Here is a general idea of what’s in a slice of this decadent **red velvet bundt cake** finished with that dreamy cream cheese drizzle.
Please remember that this information is just an estimate. The actual nutritional breakdown can change wildly depending on the exact brand of flour you use, whether you used full-fat cream cheese, or even how thick you let your glaze get! I always advise just using this chart as a happy guideline. For official details about our recipes, you can always check our full disclaimer page right here.
- Serving Size: 1 slice
- Calories: 450
- Sugar: 55g (That glaze adds up, doesn’t it? Worth every bit!)
- Sodium: 350mg
- Fat: 24g
- Saturated Fat: 8g
- Carbohydrates: 58g
- Protein: 5g
- Cholesterol: 50mg
See? It looks impressive! But honestly, when you’re serving up something this festive and perfectly moist, you just have to enjoy the moment. Don’t let the numbers steal the joy from this fantastic **Holiday Red Velvet Baking** experience!
Share Your Beautiful Bundt Desserts Experience
Well, friend, that’s it! We’ve conquered the glorious, rich, and supremely moist **red velvet bundt cake** together! I really hope the process was fun and that your kitchen smells absolutely incredible right now. Baking is always better when we share what we create, so I’m putting this out to you: don’t be shy!
I absolutely love seeing how your cakes turn out in your own kitchens. Did you nail that drizzle pattern I showed you? Did your kids get excited when they saw that deep red color peeking out? Please, jump down into the comments below and let me know how your baking went! Did you think it was the best **red velvet bundt cake** you’ve ever made? Drop a star rating so others know they can trust this recipe too.
And if you took pictures—and I hope you did, because this is such a Beautiful Bundt Dessert—please tag me on social media! Seeing your finished **red velvet bundt cake** makes my day. It’s what this whole community is about: sharing the joy of baking something fantastic from scratch. If you have any final lingering questions or ideas for me, you can always get in touch directly through our Contact Page. Happy eating, everyone!
PrintMoist Red Velvet Bundt Cake with Tangy Cream Cheese Drizzle
A recipe for a tender, moist red velvet cake baked in a Bundt pan, topped with a simple cream cheese drizzle.
- Prep Time: 20 min
- Cook Time: 50 min
- Total Time: 70 min
- Yield: 12 servings
- Category: Dessert
- Method: Baking
- Cuisine: American
- Diet: Vegetarian
Ingredients
- 2 1/2 cups all-purpose flour
- 1 1/2 cups granulated sugar
- 1 teaspoon baking soda
- 1 teaspoon salt
- 1 tablespoon unsweetened cocoa powder
- 1 cup vegetable oil
- 1 cup buttermilk
- 2 large eggs
- 1 teaspoon white vinegar
- 1 teaspoon vanilla extract
- 2 tablespoons red food coloring
- 1 cup boiling water
- 1/2 cup (4 ounces) cream cheese, softened
- 1/4 cup unsalted butter, softened
- 2 cups powdered sugar
- 1 teaspoon vanilla extract
- 1 tablespoon milk
Instructions
- Preheat your oven to 350°F (175°C). Grease and flour a 10-cup Bundt pan well.
- In a large bowl, whisk together the flour, sugar, baking soda, salt, and cocoa powder.
- In a separate bowl, mix the vegetable oil, buttermilk, eggs, vinegar, vanilla extract, and red food coloring until combined.
- Pour the wet ingredients into the dry ingredients and mix on low speed until just combined. Do not overmix.
- Carefully stir in the boiling water until the batter is smooth and thin.
- Pour the batter into the prepared Bundt pan.
- Bake for 45 to 55 minutes, or until a wooden pick inserted into the center comes out clean.
- Let the cake cool in the pan for 15 minutes before inverting it onto a wire rack to cool completely.
- To make the drizzle, beat the softened cream cheese and butter together until smooth. Gradually beat in the powdered sugar and 1 teaspoon of vanilla. Add milk one teaspoon at a time until you reach a thick, pourable consistency.
- Drizzle the cream cheese glaze over the cooled cake.
Notes
- For the best red color, use a high-quality gel-based red food coloring.
- Ensure your buttermilk is at room temperature before mixing for a more tender crumb.
- If the glaze is too thick, add a few more drops of milk. If it is too thin, add a little more powdered sugar.
Nutrition
- Serving Size: 1 slice
- Calories: 450
- Sugar: 55g
- Sodium: 350mg
- Fat: 24g
- Saturated Fat: 8g
- Unsaturated Fat: 16g
- Trans Fat: 0g
- Carbohydrates: 58g
- Fiber: 1g
- Protein: 5g
- Cholesterol: 50mg