

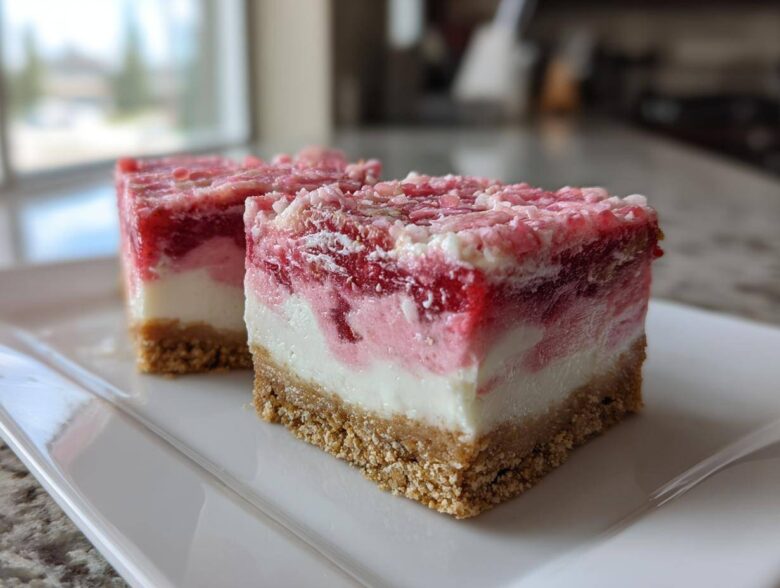
You know those incredible layered desserts you see in bakeries that look complicated but taste like pure sunshine? Well, stop dreaming, because I’ve cracked the code! We are officially making my famous strawberry crunch cheesecake bars, and trust me, the best part is you don’t even have to turn on your oven. It’s totally no-bake, which means creamy, dreamy filling is just hours away. This specific dessert has replaced every other summer treat we used to make—the combination of the thick crust, the smooth filling, and that signature crunchy topping? It’s happiness in square form, guaranteed!
Why This No-Bake Strawberry Crunch Cheesecake Recipe Works (Easy Cheesecake Bars)
Seriously, this recipe is my absolute go-to when I need something show-stopping but I’m short on time. You don’t need any fancy equipment, and we skip the terrifying water bath entirely! It’s all about maximum reward for minimum effort.
- It’s completely no-bake, making it the perfect summer project when the kitchen is already too hot.
- The texture is incredible! You get that super smooth, creamy strawberry dessert layer that rivals any full bakery-style cheesecake.
- The crunchy cheesecake topping gives you that amazing texture contrast that makes people ask, “Where did you buy these?”
- These come out as perfectly portioned individual cheesecake slices—no messy cutting required later!
If you need no bake dessert recipes that truly impress, this is it. It’s an instant family favorite, I promise.
Gathering Your Ingredients for Strawberry Crunch Cheesecake
Okay, the best part about this dessert being no-bake is that you don’t need a long shopping list of strange items. We’re keeping it real and focusing on what gets us that perfect texture. I’ve broken the list down for you so you can grab exactly what you need for each layer. Remember, accurate measuring here is key for that perfect set when chilling!
For the Graham Cracker Crust
This is the foundation, sweet but sturdy. We only need three things to make this base!
- 1 1/2 cups graham cracker crumbs (Get those fine crumbs; don’t worry about crushing them yourself!)
- 1/2 cup granulated sugar (This is the sugar that sweetens the bottom layer.)
- 6 tablespoons unsalted butter, perfectly melted
For the Creamy Filling
This is where the magic happens that makes it the best strawberry dessert—silky smooth, no lumps, whatsoever. Make sure your cream cheese is actually *softened*; it really makes the mixing process so much easier on your arm!
- 16 ounces cream cheese, remember, it has to be softened!
- 1 cup powdered sugar
- 1 teaspoon vanilla extract
- 1 (8 ounce) container frozen whipped topping, thawed (Make sure this is completely relaxed and soft before folding it in later!)
- 1/2 cup strawberry puree (This should come from thawed strawberries; strain out any excess water if you can.)
Crafting the Strawberry Crunch Topping
This topping is what makes it a true strawberry crunch cheesecake experience, inspired by those famous shortcake bars. Those freeze-dried strawberries? They are non-negotiable! They give us the intense color and flavor without adding extra moisture that would make the crunch soggy.
- 1 cup crushed vanilla wafer cookies
- 1/4 cup granulated sugar (for the topping mix)
- 1/4 cup all-purpose flour
- 1/4 cup unsalted butter, melted
- 1/4 cup freeze-dried strawberries, crushed (Get them fine in a zip-top bag with a rolling pin!)
Step-by-Step Instructions for Perfect Strawberry Crunch Cheesecake Bars
Alright, let’s get mixing! Since this is an easy cheesecake bars recipe, the steps are super straightforward, but timing your chills is where we nail that perfect texture. We’re moving fast between crust, filling, and topping, so have everything measured out before you start. Trust me, once you get that graham cracker base pressed down, the rest flies by!
Setting the Base: Preparing and Chilling the Crust
First things first: the base! You need to mix those graham cracker crumbs, the half-cup of sugar, and the melted butter together until it looks like wet sand. Press that mixture firmly—and I mean firmly—into the bottom of your 8×8 inch pan. I line mine with parchment paper first, letting the edges hang over so I can lift the whole thing out later. Pop that pan into the fridge for a good 15 minutes while you work on the filling. It needs to be solid!
Mixing the Smooth Filling for Your No Bake Cheesecake
Grab your stand mixer or a hand mixer. Get that 16 ounces of softened cream cheese beating until it’s perfectly smooth, no lumps allowed! Then, slowly beat in the powdered sugar and that vanilla extract. Once that’s all combined, you gently fold in your thawed whipped topping—don’t overmix it, or you deflate all the air!
Now, spread exactly half of that gorgeous white filling evenly over your chilled crust. Then, take your strawberry puree and drizzle it gently across this layer. Top that off with the rest of the creamy filling. Smooth it out gently over the puree layer.
Assembling and Firming the Strawberry Crunch Cheesecake Layers
This is the hardest part: waiting! Cover the pan loosely—don’t let plastic wrap touch the filling—and get it into the fridge. You need at least four hours here. Honestly, try for five or even overnight if you can swing it. This long chill ensures the filling sets up beautifully and won’t squash when you try to slice it. We’re aiming for that beautiful, firm set you get from a high-quality no bake cheesecake.
Creating and Applying the Crunchy Cheesecake Topping
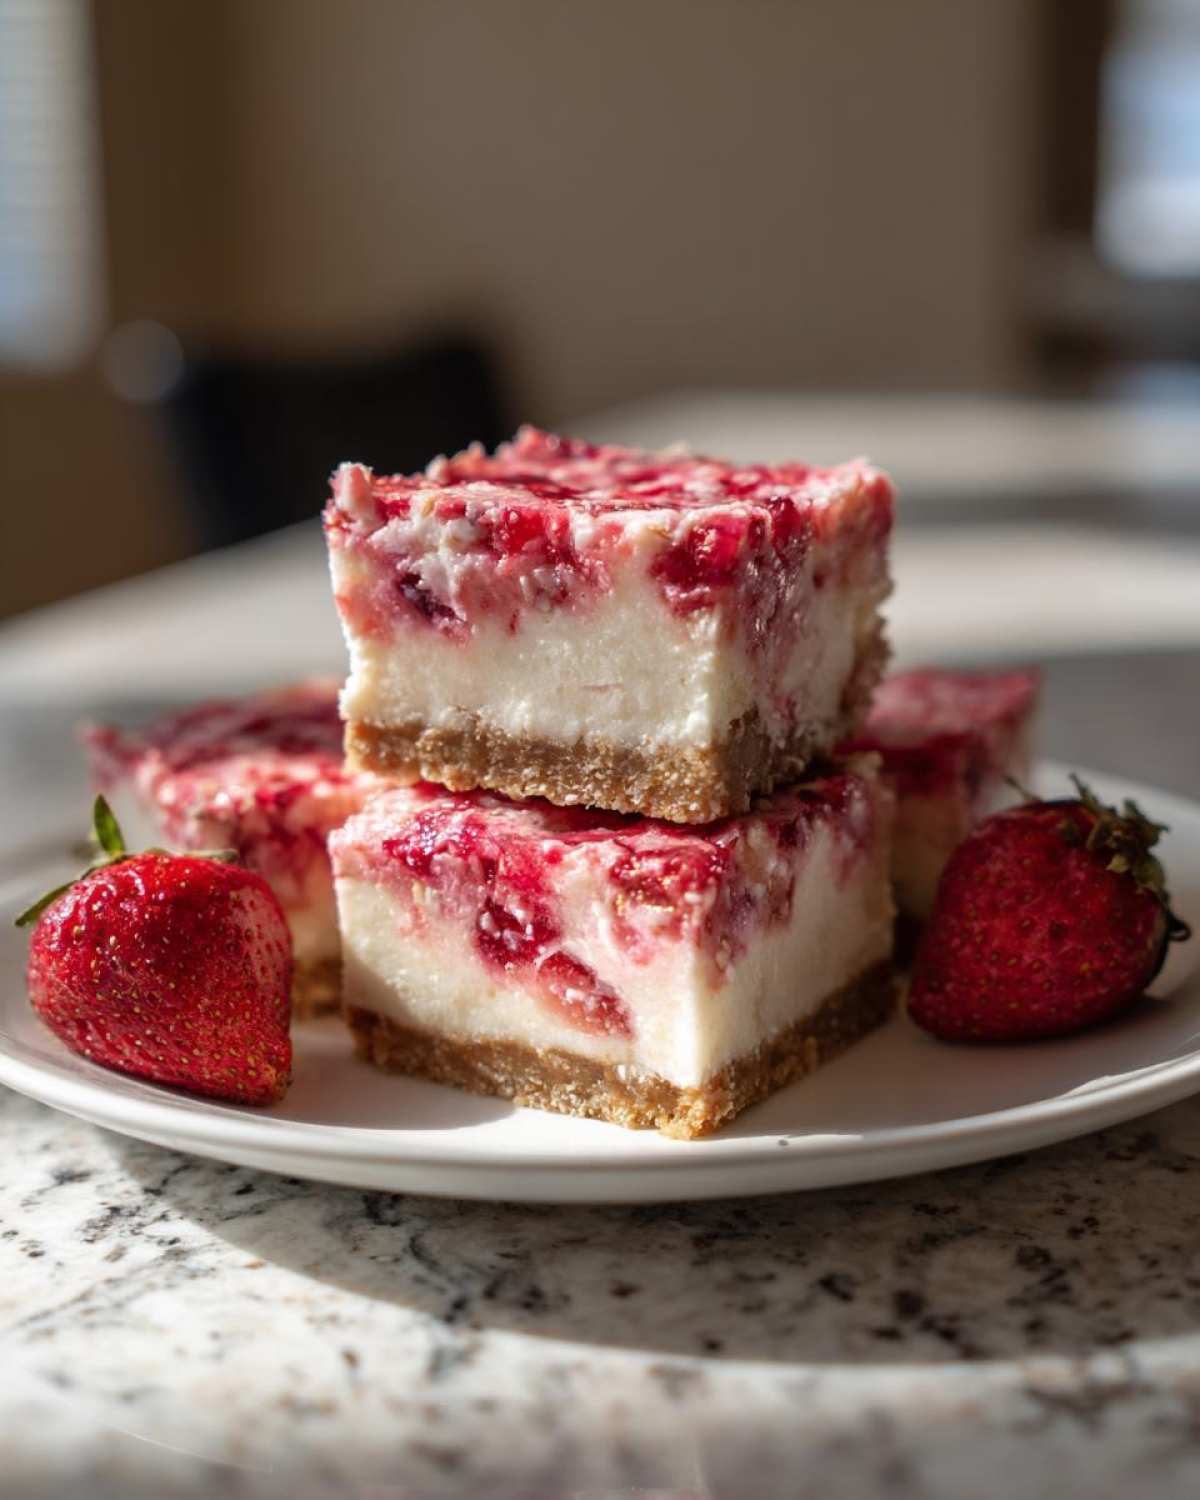
While the cheesecake is firming up its final chill, let’s make our crunch! Combine the crushed vanilla wafers, the topping sugar, the flour, and the other 1/4 cup of melted butter. Mix it up until you have nice, uniform crumbles—it should look like wet, sandy streusel. Then, stir in those precious crushed freeze-dried strawberries for that punch of flavor.
Once your bars are set, sprinkle that beautiful crunchy cheesecake topping evenly over the entirety of the surface. Get it right to the edges! Pop the whole thing back in the fridge for just 30 more minutes. This quick final chill helps the topping adhere perfectly before you use those parchment overhangs to lift everything out and slice up those amazing bars.
Tips for the Best Strawberry Crunch Topping and Filling
Getting this strawberry crunch cheesecake to taste like it came from a fantastic bakery means paying attention to a couple of details: ingredient temperature and topping moisture. If you follow these little secrets, you are golden!
- Always use high-quality, fully softened cream cheese for the filling. If it’s too cold, you’ll end up just beating air into hard lumps instead of getting that velvety smooth texture we love.
- When you fold in the whipped topping, use a spatula and be gentle! Nobody wants a sad, deflated filling. We want airy and light, not overworked.
- For the absolute creamiest result, I always let my cream cheese and whipped topping sit out on the counter for a solid hour before mixing. That slight extra warmth helps everything incorporate flawlessly.
- Regarding the crunch topping: Don’t skip the final 30-minute chill after spreading it on. It helps the melted butter firm up just enough so the topping doesn’t crumble off in huge pieces when you slice it.
Serving Suggestions for Your Family Favorite Cheesecake
Now that you have these gorgeous, perfectly set **individual cheesecake slices**, how are you going to present them? These bars are already superstars, but a tiny touch can make them look like they belong on a magazine cover—perfect for any party or summer gathering you host.
Because the flavor profile is so bright and sweet from the strawberries, you want accompaniments that cut through that richness just a little bit. Don’t feel like you need to overload them, though; they stand alone beautifully!
When it comes time to cut them, use a long, sharp knife warmed under hot water and wiped dry between every single cut. This is my trick for getting those super clean edges on any cheesecake bar. It makes all the difference when presenting them on a platter!
Here are a few little things I love to do:
- A small dollop of extra whipped cream right next to the bar adds height, especially if you are serving them on individual plates.
- A fresh mint leaf placed delicately on top of the strawberry crunch topping adds a lovely pop of contrasting green color.
- If you want to take it up a notch, serve these slightly chilled, not rock-hard cold. That allows the creamy filling to slightly soften on your tongue.
- For serving, I often use small, decorative paper liners placed right underneath each slice. It keeps sticky fingers away and makes cleanup a breeze for me, the cook!
If you need help figuring out serving times for a big event, I’ve put together some tips on my contact page about timing out big dessert batches. Honestly though, these are usually gone before I even get a chance to garnish them!
Storage and Reheating Instructions for Strawberry Crunch Cheesecake
The good news about this strawberry crunch cheesecake is that it stores like a dream because we didn’t involve any eggs or baking! That means it lasts longer than a baked version, which is great because I highly doubt these bars will stick around long enough to need serious storage space.
Since this is a pure, glorious no bake dessert, the refrigerator is your best friend for short-term keeping. When you store them, make sure they are tightly covered, or the filling can start to absorb other fridge smells—and nobody wants cucumber-scented cheesecake!
Here’s my breakdown for keeping these fresh:
- In the Fridge: Keep the covered 8×8 pan in the refrigerator for up to 5 days. If you’ve already cut them into individual cheesecake slices, place small squares of parchment paper between the layers if you stack them, though flat storage is always better.
- Freezing for Later: Yes, you absolutely can freeze these! This is perfect for making ahead of time for a big party. Make sure you let the bars set completely in the fridge first.
When it comes to wrapping for the freezer, you want serious protection against freezer burn. Cover the pan tightly with plastic wrap, then follow that up with a layer of aluminum foil. This double barrier keeps the topping crunchy and the filling creamy.
If you freeze them, you need to plan ahead for thawing time, because you can’t just microwave these!
- Move the completely wrapped pan from the freezer directly into the refrigerator.
- Let it thaw slowly for about 8 to 12 hours. Thawing overnight in the fridge is the absolute easiest way to manage it.
- Once fully thawed, you can slice them, top them (if you didn’t top them before freezing—though I recommend topping after thawing for full crunch!), and serve them cold.
Do not try to rush the thaw by leaving them on the counter. Unlike baked goods, these no bake cheesecake bars can get sweaty and mushy if they warm up too quickly. Patience here preserves that lovely creamy texture!
Common Questions About This Strawberry Crunch Cheesecake Recipe
Whenever I post photos of these bars, people always have the same burning questions! It’s lovely to see how many people want to try making this creamy strawberry dessert at home. I totally get it; mastering a bakery style cheesecake without the oven scares people, but these bars are foolproof if you listen to what the cream cheese needs. Here are the things I hear most often, so we can make sure your bars are perfect!
Can I use fresh strawberries instead of puree in the filling?
That’s a great question, especially when fresh berries are calling your name at the market! You absolutely *can* use fresh strawberries, but you need to be prepared to bake it instead of making it an official no bake dessert recipe. If you try to use fresh, watery strawberries in the no-bake filling, it just adds too much liquid, and your bars will never set firm enough to slice cleanly—they’ll just weep strawberry juice everywhere.
If you must use fresh berries in the filling, you need to cook them down first. Simmer about a cup of mashed, sugared strawberries until it thickens considerably, maybe by half. Let that cook-down puree cool completely before folding it into the mix. If you stick to the puree from thawed frozen strawberries we used in the recipe, you avoid all that extra cooking time!
How do I make this into a full round strawberry crunch cheesecake?
Oh, I love the idea of a full, round presentation for a big holiday! It’s totally doable. If you want to switch from the 8×8 pan to a standard 9-inch springform pan—which is what most people use for a true round cheesecake—you’ll want to increase all your ingredient ratios by about 1.5 times. This ensures you have enough filling to reach a satisfying height.
Because the depth will be greater in a round pan, you absolutely have to accept that the chilling time will increase. You need that longer chill for such a big block of dairy to firm up properly. I would plan on chilling the full round cake for a minimum of 6 hours, but seriously, overnight is always safest for a 9-inch springform. Then, apply the topping and give it one last 30-minute chill before slicing!
What is the best way to get a vibrant pink color in the filling?
The amount of strawberry puree we used is usually enough to give you a beautiful, soft blush—like a pale rose color. If you are looking for that shocking, vibrant pink, you can certainly push it further! I always prefer using a touch of gel food coloring over adding more liquid, which is why concentrated gel colors are my favorite baking supplies.
Start with just one or two tiny drops of bright pink or red gel coloring when you mix in the powdered sugar. Mix it thoroughly! Gel colors are potent, so start slow. You want that gorgeous pigment without upsetting the balance of that rich cream cheese mixture. Remember, if you add too much liquid—even liquid coloring—you risk making your no bake cheesecake soft again, and we can’t have that!
Tips for the Best Strawberry Crunch Topping and Filling
Getting this strawberry crunch cheesecake to taste like it came from a fantastic bakery means paying attention to a couple of details: ingredient temperature and topping moisture. If you follow these little secrets, you are golden!
- Always use high-quality, fully softened cream cheese for the filling. If it’s too cold, you’ll end up just beating air into hard lumps instead of getting that velvety smooth texture we love.
- When you fold in the whipped topping, use a spatula and be gentle! Nobody wants a sad, deflated filling. We want airy and light, not overworked.
- For the absolute creamiest result, I always let my cream cheese and whipped topping sit out on the counter for a solid hour before mixing. That slight extra warmth helps everything incorporate flawlessly.
- Regarding the crunch topping: Don’t skip the final 30-minute chill after spreading it on. It helps the melted butter firm up just enough so the topping doesn’t crumble off in huge pieces when you slice it.
Serving Suggestions for Your Family Favorite Cheesecake
Now that you have these gorgeous, perfectly set individual cheesecake slices, how are you going to present them? These bars are already superstars, but a tiny touch can make them look like they belong on a magazine cover—perfect for any party or summer gathering you host.
Because the flavor profile is so bright and sweet from the strawberries, you want accompaniments that cut through that richness just a little bit. Don’t feel like you need to overload them, though; they stand alone beautifully!
When it comes time to cut them, use a long, sharp knife warmed under hot water and wiped dry between every single cut. This is my trick for getting those super clean edges on any cheesecake bar. It makes all the difference when presenting them on a platter!
Here are a few little things I love to do:
- A small dollop of extra whipped cream right next to the bar adds height, especially if you are serving them on individual plates.
- A fresh mint leaf placed delicately on top of the strawberry crunch topping adds a lovely pop of contrasting green color.
- If you want to take it up a notch, serve these slightly chilled, not rock-hard cold. That allows the creamy filling to slightly soften on your tongue.
- For serving, I often use small, decorative paper liners placed right underneath each slice. It keeps sticky fingers away and makes cleanup a breeze for me, the cook!
If you need help figuring out serving times for a big event, I’ve put together some tips on my contact page about timing out big dessert batches. Honestly though, these are usually gone before I even get a chance to garnish them!
Storage and Reheating Instructions for Strawberry Crunch Cheesecake
The good news about this strawberry crunch cheesecake is that it stores like a dream because we didn’t involve any eggs or baking! That means it lasts longer than a baked version, which is great because I highly doubt these bars will stick around long enough to need serious storage space.
Since this is a pure, glorious no bake dessert, the refrigerator is your best friend for short-term keeping. When you store them, make sure they are tightly covered, or the filling can start to absorb other fridge smells—and nobody wants cucumber-scented cheesecake!
Here’s my breakdown for keeping these fresh:
- In the Fridge: Keep the covered 8×8 pan in the refrigerator for up to 5 days. If you’ve already cut them into individual cheesecake slices, place small squares of parchment paper between the layers if you stack them, though flat storage is always better.
- Freezing for Later: Yes, you absolutely can freeze these! This is perfect for making ahead of time for a big party. Make sure you let the bars set completely in the fridge first.
When it comes to wrapping for the freezer, you want serious protection against freezer burn. Cover the pan tightly with plastic wrap, then follow that up with a layer of aluminum foil. This double barrier keeps the topping crunchy and the filling creamy.
Do not try to rush the thaw by leaving them on the counter. Unlike baked goods, these no bake cheesecake bars can get sweaty and mushy if they warm up too quickly. Patience here preserves that lovely creamy texture!
Nutritional Estimates for This Creamy Strawberry Dessert
I’m not going to lie, this dessert isn’t exactly ‘diet food,’ but in the world of rich, creamy treats, it’s a fantastic mid-range option! We’re getting fats from the cream cheese and butter, sure, but we also have a decent amount of protein for a dessert. Always remember these numbers are just estimates based on the exact ingredients I listed, so if you use a different brand of cream cheese, your exact count will shift slightly. Transparency is important when you’re sharing a recipe!
Here’s the breakdown per bar (serving size is 1 bar):
| Nutrient | Estimate Per Bar |
|---|---|
| Calories | 310 |
| Fat | 18g |
| Carbohydrates | 34g |
| Protein | 4g |
| Sugar | 25g |
Considering how rich and satisfying these bars are, getting that flavor profile for only 310 calories is a win in my book for a centerpiece spring dessert recipe!
Share Your Perfect Strawberry Crunch Cheesecake Bars
I truly hope you take the time this week to whip up a batch of these strawberry crunch cheesecake bars. Honestly, they are such a joy to make, and the reward is incredible!
If you made these bars, please do me a huge favor and come back here to leave a rating below. Did you try the overnight chill? Did your kids manage to stay out of the pan while it was setting up? Tell me everything!
When you take that first photo of them sliced perfectly—clean edges and that beautiful layered look—snap a pic and tag me on social media! Seeing your successes means the world to me. It shows that my favorite family favorite cheesecake can be yours too. Happy baking (well, happy chilling for us this time)!
Nutritional Estimates for This Creamy Strawberry Dessert
I’m not going to lie, this dessert isn’t exactly ‘diet food,’ but in the world of rich, creamy treats, it’s a fantastic mid-range option! We’re getting fats from the cream cheese and butter, sure, but we also have a decent amount of protein for a dessert. Always remember these numbers are just estimates based on the exact ingredients I listed, so if you use a different brand of cream cheese, your exact count will shift slightly. Transparency is important when you’re sharing a recipe!
Here’s the breakdown per bar (serving size is 1 bar):
| Nutrient | Estimate Per Bar |
|---|---|
| Calories | 310 |
| Fat | 18g |
| Carbohydrates | 34g |
| Protein | 4g |
| Sugar | 25g |
Considering how rich and satisfying these bars are, getting that flavor profile for only 310 calories is a win in my book for a centerpiece spring dessert recipe!
Share Your Perfect Strawberry Crunch Cheesecake Bars
I truly hope you take the time this week to whip up a batch of these **strawberry crunch cheesecake** bars. Honestly, they are such a joy to make, and the reward is incredible!
If you made these bars, please do me a huge favor and come back here to leave a rating below. Did you try the overnight chill? Did your kids manage to stay out of the pan while it was setting up? Tell me everything!
When you take that first photo of them sliced perfectly—clean edges and that beautiful layered look—snap a pic and tag me on social media! Seeing your successes means the world to me. It shows that my favorite family favorite cheesecake can be yours too. Happy baking (well, happy chilling for us this time)!
Tips for the Best Strawberry Crunch Topping and Filling
Getting this strawberry crunch cheesecake to taste like it came from a fantastic bakery means paying attention to a couple of details: ingredient temperature and topping moisture. If you follow these little secrets, you are golden!
- Always use high-quality, fully softened cream cheese for the filling. If it’s too cold, you’ll end up just beating air into hard lumps instead of getting that velvety smooth texture we love.
- When you fold in the whipped topping, use a spatula and be gentle! Nobody wants a sad, deflated filling. We want airy and light, not overworked.
- For the absolute creamiest result, I always let my cream cheese and whipped topping sit out on the counter for a solid hour before mixing. That slight extra warmth helps everything incorporate flawlessly.
- Regarding the crunch topping: Don’t skip the final 30-minute chill after spreading it on. It helps the melted butter firm up just enough so the topping doesn’t crumble off in huge pieces when you slice it.
Serving Suggestions for Your Family Favorite Cheesecake
Now that you have these gorgeous, perfectly set individual cheesecake slices, how are you going to present them? These bars are already superstars, but a tiny touch can make them look like they belong on a magazine cover—perfect for any party or summer gathering you host.
Because the flavor profile is so bright and sweet from the strawberries, you want accompaniments that cut through that richness just a little bit. Don’t feel like you need to overload them, though; they stand alone beautifully!
When it comes time to cut them, use a long, sharp knife warmed under hot water and wiped dry between every single cut. This is my trick for getting those super clean edges on any cheesecake bar. It makes all the difference when presenting them on a platter!
Here are a few little things I love to do:
- A small dollop of extra whipped cream right next to the bar adds height, especially if you are serving them on individual plates.
- A fresh mint leaf placed delicately on top of the strawberry crunch topping adds a lovely pop of contrasting green color.
- If you want to take it up a notch, serve these slightly chilled, not rock-hard cold. That allows the creamy filling to slightly soften on your tongue.
- For serving, I often use small, decorative paper liners placed right underneath each slice. It keeps sticky fingers away and makes cleanup a breeze for me, the cook!
If you need help figuring out serving times for a big event, I’ve put together some tips on my contact page about timing out big dessert batches. Honestly though, these are usually gone before I even get a chance to garnish them!
Storage and Reheating Instructions for Strawberry Crunch Cheesecake
The good news about this strawberry crunch cheesecake is that it stores like a dream because we didn’t involve any eggs or baking! That means it lasts longer than a baked version, which is great because I highly doubt these bars will stick around long enough to need serious storage space.
Since this is a pure, glorious no bake dessert, the refrigerator is your best friend for short-term keeping. When you store them, make sure they are tightly covered, or the filling can start to absorb other fridge smells—and nobody wants cucumber-scented cheesecake!
Here’s my breakdown for keeping these fresh:
- In the Fridge: Keep the covered 8×8 pan in the refrigerator for up to 5 days. If you’ve already cut them into individual cheesecake slices, place small squares of parchment paper between the layers if you stack them, though flat storage is always better.
- Freezing for Later: Yes, you absolutely can freeze these! This is perfect for making ahead of time for a big party. Make sure you let the bars set completely in the fridge first.
When it comes to wrapping for the freezer, you want serious protection against freezer burn. Cover the pan tightly with plastic wrap, then follow that up with a layer of aluminum foil. This double barrier keeps the topping crunchy and the filling creamy.
Do not try to rush the thaw by leaving them on the counter. Unlike baked goods, these no bake cheesecake bars can get sweaty and mushy if they warm up too quickly. Patience here preserves that lovely creamy texture!
Nutritional Estimates for This Creamy Strawberry Dessert
I’m not going to lie, this dessert isn’t exactly ‘diet food,’ but in the world of rich, creamy treats, it’s a fantastic mid-range option! We’re getting fats from the cream cheese and butter, sure, but we also have a decent amount of protein for a dessert. Always remember these numbers are just estimates based on the exact ingredients I listed, so if you use a different brand of cream cheese, your exact count will shift slightly. Transparency is important when you’re sharing a recipe!
Here’s the breakdown per bar (serving size is 1 bar):
| Nutrient | Estimate Per Bar |
|---|---|
| Calories | 310 |
| Fat | 18g |
| Carbohydrates | 34g |
| Protein | 4g |
| Sugar | 25g |
Considering how rich and satisfying these bars are, getting that flavor profile for only 310 calories is a win in my book for a centerpiece spring dessert recipe!
Share Your Perfect Strawberry Crunch Cheesecake Bars
I truly hope you take the time this week to whip up a batch of these **strawberry crunch cheesecake** bars. Honestly, they are such a joy to make, and the reward is incredible!
If you made these bars, please do me a huge favor and come back here to leave a rating below. Did you try the overnight chill? Did your kids manage to stay out of the pan while it was setting up? Tell me everything!
When you take that first photo of them sliced perfectly—clean edges and that beautiful layered look—snap a pic and tag me on social media! Seeing your successes means the world to me. It shows that my favorite family favorite cheesecake can be yours too. Happy baking (well, happy chilling for us this time)!
PrintNo-Bake Strawberry Crunch Cheesecake Bars
Make easy, creamy no-bake cheesecake bars topped with a sweet, crunchy strawberry topping. This recipe is simple to prepare and perfect for parties or summer desserts.
- Prep Time: 25 min
- Cook Time: 0 min
- Total Time: 4 hr 25 min
- Yield: 16 bars
- Category: Dessert
- Method: No-Bake
- Cuisine: American
- Diet: Vegetarian
Ingredients
- 1 1/2 cups graham cracker crumbs
- 1/2 cup granulated sugar (for crust)
- 6 tablespoons unsalted butter, melted
- 16 ounces cream cheese, softened
- 1 cup powdered sugar
- 1 teaspoon vanilla extract
- 1 (8 ounce) container frozen whipped topping, thawed
- 1/2 cup strawberry puree (from thawed strawberries)
- 1 cup crushed vanilla wafer cookies
- 1/4 cup granulated sugar (for crunch topping)
- 1/4 cup all-purpose flour
- 1/4 cup unsalted butter, melted (for crunch topping)
- 1/4 cup freeze-dried strawberries, crushed
Instructions
- Prepare the crust: Mix graham cracker crumbs, 1/2 cup sugar, and 6 tablespoons melted butter. Press the mixture firmly into the bottom of an 8×8 inch baking pan lined with parchment paper, leaving an overhang. Chill for 15 minutes.
- Make the cheesecake filling: Beat the softened cream cheese until smooth. Gradually add powdered sugar and vanilla extract. Mix until combined.
- Fold in the whipped topping gently. Spread half of the filling over the chilled crust.
- Drizzle the strawberry puree over the filling layer. Spread the remaining filling on top. Cover and chill for at least 4 hours, or until firm.
- Prepare the crunch topping: In a medium bowl, combine crushed vanilla wafers, 1/4 cup sugar, flour, and 1/4 cup melted butter. Mix until crumbly. Stir in the crushed freeze-dried strawberries.
- Spread the strawberry crunch topping evenly over the chilled cheesecake layer.
- Chill the bars for another 30 minutes before slicing. Lift the bars out using the parchment overhang and cut into squares.
Notes
- Use good quality, softened cream cheese for the smoothest filling texture.
- For a stronger strawberry flavor in the filling, add 1 teaspoon of strawberry extract.
- If you prefer a baked version, bake the crust for 10 minutes at 350°F before adding the filling and baking for 45 minutes.
Nutrition
- Serving Size: 1 bar
- Calories: 310
- Sugar: 25
- Sodium: 180
- Fat: 18
- Saturated Fat: 10
- Unsaturated Fat: 8
- Trans Fat: 0
- Carbohydrates: 34
- Fiber: 1
- Protein: 4
- Cholesterol: 45