

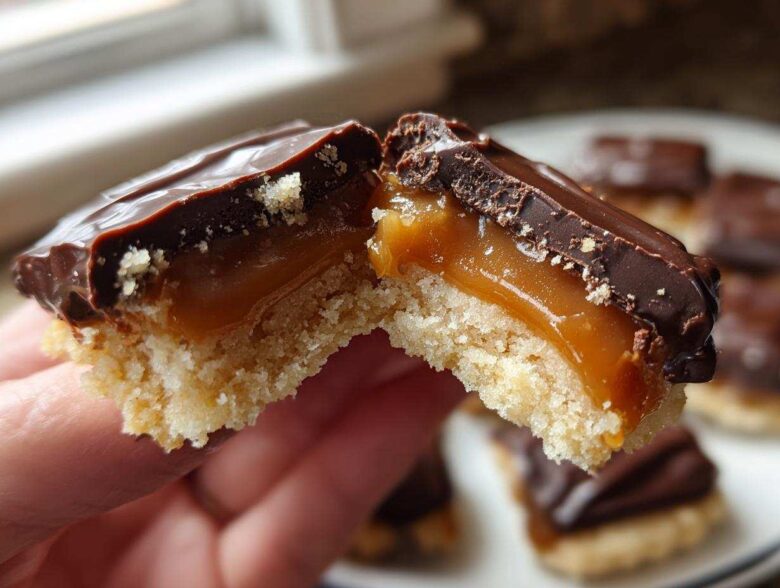
Oh my gosh, sometimes you just need that satisfying crunch, chew, and chocolate hit that only a candy bar can deliver, right? But seriously, why buy them when you can make easy homemade Twix cookies that taste ten times better? I spent what felt like an eternity messing around with ratios until I hit the absolute perfect spot where the shortbread base snaps just right, the caramel oozes perfectly, and the chocolate hugs everything tight.
Trust me on this: perfecting that caramel-to-shortbread ratio was a journey involving many, many failed batches! But now I have a recipe that nails that signature candy bar experience without any fuss. If you want a show-stopping layered treat that’s surprisingly quick, this is the one. Plus, you’ll never go back to the wrappers after tasting these bad boys!
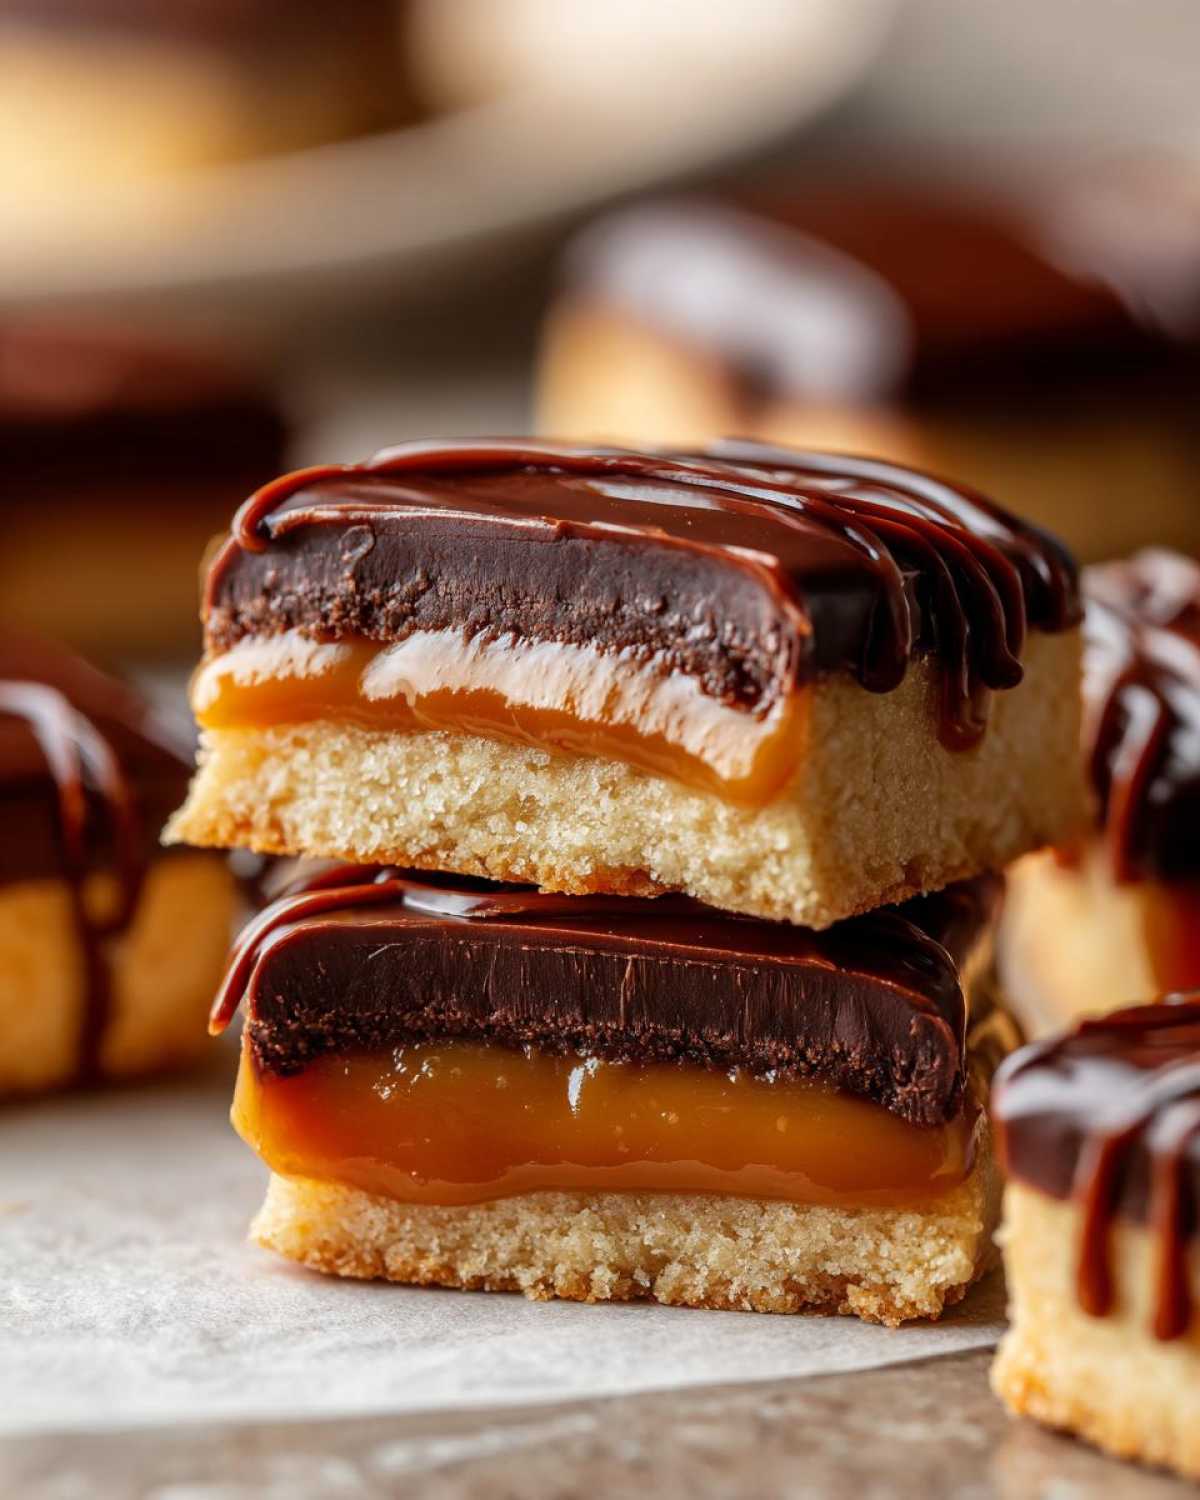
If you’re ready for a baking adventure that feels like magic—and you love my chewy chocolate chip cookies—you’re going to adore these next steps. We’re building layers of pure deliciousness!
Why You Will Love These Easy Homemade Twix Cookies
Honestly, there are a ton of layer cookies out there, but these Twix cookies hit differently. Once you see how straightforward they are, they’ll become your new go-to treat. Here are a few reasons why I know you’ll be making these constantly:
- They are genuinely easy! I managed this as a frazzled mom of three; if I can assemble the layers, anyone can. Forget complicated pastry work—this is simple baking magic.
- Texture perfection is guaranteed. You get that delicate, slightly crumbly shortbread base, followed by that thick, gooey caramel layer that just melts in your mouth.
- The flavor replication is spot-on. It tastes exactly like biting into your favorite candy bar, only warmer and fresher from the oven.
- They look impressive, even though they’re secretly low-effort. These are fantastic for potlucks or gifts because everyone immediately recognizes that irresistible chocolate-caramel look!
Gathering Ingredients for Your Twix Cookies
Okay, now for the fun part—getting everything laid out! I always approach layered baking by setting everything up in little bowls first. It makes the actual assembly process so much less stressful. For these copycat Twix cookies, we have three distinct parts, and using the exact measurements I list here is key to getting that perfect balance.
Seriously, don’t skip prepping your components ahead of time. It keeps you from over-mixing the dough, and it ensures your caramel doesn’t burn while you’re chasing down the right kind of chocolate chips. You can find my tips on my go-to caramel sauce recipe if you want to see how I generally prep caramel ingredients!
For the Shortbread Base
This base is what gives us that classic snap, but we want it tender, not brick-like! Make sure your butter is truly softened—not melted, just soft enough to leave an indent when you firmly press your finger into it.
- 1 cup (2 sticks) unsalted butter, softened
- 1/2 cup granulated sugar
- 1 teaspoon vanilla extract
- 2 cups all-purpose flour
- 1/4 teaspoon salt
For the Gooey Caramel Layer
This is where the magic happens! The sweetened condensed milk is our secret weapon here; it cooks down into the richest, chewiest caramel. This layer has to be right, or the whole Twix candy bar cookie experience falls apart!
- 1 (14 ounce) can sweetened condensed milk
- 1/2 cup packed light brown sugar
- 1/2 cup (1 stick) unsalted butter
For the Chocolate Topping
We need standard semi-sweet chocolate, but the shortening is important! It’s not for flavor; it’s what keeps the melted chocolate smooth and glossy, preventing it from getting thick and dull when we dip our cookies. It helps things flow perfectly for dipping.
- 1 cup semi-sweet chocolate chips
- 1 tablespoon vegetable shortening
Step-by-Step Guide to Making Twix Cookies
Alright, here’s the game plan for putting these triple-layer wonders together. We’re going to tackle the base first, then the caramel, and finish it all off with that beautiful chocolate shell. If you follow the timing, you’ll be amazed at how fast these come together, even though they look super fancy. I swear, every time I follow the steps outlined in my chocolate croissant recipe, the structure just comes out so much better, and that applies here too!
Preparing the Shortbread Cookie Base
First thing’s first, get your oven hot—350°F (175°C) is the magic number. Line those baking sheets; you don’t want anything sticking! In a big bowl, get that softened butter and granulated sugar whipping together until they are pale and fluffy. That’s called creaming, and it whips in the air we need for a tender, almost sandy shortbread texture.
Once that’s done, mix in your vanilla. Then, gently add the flour and salt. And here’s the E-E-A-T tip: do not overmix here! As soon as you see the last streak of flour disappear, stop stirring. Overmixing the flour makes your Twix cookies tough, and we want them delicate.
Roll those dough portions into little one-inch balls and place them on your lined sheets, leaving enough room since they spread a little. Just flatten them gently with the bottom of a glass. Bake these shortbread bases for about 10 to 12 minutes until the edges just start looking golden brown. Let them cool completely right on the pan—they are too fragile when piping hot!
Creating the Soft Caramel Layer for Twix Cookies
While the bases are cooling down—and I mean fully cooling, or the caramel melts right through—we tackle the middle layer. Grab a small saucepan and mix your sweetened condensed milk, brown sugar, and the remaining butter. Set it over medium heat.
You need to stir this constantly! As soon as it hits a gentle boil, reduce the heat way down low. Keep stirring for about 5 to 7 minutes. You’ll notice it starting to thicken and darken slightly into a beautiful amber color. Don’t wander off, or you’ll scorch it! Pull it off the heat and let it rest for about five minutes. It needs to cool just enough so it doesn’t soak into the shortbread but is still spoonable.
Take your cooled shortbreads and carefully spoon about a teaspoon of that warm caramel right onto the center of each one. Let those caramel mounds sit for a good 15 minutes to firm up a little bit before we dunk them in chocolate. Patience is key here; we don’t want caramel running everywhere!
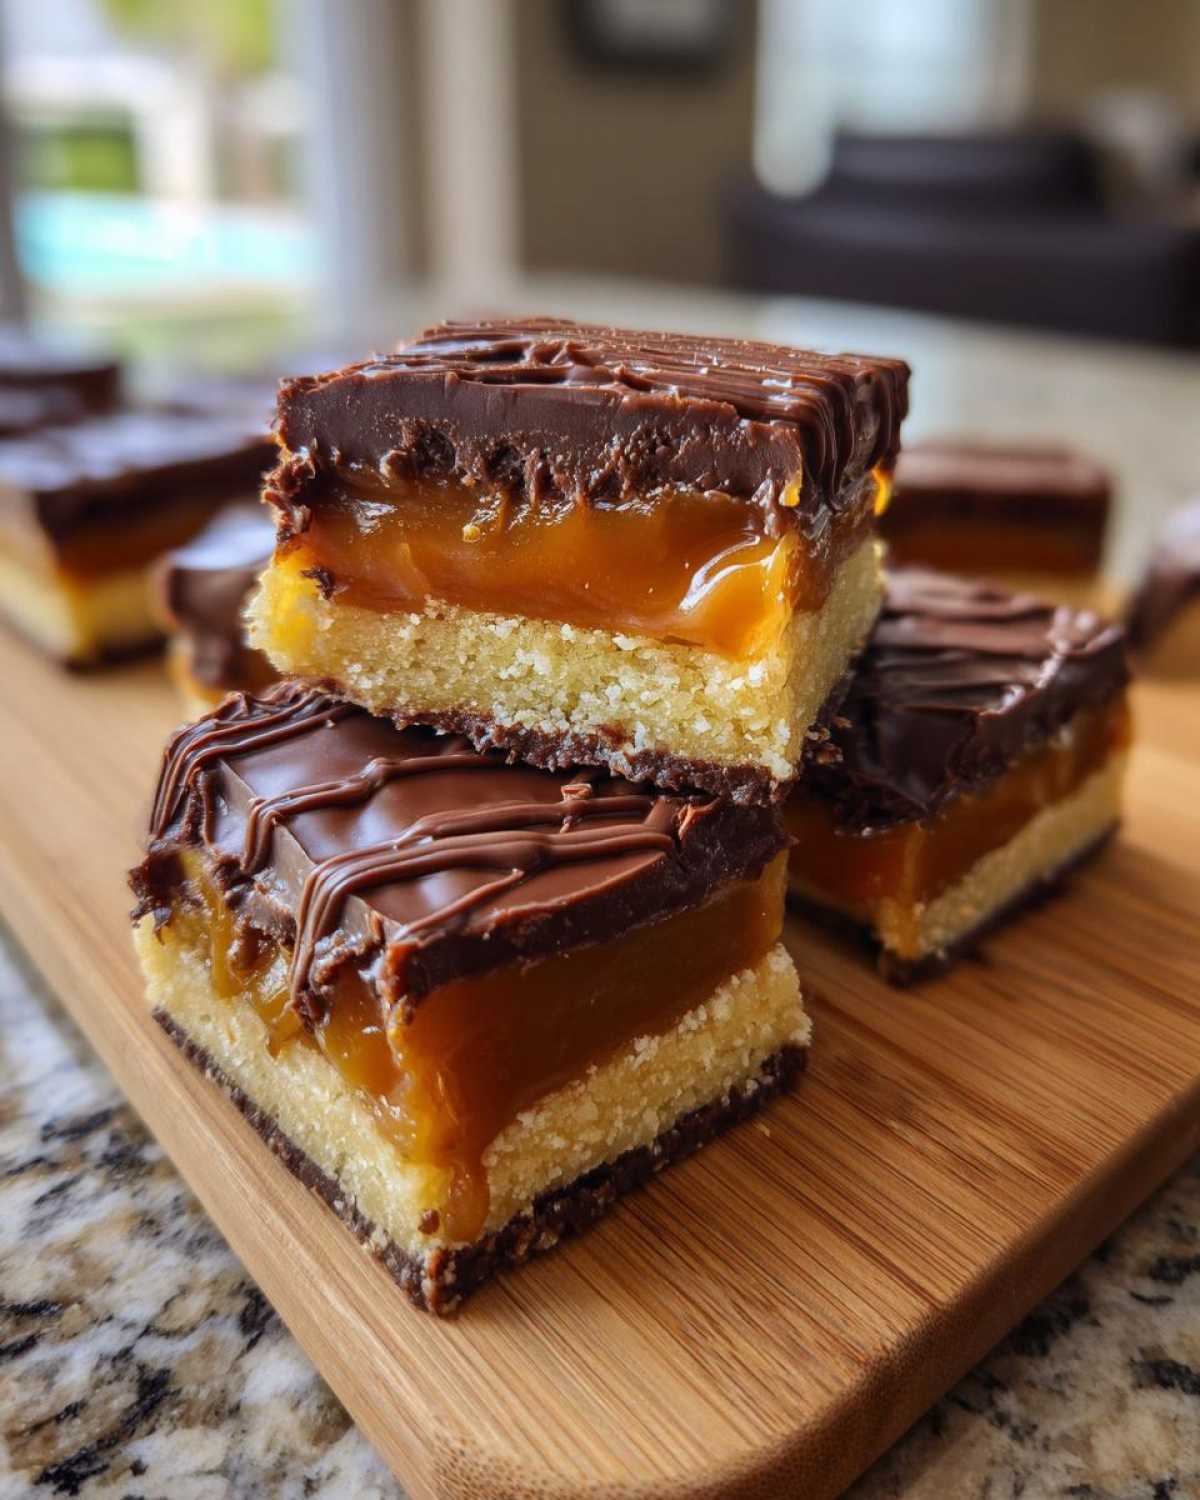
Finishing Your Layer Cookie Recipe Chocolate Caramel
Now for the grand finale! Put your chocolate chips and that tablespoon of shortening into a microwave-safe bowl. Microwave in short 30-second bursts, stirring hard between each one, until it’s totally smooth and shiny. The shortening ensures this chocolate is dippable!
Take your caramel-topped cookie, hold it carefully (maybe use two forks), and dip the top straight down into that luscious chocolate. Lift it up and gently wiggle it so that excess chocolate drips back into the bowl. Place the finished caramel chocolate shortbread cookies back onto your parchment paper.
This is the *most* important part for clean edges: pop the whole tray into the refrigerator for at least 30 minutes! You need that chocolate shell to be totally firm before you try grabbing them. Once they are hard, you’ve got perfect copycat Twix cookies ready to go!
Tips for Perfect Copycat Twix Cookies
Even though this layer cookie recipe chocolate caramel is pretty straightforward, there are a few little tricks I learned through trial and error that make the difference between a good cookie and a show-stopping one. Always trust me when I say that these tiny details elevate your easy homemade Twix cookies from homemade-good to candy-bar-mimic perfection!
For starters, let’s talk about that caramel chewiness, which is Non-Negotiable for a great copycat experience. The recipe note suggested cooking it longer for a chewier texture—and I fully back that up! If you like that slightly firmer pull like in a real chewy Twix, cook that caramel mixture for an extra minute or two until it just barely starts to pull away from the bottom of the saucepan when you tilt it, but be cautious!
If you are worried about the caramel being too soft when you go to dip them, try putting the caramel-topped cookies into the fridge for about 20 minutes *before* you go in for the chocolate dip. This chills the caramel so it won’t streak out into your nice, smooth chocolate coating.
A little tip for making the chocolate look really professional? When you pull the cookie out of the melted chocolate, use a toothpick to gently swirl the chocolate right around the edge where it meets the caramel layer. This helps seal everything in neatly and creates a beautiful border. It’s a little move I picked up a while back—you can see how precise I try to be when I deal with my snickerdoodle dough, too!

Finally, resist the urge to eat them right away! Chilling them in the fridge afterwards isn’t just about setting the chocolate; it lets the shortbread base absorb a tiny bit of the caramel moisture, which makes the whole cookie taste richer and brings the flavors together perfectly overnight!
Twix Cookie Variations and Flavor Twists
Now that you’ve mastered the classic look, let’s talk about having some fun. Since this is your kitchen, we should absolutely play around with the basic template! These Twix cookies are so versatile, and you can easily adjust them for holidays, dietary preferences, or just because you feel like it. We are big on creativity here!
I’ve got three tried-and-true fun swaps you can use next time you bake a batch of these layers. Don’t be afraid to get a little messy; that’s how the best ideas happen!
Switching Up the Chocolate Finish
The recipe calls for semi-sweet chips, which is classic and balances the caramel sweetness perfectly. But if you’re a dark chocolate enthusiast like me, swap those out! Dark chocolate chips give your copycat Twix cookies a much more intense, less sweet finish that adults absolutely adore. It cuts through the sugar beautifully.
For something really special, try going gourmet! After you dip the cookie in the milk or dark chocolate but *before* it sets in the fridge, sprinkle just a tiny pinch of flaky sea salt right on top of the wet chocolate. That salty-sweet combination is absolutely killer and takes the flavor profile up about three notches. It looks so fancy, too!
Trying the Twix Cookie Cups Tutorial
We’ve been focusing on traditional cookies, but have you considered turning this into a thumbprint style? This is a fantastic way to make these when you’re short on time or want a softer, more pudding-like center. We’re talking about a quick Twix cookie cups tutorial here!
Instead of rolling the shortbread dough into balls and flattening them, gently press the dough into the little wells of a mini-muffin tin. You just need a small amount, maybe enough to line the bottom and go halfway up the side of the cup. Bake those according to the usual time (they might bake a tiny bit faster, so watch them!).
Once they cool slightly, you just spoon the caramel right inside the shortbread cup. Since the sides hold everything in, you can even pour a little more melted chocolate right over the top. They set up beautifully and are perfect for parties!
Adding Texture to the Shortbread Layer
When I mentioned that you shouldn’t overmix the shortbread dough, I meant it, so you get that nice soft base. But if you want a bit more texture baked right into the base—more like a traditional shortbread cookie with a bit of crunch—you can swap out about half a cup of the flour for finely ground almonds or pecans.
If you do this, make sure your butter and sugar are creamed really well, because the nuts need that aeration. It adds a lovely nutty depth that pairs surprisingly well with the caramel. Plus, nuts make everything feel slightly healthier, right? (Just kidding! But they do taste great!)
Storage and Reheating Instructions for Twix Cookies
Look, these Twix cookies are so good, you might actually have leftovers—though I certainly hope you do! But because we’ve got that gooey, homemade caramel layer in the middle, we can’t just leave them sitting out on the counter like a standard chocolate chip cookie. Nope! Temperature control is key here to keep that caramel soft but set, and the chocolate shell firm.
My absolute first rule for storing any cookie with a soft filling like this is: airtight containers and the refrigerator are your best friends. If you leave them on the counter, the caramel will get sticky, the base might soften too much, and the chocolate will definitely start melting if your house is warm.
You want to keep these cookies in a single layer if you can manage it, especially if your chocolate tops aren’t super hard yet. If you have to stack them, make sure you place a small square of wax paper or parchment paper between each layer. This stops the sticky caramel from one cookie from adhering to the chocolate of the cookie above it. It’s tedious, but it saves you from ripping your beautiful layers apart!
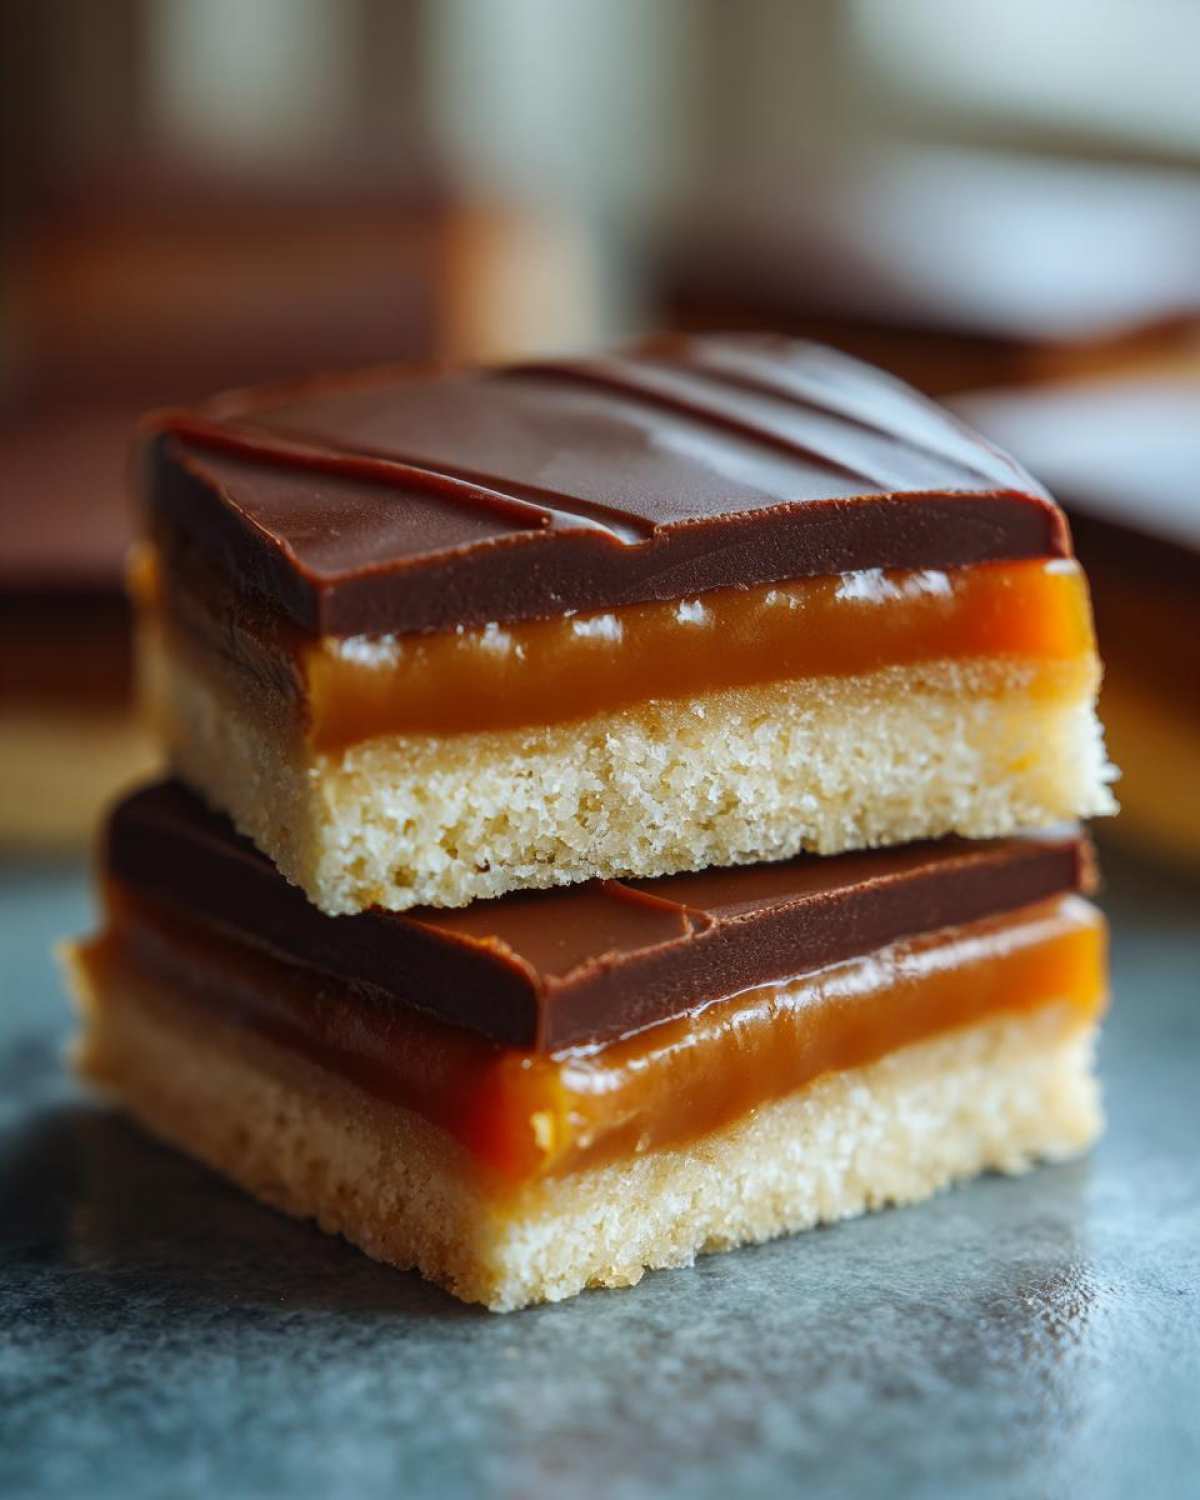
When stored properly in the fridge in an airtight container, these caramel chocolate shortbread cookies will stay wonderfully fresh for about five to seven days. Honestly, I find they are actually *better* on day two or three, as the shortbread base mellows out from the caramel soaking in just a little bit.
Now, what about reheating? You don’t actually need to reheat these! If you pull them straight from the fridge, they might be a little hard initially. Just let them sit on the counter for about 15 to 20 minutes before serving. That gentle warm-up softens the caramel back to that perfect, chewable consistency without making the chocolate runny. Skip the microwave entirely unless you want a chocolate lava situation!
Quick Facts: Details for Your Twix Style Cookies
I know sometimes you’re sneaking a peek at the recipe while you’re running out the door, trying to figure out if you even have time to bother baking those amazing Twix style cookies. So, I pulled all the key logistical details right here so you can see exactly what you’re committing to! Honestly, for a layered cookie, the total time is incredibly reasonable. I’m pretty proud of how quickly we can get these beautiful things made!
I always keep these times handy for my own reference, especially around the holidays when I’m batch baking. If you want to know more about my weird little baking world, check out my About Us page!
Here’s the rundown on effort versus reward for these easy homemade Twix cookies:
- Prep Time: 20 minutes. That’s just mixing the dough, stirring up the caramel, and getting your chocolate ready. Super fast!
- Cook Time: About 20 minutes total. That’s the shortbread baking time plus the time it takes for the caramel to thicken up a touch on the stove.
- Total Time Estimate: Around 70 minutes. Now, that includes the crucial chilling time for the caramel to set and the chocolate to harden in the fridge. Don’t rush that last part, or you’ll have a melty mess!
- Yield: You’ll get about 24 perfect cookies, assuming you follow the measurements and don’t eat half the dough while you’re rolling the balls.
- Category: Dessert. Obviously! But specifically, these fall under the “Candy Bar Inspired” category for me.
- Method: Baking. We bake that shortbread base until golden brown before we add the no-bake caramel and chocolate toppings.
- Cuisine: American. Classic candy bar flavors translated into a perfect little cookie format!
- Diet: Vegetarian. No funny business in these layers!
Frequently Asked Questions About Twix Cookies
I know you’ve got questions! When you’re dealing with layers like this—shortbread, caramel, and chocolate—people always want to make sure they are doing things right to get that perfect crunch and chew. I’ve collected the questions I get asked most often about these copycat Twix cookies so we can clear things up!
If you’re looking for even more general baking help, I actually have a great resource on making homemade garlic butter that has some surprising crossover tips about mixing fats and flour!
Can I just use pre-made soft caramel sauce instead of cooking it?
You absolutely *can* go that route if you’re desperate for a time-saver, but I have to be honest: the texture won’t be the same. Pre-made sauces don’t usually have the structure needed to hold up under the chocolate shell once they are chilled. They tend to get too soft or sometimes even too hard.
The whole charm of these easy homemade Twix cookies is that super soft, slightly chewy caramel that melts in your mouth. Cooking the condensed milk mixture down is what achieves that perfect viscosity. If you’re set on store-bought, I’d suggest microwaving it briefly to try and thicken it up first, but the homemade method is worth the extra 10 minutes, trust me!
Is it possible to make these as No Bake Twix Cookies?
Well, no, not really, unless you are happy with a very different structure. The shortbread base *must* be baked to give you that crumbly, stable foundation that mimics the actual candy bar wafer. If you skip baking the dough, you’re essentially just making a very hard, crumbly shortbread crust that won’t taste right.
The caramel and chocolate layers are no-bake, yes, but that base is crucial! If you want something truly no-bake that mimics caramel and chocolate, you might be better off looking up a recipe for no bake Twix cookies recipe bars, where you crush cookies for the base instead of making dough from scratch. But for the *best* flavor and texture, we bake that base!
How do I ensure the shortbread base stays soft and crumbly?
This is where technique matters more than ingredients! The biggest mistake people make with shortbread is overworking the dough once the flour is added. Once you mix in those two cups of flour, your goal is just to bring it together into a cohesive mass. Stop stirring as soon as you can press it into a ball.
Overmixing develops gluten, which makes the texture chewy and sturdy—that’s great for a regular sugar cookie, but terrible for a shortbread base! You need fat and flour to coat completely, but not bond tightly. That’s why we use the creaming method first to introduce air and keep the final cookie tender. Follow that instruction in the guide to stop mixing before the last streak of flour is gone, and you will get that heavenly, slightly soft cookie base every time.
Can I make these ahead of time for Christmas or parties?
Yes! These Christmas Twix cookie recipe ideas are perfect for making ahead because they absolutely *need* the chilling time anyway. Once they are fully dipped and the chocolate is set (after about an hour in the fridge), you can store them. As I mentioned in the storage section, keep them in an airtight container in the refrigerator.
They actually taste better the next day! The slight moisture transfer from the caramel to the shortbread base softens the base just enough to make the whole cookie a dream to bite through. They are great for batch baking when you’re planning for a big holiday gathering!
Understanding the Nutrition in These Twix Cookies
So, we’ve made these incredible Twix cookies, layer by layer, and they taste like pure joy—but what about the fuel they provide, right? I always feel a little guilty checking the stats after baking something so delicious, but knowledge is power! Keep in mind that because these have a buttery shortbread base and a rich caramel center, they are definitely a treat, not an everyday snack.
I’ve crunched the numbers based on the exact recipe amounts we used, which gives us a good ballpark figure for what you’re looking at per cookie. But hey, homemade is always better because at least you know exactly what kind of butter went into yours! For more on how I approach transparency in my recipes, you can check out my full site disclaimer.
Here is a breakdown of the estimated nutrition facts based on making 24 cookies:
- Serving Size: 1 cookie (You’ll probably eat more than one, but we count it as one!)
- Calories: 195
- Sugar: 18 grams. Yep, that’s where the candy bar flavor comes from!
- Fat: 11 grams (This includes the butter in the base and the chocolate fat).
- Saturated Fat: 7 grams
- Trans Fat: 0.1 grams
- Carbohydrates: 23 grams
- Protein: 2 grams
- Cholesterol: 25 milligrams
- Sodium: 65 milligrams
Just remember, these numbers are estimates! Brands of chocolate chips vary, and how much you drizzle on top will change everything. These are a fantastic, decadent treat for holidays or a special weekend bake, but definitely enjoy them with that knowing smile because they are *so* worth it. They’re a labor of love, and that counts for something, right?
PrintEasy Homemade Twix Cookies

Make simple cookies that taste like a Twix bar, featuring a shortbread base, a gooey caramel layer, and a chocolate coating.
- Prep Time: 20 min
- Cook Time: 20 min
- Total Time: 70 min
- Yield: 24 cookies
- Category: Dessert
- Method: Baking
- Cuisine: American
- Diet: Vegetarian
Ingredients
- 1 cup (2 sticks) unsalted butter, softened
- 1/2 cup granulated sugar
- 1 teaspoon vanilla extract
- 2 cups all-purpose flour
- 1/4 teaspoon salt
- 1 (14 ounce) can sweetened condensed milk
- 1/2 cup packed light brown sugar
- 1/2 cup (1 stick) unsalted butter
- 1 cup semi-sweet chocolate chips
- 1 tablespoon vegetable shortening
Instructions
- Preheat your oven to 350°F (175°C). Line baking sheets with parchment paper.
- For the shortbread base: Cream together the softened butter and granulated sugar in a large bowl until light and fluffy. Beat in the vanilla extract.
- Gradually add the flour and salt until just combined to form a soft dough. Do not overmix.
- Roll the dough into small balls, about 1 inch in diameter, and place them 2 inches apart on the prepared baking sheets. Flatten each ball slightly with the bottom of a glass.
- Bake the shortbread bases for 10 to 12 minutes, or until the edges are lightly golden. Let them cool completely on the baking sheet.
- For the caramel layer: In a small saucepan over medium heat, combine the sweetened condensed milk, brown sugar, and 1/2 cup of butter. Stir constantly until the butter melts and the mixture comes to a gentle boil.
- Reduce the heat to low and cook, stirring constantly, for 5 to 7 minutes until the mixture thickens slightly and turns a deeper amber color. Remove from heat and let cool for 5 minutes.
- Spoon about 1 teaspoon of the warm caramel mixture onto the center of each cooled shortbread cookie. Let the caramel set for about 15 minutes.
- For the chocolate topping: Place the chocolate chips and shortening in a microwave-safe bowl. Microwave in 30-second intervals, stirring well after each, until smooth and fully melted.
- Dip the top of each caramel-topped cookie into the melted chocolate, allowing excess to drip off. Place the cookies back on the parchment paper.
- Refrigerate the cookies for at least 30 minutes, or until the chocolate is firm.
Notes
- If you prefer a chewier caramel, cook the caramel mixture for a minute or two longer until it reaches a soft-ball stage when tested in cold water.
- For a cleaner dip, use a toothpick to gently guide the chocolate around the edges of the caramel.
- Store the finished cookies in an airtight container in the refrigerator to keep the caramel soft but set.
Nutrition
- Serving Size: 1 cookie
- Calories: 195
- Sugar: 18
- Sodium: 65
- Fat: 11
- Saturated Fat: 7
- Unsaturated Fat: 4
- Trans Fat: 0.1
- Carbohydrates: 23
- Fiber: 0.5
- Protein: 2
- Cholesterol: 25