

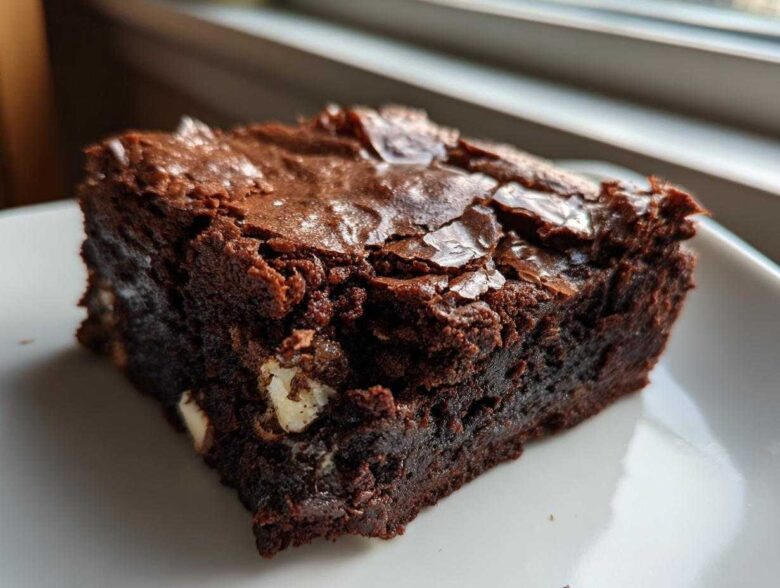
Oh my gosh, you know those moments when you just absolutely need chocolate? Not just any chocolate, but something deeply rich, gooey, and incredibly satisfying? That’s exactly where I was when I finally locked down this recipe. After way too many baking disasters trying to replicate those bakery-style bars, I cracked the code. These oreo brownies are truly the ultimate! Forget dry, cakey things—I’m talking about the fudgiest, chewiest bite possible, loaded with those perfect chunks of cookies, and yes, they get that impossibly shiny, crackly top!
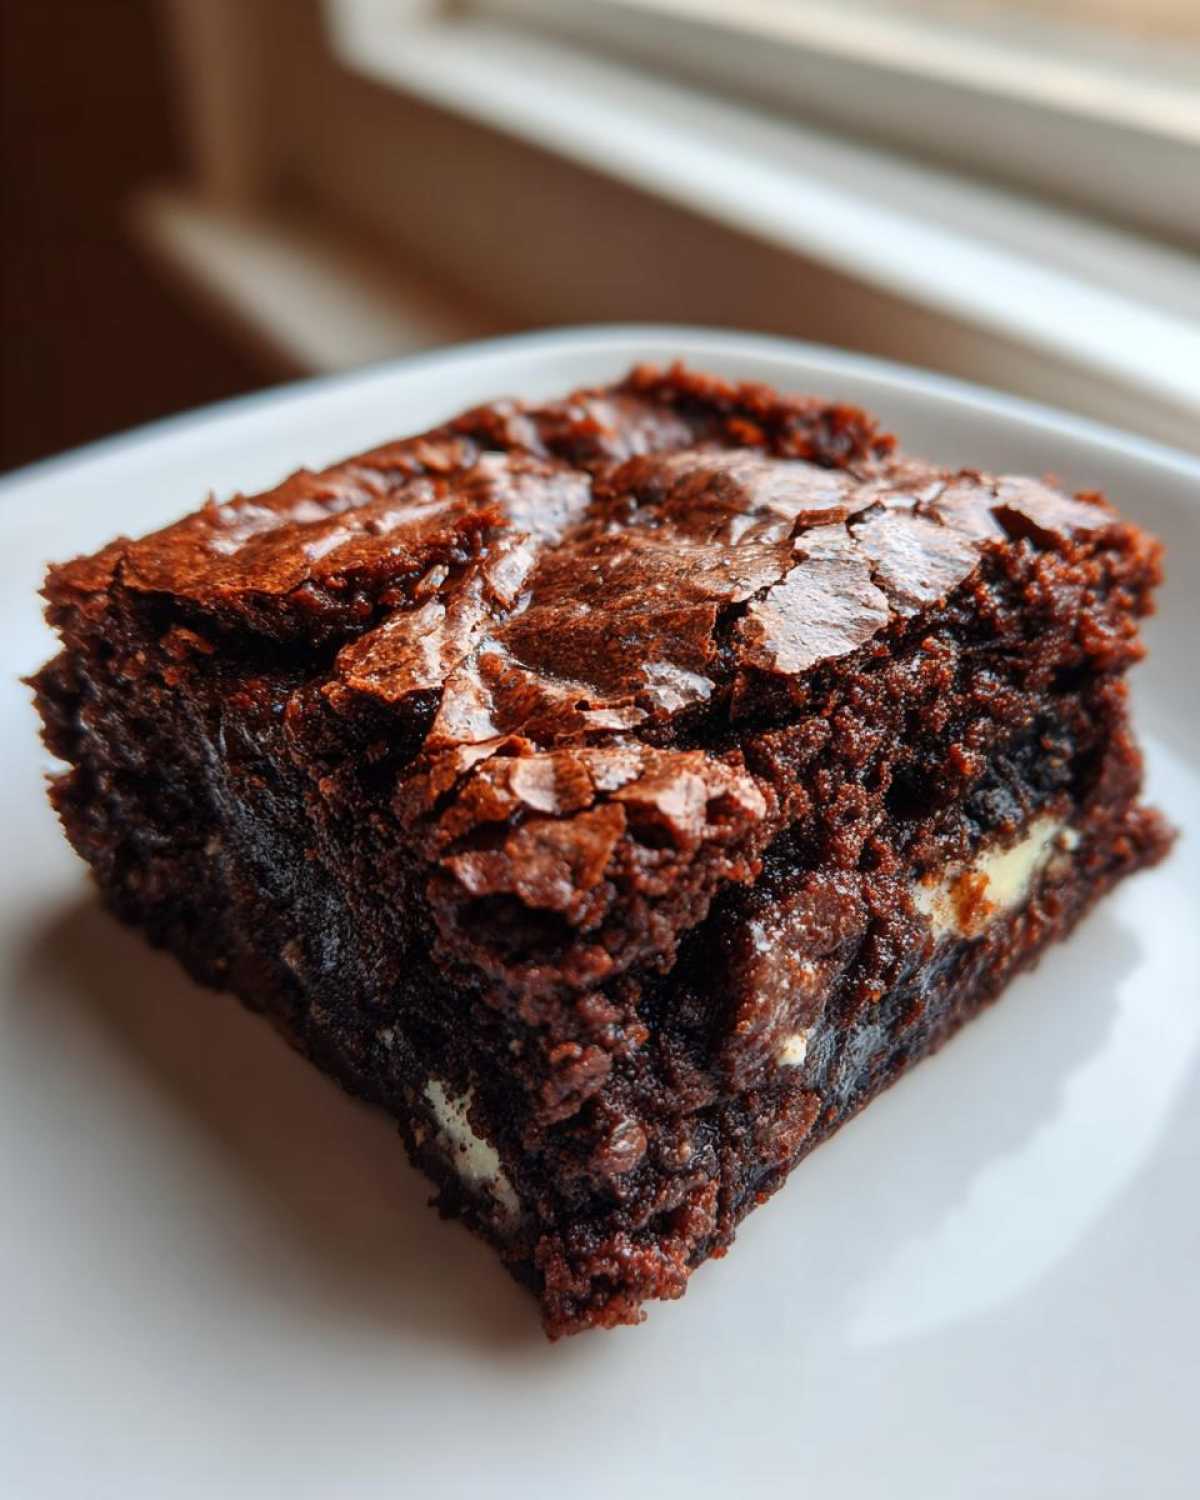
It took me about five tries, tweaking the sugar ratio and the whisking time, but trust me, this version—made completely from scratch—is the one. I am so excited for you to try this because it’s shockingly fast, too. You are going to love how these come together faster than you can talk yourself out of eating the entire pan!
If you’re looking for a super quick chocolate fix that tastes like you spent all day in the kitchen, you should also check out my recipe for a fudgy chocolate mug cake. It hits the spot in about two minutes!
Why These Are the Best Oreo Brownies You Will Ever Make
Okay, let’s talk texture, because that’s everything when it comes to brownies. If you’re anything like me, you want that dense, almost underbaked center that just melts in your mouth—that’s the sign of truly fudgy oreo brownies. We are absolutely avoiding anything dry or too cakey here. Seriously, I almost threw out batch number three because it seemed headed in that direction!
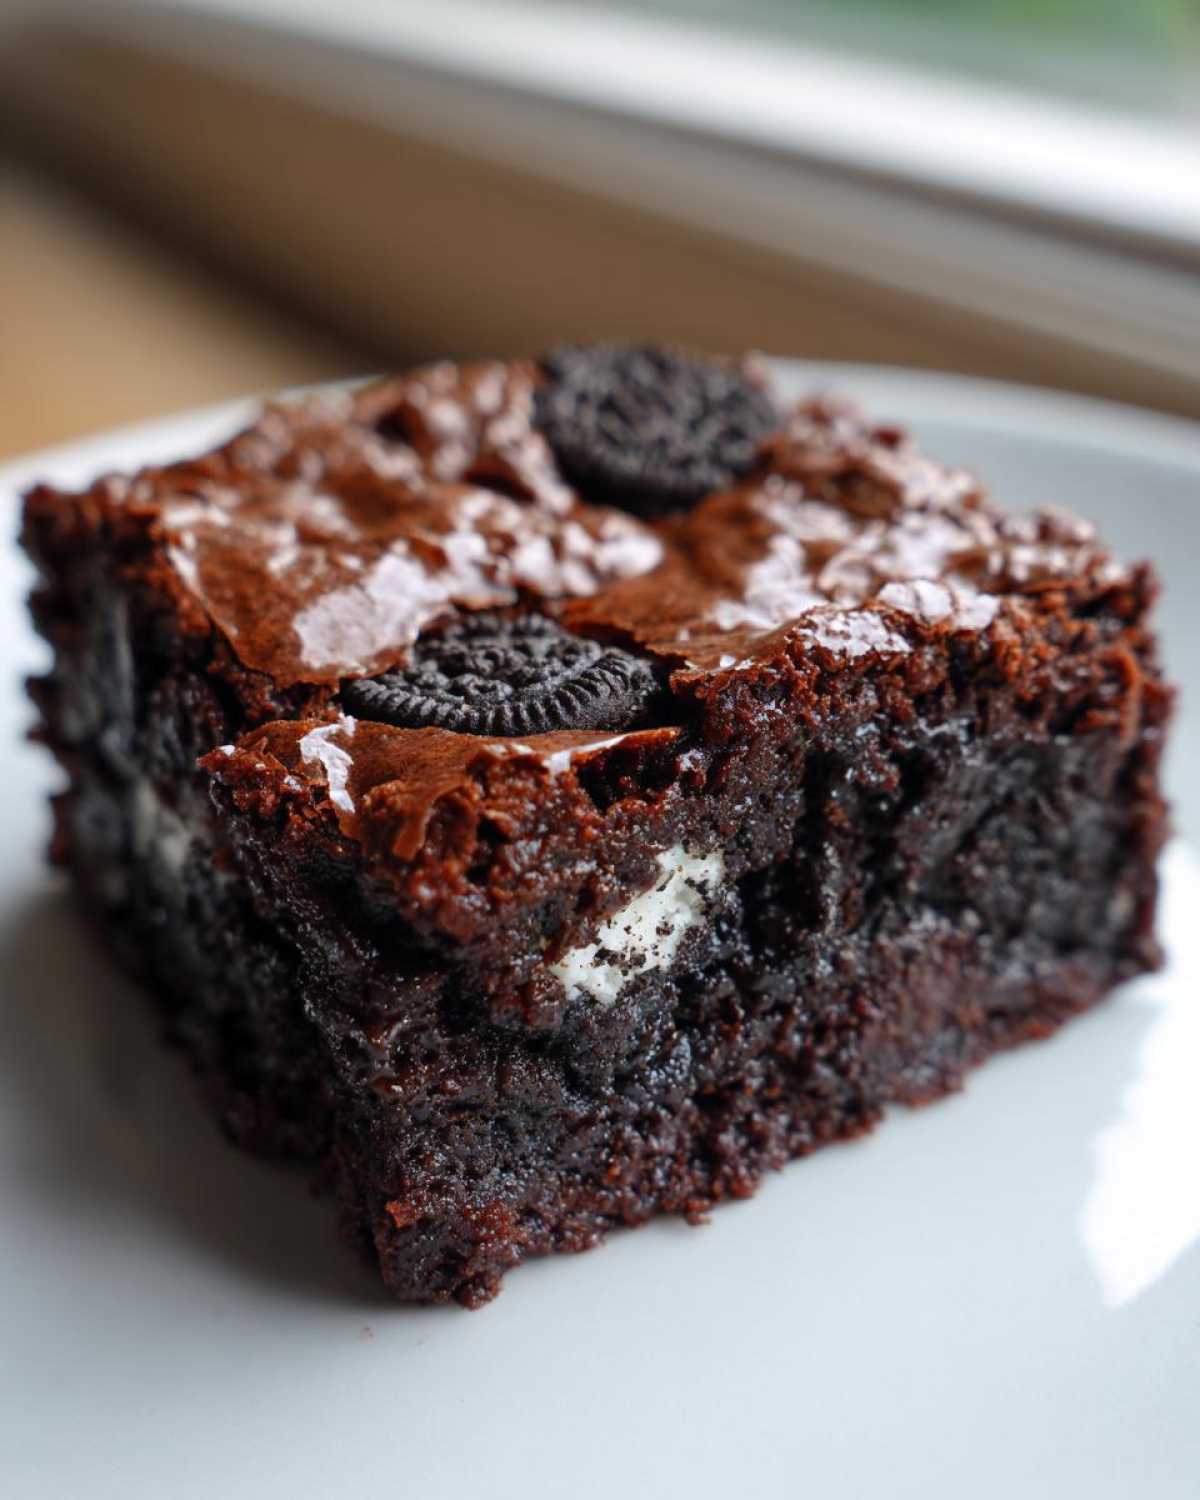
But the real showstopper, and what makes people ask for this recipe constantly, is that top layer. You know the one—it’s thin, it’s glossy, and cracks beautifully when you cut into it. Getting that signature shine isn’t about magic; it’s about following my specific steps for dissolving the sugar, which I explain later.
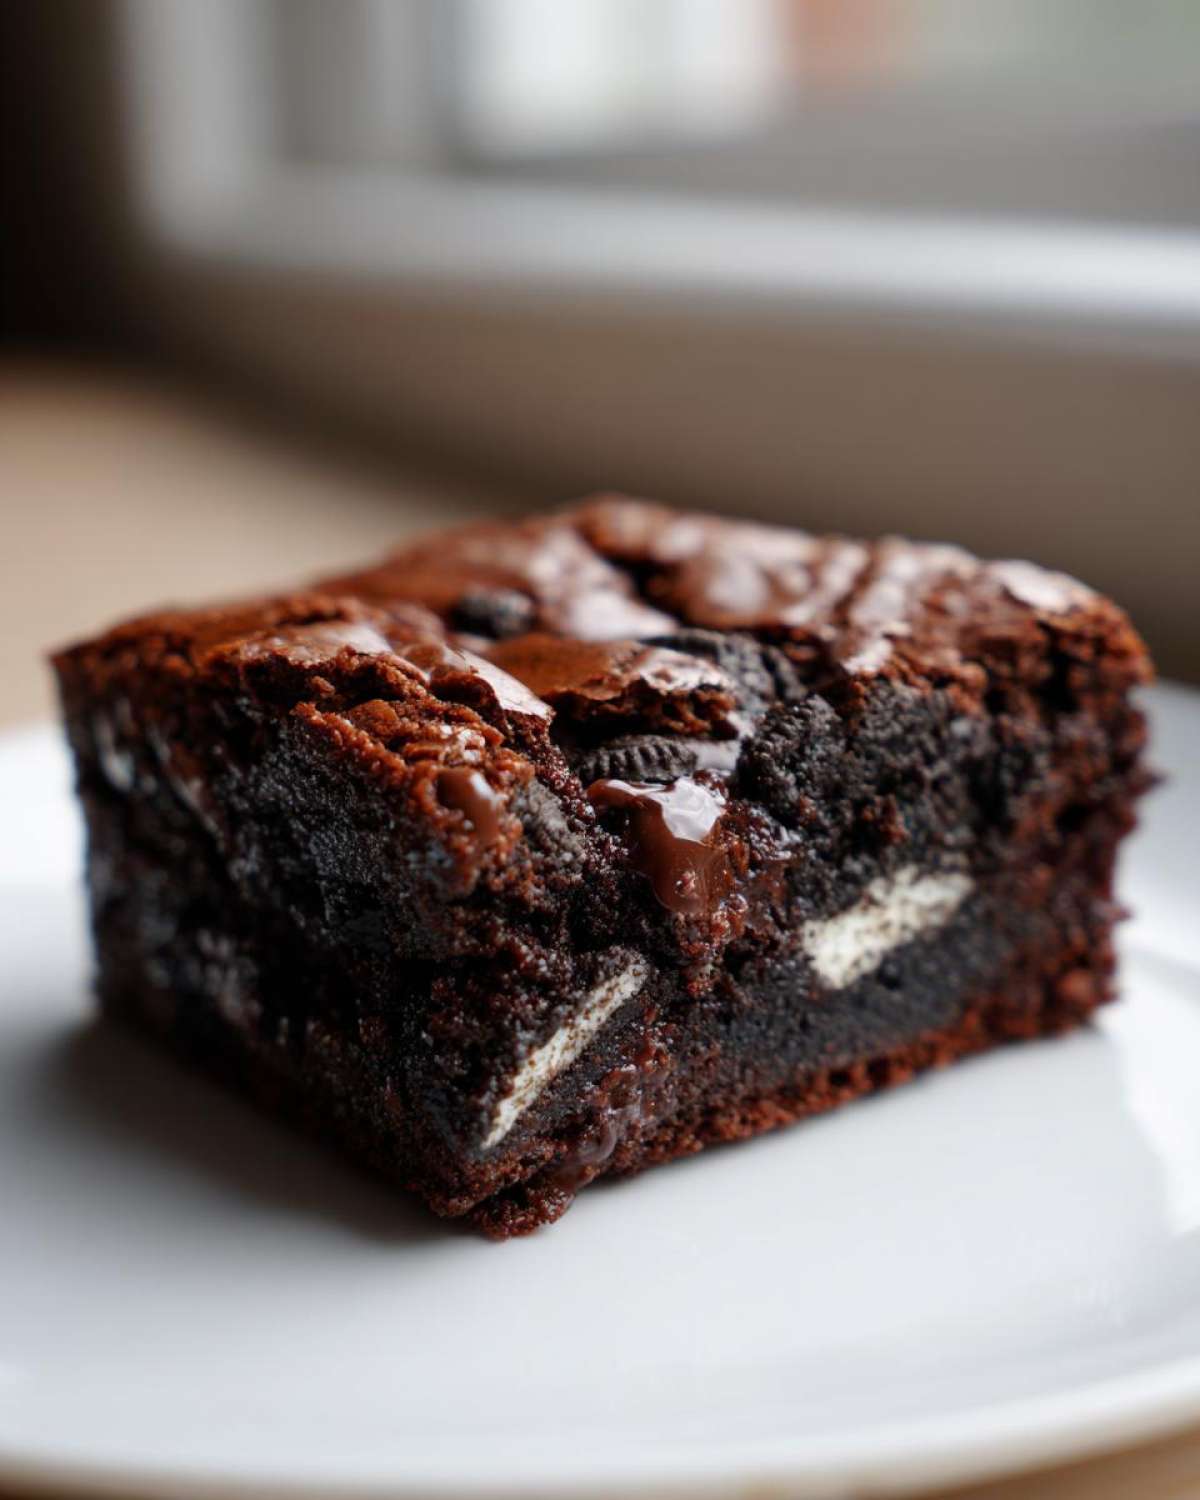
These aren’t just good brownies; they are the ultimate chewy chocolate cookies and cream bars. Every bite gives you that satisfyingly dense chew around the edges, followed by a soft, chocolate explosion studded with creamy Oreo pieces. You won’t go back to anything else, trust me on this one. For more chewy goodness, you might love my chewy chocolate chip cookies recipe, too!
Gathering Ingredients for Homemade Oreo Brownies from Scratch
What I love most about this recipe is that it feels fancy, but honestly, most of what you need is probably hiding in your pantry right now! We are skipping every box mix ever invented because, trust me, nothing compares to the depth of flavor you get when you actually mix these proper ingredients together.
For the rich chocolate base you’re dreaming of, you need two main things: plenty of butter and good cocoa powder. Don’t skimp on the cocoa powder here; it’s what gives us that dark, intense flavor that stands up to all those cookies we’re throwing in. I always grab the darkest unsweetened cocoa powder I can find—it makes all the difference in the final color and taste, which is crucial for truly decadent homemade brownies. If you’re interested in learning more about making great chocolate drinks, I wrote a little guide on using quality cocoa powder!
The line-up is simple: butter, both white and brown sugar, eggs, vanilla, that cocoa powder, flour, salt, chocolate chips (yes, more chocolate!), and of course, the stars of the show—the Oreos!
Specific Ingredient Notes and Substitutions
Let’s pause for a second to talk specifics because these small details are what keep these from turning into a cake-like mess. First up, that brown sugar. You must pack it tightly into your measuring cup! If you just scoop it loosely, you won’t have enough sugar to help create that shiny top we talked about. It needs that dense molasses content.
Next, about those cookies. I use whole Oreos, and I mean whole. I just roughly chop them up, like big, glorious shards, and toss them in. Having some big chunks and some smaller crumbs means you get that surprise cookie crunch in every spot. Don’t bother separating the cream filling; we want it all in there for the ultimate cookies and cream experience!
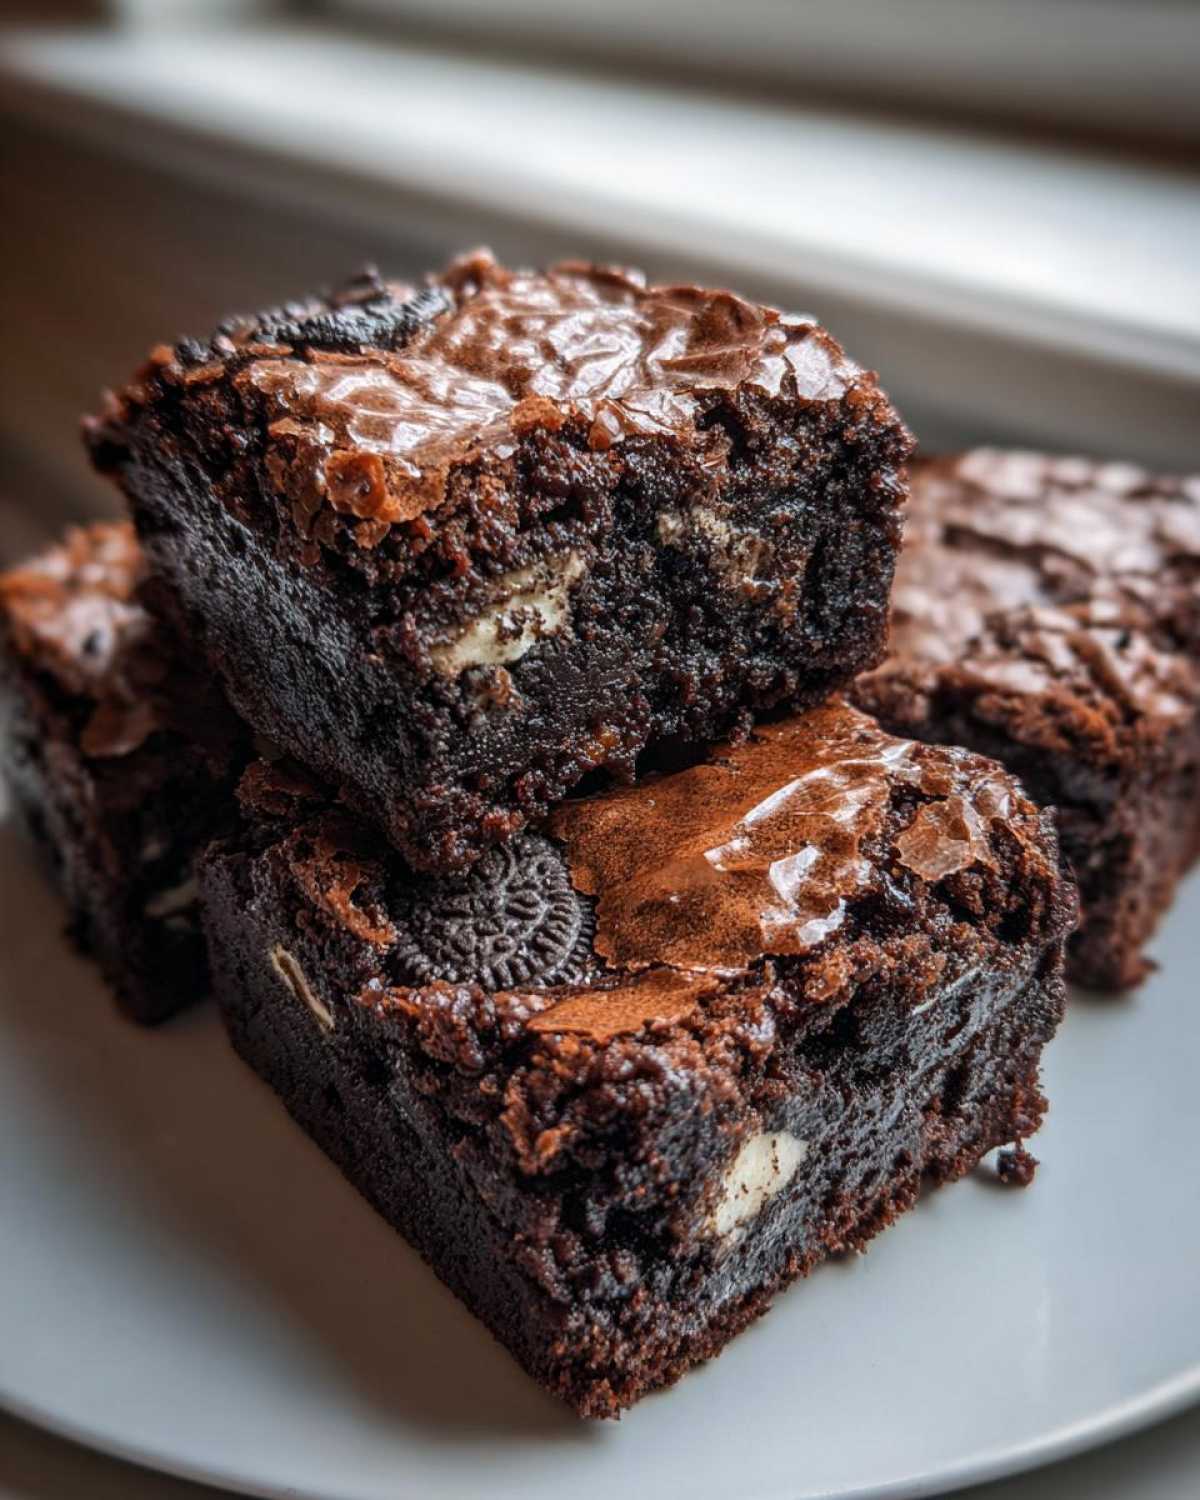
Another little trick: the chocolate chips. While these are technically optional, they add an extra layer of melted chocolate goodness right into the batter, ensuring that even the non-Oreo parts are intensely gooey. If you forget them, don’t panic, but I highly recommend it for the best results!
Step-by-Step Instructions for Easy Oreo Brownie Recipe
Alright, buckle up, because this is where the magic happens—and it’s faster than you think! To start our easy oreo brownie recipe, get that oven fired up to 350°F (175°C). Don’t forget to prep your 9×9 inch metal pan with parchment paper that hangs over the sides. This overhang is your best friend later; it acts like a sling to lift the whole amazing block out when they’re done, preventing any breakage.
First things first: we melt the butter in a saucepan over low heat. Once it’s totally liquid, pull it right off the burner. Now, this is critical for the texture—sugars go in next! Whisk both the granulated and the packed brown sugar into that warm butter until everything looks smooth and uniform.
Next, the chocolatey power-up: add your four eggs one at a time, whisking really well after each one. You want the mixture to actually lighten up a little bit here. Follow that with your vanilla. Once that’s incorporated, you can quickly whisk in your dry stuff—cocoa powder, flour, and salt—but only until you barely see streaks disappear. Remember what I said about overmixing? Keep it minimal!
Now for the fun part! Fold in those chocolate chips and all those roughly chopped Oreos. Once everything is just barely combined, pour that glorious batter into your prepared pan, spread it out evenly, and sprinkle those extra crumbs on top if you want extra crunch. Time to bake for about 30 to 35 minutes. Don’t get distracted by the amazing smell!
Achieving the Perfect Crackly Top on Your Oreo Brownies
If you want that Instagram-worthy sheen, this is the step you can’t rush. That gorgeous crackly top comes from dissolving the sugar perfectly into the fats and eggs *before* the flour goes in. Think of it like creating a sugary syrup base.
When you’re whisking those eggs into the warm butter and sugar mixture, keep going for a solid minute after the last egg is in. You need the heat from the butter to help the sugar grains fully dissolve. When you stop whisking too early, the sugar granules stay distinct, and they eventually bloom on top during baking as sugar crystals—not the airy meringue layer you need for that crinkle. It takes a little elbow grease, but it’s the ultimate trade-off for getting those beautiful, shiny homemade brownies!
Baking Time and Doneness Check for Fudgy Texture Brownies
This is where most people accidentally turn a perfect batter into a hockey puck! For truly fudgy brownies, you must accept that they should look slightly underdone when they come out. We are aiming for fudgy texture brownies, not cake!
Set your timer, but start peeking around the 30-minute mark. Stick a toothpick right near the edge—that part should come out clean. But for the center, you want that toothpick to come out with a few moist crumbs clinging to it. If it’s totally clean when you pull it from the middle, you’ve gone too far! The residual heat keeps cooking them after you pull them out, so trust the moist crumbs. If you want to check my favorite way to make quick chocolate desserts, check out this amazing chocolate mug cake recipe!
Tips for Success When Making Decadent Homemade Brownies
I am so glad you made it this far! We covered the big stuff—the sugar whisking for the shine and the underbaking for the fudge—but I have a few more little secrets that make these decadent homemade brownies foolproof. These tips are the things I learned after my first few baking failures that totally changed the game for me.
First, let’s talk cooling. Patience is truly a virtue when it comes to rich brownies. You have to let them cool completely in the pan before you even think about touching that parchment sling. If you try to cut them while they are warm, the gooey centers turn into chocolate soup, and you end up with a crumbly mess instead of those perfect squares. Seriously, give them at least two hours on the counter to set up. If you’re making these for a party, bake them the day before—they taste even better the next day!
Second, think about your environment. If your kitchen is super humid, your brownies might take a few extra minutes in the oven because the air is already carrying extra moisture. If it’s very dry, you might need that extra sugar dissolving step to be extra vigorous to compensate. Just pay attention to how the mixture is behaving compared to what I described!
Third tip: Don’t substitute the butter for oil if you can help it. I know oil seems easier, but butter is what gives these brownies their structure and that rich, complex flavor we’re after. Oil keeps things moist, sure, but butter helps create a cleaner structure that lets the fudge layers set up nicely against the chewy edges. If you’re a huge fan of no-bake treats, you can check out my recipe for a layered brownie refrigerator cake, which skips the oven completely; but for these classic dessert bars, stick with butter!
Finally, quality chocolate chips make a surprisingly big difference here. Since we are using cocoa powder *and* chips, make sure the chips you use are good quality semi-sweet or dark chocolate. They melt better and their higher cocoa butter content really contributes to that luxurious mouthfeel.
Serving Suggestions for These Brownie Bars with Oreos
So your amazing, fudgy, crackly-topped creation has finally cooled down, and now it’s time for the best part: eating them! Honestly, even on their own, these brownie bars with Oreos are perfection, but if you’re feeling extra indulgent—and let’s be real, why wouldn’t you be?—there are a few ways I love to serve them up.
The classic move, and I stand by this, is to serve these slightly warm. Not hot, mind you, because that ruins the structure, but give a square about 15 minutes on the counter after slicing. This just helps the center get that extra melt factor going. Then, you absolutely have to top it with a scoop of vanilla bean ice cream. The contrast between the warm, intense dark chocolate and the cool, creamy vanilla? Divine. That ice cream melts right down, mingling with any oozing Oreo filling—it’s pure movie night perfection.
If you’re serving these during the day or with coffee, keep it simpler. A generous dusting of powdered sugar looks beautiful against that dark, shiny top. It just adds that little bit of visual contrast. Or, you can get fancy and grate a little extra dark chocolate over the top just before serving. It really highlights the fact that these are truly indulgent chocolate treats.
Another pairing I adore is a quality cup of black coffee. The bitterness of the coffee really cuts through the richness of the chocolate and the sweetness of the cookies. It balances everything out, making it easy to eat two squares instead of just one! If your sweet tooth is leaning toward creamy desserts, though, you might love looking at my recipe for chocolate eclair cake—it’s an entirely different kind of indulgence!
Storing and Reheating Your Leftover Oreo Brownies
First off, these are so good that keeping leftovers might be the hardest part! But if you somehow manage to resist eating the entire pan immediately, you need to know the best way to keep them fudgy and chewy. If you use cheap box mixes, they often get hard in the fridge, but thankfully, because we used real butter and all that sugar, these hold up beautifully.
For storage, the absolute best method is keeping them right on the counter, *not* in the refrigerator. Pop your fully cooled brownie bars—cut or uncut—into a completely airtight container. A good quality container makes a difference against fridge smells! At cool room temperature, these will stay perfectly soft, fudgy, and chewy for a solid three to four days. I’ve tested this extensively, trust me!
Once they’re in the fridge, they tend to firm up quite a bit due to the butter solidifying, and we definitely don’t want that hard texture when we’re aiming for the ultimate gooey experience. If your kitchen is super hot and humid, then the fridge is a last resort, but only if you remember to let them warm up first.
How to Reheat Your Brownies for That Fresh-Baked Feel
If you stored your bars in the fridge for safety, or if you just really want that freshly-baked warmth, reheating is super simple. You need quick, gentle heat to soften that butter back up without drying out the edges.
My favorite way is the microwave, but you have to be careful because that powerful heat can turn fudgy into molten lava fast! Just take one square—or two, if you’re being honest with yourself—and zap it for about 10 to 15 seconds max. That’s usually enough time to get the center slightly melty again. You want them warm, not screaming hot!
If you have more self-control and want to heat up a whole batch of them, the oven is better, though it takes longer. Set your oven or toaster oven to a very low temperature—like 300°F (150°C). Lay the squares on a baking sheet lined with foil and warm them for about 5 to 8 minutes. This gently softens the whole bar evenly. If you’re looking for more tips on keeping chocolate treats moist long-term, you can check out my recipe for a moist chocolate cake, which uses a similar principle of retaining moisture!
Either way, once they are warmed up, that shiny top layer gets just a little bit tighter, and the Oreos seem to melt right into the batter. Honestly, reheating these decadent squares often tastes even better than when they were first cool!
Frequently Asked Questions About Cookies and Cream Dessert Bars
I know you might still have a few burning questions left, especially after digging into how to get that perfect shiny top! People ask me all the time about tweaking oven temps or what happens if they mess up a step. It’s normal when you’re working with something this important, like the ultimate cookies and cream dessert bars! Here are the most common things I hear after people bake this recipe.
Don’t worry if you think you messed up; usually, these brownies are super forgiving! If you want to see some other fantastic chocolate bakes people love, check out my tips for chocolate crinkle cookies—they are way different but just as fun to make.
Can I make these Oreo brownies ahead of time?
Oh yes, and I actually encourage it! If you plan on bringing these to a party or just want to have them ready for a craving attack, baking them the day before is totally fine. Remember what I said about letting them cool completely? That’s even more important when planning ahead! Trying to cut them while they are even slightly warm results in a huge mess because the butter hasn’t fully set up.
Once they are completely cool—and I mean cool to the touch, about three hours or overnight—slice them neatly. Keep them in that airtight container on your counter. They honestly taste better on day two because the flavors really have time to meld together. They stay soft and fudgy for four days easily this way!
What is the secret to a fudgy texture brownies?
It really boils down to two main things, which we hammered home earlier, but it’s worth repeating because it’s the single most important factor for achieving that dense, melt-in-your-mouth bite. The first secret is the fat-to-flour ratio. We use a lot of butter and the right amount of sugar relative to our flour, which keeps the crumb heavy and dense rather than light and airy.
The second, and maybe most crucial part, is avoiding overbaking at all costs. If you bake it until a clean toothpick comes out, you’ve baked a cakey brownie, not a fudgy one! You are aiming for that semi-liquid, gooey center that keeps cooking after you pull the pan out. I know it feels scary to leave them looking slightly underdone, but trust your timer and pull them out when the toothpick has moist crumbs clinging to it. That slight under-baking guarantees the best fudgy texture brownies!
Estimated Nutritional Data for This Indulgent Chocolate Treat
Now, I hate to put a damper on pure chocolate joy, but for those of you who like to keep track, I’ve pulled the estimated nutrition facts for one square of these amazing indulgent chocolate treats. Remember, I am a baker, not a nutritionist, so please take these numbers with a giant grain of salt—or maybe a giant spoonful of frosting!
These figures are calculated based on the ingredient list provided, assuming you get 16 beautiful, even squares out of your pan. Since we are using so many amazing ingredients like butter and those whole Oreos, these are certainly decadent treats and not something you want to eat every day, ha! It’s all about balance, right?
Here is what the data suggests for a single serving:
- Calories: Approximately 310
- Sugar: Around 30 grams
- Total Fat: About 18 grams (with 10g saturated)
- Carbohydrates: Roughly 35 grams
- Protein: About 4 grams
If you’re swapping out ingredients—say, using dark chocolate instead of semi-sweet, or perhaps adding mint Oreos—these numbers will shift slightly, so keep that in mind! Since we use a lot of real butter and sugar to get that perfect crackly top and fudgy texture, the sugar and fat content reflects that richness. If you want to read my official thoughts on how this data should be viewed, you can check out my nutrition disclaimer page, just to be fully transparent!
But honestly, if these oreo brownies are part of a balanced diet that includes joy and happiness, I think they count as mostly healthy. Enjoy every last, rich bite!
Share Your Ultimate Oreo Dessert Experience
I have shared all my best secrets with you—from melting the butter just right to getting that gorgeous, crackly top that makes these oreo brownies so famous. Now it’s your turn! I genuinely want to know how they turned out for you. Did you achieve the fudgiest center you’ve ever tasted? Did your crackle come out perfectly shiny?
The best part about baking is sharing the success! So please, don’t be shy. Drop a comment down below and let me know how your batch went. Tell me if you tried any fun variations like adding peanut butter swirls or using Mint Oreos. I love hearing how you make this amazing recipe your own!
If you snap a picture—and you absolutely should, because these look incredible—tag me on social media! Seeing your beautiful, chewy chocolate cookies and cream bars brightens up my whole week. It makes all that recipe testing completely worth it to know they are making someone else’s day a little bit sweeter.
And hey, if you’re looking to learn more about the team behind these recipes and why we love sharing food this much, you can always check out our About Us page!
Thank you so much for baking these ultimate Oreo desserts with me. Happy baking, and I can’t wait to read your thoughts!
PrintUltimate Fudgy Homemade Oreo Brownies with a Shiny, Crackly Top
Make rich, fudgy Oreo brownies from scratch that feature a chewy texture and a desirable shiny, crackly top. This easy recipe incorporates whole and crushed Oreo cookies for a decadent cookies and cream experience.
- Prep Time: 15 min
- Cook Time: 35 min
- Total Time: 50 min
- Yield: 16 squares
- Category: Dessert
- Method: Baking
- Cuisine: American
- Diet: Vegetarian
Ingredients
- 1 cup (2 sticks) unsalted butter
- 1 cup granulated sugar
- 1 cup packed light brown sugar
- 4 large eggs
- 1 tablespoon vanilla extract
- 3/4 cup unsweetened cocoa powder
- 1/2 cup all-purpose flour
- 1/2 teaspoon salt
- 1/2 cup semi-sweet chocolate chips
- 12 whole Oreo cookies, roughly chopped
- 1/2 cup Oreo cookie crumbs (optional, for topping)
Instructions
- Preheat your oven to 350°F (175°C). Line a 9×9 inch metal baking pan with parchment paper, leaving an overhang on two sides for easy removal. Lightly grease the paper.
- In a medium saucepan over low heat, melt the butter completely. Remove from heat.
- Whisk the granulated sugar and brown sugar into the melted butter until fully combined.
- Add the eggs one at a time, whisking well after each addition until the mixture lightens slightly in color. Whisk in the vanilla extract.
- In a separate bowl, whisk together the cocoa powder, flour, and salt.
- Gradually add the dry ingredients to the wet ingredients, mixing only until just combined. Do not overmix.
- Stir in the chocolate chips and the roughly chopped whole Oreo cookies.
- Pour the batter into the prepared pan and spread evenly. Sprinkle the optional Oreo cookie crumbs over the top.
- Bake for 30 to 35 minutes. A toothpick inserted near the edge should come out with moist crumbs attached, but the center should still look slightly underdone for fudginess.
- Let the brownies cool completely in the pan on a wire rack before lifting them out using the parchment overhang. Cut into squares.
Notes
- For the best shiny, crackly top, make sure your sugar is fully dissolved into the warm butter and eggs before adding the dry ingredients. Whisk vigorously for about 60 seconds after adding the eggs.
- Do not overbake if you want a fudgy texture; underbaking slightly is key.
- Use high-quality cocoa powder for the best chocolate flavor.
Nutrition
- Serving Size: 1 square
- Calories: 310
- Sugar: 30
- Sodium: 150
- Fat: 18
- Saturated Fat: 10
- Unsaturated Fat: 8
- Trans Fat: 0
- Carbohydrates: 35
- Fiber: 1
- Protein: 4
- Cholesterol: 75