

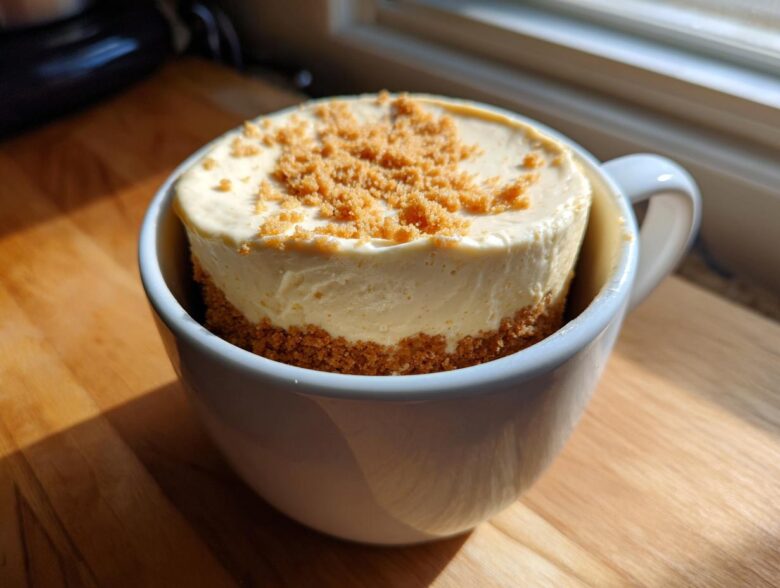
Okay, listen to me: sometimes you just need cheesecake. Not a slice from a giant, refrigerated creation, but a deeply rich, creamy fix *right now*. I know that feeling! I’ve spent years tweaking microwave desserts—trust me, I’ve made some rubbery messes trying to rush things—but I finally cracked the code. This **Decadent Cheesecake Mug Recipe** isn’t some sad, grainy imitation; it genuinely tastes like New York style, but done in about a minute in the microwave. It’s perfect for those evenings when you’re cozy on the sofa and the craving hits hard, and you need that satisfying, rich cheesecake flavor without waiting around. If you wanna see how I made quick chocolate fixes work before, you can check out my secrets for easy fudgy chocolate mug cake! This single-serving recipe proves you don’t need an oven to achieve dessert perfection!
Why This Decadent Cheesecake Mug Recipe Delivers Rich Flavor
The secret to making this taste truly decadent, even though it’s coming out of a microwave, is all about texture and fat content. We aren’t messing around with substitutes here! To get that unmistakable rich cheesecake flavor, I insist on using a little bit of heavy cream—or even better, a tiny dollop of sour cream if you have it. That slight acidity mimics those amazing layered flavors you get in a full-sized cheesecake.
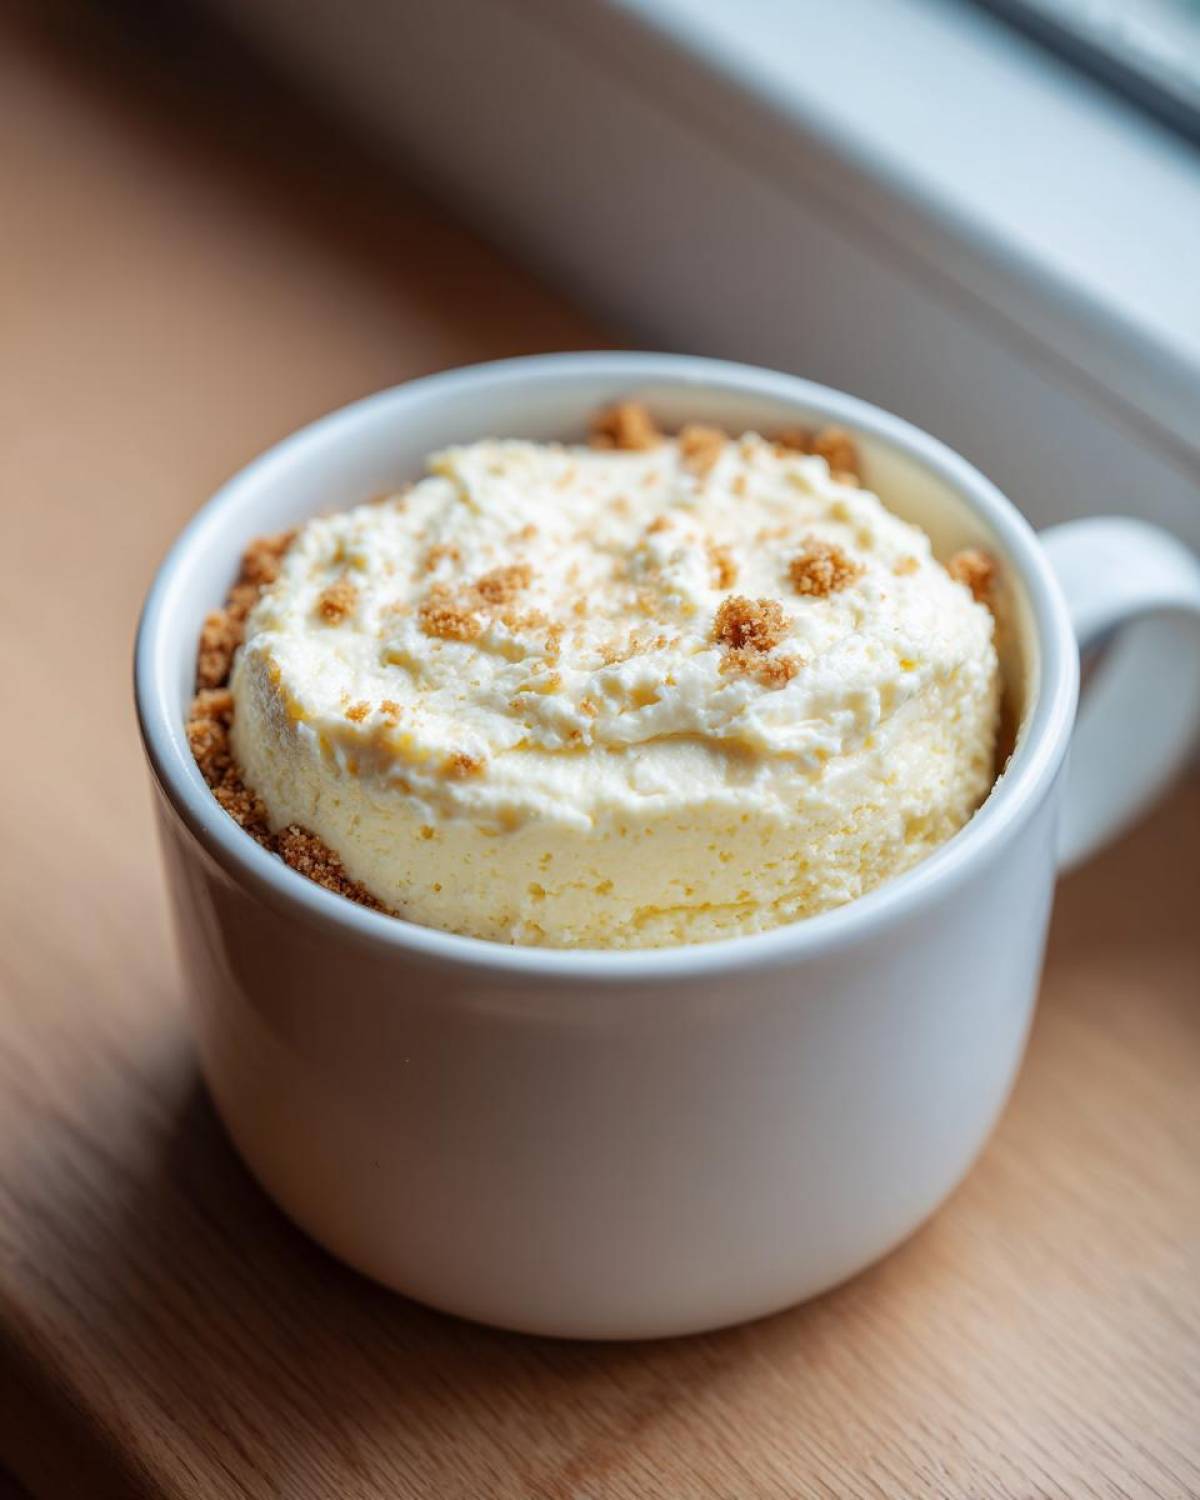
Heating it so fast means we have to be smart with the ingredients to avoid that rubbery texture. We keep the mixing super minimal, which is key for a creamy microwave dessert. Less mixing means fewer air bubbles get trapped, ensuring a dense, smooth bite that melts beautifully in your mouth. It’s pure satisfaction, honestly.
Quick Preparation for Your Decadent Cheesecake Mug Recipe
Seriously, the active time here is almost embarrassing. Once you’ve got your cream cheese softened (which only takes a minute on the counter if you’re desperate), you’re just mixing four things for the batter! You’ll spend maybe three minutes whipping up the filling and pressing down the crumb crust.
This is the ultimate quick cheesecake solution. You go from craving to dessert in under ten minutes total time, which beats ordering delivery any day of the week!
Gathering Ingredients for Your Decadent Cheesecake Mug Recipe
Okay, for this single serving cheesecake recipe, don’t try to wing it—the measurements matter because we’re working with such small quantities! You need the right balance to keep it rich and prevent it from turning into scrambled eggs in the microwave. Grab your ingredients:
- 1/4 cup cream cheese, and I mean really softened. Leave it out for a bit! If it’s cold, it won’t mix smoothly and you’ll end up with lumps—and nobody wants that in their dessert for one.
- 1 tablespoon granulated sugar.
- 1 large egg yolk only! The white can make things too airy and fluffy, which isn’t what we want for that dense, cheesy texture.
- 1/4 teaspoon vanilla extract.
- 1 teaspoon heavy cream or milk.
- 1 tablespoon graham cracker crumbs for the crust layer.
- 1/2 teaspoon melted butter to bind that crust.
If you want that extra depth that makes it superb, check out my guide to making a truly classic cheesecake recipe—the dairy ratios are similar!
Ingredient Notes and Substitutions for the Decadent Cheesecake Mug Recipe
Let’s talk swaps because I know not everyone keeps heavy cream on hand. You can definitely swap that out for regular milk, but you’ll lose a tiny bit of that velvety mouthfeel, so you might need to slightly reduce the cooking time just to be safe.
Now, for that extra E-E-A-T hit to make it feel like true New York style? Substitute the heavy cream with 1/2 teaspoon of sour cream. It adds a little tang that cuts the sweetness beautifully! And hey, if you skipped the butter and crumbs? Congratulations, you’ve got a crustless model! That’s just as delicious if you’re looking to save a few more calories in your portion control dessert.
Step-by-Step Instructions for the Decadent Cheesecake Mug Recipe
Alright, this is where we turn simple dairy into magic! Pay attention to the mixing order here, because this is what separates a truly creamy microwave dessert from a bouncy disaster. If you follow these steps, you’ll nail the texture every time you try this quick cheesecake method. We’re talking about mastering how to make cheesecake microwave style, and it’s surprisingly straightforward!
Since this is a recipe designed for speed, we want to keep the active time low, but that doesn’t mean we skip the crucial textural steps. Remember, even though it’s fast, this is about achieving that rich vibe, making it one of the best easy mug desserts out there.
Creating the Crust Layer for the Decadent Cheesecake Mug Recipe
First thing’s first: we need that little graham cracker base! Grab your favorite, sturdy, microwave-safe mug—I use an 8-ounce one, nothing too tall. In that mug, combine your tablespoon of graham cracker crumbs with the melted butter. Yes, you mix this *inside* the final serving vessel. That saves washing an extra bowl!
Use the back of a small spoon or the bottom of a clean shot glass and press those crumbs down just gently and firmly into the bottom of the mug. You don’t need to pack it like cement, but you want a nice, even layer so it holds together when you dig in later. This crust is optional, of course, especially if you’re trying to keep it light, but wow, it adds that authentic textural contrast!
Microwaving and Setting the Decadent Cheesecake Mug Recipe
Now for the cheesecake batter you mixed in that separate bowl—pour it right over that crust layer. Make sure it settles in evenly. Then, it’s microwave time! This is the part that requires caution because every microwave is different in power.
I start mine at 45 seconds on HIGH power. Immediately after that, I check it. If the edges look set but the very center looks a little wobbly, I give it another 10 or 15 seconds MAX. You are aiming for the center to look *just* slightly soft, not totally liquid, but definitely not firm and dry looking! Overcooking is the enemy of texture here.
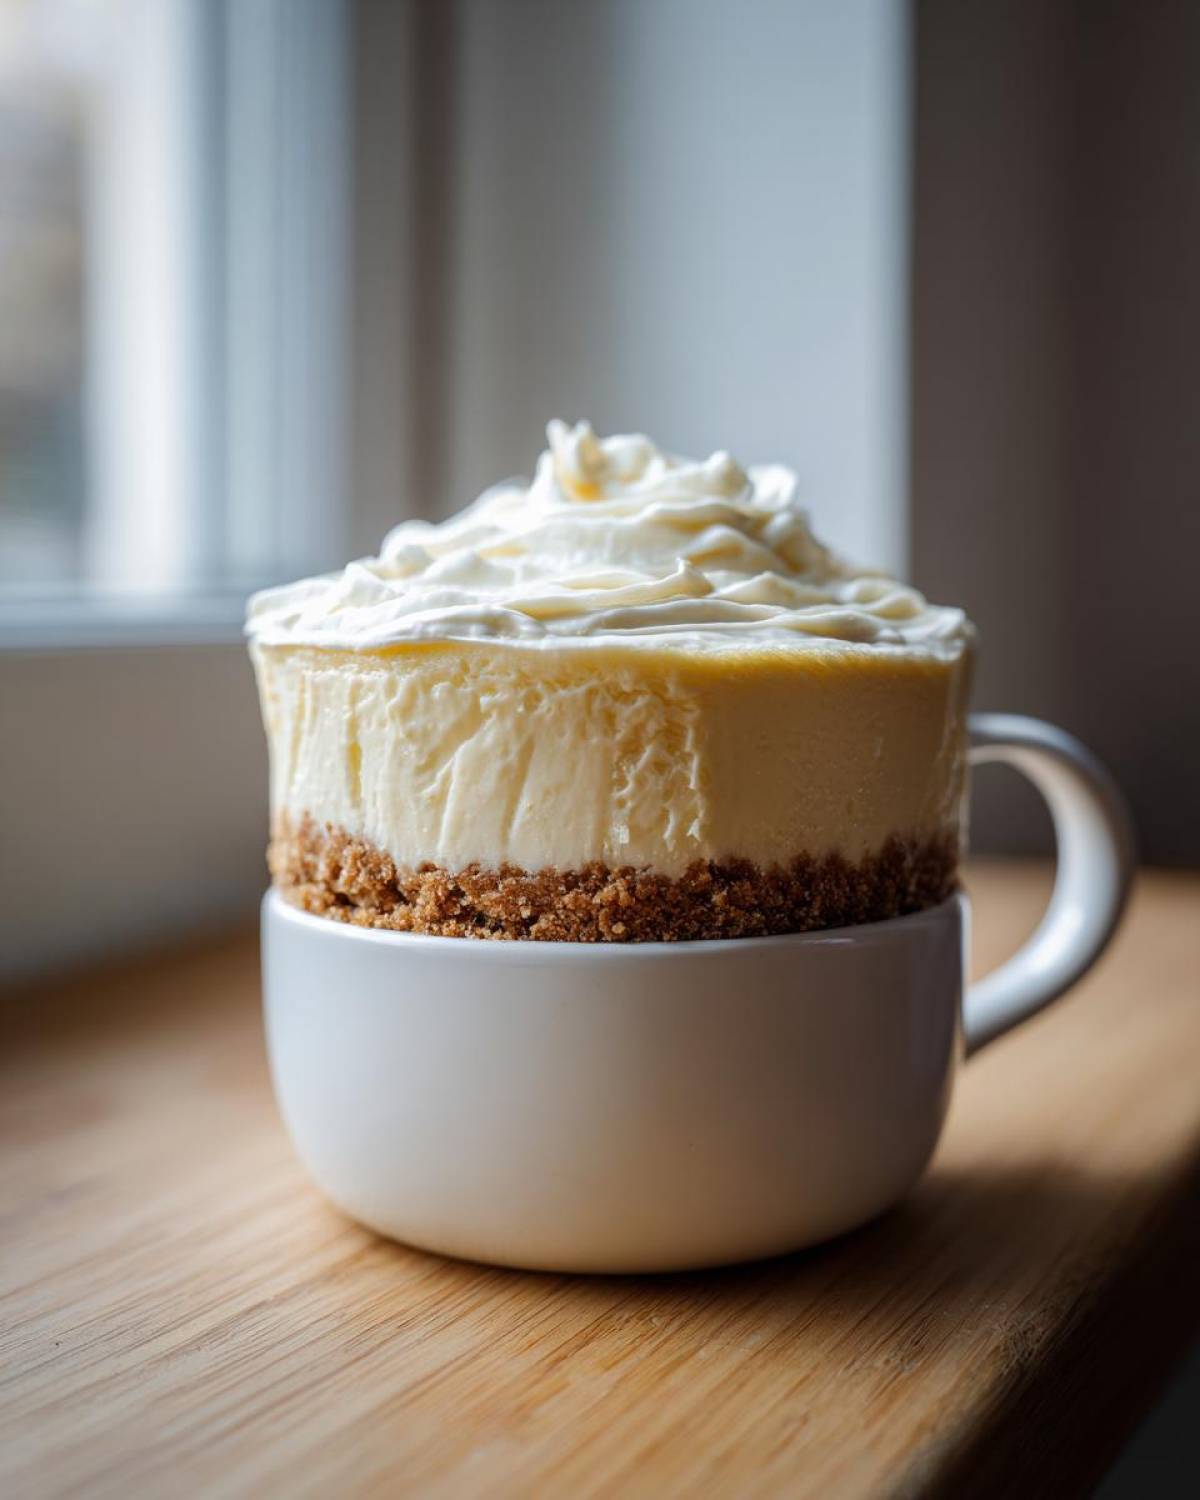
Once it’s out, do not touch it! You have to let it sit on the counter at room temperature for a good 5 minutes. This rest period is critical; it allows the residual heat to finish cooking the center gently and helps set the structure before you even think about chilling it. Finally, pop that mug into the fridge for at least 30 minutes. That chill time is what transforms it from warm custard into true, glorious cheesecake.
For more cool ways to use quick cooking methods, feel free to browse my collection of microwave dessert recipes!
Tips for the Ultimate Decadent Cheesecake Mug Recipe Texture
Listen, the microwave is powerful, but it can be brutal—we want creamy, not crunchy! If your cheesecake comes out even a little rubbery, I guarantee you cooked it too long, or you didn’t let it rest afterward. That 5-minute rest on the counter after microwaving is not optional; it lets the surface tension settle down before the chill.
My biggest tip for achieving that decadent mouthfeel is to use lower power if your microwave is a monster (over 1000 watts). Try cooking it at 70% power for about 75 seconds instead of full blast for 45 seconds. It takes longer, sure, but the heat penetrates more evenly, avoiding that weirdly cooked outer ring.
And please, please let it chill! Even if you think you need a fast satisfying dessert immediately, that 30 minutes in the fridge is what firms up the egg yolk and heavy cream mixture into that sliceable, melt-in-your-mouth texture we’re aiming for. If you want more on maintaining great texture in baked goods, peep my advice here on cheesecake recipes!
Serving Suggestions for Your Individual Serving Dessert
Now that you’ve perfected your individual serving dessert, it’s time to make it look as decadent as it tastes! While a drizzle of raspberry jam is nice, we can do better for our quick creation. If you want something extra special, try giving it a quick dusting of finely sifted cocoa powder right before you eat it.
For crunch, I love crumbling some store-bought shortbread on top, or you could treat yourself and top it with my own candied pecans recipe—they add such a lovely sweet crunch.
Also, a little sprinkle of fresh lemon zest over the top cuts the richness so well. It wakes up the whole flavor profile and feels really elegant, even though you just zapped this in the microwave!
Storage and Reheating Instructions for This Decadent Cheesecake Mug Recipe
Since this is such a perfect little individual serving, my honest advice is to just make one when the craving strikes! However, if you managed to save a bite—lucky you!—make sure it’s covered tightly with plastic wrap or a lid and kept in the fridge. Chilling it for a few hours actually improves that creamy texture we worked so hard for.
Now, if you’re thinking about reheating it later? Just don’t! Please trust me on this one. Microwaving cheesecake, even this easy mug version, turns that delicate texture tough and rubbery almost instantly. It’s designed to be eaten cold or chilled. Save any leftovers for tomorrow’s refrigerated snack instead of trying to zap it again!
Frequently Asked Questions About the Decadent Cheesecake Mug Recipe
Is this truly ‘New York Style’ cheesecake in a mug?
That’s a great question! While we can’t replicate the hours of slow baking a true New York cheesecake takes, we are hitting the flavor profile hard. The richness comes from using both cream cheese and that bit of heavy cream or sour cream. It keeps the flavor dense and tangy, definitely achieving that unmistakable rich cheesecake flavor we all love, but in an instant format. It’s inspired by it, absolutely!
Can I make this a crustless dessert for one?
Yes, you totally can! That’s one of the best things about having a recipe designed specifically for a single serving. If you skip the melted butter and graham cracker crumbs, you simply pour the batter straight into your mug after mixing. It still sets up beautifully, making it a great option if you’re watching carbs or just aren’t a fan of the crust. It’s still a wonderfully satisfying dessert for one!
What is the best size mug to use for this recipe?
I highly recommend an 8-ounce or a 10-ounce mug, but don’t go much bigger than that. Remember, we only have about 1/4 cup of batter plus the little crust layer. If your mug is too wide or too tall, the cheesecake won’t set up correctly because the heat won’t distribute through the batter evenly. For perfect results with this mini cheesecake guide style recipe, stick to a standard coffee mug size! You can learn more about sizing in my full mini cheesecake guide!
Why does my microwave dessert recipe feel slightly spongy?
Oh, that spongy feeling is the most common pitfall with microwave dessert recipes! It almost always means it cooked for too long. Microwave power levels vary wildly, but that texture means the protein in the egg yolk overcooked. Next time, take 10 seconds off the cooking time and rely on the natural heat to carry it the rest of the way when it rests on the counter. Remember the rule: better to undercook slightly and rest, than overcook and ruin that creamy microwave dessert!
Can I make a batch of these ‘mini cheesecake’ recipes ahead of time?
To get the best texture, these are truly meant to be made fresh. However, if you wrapped a finished, chilled mug tightly, it will hold up well for about a day in the fridge. But seriously, for the absolute best experience, enjoy your decadent cheesecake mug recipe cold and fresh!
Nutritional Estimates for the Decadent Cheesecake Mug Recipe
Now, I know we’re here for indulgence, but sometimes it’s nice to see where this single-serving treat lands, right? Since this decadent cheesecake mug recipe uses specific measurements, I was able to run some general numbers for you using standard pantry items.
Here are the estimated values based on the recipe provided. Please remember that this is just an estimate! If you swap out heavy cream for whole milk, or use a different brand of cream cheese, these numbers are definitely going to shift around a little bit. This is just a guide to show you what’s in your delicious, quick dessert!
- Serving Size: 1 mug
- Calories: 280
- Sugar: 15g
- Sodium: 180mg
- Fat: 21g
- Saturated Fat: 12g
- Unsaturated Fat: 9g
- Trans Fat: 0.5g
- Carbohydrates: 18g
- Fiber: 0.5g
- Protein: 6g
- Cholesterol: 85mg
See? Not too bad for something that satisfies that deep, rich cheesecake flavor craving! I always say that knowing what’s in your small treat makes enjoying it even better. It’s a perfect little reward after a long day!
Share Your Decadent Cheesecake Mug Recipe Creations
Seriously, now that you know the secrets behind making the ultimate Decadent Cheesecake Mug Recipe, I want to see what you created! Because this is such a fast and fun single-serving dessert, I know everyone jazzes it up differently. Did you use extra lemon zest? Or maybe you went all-in with a drizzle of chocolate from my blog stash?
Don’t be shy! Drop a comment down below and let me know how long your microwave took, or which topping stole the show for you. A quick rating helps other readers know how well this recipe works for them, too. Happy baking—or, well, microwaving!
PrintDecadent Cheesecake in a Mug
Make a rich, creamy, single-serving cheesecake quickly using your microwave.
- Prep Time: 5 min
- Cook Time: 1 min
- Total Time: 36 min
- Yield: 1 serving
- Category: Dessert
- Method: Microwave
- Cuisine: American
- Diet: Vegetarian
Ingredients
- 1/4 cup cream cheese, softened
- 1 tablespoon granulated sugar
- 1 large egg yolk
- 1/4 teaspoon vanilla extract
- 1 teaspoon heavy cream or milk
- 1 tablespoon graham cracker crumbs
- 1/2 teaspoon melted butter
Instructions
- In a small microwave-safe mug (about 8-10 oz), mix the graham cracker crumbs and melted butter. Press this mixture lightly into the bottom of the mug to form a crust layer.
- In a separate small bowl, beat the softened cream cheese until smooth.
- Add the sugar, egg yolk, vanilla extract, and heavy cream (or milk) to the cream cheese. Mix until just combined and smooth. Do not overmix.
- Pour the cheesecake batter over the crust layer in the mug.
- Microwave on high for 45 to 60 seconds. Cooking time varies by microwave power; start with 45 seconds. The center should look slightly soft but not liquid.
- Let the mug sit at room temperature for 5 minutes to set further.
- Chill in the refrigerator for at least 30 minutes for the best texture before eating.
Notes
- For a richer flavor, substitute the heavy cream with 1/2 teaspoon of sour cream.
- If you prefer a crustless version, skip the first step and simply pour the batter directly into the mug.
- Top with a small spoonful of fruit preserves or chocolate sauce after chilling.
Nutrition
- Serving Size: 1 mug
- Calories: 280
- Sugar: 15
- Sodium: 180
- Fat: 21
- Saturated Fat: 12
- Unsaturated Fat: 9
- Trans Fat: 0.5
- Carbohydrates: 18
- Fiber: 0.5
- Protein: 6
- Cholesterol: 85