

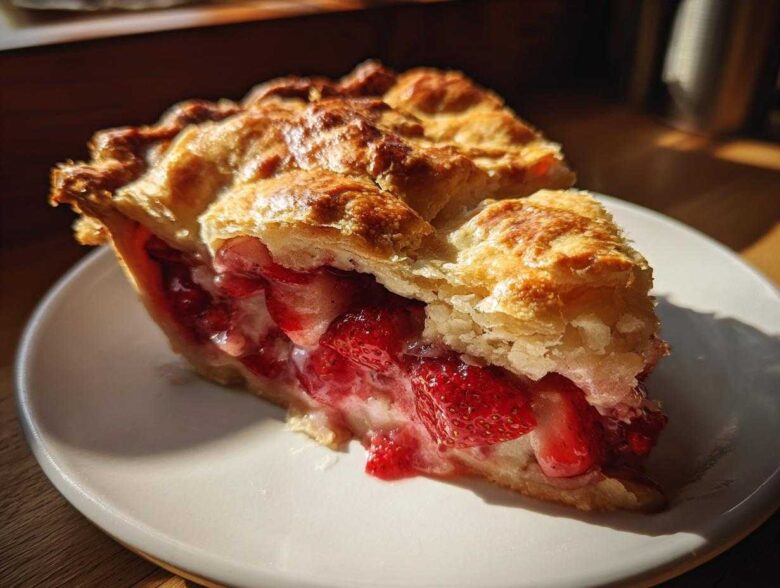
Oh, summer baking! There is just nothing that screams sunshine and porch sitting quite like that first bite of a perfectly made fruit pie. For me, the undisputed champion of seasonal desserts has always been the strawberry rhubarb pie. I swear I spent three whole summers tweaking and messing with my grandmother’s original dough recipe until I finally nailed it.
You know the struggle: the filling runs everywhere, or the bottom crust gets soggy. Not with this one! This is what I confidently call the ultimate recipe for getting that unbelievably flaky crust and a filling that sets up beautifully—that ideal sweet-tart balance that makes your eyes roll back a little bit. Trust me, after years of trial and tasty error, this classic method works every single time, and I can’t wait to share my secrets with you. I hope you love the results as much as we do at our kitchen table!
Why This Strawberry Rhubarb Pie Recipe Stands Out
So, why bother with my version when there are a million recipes out there? Because this one actually delivers those legendary results! We focused on three things that make or break your experience:
- The unbelievably airy, flaky pie crust secrets.
- The perfect juice-to-thickener ratio that ensures your filling sets up like a dream—no soup on your plate!
- That magnificent marriage of sweet and tart that makes this the best summer pie.
It’s the reliability of this strawberry rhubarb pie that keeps me coming back to it year after year.
Achieving the Perfect Flaky Crust Secrets
Listen, the secret to that shatteringly flaky top isn’t complicated, but it requires respect for the butter. You have to keep everything *ice cold*. Seriously, when you’re bringing that butter and water into the flour, if it starts feeling warm or soft, just stop! Put the bowl in the freezer for ten minutes. This cold shock is the single most important thing for success with your strawberry rhubarb pie.
Balancing Sweet Tart Fruit Pie Flavor
Rhubarb is mouth-puckeringly tart, and strawberries are sweet, but they need guidance! We use 1 1/2 cups of sugar for 10 cups of fruit here, plus a splash of lemon juice. This ratio hits that perfect sweet tart fruit pie level. If you use overly sweet strawberries, hold back a quarter cup of sugar—taste the raw filling first, trust your tongue!
Ingredients for the Ultimate Strawberry Rhubarb Pie
Okay, gathering your supplies is almost as fun as baking! Since this is a classic dessert, we need to be precise here. Accuracy in measurement is what separates a good pie from the absolute *best* strawberry rhubarb pie, especially when dealing with fruit quantities. Don’t eyeball the cornstarch—that’s what keeps us from having a runny mess!
Make sure you have everything ready to go before you start mixing. Having everything prepped (we call this Mise en Place, but I just call it ‘getting organized before I spill something’) is a game-changer in the kitchen.
For the Flaky Pie Dough
For that incredible crust you’ve been hearing about, temperature rules everything. You absolutely must use cold cubes!
- 2 1/2 cups all-purpose flour
- 1 teaspoon salt
- 1 cup (2 sticks) unsalted butter, cold and cubed
- 1/2 cup ice water
For the Sweet Tart Fruit Filling
This is where we lock in that perfect flavor and ensure it sets up nice and thick so you can actually slice it!
- 6 cups fresh rhubarb, chopped into 1-inch pieces
- 4 cups fresh strawberries, hulled and halved
- 1 1/2 cups granulated sugar (this is the amount generally needed for good balance)
- 1/4 cup cornstarch (this is crucial for setting!)
- 1 tablespoon lemon juice
- 1 teaspoon vanilla extract
Oh, and don’t forget the final touches! You will need 1 large egg, beaten (for the egg wash to make it golden), and 1 tablespoon of coarse sugar for sprinkling right before it goes in the oven. Gorgeous crust coming right up!
How to Prepare the Flaky Crust for Your Strawberry Rhubarb Pie
Alright, let’s talk foundation! If you want the best strawberry rhubarb pie ever, you have to treat the dough right. This isn’t the time for rushing, sweetie. You’ll grab your flour and salt, and then comes the part that builds all that texture: the butter. Remember, the butter needs to be ice cold and cubed small, like little jewelry for your dough!
You need to work that cold butter into the flour mixture until you see pea-sized chunks remaining. I usually use my fingers for the last bit, just squeezing it between my thumbs and palms. Those cold pockets of butter create steam when they hit the hot oven, and that steam pushes the layers apart, giving you that gorgeous, shattering flakiness. That’s the whole magic behind a super flaky crust! You can read all about how we run this kitchen over at our site.
Next, we add the ice water—slowly! Just a splash at a time. You are NOT making mashed potatoes here; you stop mixing the second the dough barely holds together when you squeeze it. Overmixing develops gluten, and gluten means tough crust, which is the enemy of a perfect strawberry rhubarb pie.
Chilling the Dough: A Crucial Step
Once it’s barely come together, divide it into two discs. Seriously, wrap them tight in plastic and forget about them in the fridge for a solid hour, minimum. I usually let mine hang out for two hours. This resting time is non-negotiable because it lets the gluten relax after all that squeezing and mixing we just did. When the gluten is relaxed, the dough rolls out easily, and you get a tender result instead of a tough, chewy crust. Plus, colder butter equals flakier layers, remember? Time in the cold leads to a beautiful tender result when it bakes.
Assembling and Baking the Strawberry Rhubarb Pie
Okay, this is where the magic really happens! You’ve got your chilled dough and your beautiful fruit filling just waiting to mingle. It’s time to bring this strawberry rhubarb pie to life. Preheat that oven to 400°F (200°C) right before you start rolling!
Take one disc of dough and work fast on a lightly floured surface. Roll it out big—about 12 inches—so it drapes beautifully over your 9-inch pie plate with about an inch of overhang. Gently ease it in there; don’t stretch it, or it will shrink backward when it bakes, trust me! Trim that overhang slightly, leaving just enough room to fold it under later.
Now, pour in all that gorgeous fruit filling. Make sure you get all the sugary juices in there, too! Once the fruit is nestled in, you tackle the top crust. You have two ways to go: a simple, classic solid top (where you must cut vents for steam!) or my favorite for showing off, a beautiful lattice.
Lattice Pie Crust Tutorial Tips
If you’re going for the lattice, it takes a little patience, but it looks so stunning when it bakes! Cut long strips, maybe an inch wide, from your second dough disc. Lay half of them straight across the pie, running parallel to each other. Then, you fold back every *other* strip, lay down a perpendicular strip, and then unfold the first strips back over it. You just keep alternating which strips you fold back as you lay down the next one across. It’s like weaving! It’s a great demonstration of a proper lattice pie crust tutorial, and honestly, it helps the steam escape better than just a few slits.
Whichever top you choose, you have to seal those edges tight! Crimp them—press the top and bottom edges together firmly with your fingers or a fork. This is super important because these fruit pies bubble a lot, and we want those juices staying *inside* the pie where they can thicken, not dripping all over your oven floor. Once sealed, brush the top skin with that beaten egg wash (it makes it shiny!) and sprinkle generously with coarse sugar for that satisfying crunch.
Time to bake! You start hot at 400°F (200°C) for 20 minutes. That initial blast of heat helps set the bottom crust before the filling gets too watery. Then, you drop the heat down to 375°F (190°C) and let it continue for another 35 to 45 minutes. Look for that deep golden-brown crust and make sure you can see the filling bubbling thick through the vents or the lattice openings. If the edges look like they are getting too dark before the filling is set, just grab some foil and loosely shield them. We need a beautiful strawberry rhubarb pie, not a burnt one!
Tips for Success with Your Homemade Fruit Pie
Baking this gorgeous strawberry rhubarb pie is easy when you know just a few tricks to keep things from going sideways. I’ve learned over the years that even the best ingredients can turn tricky if you skip a small step, especially when dealing with juicy summer fruit versus that delicate, flaky crust we worked so hard on!
The absolute most important thing you can do right now—and this applies to all great baking tips for pie—is patience during the cool-down. I know, I know, that pie smells like heaven out of the oven, and you want to slice into it immediately to see your beautiful work. Don’t do it!
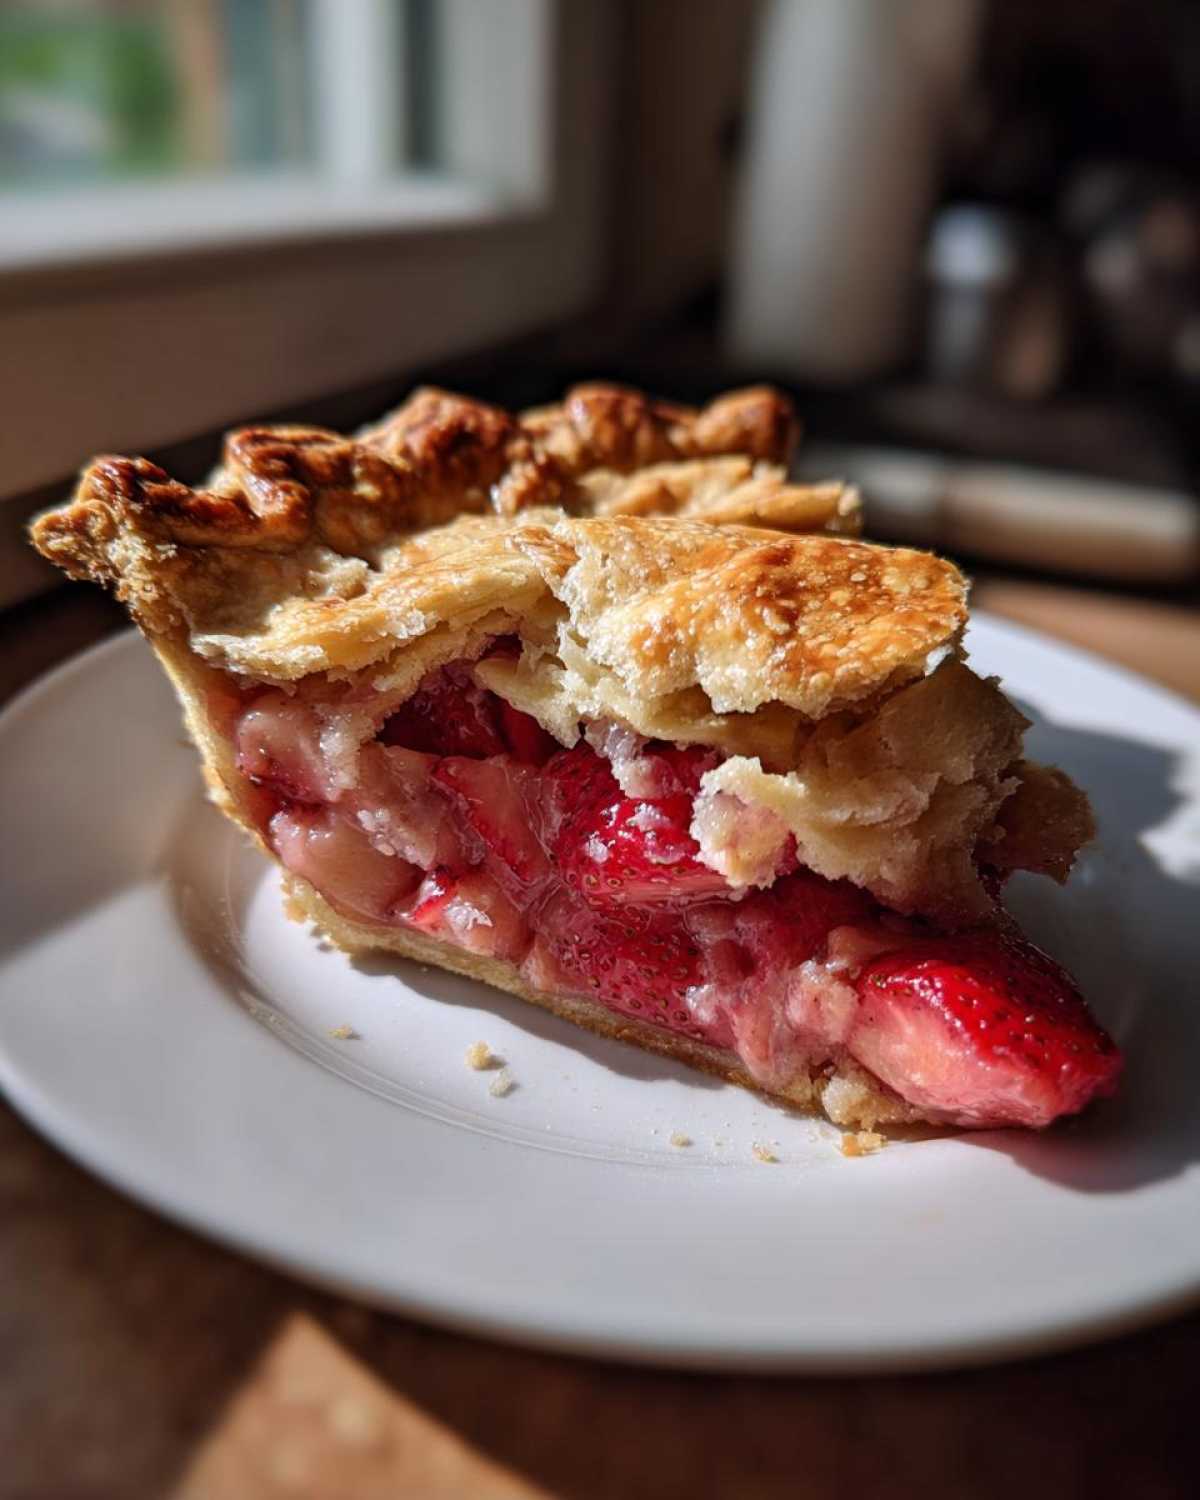
Seriously, you must let your pie cool on a wire rack for a minimum of four hours. If you cut it sooner, that gorgeous filling you just thickened with cornstarch will still be boiling hot and liquidy. If you wait those four long hours, you’ll be rewarded with thick, perfectly gelatinized slices that hold their shape. That waiting game ensures the tartness and sweetness are perfectly balanced in every bite.
Troubleshooting Common Issues in Your Strawberry Rhubarb Pie
Even when you follow directions, sometimes the oven gods are tricky! If you notice the edges of your crust getting too dark—we’re talking almost burnt before the filling bubbles thick enough—grab a strip of aluminum foil. Just wrap it loosely around the perimeter of the crust. This shields the easily browned edges while letting the center continue to cook and set up. It works like a charm for protecting this delicate strawberry rhubarb pie!
Now, what if you cut it open and, despite everything, the filling looks a little thin? Don’t panic! If you only have a little bit of juice, try heating up a spoonful of jam or apple jelly on the stove until it’s liquid, then drizzle that over the slightly runny parts. That extra pectin helps lock everything in place as it cools further. If it’s truly soupy, sometimes putting the slice back into a warm oven for ten minutes helps, but honestly, just serve those slices in a bowl with whipped cream—it tastes just as amazing!
Storage and Reheating Instructions for Classic Pie Recipes
Okay, let’s talk about what happens after you’ve conquered the baking and the cooling—how do we keep this spectacular strawberry rhubarb pie tasting fantastic for days? Because let’s be honest, sometimes you just can’t eat a whole pie in one sitting (though I’ve come close!).
Since this pie has a good amount of sugar acting as a mild preservative, it’s actually pretty happy sitting on the counter for a little while. If you’re planning on eating the whole thing within about 8 hours, leaving it covered loosely at room temperature is totally fine. It keeps that bottom crust from softening up too much under refrigeration. I usually keep mine under a big cake dome.
But if you’re making this wonderful classic pie recipe for a big gathering and need leftovers—and trust me, you will—you need to chill it down. Once it’s fully cooled (remember that crucial 4-hour wait!), cover the entire pie tightly with plastic wrap or foil and pop it in the fridge. It keeps beautifully for about three to four days this way. The filling stays firm, and the crust holds up surprisingly well!
Now for the tricky part: reheating! You never want to reheat an entire pie, or you risk ruining the structure and making the crust immediately soggy. If you’re just grabbing a single slice, try this little hack. Don’t use the microwave unless you absolutely have to—that moisture will steam your crust right into bread dough territory!
Instead, preheat a small toaster oven or a regular oven to about 325°F (160°C). Put your slice directly on a small baking sheet. Warm it up for just 10 to 15 minutes. This gentle heat warms the fruit back up nicely while giving the crust a second chance to crisp up a bit. It wakes up the spices and makes that slice taste almost freshly baked. Enjoy your leftovers!
Frequently Asked Questions About Strawberry Rhubarb Pie
I get so many wonderful messages asking about variations or potential pitfalls when making this pie, which is awesome! It shows you’re really invested in making the best strawberry rhubarb pie possible. Here are the three questions I hear the most that might save you a step!
Can I use frozen rhubarb or strawberries in this strawberry rhubarb pie?
Yes, you absolutely can! Summer doesn’t last forever, and sometimes we need to rely on the freezer stash. If you use frozen fruit, you need to adjust two things. First, thaw the fruit completely overnight in the fridge, and here is the most important part: drain off as much liquid as you possibly can before mixing it with the sugar and cornstarch. Frozen fruit releases so much more water than fresh, and if you skip draining, you’ll end up with that soupy filling we worked so hard to avoid!
Also, sometimes frozen fruit is a bit softer, so I usually add just a tiny bit more cornstarch—maybe a tablespoon extra—just as an insurance policy. You don’t need to change the baking time much, but definitely watch those edges to make sure the crust doesn’t get too dark from the extra moisture evaporating.
What is the best way to make this an easy strawberry rhubarb pie?
I totally get it! Sometimes you want that incredible flavor and flakiness without spending half a day making dough from scratch. If you’re in a rush, the best shortcut is sacrificing the homemade dough. You can absolutely use your favorite store-bought pie crust! This shortcut immediately cuts your prep time in half.
Now, I’m going to be honest—my recipe truly shines with that butter crust we talked about, but a good quality store-bought crust will still give you a fantastic result with this filling. It’s the perfect way to create an easy strawberry rhubarb pie when time is tight. Just make sure you still bake it according to the time and temperature I noted in the assembly section so that filling sets up!
If you want to try reaching me or sharing your results, you can always find the contact form over at my contact page!
How important is the lemon juice in the filling?
That little bit of lemon juice is more than just flavor; it’s functionality! Rhubarb is naturally quite acidic, but the strawberries can sometimes mute that tartness. The lemon juice brightens everything up so you get that clean, vibrant flavor, ensuring you have that signature sweet-tart experience. But beyond flavor, acid slightly helps the fruit break down evenly. Honestly, if you leave it out, the pie will still be good, but it won’t have that same zesty ‘pop’ that makes this strawberry rhubarb pie so memorable.
Estimated Nutritional Data for One Serving of Strawberry Rhubarb Pie
I always feel a little silly putting hard numbers on something this comforting, right? Like, when you eat a slice of heaven, who really stops to think about the grams of fat? But, I know some of you are tracking things, and I always aim to be completely transparent here at the blog. So, based on the ingredients listed for our ultimate strawberry rhubarb pie recipe, here is the estimated nutritional breakdown for one generous slice.
Please remember this is just an estimate! If you use a store-bought crust versus my homemade flaky one, or if your strawberries were bigger that week, the final numbers will shift a little. Think of this as directional guidance rather than gospel. You can read more about how we calculate nutritional info over at our disclaimer page.
- Serving Size: 1 slice
- Calories: 410
- Sugar: 35g
- Fat: 22g (That’s the butter working its flaky magic!)
- Saturated Fat: 14g
- Carbohydrates: 52g
- Fiber: 3g
- Protein: 5g
- Sodium: 250mg
Honestly, the sugar count looks high, but remember that’s balancing out the intense tartness of the rhubarb, which is a wonderful way to sneak in some seasonal fruit, if you ask me! Enjoy every single bite!
Share Your Best Summer Pie Creations
Well, there it is! My absolute best recipe for a summer classic. I’ve poured years of testing into getting that crust perfect and making sure the filling cuts beautifully without spilling all over the table. Now that you’ve made the ultimate strawberry rhubarb pie,
I absolutely need to know how it went! Did your crust totally flake out (in a good way)? Were your neighbors fighting over the last slice? Please, please drop a rating for this recipe below—five stars if it changed your summer baking life! Every comment you leave helps other home cooks find this recipe and have their own success with strawberry rhubarb pie.
And if you took a picture of that stunning golden lattice or that perfect slice holding its shape, tag me on social media! I love seeing your creations. Happy baking, friends, and I hope this pie brings tons of sunshine to your table!
PrintUltimate Flaky Crust Strawberry Rhubarb Pie

Make a classic summer strawberry rhubarb pie with a perfectly flaky crust and a sweet-tart filling that sets well. This recipe focuses on balance and texture.
- Prep Time: 45 min
- Cook Time: 60 min
- Total Time: 105 min
- Yield: 8 servings
- Category: Dessert
- Method: Baking
- Cuisine: American
- Diet: Vegetarian
Ingredients
- 2 1/2 cups all-purpose flour
- 1 teaspoon salt
- 1 cup (2 sticks) unsalted butter, cold and cubed
- 1/2 cup ice water
- 6 cups fresh rhubarb, chopped into 1-inch pieces
- 4 cups fresh strawberries, hulled and halved
- 1 1/2 cups granulated sugar (adjust to taste)
- 1/4 cup cornstarch
- 1 tablespoon lemon juice
- 1 teaspoon vanilla extract
- 1 large egg, beaten (for egg wash)
- 1 tablespoon coarse sugar (for sprinkling)
Instructions
- Prepare the crust: In a large bowl, whisk together the flour and salt. Cut in the cold butter using a pastry blender or your fingers until the mixture resembles coarse crumbs with some pea-sized pieces of butter remaining. Gradually add the ice water, mixing until the dough just comes together. Divide the dough in half, flatten into discs, wrap, and chill for at least 1 hour.
- Prepare the filling: In a separate bowl, combine the chopped rhubarb, strawberries, granulated sugar, cornstarch, lemon juice, and vanilla extract. Toss gently to coat everything evenly. Let the mixture sit for 15 minutes while you roll out the dough.
- Assemble the pie: Preheat your oven to 400°F (200°C). On a lightly floured surface, roll out one dough disc into a 12-inch circle. Carefully place it into a 9-inch pie plate. Trim the edges, leaving a 1-inch overhang.
- Pour the fruit filling into the bottom crust.
- Roll out the second dough disc. You can either place it over the top as a solid crust (cutting vents) or cut strips to create a lattice top. Crimp the edges of the top and bottom crusts together to seal.
- Brush the top crust with the beaten egg wash and sprinkle with coarse sugar.
- Bake the pie: Place the pie on a baking sheet to catch any drips. Bake at 400°F (200°C) for 20 minutes. Reduce the oven temperature to 375°F (190°C) and continue baking for another 35 to 45 minutes, or until the crust is golden brown and the filling is bubbling thickly. If the edges brown too quickly, cover them loosely with foil.
- Cool completely: Let the pie cool on a wire rack for at least 4 hours before slicing. This allows the filling to set properly.
Notes
- For the flakiest crust, keep all ingredients, especially the butter and water, very cold. Do not overwork the dough.
- If your rhubarb is very tart, you may increase the sugar slightly, but taste the raw filling mixture first to gauge the sweetness level.
- If you prefer a crumble topping instead of a top crust, mix 1 cup flour, 1/2 cup brown sugar, 1/2 cup rolled oats, and 1/2 cup cold butter until crumbly, then sprinkle over the filling.
Nutrition
- Serving Size: 1 slice
- Calories: 410
- Sugar: 35g
- Sodium: 250mg
- Fat: 22g
- Saturated Fat: 14g
- Unsaturated Fat: 8g
- Trans Fat: 0g
- Carbohydrates: 52g
- Fiber: 3g
- Protein: 5g
- Cholesterol: 55mg