

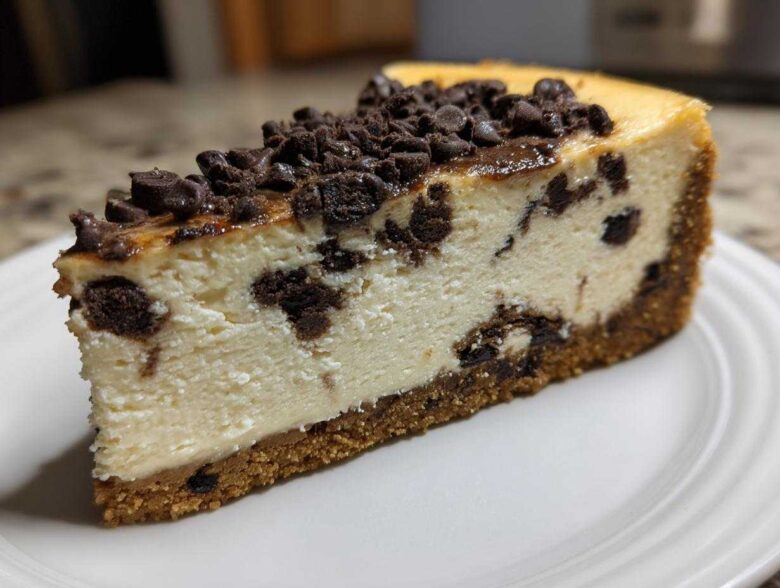
Oh my goodness, if you’re looking for that truly decadent, pull-out-the-stops dessert, you’ve hit the jackpot today! Forget those flimsy, runny desserts you sometimes get; this is the real deal. I put in the work—trust me, I had my share of heartbreaking, cracked tops—to perfect this ultimate baked chocolate chip cheesecake recipe. The goal was pure decadence, and what you get is a super rich and creamy texture studded with pockets of warm, melted chocolate. This recipe sets every time, and it’s guaranteed to be the star of any party or holiday spread.
Seriously, once you taste this homemade cheesecake with its buttery graham cracker crust, you won’t go back to the store-bought stuff. I learned so many tricks reading up on the classics, and I even found an amazing guide on making the perfect cheesecake that helped me solidify my method. We’re going to make magic happen!
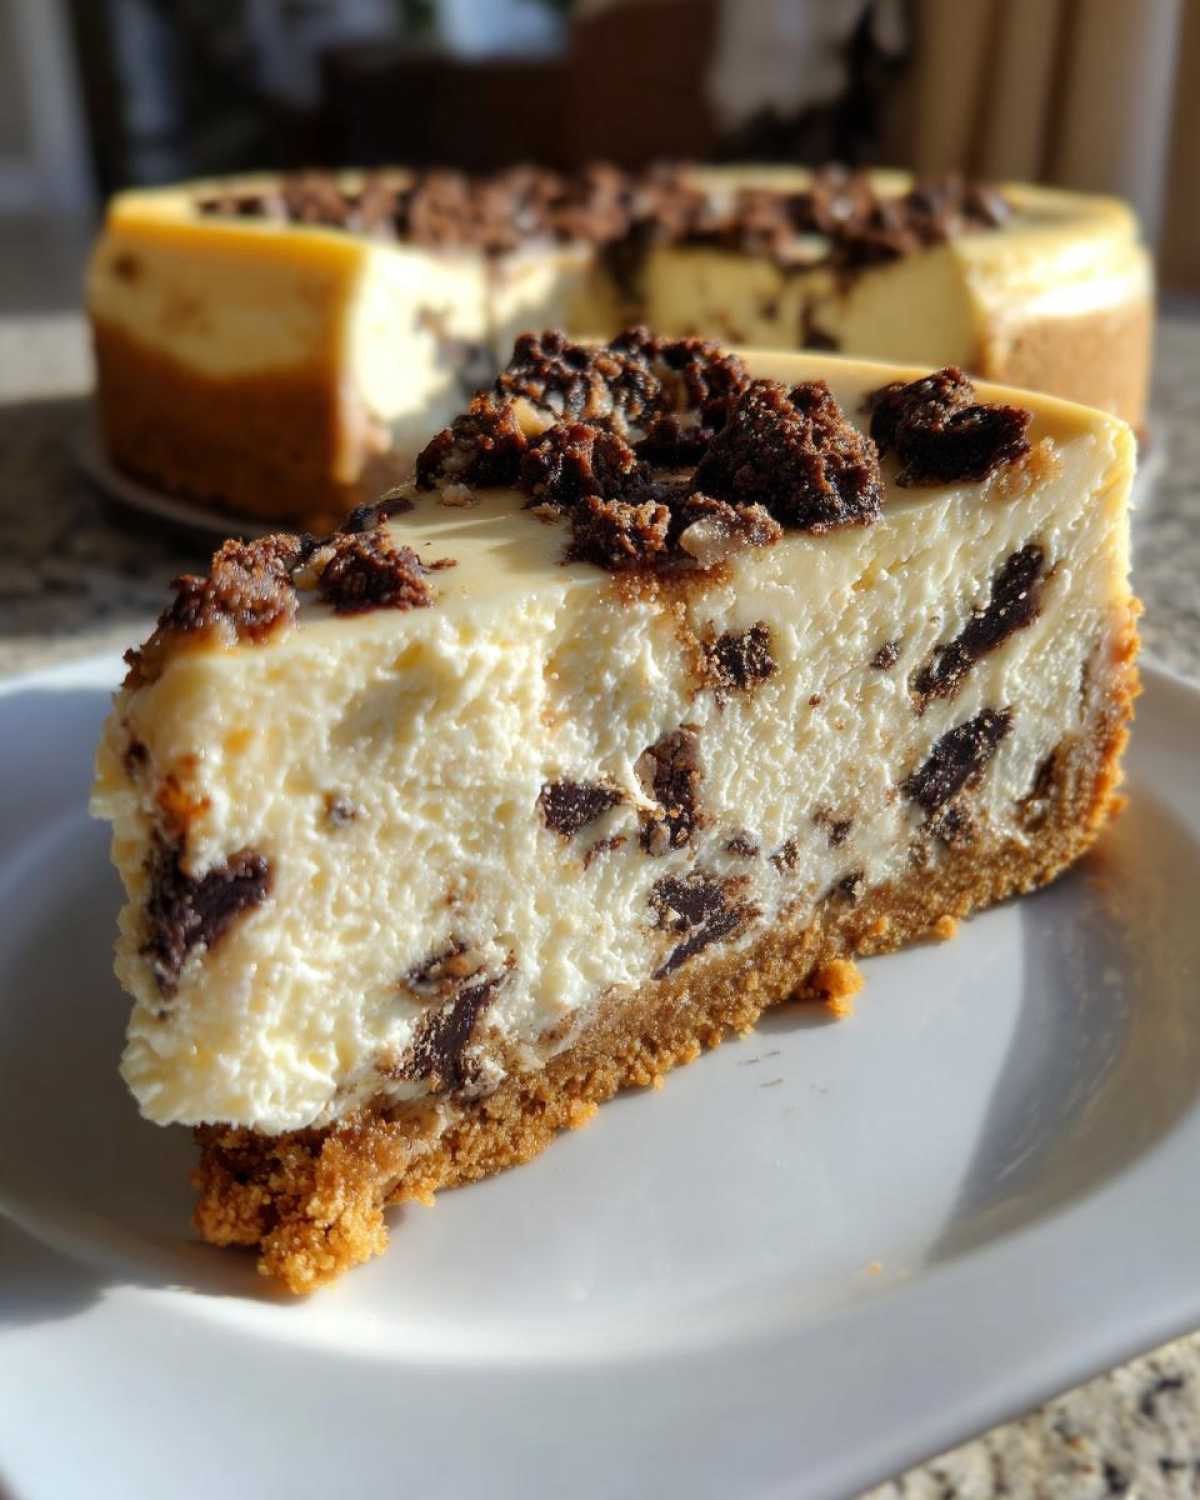
Why This Baked Chocolate Chip Cheesecake Recipe Works (E-E-A-T)
Okay, so why should you trust my method for this creamy chocolate cheesecake dessert? It all comes down to respecting the integrity of the cream cheese. We aren’t just throwing things in a bowl and hoping for the best here! I’ve spent years figuring out the secrets chefs use to get that smooth, luxurious feel without any of the dreaded cracks.
The water bath—that big roasting pan filled with hot water—is non-negotiable. It keeps the heat around the cheesecake gentle and indirect. This careful environment is what makes all the difference when you’re aiming for the best chocolate chip cheesecake experience possible.
Honestly, the results speak for themselves:
- You get a perfectly crack-free, professional-looking top every single time.
- The texture is unbelievably rich and creamy, never grainy or curdled.
- The slow cooling process inside the turned-off oven locks in that moisture.
- It sets beautifully, making it stable enough for transport to parties.
If you want to read a bit more about why precision matters in baking, I found this great piece about perfecting cheesecake structure that really convinced me to stick to the rules!
Gathering Ingredients for Your Chocolate Chip Cheesecake
Before we even think about mixing anything, we need the right players on our counter! The absolute, number-one rule for any great homemade cheesecake is simple but vital: everything has to be at room temperature. I mean it! Cold cream cheese equals lumps, and we are not having any of that in our chocolate chip cheesecake.
Set your cream cheese blocks and your eggs out about an hour before you start. Trust me, taking this tiny step saves you so much heartache later. Once you have everything soft and ready, setting up the crust is a breeze. For more ideas on seasonal flavors, you might want to check out my favorite pumpkin version!
For the Graham Cracker Crust
This crust is buttery, slightly sweet, and gives the perfect crunch against that rich filling. Don’t try to skip the butter here!
- 1 1/2 cups graham cracker crumbs (about one sleeve of crackers crushed up!)
- 1/4 cup granulated sugar
- 6 tablespoons unsalted butter, melted
For the Creamy Chocolate Cheesecake Filling
This is where the magic happens. Pay close attention to those egg counts and make sure you’re using that good, full-fat cream cheese.
- 3 (8 ounce) packages cream cheese, fully softened
- 1 1/2 cups granulated sugar
- 1 teaspoon vanilla extract
- 1/4 teaspoon salt
- 4 large eggs, at room temperature
- 1 cup semi-sweet chocolate chips
Step-by-Step Instructions for the Ultimate Chocolate Chip Cheesecake
Alright, this is where we transform simple ingredients into that beautiful, rich and creamy cheesecake dessert. Don’t be intimidated by the water bath; it’s our best secret weapon! Just follow these steps closely, and you’ll have a masterpiece ready for chilling. Seriously, the timing here is everything if you want that perfect texture, so pay attention to the temperature changes! If you want to see how I handle a totally different flavor profile, check out my turtle cheesecake recipe for inspiration!
Preparing and Baking the Cheesecake Graham Cracker Crust
First things first, get that oven warm! We start by preheating it to 350 degrees F. Now, grab your 9-inch springform pan. You absolutely must wrap the bottom and sides tightly—like, really tightly—in heavy-duty aluminum foil. This protects the crust from the water bath later on. Mix your graham cracker crumbs, the quarter cup of sugar, and the melted butter right in a bowl until it looks like wet sand. Press that mixture firmly into the bottom of your wrapped pan, like you mean business!
Pop that crust in the 350-degree oven for just 10 minutes to set it up. When it comes out, let it cool down a tiny bit while you handle the filling. And here’s the first temperature shift: go ahead and reduce the oven down to 325 degrees F. That lower, gentler heat is key for cheesecake!
Mixing the Rich and Creamy Cheesecake Batter
This mixing part needs patience! Grab that softened cream cheese and beat it with your mixer until it’s impossibly smooth—no lumps allowed! Then, slowly beat in that cup and a half of sugar along with the vanilla and salt until they are just combined. Stop mixing that bit!
The next additions are sensitive. Now, add your eggs one at a time, mixing only until you see each one disappear into the batter. If you overmix the eggs, you add too much air, and that’s what causes the cracking later. When they’re incorporated, scrape down the bowl sides, and gently fold in those beautiful semi-sweet chocolate chips. We’re not whipping them; we’re just folding them in so they sit happily throughout your rich and creamy cheesecake.
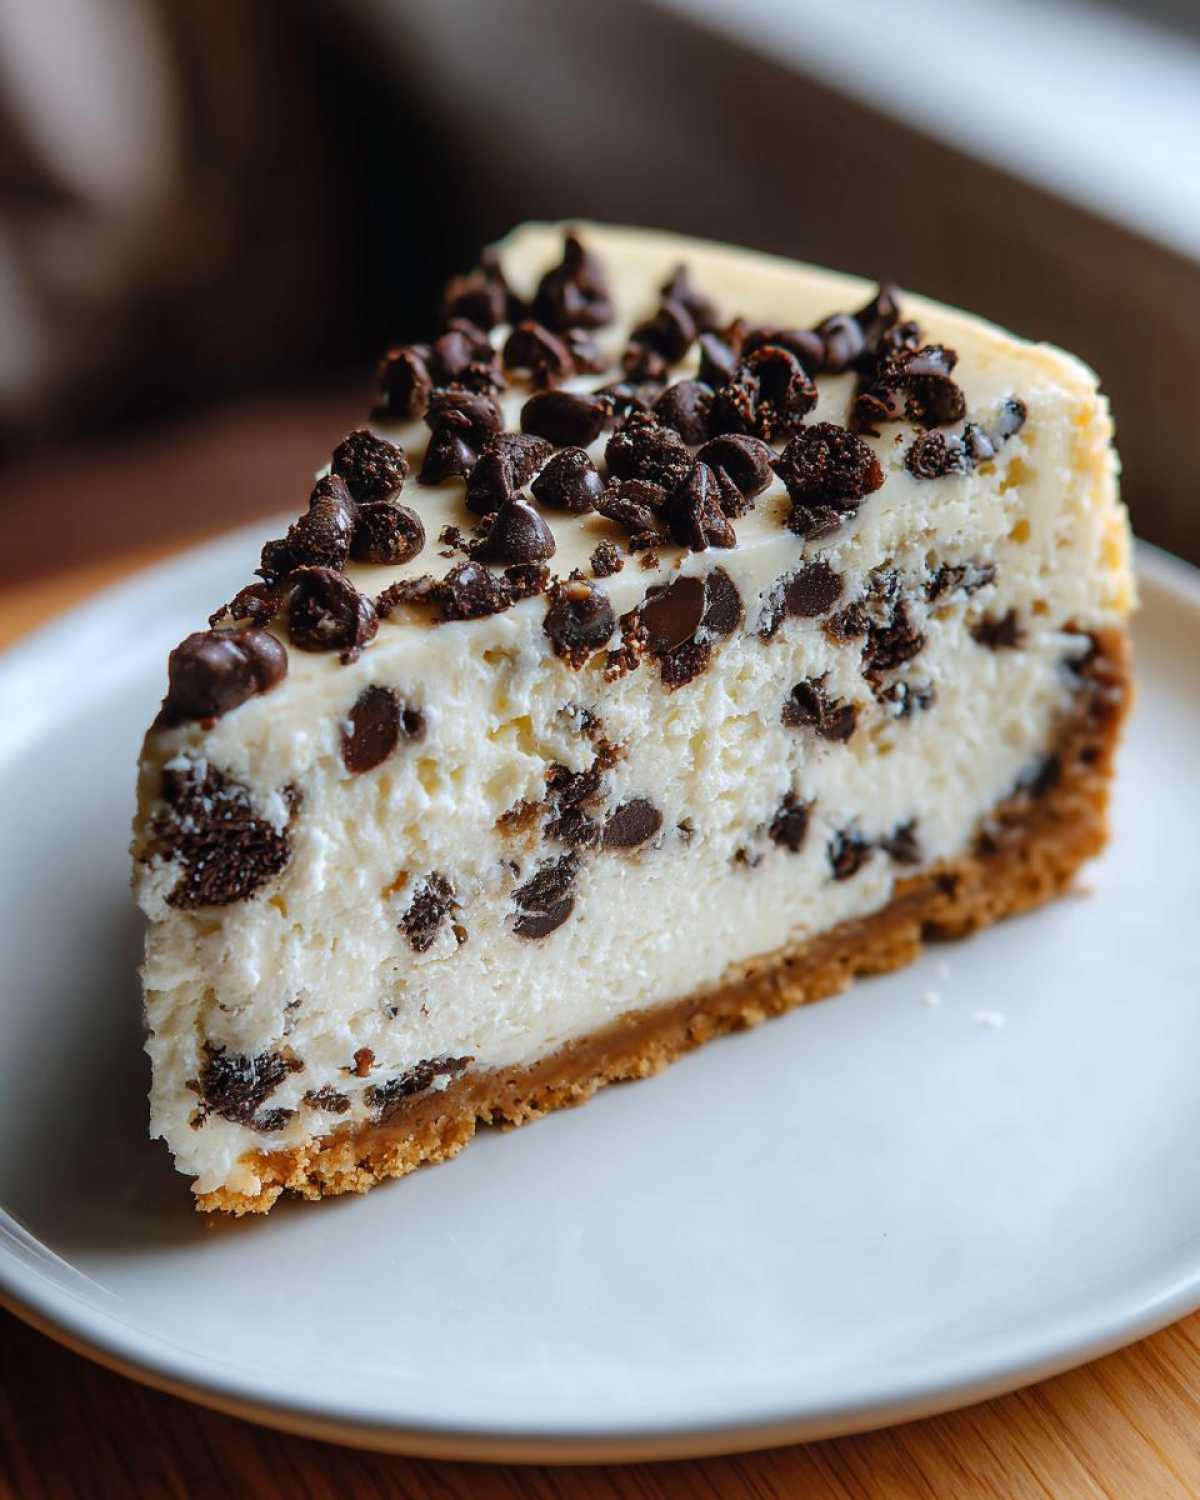
Baking the Chocolate Chip Cheesecake with a Water Bath
Time to assemble! Pour that lovely batter right over your slightly cooled crust. Now, grab a larger roasting pan—big enough for your springform to sit inside comfortably. Place the springform pan inside the larger pan. This is the water bath setup: carefully pour hot water into the *roasting pan* until it comes about halfway up the sides of your springform. This steamy environment cooks the filling evenly.
Bake it now at 325 degrees F for about 55 to 65 minutes. You’re looking for the edges to be set, but if you give the pan a gentle nudge, the center should still jiggle a tiny bit—like firm jelly. If it looks like liquid, it needs more time. If it doesn’t jiggle at all, it might be overdone!
Cooling and Chilling Your Homemade Cheesecake
Don’t rush this part! Seriously, pulling it out immediately guarantees disaster. Once that bake time is up, just turn the oven off. Open the door slightly, prop it open if you have to, and let the entire chocolate chip cheesecake cool down inside the oven for a full hour. This slow transition is critical for stability.
After that hour, take it out of the water bath and foil, and let it cool completely on a wire rack on the counter. Once it’s totally cool to the touch, it’s time for the long haul: slide it into the fridge. You need a minimum of 6 hours to set up properly—but honestly, overnight is where you find the truly mind-blowing texture for this homemade cheesecake.
Ingredient Notes and Substitutions for Your Chocolate Chip Cheesecake
We talked about room temperature, but let’s drill down just a bit on the chocolate chips because that’s the star flavor besides the cream cheese, right?
I specify semi-sweet because it gives you the perfect balance against the sweetness of the filling. If you sneak in milk chocolate chips, the whole thing gets a bit too sweet for my taste, and you might lose that nice little dark contrast. But hey, if you love it sweeter, go for it!
Now, about that crust! If you adore a deep chocolate flavor, you can absolutely swap the graham crackers for crushed Oreo cookies—make sure you scrape out most of the white filling first, or it throws off the butter ratio. It makes for such a fun twist on a classic chocolate chip cheesecake! I actually show a recipe for a super fun strawberry crunch cheesecake over here if you ever want a fruity pairing, but for this recipe, you can’t go wrong with the graham cracker crunch.
Tips for Success When Making a Baked Cheesecake Recipe
Now that you know the major steps for achieving that rich and creamy cheesecake, let me share a few final little tricks I use! These are the things that bridge the gap between a good homemade cheesecake and a truly show-stopping one. We’re focusing on preventing sticking and ensuring easy serving, which is just as important as getting that perfect bake.
First, remember that knife trick I mentioned? Once the cheesecake has chilled overnight and is totally firm, take a very thin, sharp knife, dip it in hot water, and wipe the blade dry. Then, carefully run it all around the inside edge where the cake meets the springform wall. This frees up any tiny bits that might be clinging on. When you release the springform collar, it should slide right off cleanly! No wrestling matches required, I promise.
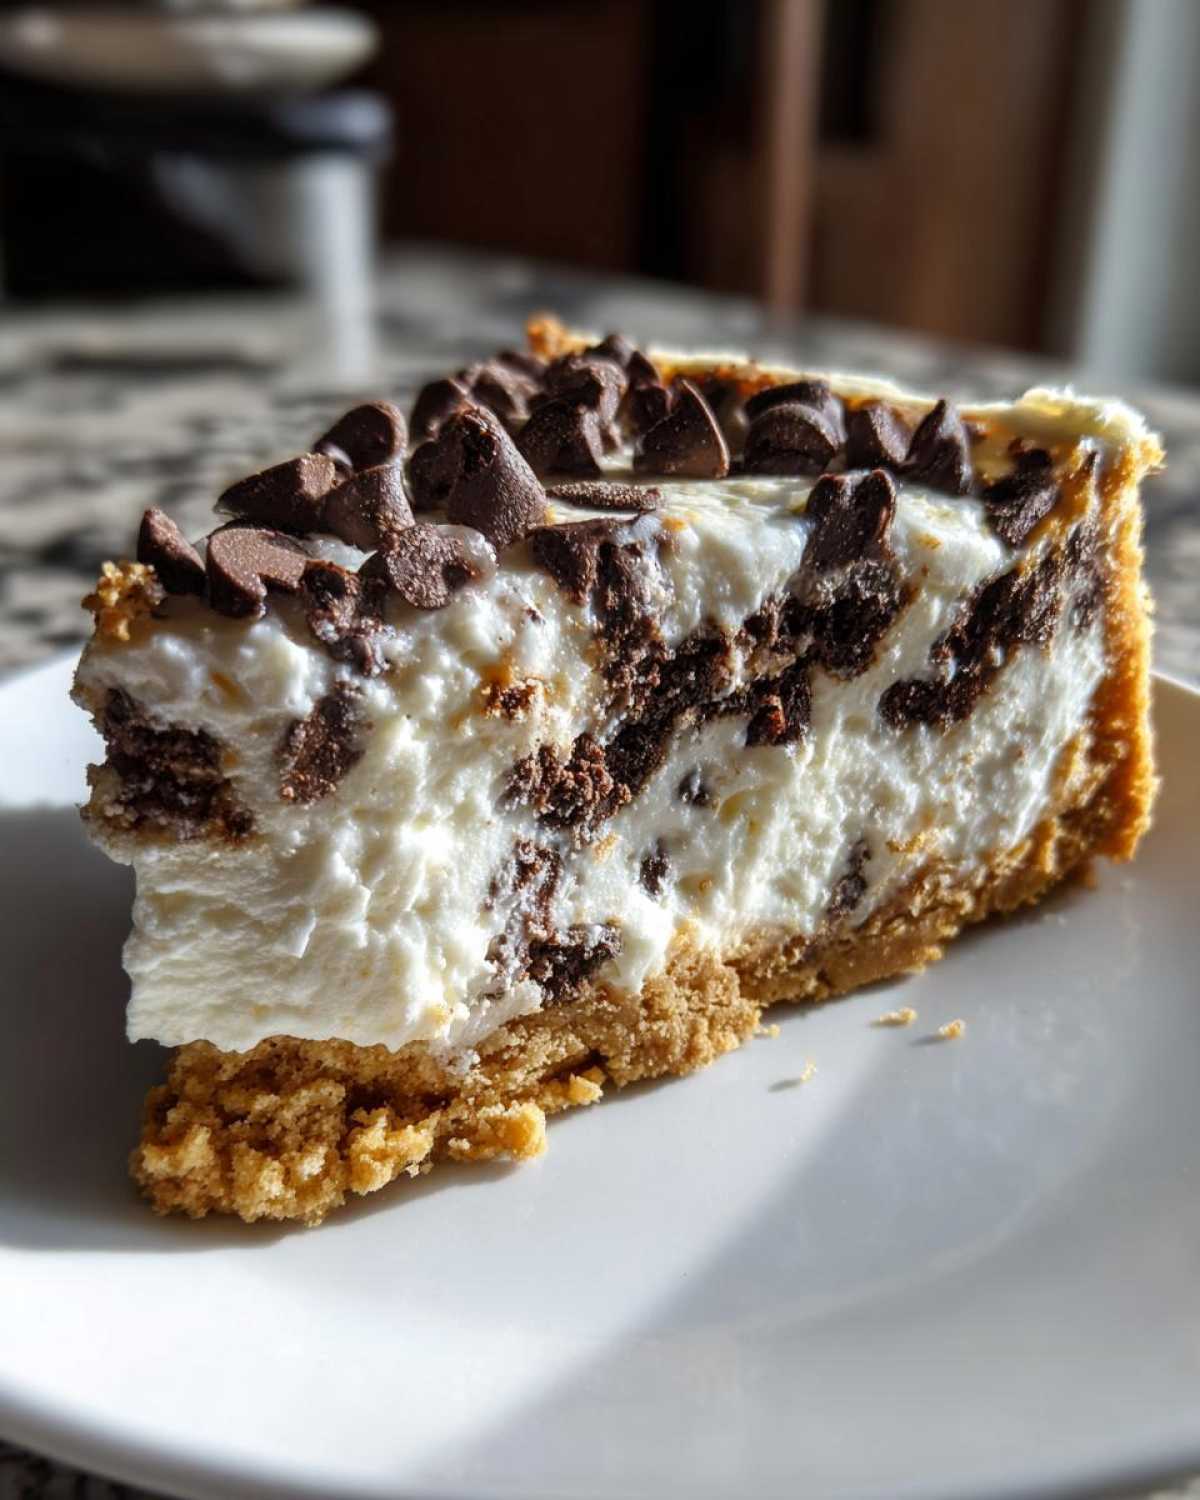
Second, don’t skimp on the chilling time! I know it’s tempting to dive in after four hours, but that texture only solidifies and improves as it rests. The long chill—preferably overnight—allows the structure to firm up so you get those lovely, dense slices you expect. It’s worth the wait every time!
Also, if you’re aiming for incredibly smooth edges when you slice it for a party, use a hot, sharp knife between every cut. Wipe the knife clean after each slice, reheat it slightly under hot water, and wipe it dry before cutting the next piece. That just keeps the sides of your slice immaculate.
If you want to explore another glorious, creamy version, you should peek at my white chocolate cheesecake recipe. It follows a very similar structure, so you’ll be a professional water-bath baker by the time you finish both!
Serving Suggestions for a Decadent Cheesecake Dessert
Once your chocolate chip cheesecake has chilled overnight and is perfectly firm, it’s ready for its big moment, whether it’s just for your family or you’re bringing this amazing cheesecake dessert to a party! The beauty of this rich cake is that it really doesn’t need much fuss, honestly. Overloading it can just hide those lovely pockets of melted chocolate chips.
I always go light on toppings. A simple dusting of high-quality powdered sugar is elegant and lets the flavor shine. Or, if you want a touch more texture, a light sprinkle of finely chopped pecans or toasted walnuts adds a wonderful nutty contrast to the creaminess.
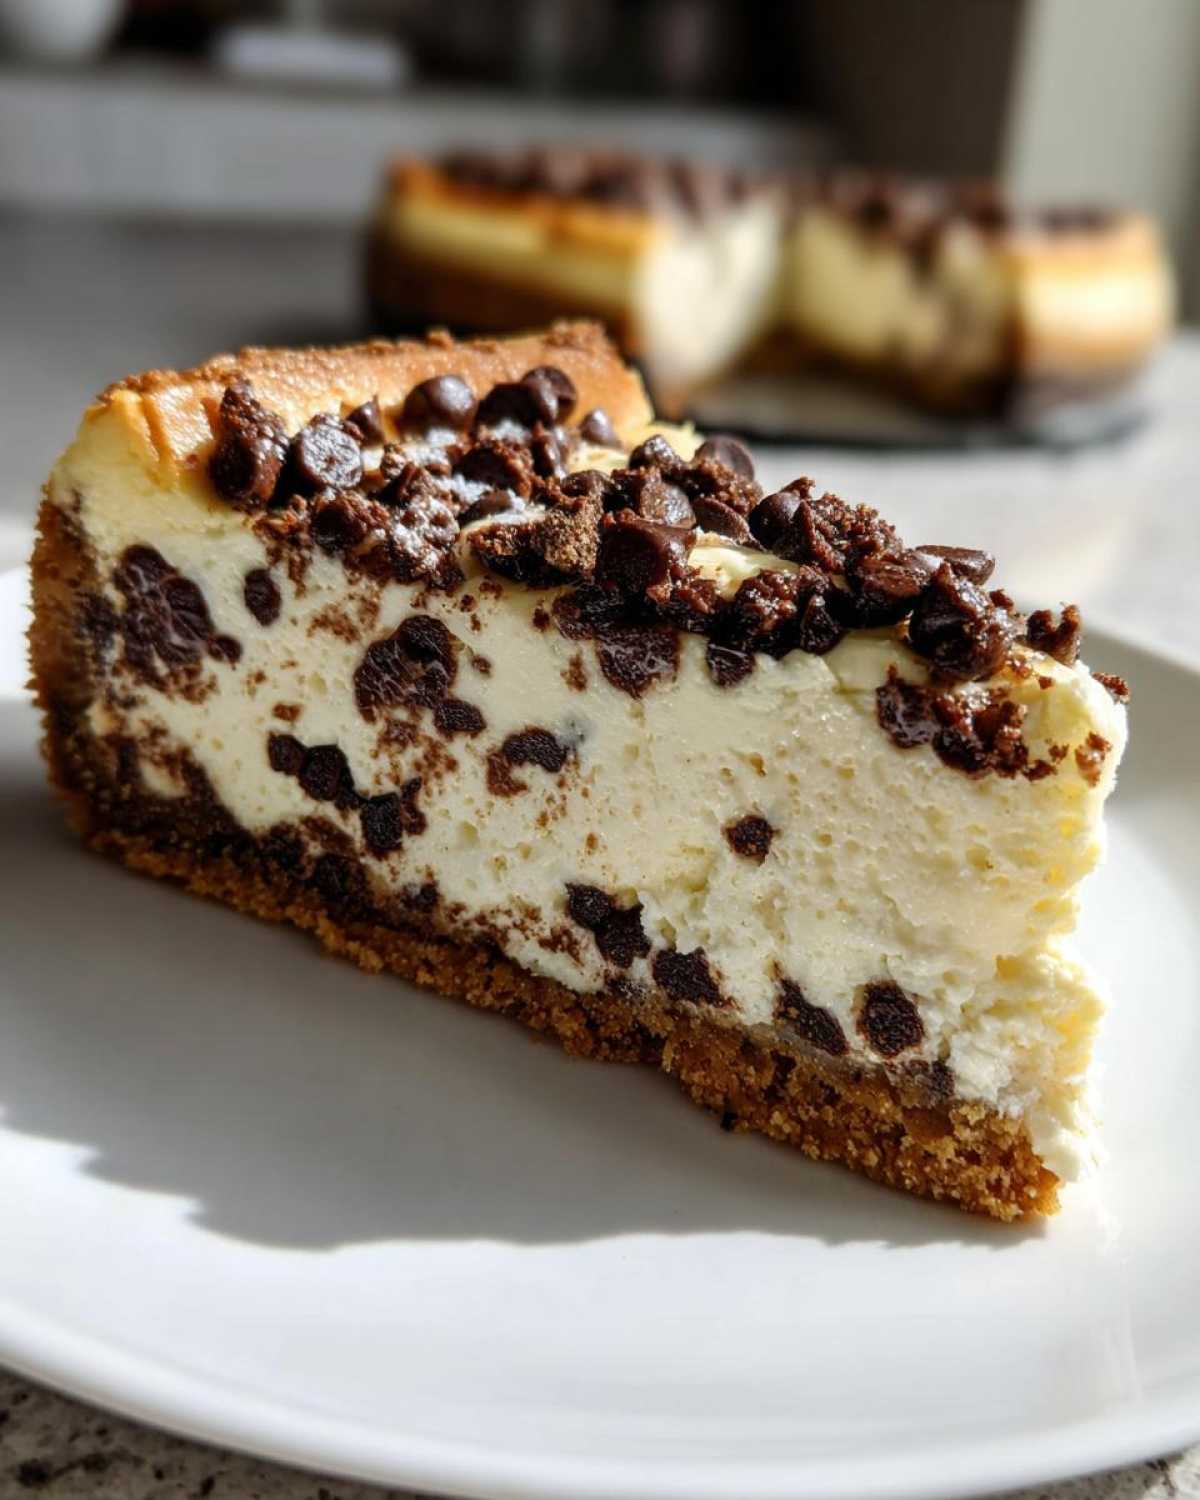
Crucially, serve it cold! Pull it straight from the fridge. That firm, cold texture is what makes this the ultimate homemade cheesecake experience. If you’re looking for a showstopper that doesn’t involve a cheesecake, but is just as easy to bring to an event, check out my recipe for chocolate eclair cake while you wait for your cheesecake to chill!
Storage and Make-Ahead Options for Your Chocolate Chip Cheesecake
One of the best things about this chocolate chip cheesecake recipe is that it’s practically designed to be made ahead! It’s actually better the next day once those flavors have really settled into the cream cheese. You cannot rush the setting process. Remember how I stressed chilling for at least six hours? That’s the absolute minimum for this rich and creamy cheesecake to firm up properly.
If you can manage it, letting it chill overnight is my real recommendation. It makes slicing less messy, and the texture firms up just right—it’s so much denser and more “ultimate dessert” perfection when totally cold.
Once it’s fully chilled and you’ve served a few slices, the leftovers last beautifully in the fridge. Just make sure you cover the pan loosely with plastic wrap or transfer the remaining slices to an airtight container. They stay fantastic for about four to five days. So, you can totally make this cheesecake a day or two before your party, which means less stress on the big day!
But what about freezing? Yes, you can freeze it! If you want to prepare this for a future holiday dessert, wrap the completely chilled cheesecake tightly in plastic wrap, and then wrap it again in aluminum foil to stop any freezer burn. It freezes great for about a month. When you want to eat it, just move it from the freezer to the fridge overnight to thaw slowly. It stays remarkably good, though sometimes the texture of the crust is *slightly* softer after thawing, but honestly, it’s still heavenly!
If you’re looking for other make-ahead options that don’t require baking, check out my recipe for brownie refrigerator cake—it’s a lifesaver when you need something easy and decadent!
Frequently Asked Questions About Making Chocolate Chip Cheesecake
I figured you’d have some questions after diving into this rich recipe! It’s the kind of dessert that makes people pause and wonder about the details. Don’t worry if you’re stressing about the bake time or wondering about bars—I’ve got the answers right here based on my years of testing this specific chocolate chip cheesecake.
If you’re looking for an entirely different holiday flavor profile that still uses that creamy base, you might enjoy my eggnog cheesecake recipe—it’s surprisingly similar in technique!
How do I prevent my chocolate chip cheesecake from cracking?
Oh, the dreaded crack! This is the single biggest concern for anyone attempting a baked cheesecake recipe, and it’s 100% preventable if we follow the cooling rule. Remember that water bath? That’s your first defense, keeping the edges from setting too fast. Room-temperature ingredients mean a smooth, lump-free batter, which also helps prevent stress fractures!
But the real anti-crack magic happens *after* the bake. You absolutely must perform the slow cool-down: turn the oven off, prop the door open, and let it sit in that residual heat for a full hour. That gradual temperature drop prevents the cheesecake from shrinking too quickly, which is what pulls the surface apart. Seriously, don’t skip that hour!
Can I turn this into easy cheesecake bars?
Yes, you totally can! Transforming this spectacular cheesecake into easy cheesecake bars is a fantastic idea for a party or bake sale, as they slice up so neatly. If you want to do this, ditch the 9-inch springform pan. Instead, use a standard 9×13 inch baking dish. Make sure you line that dish with parchment paper, leaving an overhang on the two long sides—this acts as handles later for lifting the whole slab out!
You’ll still bake the crust for 10 minutes, but for the filling, you might need to reduce the bake time slightly since the layer will be thinner overall. Keep an eye on it around the 45-minute mark. You’re looking for the same jiggle—firm edges, slight wobble in the center.
What is the total chilling time required for this creamy chocolate cheesecake dessert?
For this creamy chocolate cheesecake dessert, patience really is a virtue! The structure needs time to fully stabilize, and the flavors need time to deepen. I always recommend chilling for at least 6 hours, but if you want that absolute perfect, dense, sliceable texture that makes people ask for your recipe, you should aim for overnight chilling. Honestly, the cheesecake tastes even *better* the next day!
Estimated Nutritional Overview for This Ultimate Chocolate Dessert
Here’s the rundown on what you’re looking at, nutrition-wise, for one slice of this show-stopping, ultimate chocolate dessert. Now, remember, this is my best estimate based on creamy ingredients and a full Graham Cracker Crust, so your exact numbers might tick up or down depending on the brand of chips or volume of butter you use in the crust.
This is a rich dessert, so we’re not pretending it’s a featherlight snack! But knowing what’s in it helps when you’re bringing this decadent treat to a gathering. If you’re looking for more baking inspiration, you can always browse my massive collection of chocolate cake recipes!
For about 1/12th slice, here are the ballpark figures:
- Serving Size: 1 slice
- Calories: 450
- Sugar: 35g (That’s where the joy is!)
- Fat: 30g
- Protein: 8g
- Carbohydrates: 40g
Just like any homemade cheesecake, this comes packed with satisfaction. Enjoy every single bite!
PrintBaked Chocolate Chip Cheesecake with Graham Cracker Crust
Follow this recipe to make a rich, creamy baked cheesecake studded with chocolate chips, set on a simple graham cracker crust.
- Prep Time: 20 min
- Cook Time: 65 min
- Total Time: 7 hours 25 min
- Yield: 12 servings
- Category: Dessert
- Method: Baking
- Cuisine: American
- Diet: Vegetarian
Ingredients
- 1 1/2 cups graham cracker crumbs
- 1/4 cup granulated sugar
- 6 tablespoons unsalted butter, melted
- 3 (8 ounce) packages cream cheese, softened
- 1 1/2 cups granulated sugar
- 1 teaspoon vanilla extract
- 1/4 teaspoon salt
- 4 large eggs
- 1 cup semi-sweet chocolate chips
Instructions
- Preheat your oven to 350 degrees F. Wrap the outside bottom of a 9-inch springform pan tightly with heavy-duty aluminum foil.
- Combine graham cracker crumbs, 1/4 cup sugar, and melted butter in a bowl. Press the mixture firmly into the bottom of the prepared springform pan. Bake the crust for 10 minutes. Remove from the oven and let it cool slightly.
- Reduce the oven temperature to 325 degrees F.
- In a large bowl, beat the softened cream cheese with an electric mixer until smooth. Gradually beat in the 1 1/2 cups sugar, vanilla extract, and salt until just combined. Do not overmix.
- Beat in the eggs one at a time, mixing only until each egg is incorporated. Scrape down the sides of the bowl as needed.
- Gently fold in the chocolate chips.
- Pour the cheesecake batter over the cooled crust.
- Place the springform pan inside a larger roasting pan. Carefully pour hot water into the roasting pan until the water reaches about halfway up the sides of the springform pan (this creates a water bath).
- Bake for 55 to 65 minutes, or until the edges are set and the center jiggles slightly when gently nudged.
- Turn off the oven, crack the oven door open slightly, and let the cheesecake cool inside the oven for 1 hour.
- Remove the cheesecake from the water bath and foil. Cool completely on a wire rack.
- Chill the cheesecake in the refrigerator for at least 6 hours, or preferably overnight, before serving.
Notes
- For an easier release, run a thin knife around the edge of the cooled cheesecake before releasing the springform side.
- If you prefer a chocolate crust, substitute Oreo cookie crumbs for the graham cracker crumbs.
- To prevent cracking, make sure your cream cheese is fully softened before mixing.
Nutrition
- Serving Size: 1 slice
- Calories: 450
- Sugar: 35g
- Sodium: 250mg
- Fat: 30g
- Saturated Fat: 18g
- Unsaturated Fat: 12g
- Trans Fat: 0.5g
- Carbohydrates: 40g
- Fiber: 1g
- Protein: 8g
- Cholesterol: 95mg