

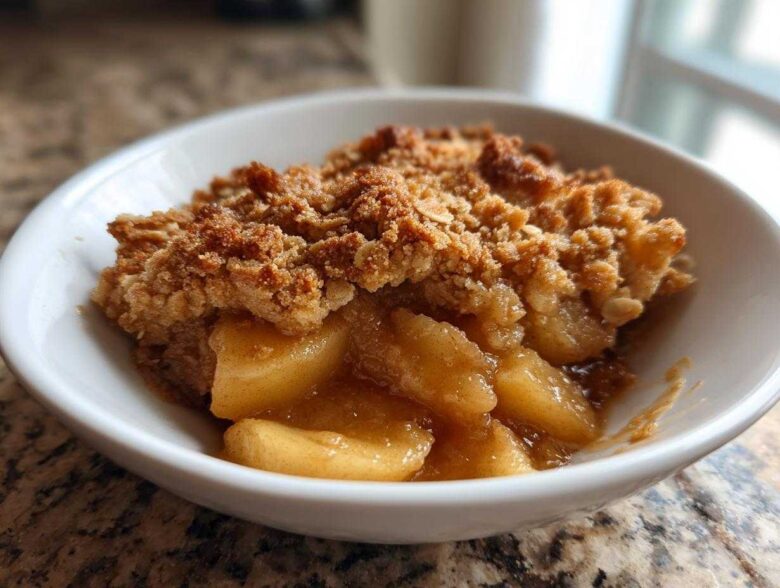
Oh my goodness, there’s nothing—and I mean *nothing*—that screams cozy perfection quite like the smell of apples baking with cinnamon filling up the kitchen. If you’re chasing that ultimate comfort food vibe on a chilly evening, you absolutely need this recipe for my **Apple Crisp**. Trust me when I say this isn’t just *another* apple dessert; this is the one that always gets asked about when company comes over!
I’ve tweaked this little gem over the years, but what stays the same is the promise of a deeply flavorful fruit filling topped with the crunchiest, most buttery oat mixture you can imagine. It’s so unbelievably straightforward, making it my go-to **Quick Fall Dessert Idea**. Forget complicated pies; we’re making magic in under an hour here!
Why This Easy Apple Crisp Recipe Works So Well
Honestly, you’re going to love how little fuss this takes, especially when the result tastes this spectacular. This **Family Favorite Apple Crisp** is proof that easy doesn’t mean sacrificing flavor or texture. It truly delivers on every promise!
- It’s fast! You’re looking at less than 20 minutes of prep time, making it the perfect **Quick Fall Dessert Idea**.
- The topping is non-negotiable perfection: reliably crunchy, buttery, and never soggy.
- We use the right apples, so the fruit filling steams perfectly underneath that amazing crumble.
If you want to see the story behind why I stand by this recipe, check out my About Me page!
Ingredients for the Perfect Apple Crisp
Alright, let’s talk supplies. Getting the right ingredients is half the battle won, especially when it comes to texture. For this **Easy Apple Crisp Recipe**, I like to keep things super organized right from the start. Splitting them up helps me make sure I don’t accidentally toss the topping ingredients into the apple bowl!
You’ll need one 8×8 inch baking dish—don’t forget to grease it lightly before you start mixing!
For the Apple Filling
- 6 medium apples (Granny Smith or Honeycrisp recommended—they hold their shape beautifully!)
- 1/4 cup all-purpose flour
- 1/4 cup granulated sugar
- 1 teaspoon ground cinnamon
- 1 tablespoon lemon juice (this keeps them bright!)
When you’re preparing the apples, peel, core, and slice them into nice, even 1/4 inch pieces. That thickness is key so they soften up without turning to mush!
For the Best Apple Crisp Topping
- 1 cup all-purpose flour
- 1 cup rolled oats (we use the old-fashioned kind for the best texture)
- 3/4 cup packed brown sugar
- 1/2 teaspoon ground cinnamon
- 1/4 teaspoon salt
- 1/2 cup (1 stick) cold unsalted butter, cut into small pieces
See that butter? It absolutely must be cold. If it’s soft, you’re going to end up with something closer to a streusel than a real **Buttery Apple Crisp** topping, and we can’t have that!
How to Make Apple Crisp from Scratch: Step-by-Step Instructions
Okay, let’s get this **Crispy Fruit Dessert** into the oven! Making this is honestly like assembling a tasty puzzle. You just need to follow the pattern for your best results. Remember, preheating is non-negotiable—get your oven going to 375 degrees Fahrenheit (or 190 Celsius) right now, and grease that 8×8 dish!
Preparing the Apples and Dish
First up, we toss the apples. Put those perfect slices in a big bowl. In a separate tiny bowl, mix your 1/4 cup of granulated sugar, flour, and that first teaspoon of cinnamon. Whisk it up, pour it over the apples along with that tablespoon of lemon juice, and toss everything until those apples are lightly coated and shiny. Spread them out evenly in your prepared baking dish. Don’t double-layer them; we want them in a single layer so they cook evenly!
Creating the Buttery Apple Crisp Topping
This is where the magic happens for that amazing texture! In a clean bowl, mix your topping dry stuff—the oats, brown sugar, remaining cinnamon, salt, and the rest of the flour. Now, take those cold chunks of butter and “cut them in.” I usually use a pastry blender, but your fingertips work great too! You’re aiming for **coarse crumbs** here. Stop mixing when you see little pea-sized bits of butter still visible. Do *not* overwork it, or the butter melts, and you lose the crisp!
Baking and Resting the Apple Crisp
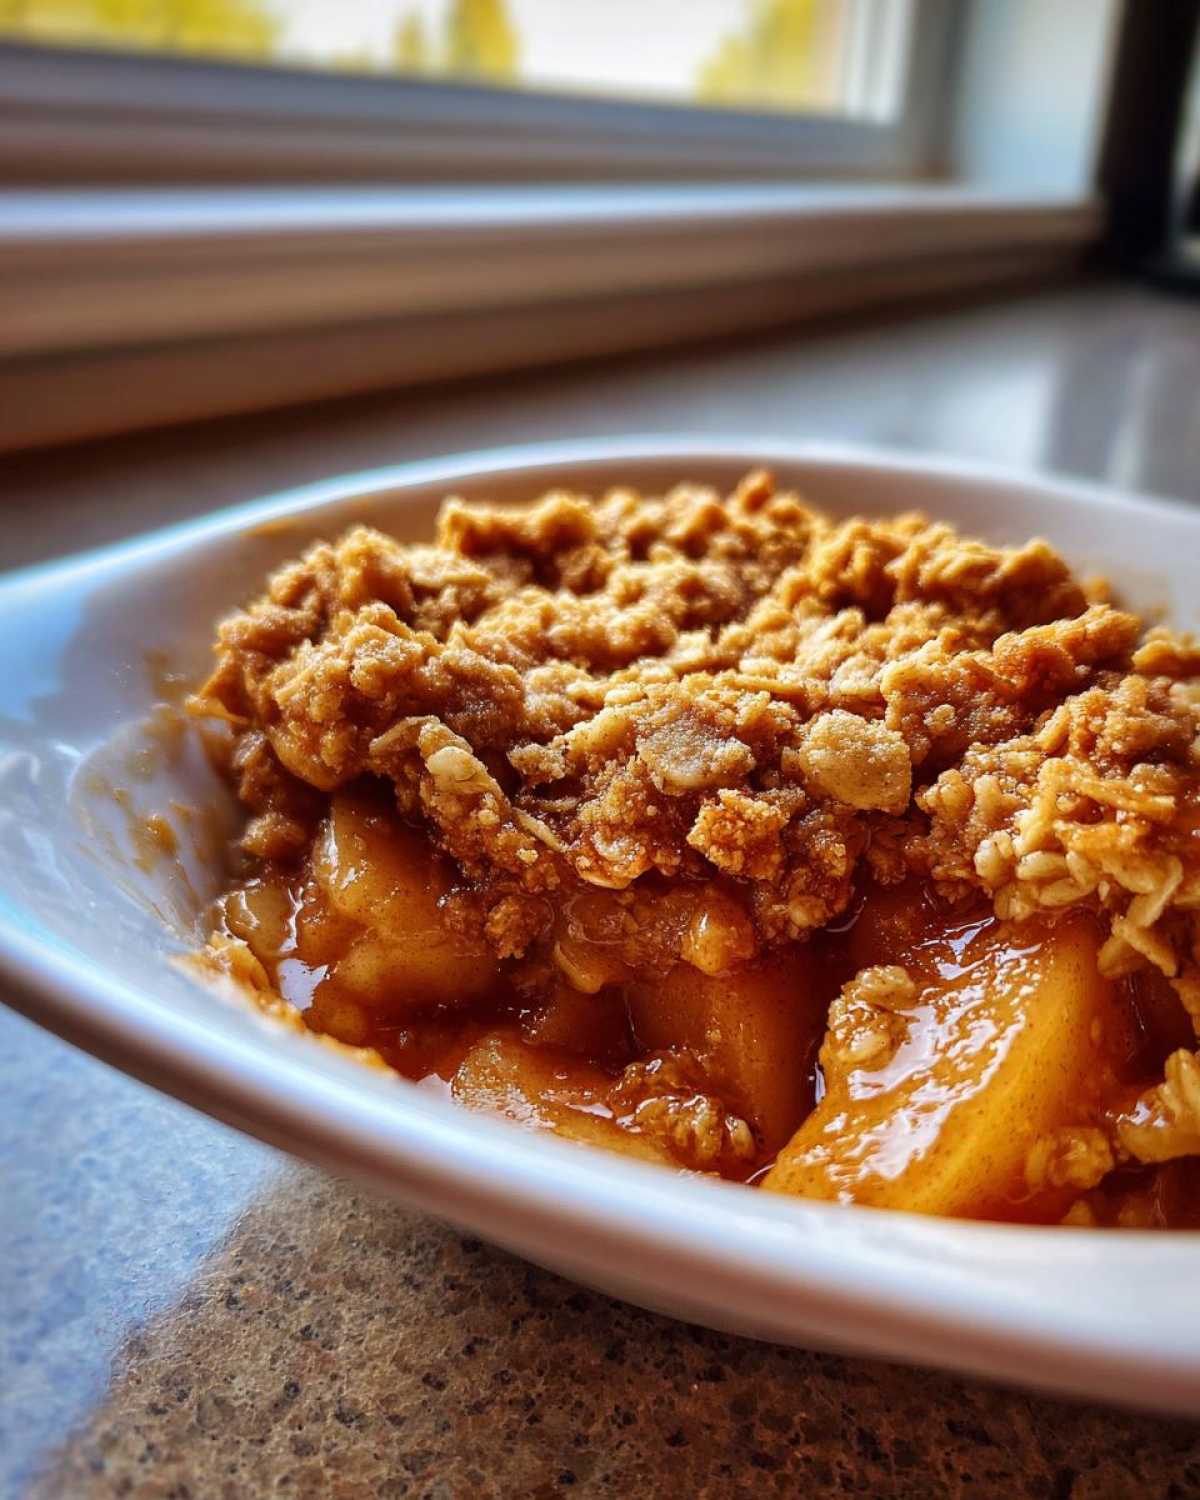
Sprinkle that crumbly topping evenly over the coated apples. Now, pop it in the preheated oven for 35 to 45 minutes. You’re looking for two things: a gorgeous, deep golden brown topping, and when you stick a fork in, the apples should yield easily. We need that moment of patience after it comes out—let it cool for at least 15 minutes. If you try cutting it immediately, everything runs everywhere. Trust me on the rest time for the best baked apple dessert!
Tips for the Best Apple Crisp Topping Success
If you want to nail that crunchy layer every single time—and why wouldn’t you?—you have to treat the topping ingredients like they’re royal guests. The single most important secret for that **Best Apple Crisp Topping** is keeping everything cold! Cold butter creates steam pockets when it hits the hot oven, which results in that desirable uneven, crunchy melt. Seriously, don’t let your butter soften up on the counter!
My personal trick, especially if my kitchen is warm, is to mix the dry topping ingredients, add the cold butter, and then pop the whole bowl in the freezer for about ten minutes before I cut it in. It makes for a much easier mixing process and guarantees those little pockets of rich fat stay intact. This guarantees you get that gloriously **Buttery Apple Crisp** texture.
Also, avoid putting too much liquid near the topping when you sprinkle it on. If you see pools of apple juice next to the topping, try to gently push the topping over those wet spots. A final tip: a little extra coating of flour or oats right on top of the topping mixture can help it toast rather than steam.
If you want to see how I approach topping other things, you might check out my recipe for Caramelized Onion Dip topping!
Ingredient Notes and Substitutions for Your Apple Crisp
We talked about keeping the butter cold, but let’s dig a bit deeper into the fruit and the oats, because those choices really impact the final texture of your **Easy Apple Crisp Recipe**. When it comes to the apples, you can absolutely use what you have, but I have strong feelings about what works best!
I always recommend using a firm, tart apple like Granny Smith. Why? Because they stand up to the heat! They soften beautifully but don’t turn into applesauce at the bottom of the dish. Honeycrisp is also fantastic because it balances sweet and tart perfectly. If you use something softer, like McIntosh, you might end up with more of a thick sauce than individual tender fruit pieces.
Now, about those oats! We use rolled oats here—trust me, those instant packets are too fine and will vanish into the mix. They won’t give you that satisfying chew factor that makes this a great **Dessert with Apples and Oats**. If someone in your house is gluten-sensitive, you can easily swap in certified gluten-free oats without changing the technique at all. Seriously, don’t mess with the amount of butter; just swap the oat type if you need to!
And if you’re wondering about additions, our recipe notes mention tossing in nuts like pecans or walnuts for extra crunch. If you do that, treat them like an optional bonus! You can find my favorite recipe for Blueberry Muffins if you want another baking adventure, but for this crisp, stick to the structure!
Variations for Your Homemade Apple Crumble Dessert
While this recipe is perfection as a classic **Apple Crisp**, I always encourage playing around a little bit once you master the base technique! If you want to elevate it, think spices. A pinch of freshly ground nutmeg or even a little dried ground ginger mixed in with the cinnamon in the filling makes it instantly complex.
For the topping, if you’re feeling adventurous, toss in some chopped pecans or walnuts—maybe even my own recipe for candied pecans if you want to go all out! This turns it into an even fancier **Homemade Apple Crumble Dessert**. Really, once the apples are tender, you can pretty much customize the crumble to whatever you have in the pantry!
Serving Suggestions for this Warm Classic Dessert
You simply cannot let this **Warm Classic Dessert** sit by itself! While it’s incredible straight from the oven (after that crucial rest, of course), the best way to serve it is truly decadent. My first choice, as noted in the recipe, is a generous scoop of good quality vanilla ice cream—the cold melting into the warm apple pockets is just heaven.
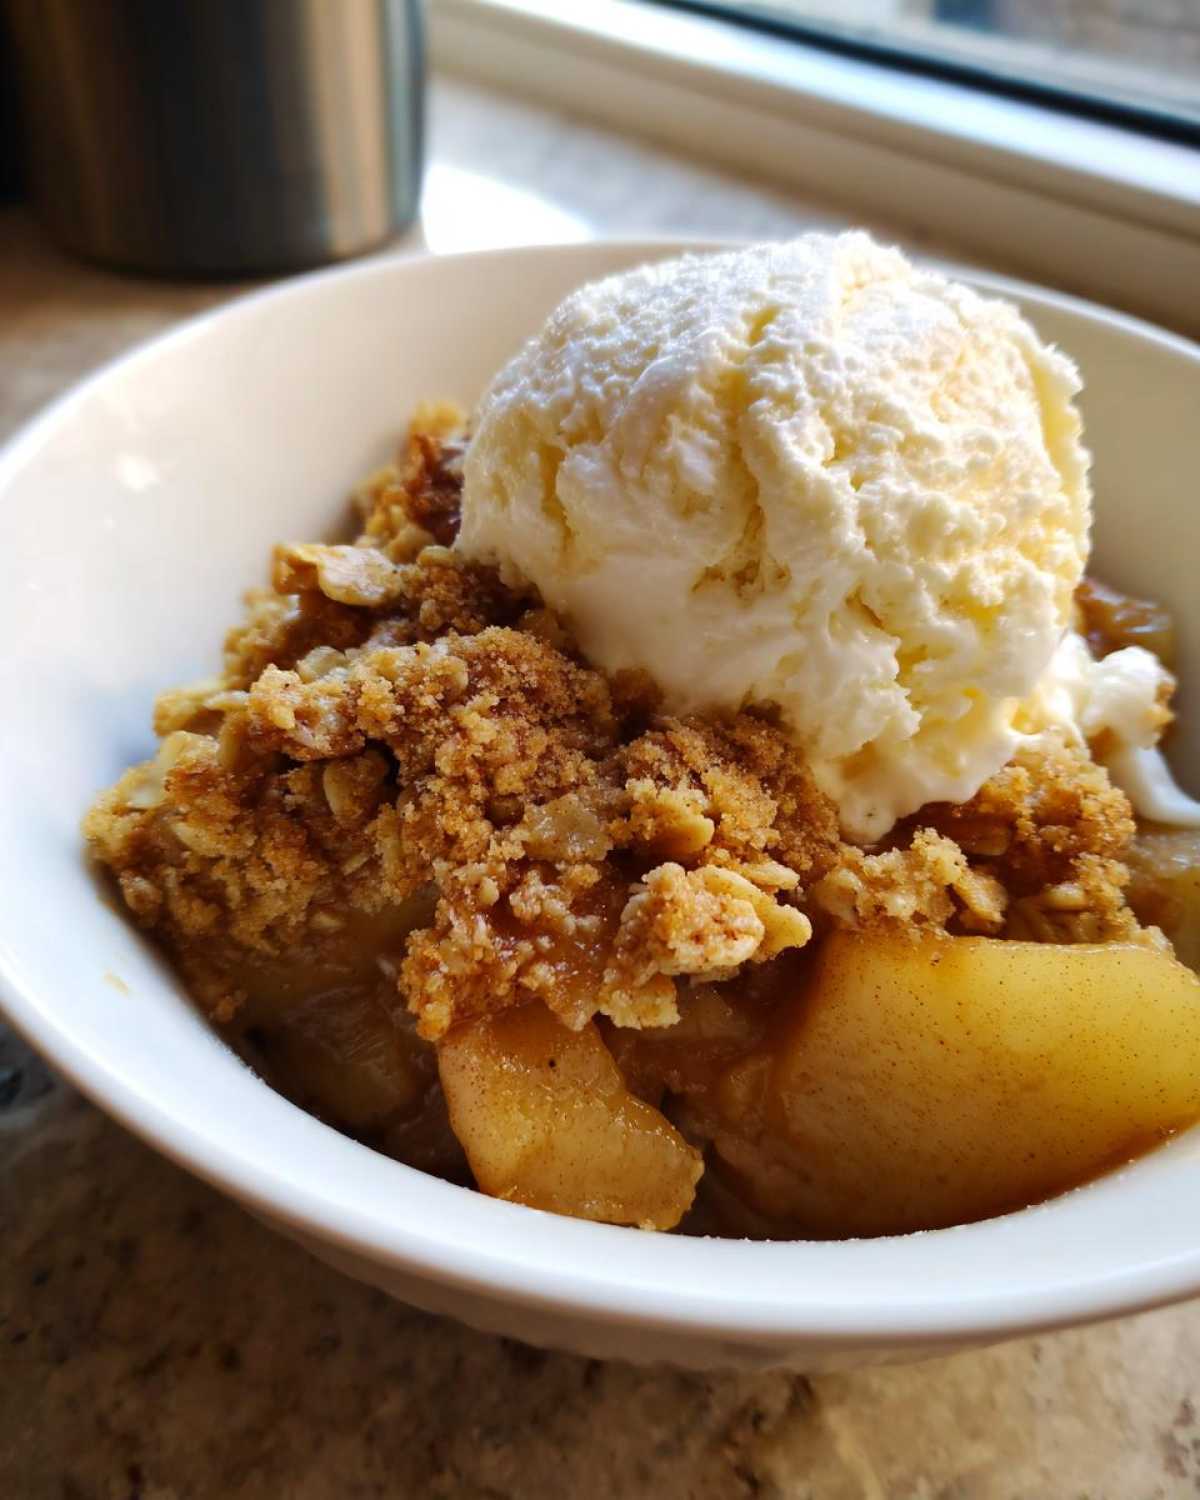
If ice cream isn’t your thing, a big dollop of freshly whipped cream works wonders. Or, if you want something tangy, a drizzle of creamy yogurt is nice too! If you enjoyed this way of serving, you might love the pairings I suggest for my Snickerdoodle Recipe!
Storage and Reheating Instructions for Apple Crisp
I’m hoping you have leftovers, because this **Apple Crisp** is just as good the next day, but we have to store it right! Once it’s completely cooled down—and I mean *cooled*—cover that baking dish tightly with foil or plastic wrap. You can keep it on the counter for about a day if your kitchen isn’t too warm, but honestly, I store mine in the fridge to keep those apples nice and firm.
When you want to bring it back to life, skip the microwave if you can! The microwave makes the topping soggy immediately. Instead, spread a serving onto a baking sheet and warm it up in a 350-degree oven for about 10 minutes. That brings back that beautiful original crunch. If you want to check out another great baked good to save for later, look at my Apple Pie Cookies!
Frequently Asked Questions About Apple Crisp
I know you might have a few nagging questions buzzing around about getting this perfect, because even the simplest recipes can trip you up if you don’t know the little secrets! I’ve pulled together the most common things people ask me all the time about making this **Simple Autumn Baking** masterpiece.
Apple Crisp vs. Apple Crumble: What is the difference?
This is a classic debate, isn’t it? For me, the main difference when we talk about a **Homemade Apple Crumble Dessert** versus an Apple Crisp lies entirely in the texture of the topping! My recipe is a true Crisp because we absolutely include rolled oats. A pure crumble traditionally uses just flour, butter, and sugar, giving you a dense, sandy topping. The oats in our crisp give it that signature, satisfying chew and crunch!
How do I prevent the Apple Crisp topping from getting soggy?
Ugh, the eternal enemy of the baked fruit dessert! Soggy topping usually comes from two things: either the butter wasn’t cold enough when mixing (so it melted instead of steaming pockets), or you skip the resting time! Remember, when you pull that dish out, the juices are still boiling hot. Letting it cool for 15 minutes lets everything settle down and firm up so the topping stays crisp. If you need to reconnect with me for more baking secrets, my Contact Page is open!
Can I make this ahead of time?
Yes, you absolutely can prep ahead! I usually mix the apple filling and keep it covered in the fridge for up to a day—just give it a little stir before topping it. For the topping, you can mix all the dry ingredients and the butter together, keeping it refrigerated in a bowl, and then sprinkle it on right before baking. That way, you save time when you’re ready to serve up this **Comfort Food Apple Bake**!
PrintClassic Apple Crisp

A simple recipe for a warm baked apple dessert with a buttery, crunchy oat topping.
- Prep Time: 20 min
- Cook Time: 40 min
- Total Time: 60 min
- Yield: 6 servings
- Category: Dessert
- Method: Baking
- Cuisine: American
- Diet: Vegetarian
Ingredients
- 6 medium apples (Granny Smith or Honeycrisp recommended)
- 1/4 cup all-purpose flour
- 1/4 cup granulated sugar
- 1 teaspoon ground cinnamon
- 1 tablespoon lemon juice
- 1 cup all-purpose flour
- 1 cup rolled oats
- 3/4 cup packed brown sugar
- 1/2 teaspoon ground cinnamon
- 1/4 teaspoon salt
- 1/2 cup (1 stick) cold unsalted butter, cut into small pieces
Instructions
- Preheat your oven to 375 degrees Fahrenheit (190 degrees Celsius). Lightly grease an 8×8 inch baking dish.
- Peel, core, and slice the apples into 1/4 inch thick pieces. Place the apple slices in a large bowl.
- In a small bowl, mix the 1/4 cup flour, 1/4 cup granulated sugar, 1 teaspoon cinnamon, and lemon juice. Toss this mixture with the apple slices until they are evenly coated.
- Spread the coated apples in a single layer in the prepared baking dish.
- Prepare the topping: In a separate medium bowl, combine the 1 cup flour, rolled oats, brown sugar, 1/2 teaspoon cinnamon, and salt.
- Cut in the cold butter using a pastry blender or your fingertips until the mixture resembles coarse crumbs. Do not overmix; some pea-sized pieces of butter are fine.
- Sprinkle the topping evenly over the apple mixture in the baking dish.
- Bake for 35 to 45 minutes, or until the topping is golden brown and the apples are tender when pierced with a fork.
- Let the crisp cool for at least 15 minutes before serving.
Notes
- For a nuttier topping, add 1/2 cup chopped pecans or walnuts to the topping mixture.
- Use firm, slightly tart apples for the best texture and flavor balance.
- Serve warm with vanilla ice cream or whipped cream.
Nutrition
- Serving Size: 1 serving
- Calories: 350
- Sugar: 30g
- Sodium: 150mg
- Fat: 16g
- Saturated Fat: 9g
- Unsaturated Fat: 7g
- Trans Fat: 0g
- Carbohydrates: 52g
- Fiber: 4g
- Protein: 5g
- Cholesterol: 35mg